

Halloween is the perfect excuse to experiment with your manicure. Unlike an everyday manicure, Halloween nails can be playful, dramatic, mysterious, glamorous, cute, creepy, or completely over-the-top. From delicate spiderweb details and tiny ghosts to blood-red chrome, black French tips, gothic lace, pumpkins, bats, and eerie eyes, there is a Halloween nail design for almost every personal style.
The best part is that you don’t need an elaborate costume to enjoy Halloween nail art. A well-designed manicure can become the statement piece of your entire October look. Whether you prefer short natural nails, almond-shaped extensions, long coffin nails, elegant minimalist details, or bold stiletto nails, you can adapt almost any spooky motif to your preferred shape and length.
In this guide, you’ll find 62 Halloween nail ideas, organized by style so it’s easier to find exactly what you’re looking for. You’ll also find color combinations, nail-shape recommendations, step-by-step tutorials, ideas for beginners, ways to make Halloween nails look more sophisticated, and practical tips for making your manicure last.
How to Choose the Right Halloween Nail Design
Before choosing a design, think about three things: your nail length, your personal style, and how dramatic you want the finished manicure to be.
A long stiletto manicure gives you much more room for detailed spiderwebs, haunted portraits, dripping effects, and intricate illustrations. Short nails, however, can look especially elegant with small ghosts, tiny stars, French tips, pumpkins, or minimalist spiderwebs.
Your base color also makes a huge difference. Black creates the strongest gothic effect, while burgundy gives Halloween nails a sophisticated and glamorous feeling. Orange creates the traditional pumpkin-season aesthetic, while nude and sheer bases make detailed designs feel more modern and wearable.
| If you want… | Try… |
|---|---|
| Cute Halloween nails | Ghosts, pumpkins, candy, tiny bats |
| Elegant Halloween nails | Black French tips, gold details, burgundy |
| Gothic nails | Black, charcoal, chrome, lace, crosses |
| Spooky nails | Blood drips, eyes, spiderwebs, skulls |
| Minimalist nails | Tiny bats, moons, stars, spiders |
| Glamorous nails | Chrome, rhinestones, metallic foil |
| Easy DIY nails | French tips, dots, stickers, decals |
| Dramatic nails | 3D designs, stiletto nails, sculpted details |
| Office-friendly nails | Nude base + tiny Halloween accents |
| Party nails | Chrome, glitter, flames, neon details |
62 Halloween Nail Ideas
1. Classic Black Halloween Nails
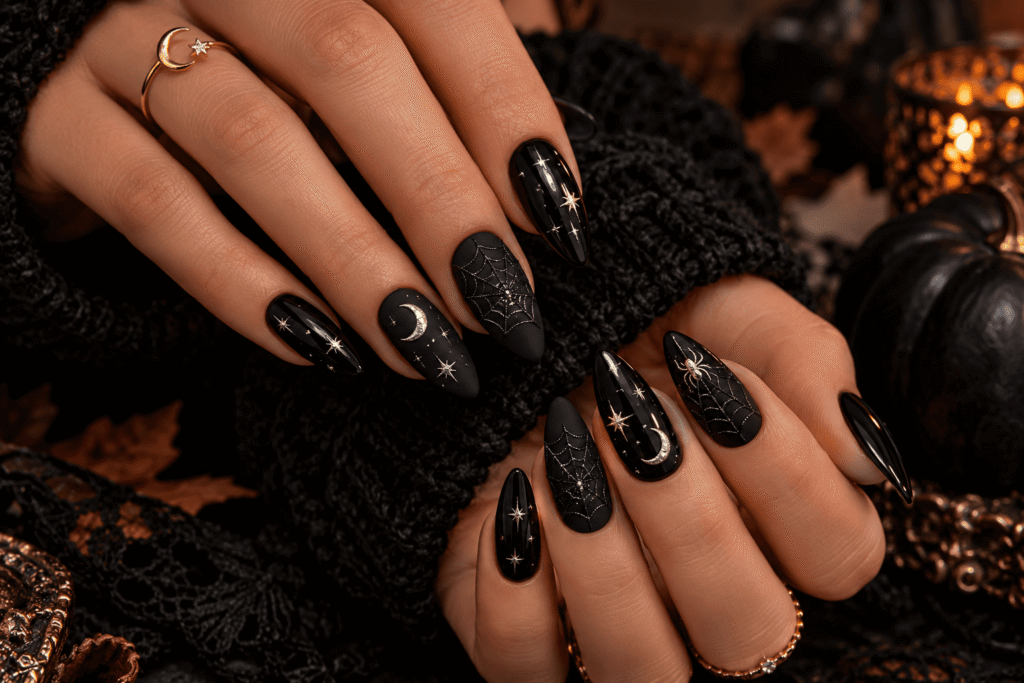
You can never go wrong with a glossy black manicure. Black nails are simple enough for everyday wear but immediately create a mysterious Halloween atmosphere.
For a more interesting finish, combine glossy black nails with one or two matte nails. Add tiny silver stars, a miniature moon, or a delicate spiderweb to create contrast.
Best for: coffin, almond, square and stiletto nails.
2. Black French Tip Halloween Nails
Instead of painting the entire nail black, keep the base nude or sheer and add a dramatic black French tip.
This is one of the easiest ways to create Halloween-inspired nails without making your manicure look like a costume.
Upgrade the look: add a tiny spiderweb in one corner of the French tip.
3. Neon Spiderweb Nails
The inspiration image shows one of the most eye-catching Halloween combinations: a dark base with bright spiderweb artwork.
Try a black or midnight-purple base with neon pink spiderwebs. You can also experiment with electric orange, green, blue or purple.
The contrast between the dark background and glowing-looking lines makes the design especially striking under party lighting.
4. Pink Spiderweb Nails
Halloween doesn’t have to mean orange and black.
A soft pink base combined with black spiderwebs creates a feminine version of spooky nail art. For something more dramatic, reverse the colors with a black base and hot-pink webbing.
5. Blood-Drip Nails
Blood-drip nails are one of the most recognizable Halloween designs.
Start with a nude, milky or black base. Add irregular red drops beginning near the tip and extending downward. The trick is to avoid making every drip identical.
Best colors: deep red, burgundy or dark cherry.
6. Vampire-Inspired Nails
Create a vampire aesthetic with combinations of:
- Burgundy
- Black
- Dark red
- Silver
- Deep plum
Try glossy burgundy nails with black French tips or tiny fang details.
7. Bloody French Tips
For a more sophisticated interpretation of blood-drip nails, use a sheer nude base and replace the traditional French tip with a dark-red dripping edge.
This design works particularly well on almond and coffin nails.
8. Tiny Ghost Nails
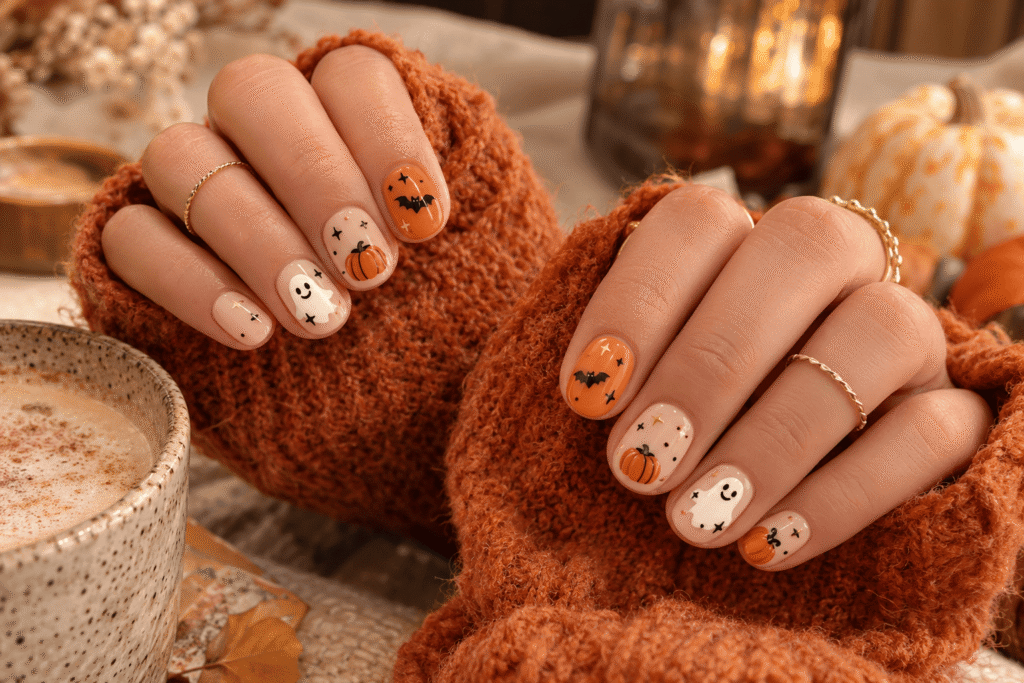
Cute ghosts are perfect if you want Halloween nails that feel playful rather than frightening.
Use a nude, pale pink or milky-white base and paint tiny white ghosts with two black eyes.
For an even easier version, use ghost nail stickers.
9. Ghost French Tips
Turn traditional French tips into little ghosts.
Paint white French tips and add two tiny black eyes to selected nails. The result is subtle from a distance but adorable when viewed up close.
10. Pumpkin Nails
Pumpkins are one of the easiest Halloween motifs to recognize.
You can paint tiny pumpkins on a nude base or create a full orange manicure with black pumpkin faces.
For an elegant interpretation, use muted terracotta instead of bright orange.
11. Jack-o’-Lantern Nails
Take pumpkin nails one step further by adding classic jack-o’-lantern faces.
Use black for the eyes and mouth, then add small highlights with a lighter orange or gold.
12. Mini Pumpkin French Tips
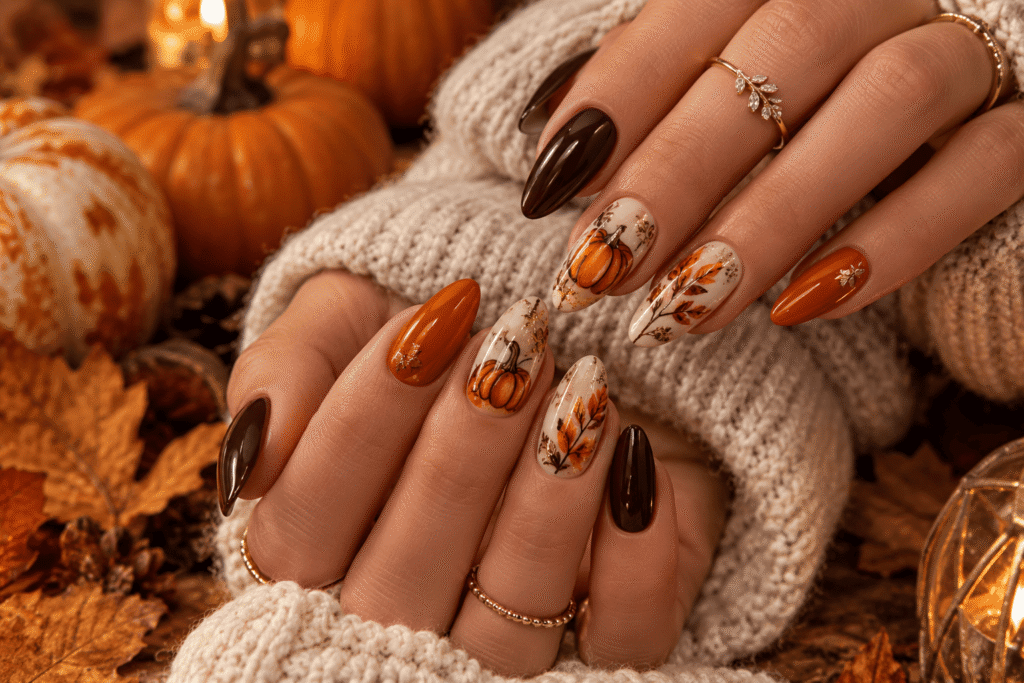
Instead of a traditional French tip, create miniature orange pumpkin shapes along the tips of your nails.
This is particularly cute on short rounded nails.
13. Spider Nails
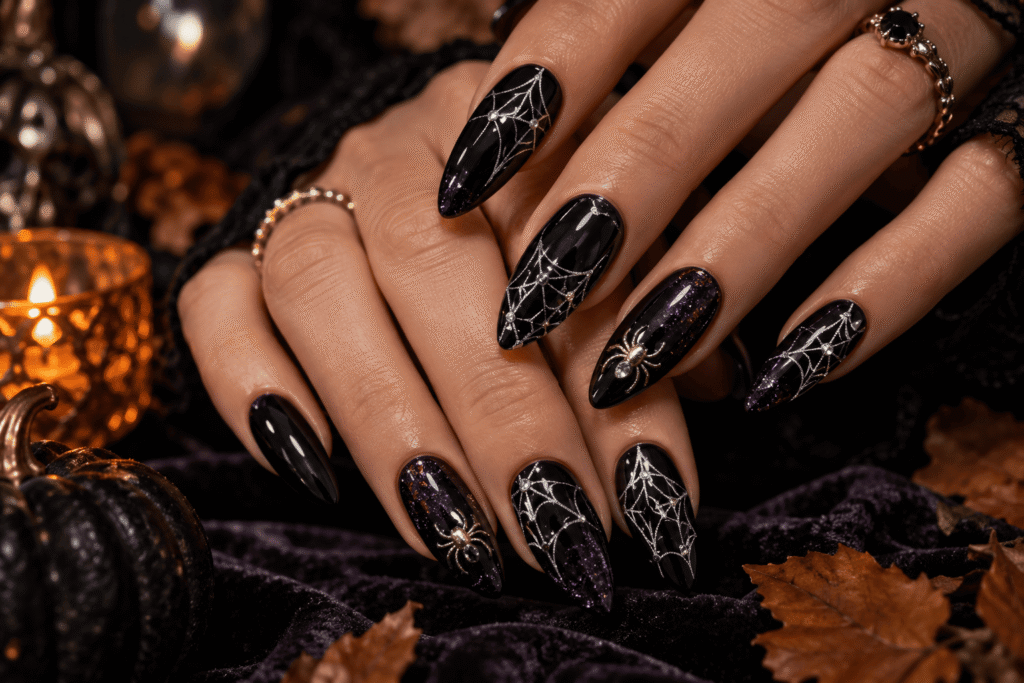
A tiny spider crawling across one nail can create a surprisingly dramatic effect.
For a minimalist manicure, keep the rest of the nails neutral and use one black spider as the focal point.
14. Spiderweb Accent Nails
Paint most nails in a solid shade and dedicate one or two nails to spiderweb artwork.
This is one of the easiest ways to create Halloween nail art without needing detailed artwork on every nail.
15. Full Spiderweb Nails
For maximum impact, cover the entire nail with delicate spiderweb lines.
A glossy black base with metallic silver webbing creates a glamorous gothic finish.
16. 3D Spider Nails
If you’re getting professional nail extensions, ask your nail artist about a raised 3D spider.
Pair it with black chrome or deep burgundy for a dramatic Halloween manicure.
17. Bat Nails
Tiny black bats look beautiful against a moonlit background.
Try a sheer nude base with small black bats, or use dark navy with silver stars.
18. Flying Bat French Tips
Create a black French tip and add tiny flying bats above it.
The result feels like a miniature Halloween night sky.
19. Moon and Star Nails
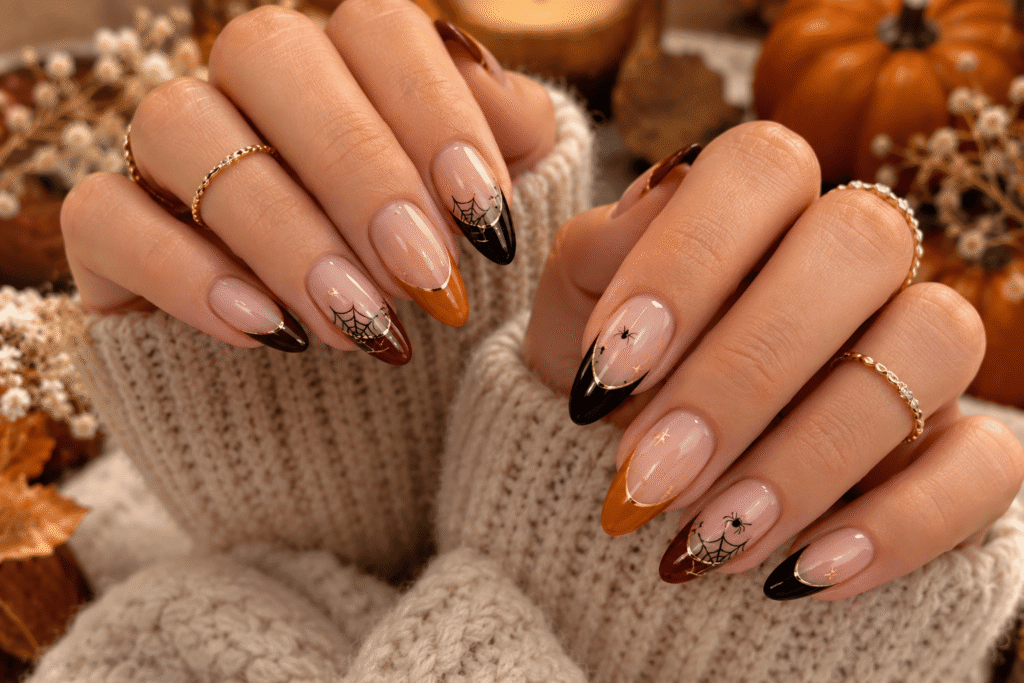
For something mystical rather than scary, combine crescent moons, stars and tiny dots.
A black or deep-purple background creates the feeling of a nighttime sky.
20. Celestial Gothic Nails
Combine:
- Crescent moons
- Stars
- Tiny planets
- Mystical symbols
- Metallic accents
Use silver or antique gold to make the design feel luxurious.
21. Evil Eye Nails
The evil-eye motif creates an eerie and mysterious Halloween manicure.
Paint an eye on one or two accent nails while keeping the remaining nails black, nude or deep blue.
22. Haunted Eye Nails
For a creepier version, create oversized eyes with tiny pupils.
A dark background makes the eyes appear more dramatic.
23. Skull Nails
Skulls are a Halloween classic.
You can create realistic skulls for a gothic effect or tiny cartoon skulls for something more playful.
24. Skeleton Hand Nails
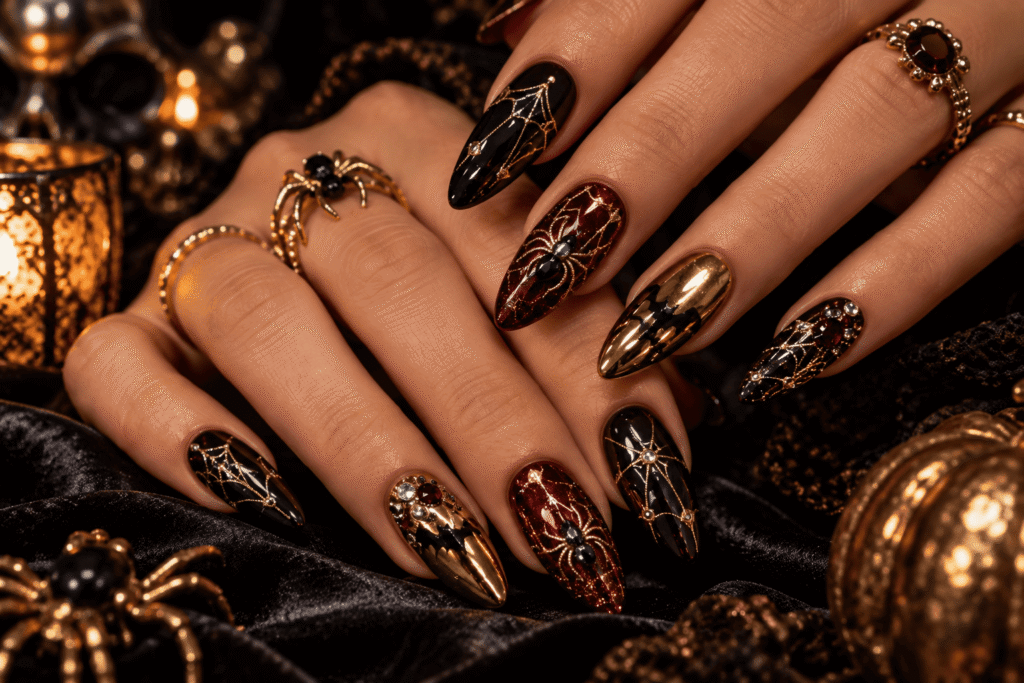
A skeleton hand reaching across the nail can create a striking manicure.
This design works especially well on long coffin or stiletto nails because the elongated nail gives the artwork more room.
25. Skeleton French Tips
Paint small skeletal bones along the tips of nude nails.
This is an unusual alternative to standard Halloween French tips.
26. Gothic Lace Nails
Black lace-inspired nail art can make Halloween nails look elegant rather than childish.
Start with a nude, beige or deep burgundy base and add delicate black lace patterns.
27. Gothic Cathedral Nails
Create tiny gothic-inspired windows, arches and ornamental details.
Use black, charcoal, burgundy and antique gold.
This is particularly beautiful on long coffin nails.
28. Black Chrome Halloween Nails
Chrome gives a traditional Halloween manicure a modern finish.
Choose black chrome, gunmetal or dark silver and combine it with tiny spiders or stars.
29. Purple Chrome Nails
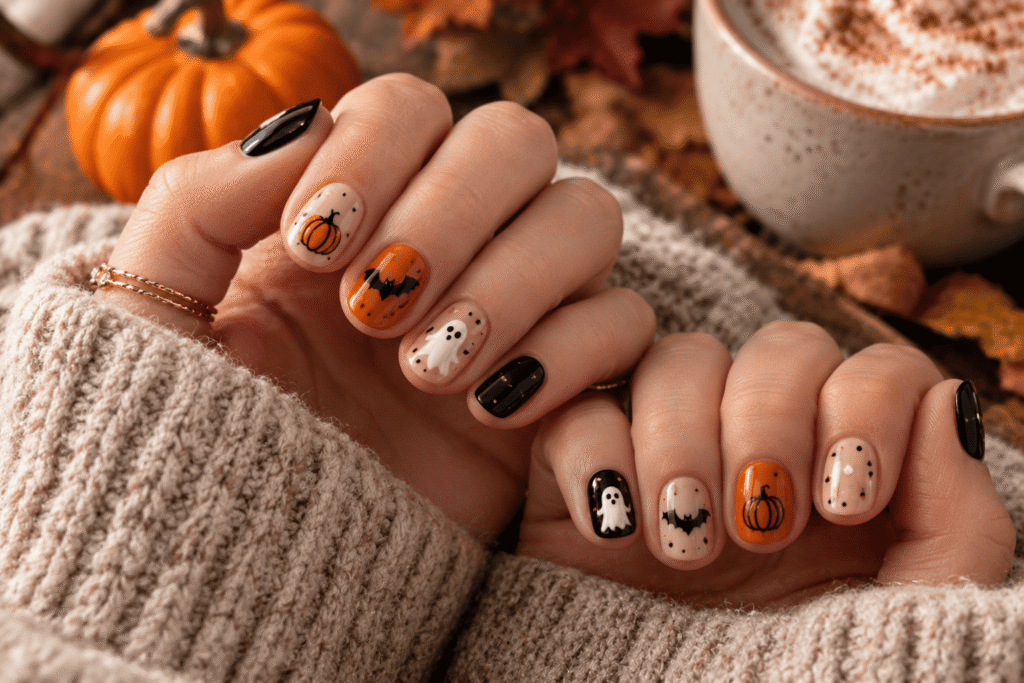
Deep purple chrome creates an almost magical Halloween effect.
Add black spiderwebs or silver stars for additional dimension.
30. Green Chrome Witch Nails
Emerald or toxic-green chrome can create a witchy aesthetic.
Pair it with black accents, moons or tiny potion bottles.
31. Orange Chrome Nails
If you want a bold Halloween manicure, try metallic orange.
It looks especially striking with black details.
32. Black and Orange French Tips
Combine the two most recognizable Halloween colors.
Alternate black and orange French tips across your nails, or use orange as the base and black as the tip.
33. Burgundy Halloween Nails
Burgundy is ideal if traditional Halloween colors feel too bright.
It gives you a seasonal manicure that can easily transition from Halloween parties into late autumn.
34. Chocolate Brown Halloween Nails
Brown is another sophisticated alternative to orange.
Try glossy espresso, chocolate brown or caramel with tiny black spiders or gold stars.
35. Tortoiseshell Halloween Nails
Tortoiseshell nails combine beautifully with autumn outfits.
Use tortoiseshell on two or three nails and pair it with chocolate brown or black on the others.
36. Black and Gold Halloween Nails
For a glamorous Halloween look, combine glossy black with metallic gold.
Gold foil, stars, moons and delicate lines can instantly elevate a dark manicure.
37. Black and Silver Halloween Nails
Silver creates a colder, more mysterious Halloween aesthetic.
Try chrome silver spiderwebs over a black base.
38. Glitter Halloween Nails
Add glitter to a traditional Halloween manicure for extra dimension.
You can use glitter as an accent nail, French tip or scattered detail.
39. Glitter Spiderweb Nails
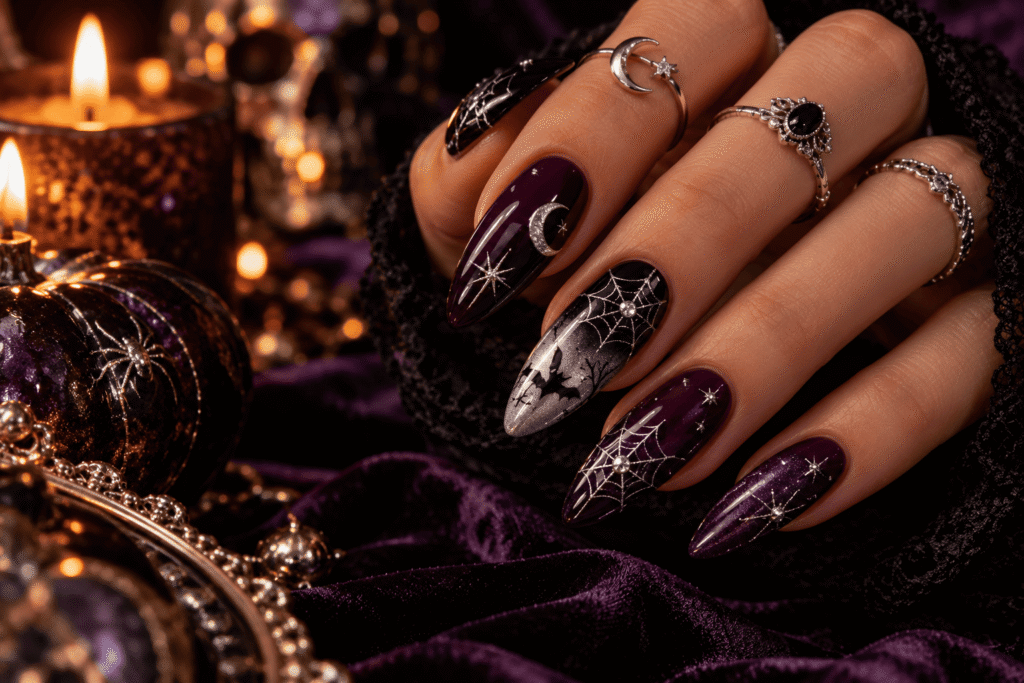
Paint delicate spiderwebs over a glittery base.
Silver glitter with black artwork works especially well for Halloween parties.
40. Witchy Green Nails
Deep green, olive, emerald and toxic green can all create a witch-inspired aesthetic.
Add moons, stars, potion bottles or black cats.
41. Witch Hat Nails
Tiny pointed witch hats are a cute accent.
Use them on one or two nails rather than every nail to keep the design balanced.
42. Potion Bottle Nails
Create tiny potion bottles using purple, green, orange or red.
Add miniature bubbles and metallic outlines for a more detailed appearance.
43. Black Cat Nails
Black cats are perfect for a Halloween manicure.
A simple silhouette is enough, but you can add glowing yellow eyes for extra character.
44. Cat-Eye Halloween Nails
Magnetic cat-eye polish is naturally mysterious.
Choose black, burgundy, purple or green magnetic polish for a dimensional effect.
45. Haunted House Nails
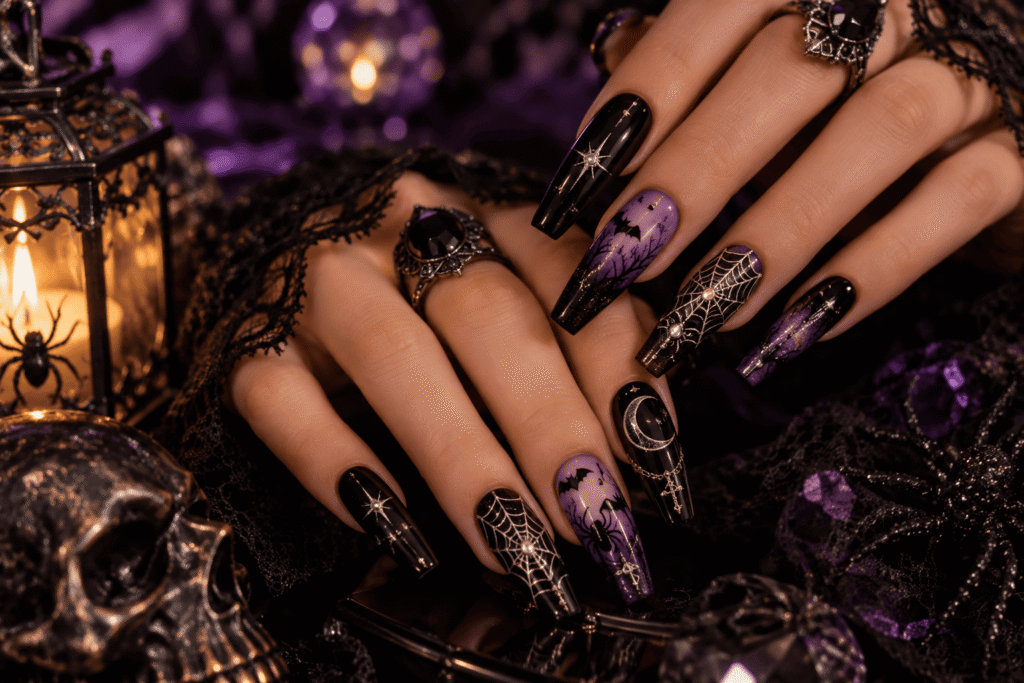
A tiny haunted-house silhouette can become the focal point of your manicure.
Use a gradient background from deep purple to black and add a small moon behind the house.
46. Graveyard Nails
Create miniature gravestones, silhouettes of trees and a crescent moon.
This works best on longer nails because there is more room for the landscape.
47. Haunted Forest Nails
Instead of drawing a house or cemetery, create black tree silhouettes against a dark purple or orange background.
Add tiny stars or a moon for atmosphere.
48. Halloween Candy Nails
For a cute manicure, paint miniature candy pieces, lollipops and sweets.
Use bright orange, purple, pink and yellow.
49. Candy Corn Nails
Use three colors in the classic candy-corn order: yellow, orange and white.
You can create candy-corn French tips instead of covering the entire nail.
50. Halloween Confetti Nails
Create a neutral base and scatter tiny Halloween icons across it.
Mix:
- Stars
- Bats
- Pumpkins
- Ghosts
- Moons
- Spiders
The result feels playful without being overwhelming.
51. Matte Halloween Nails
A matte top coat can completely change the appearance of Halloween nail art.
Try matte black with glossy spiderwebs for a subtle contrast.
52. Glossy vs. Matte Halloween Nails
Combine both finishes on the same manicure.
For example, use matte black as the base and paint glossy black spiderwebs over it.
The design becomes visible through the difference in texture rather than color.
53. Halloween French Manicure
Keep your base sheer or nude and experiment with unusual French tips.
Ideas include:
- Black
- Burgundy
- Orange
- Green
- Purple
- Spiderweb
- Dripping red
- Glitter
54. Minimalist Halloween Nails
You don’t need elaborate artwork.
Try tiny:
- Bats
- Stars
- Spiders
- Moons
- Ghosts
- Pumpkins
- Eyes
on a neutral base.
This is perfect for people who want seasonal nails without a dramatic manicure.
55. Negative-Space Halloween Nails
Leave parts of the natural nail visible.
Use black lines, moons, spiderwebs or geometric Halloween motifs against bare nail.
This creates a modern editorial look.
56. Halloween Aura Nails
Aura nails use soft gradients of color rather than traditional illustrations.
Try combinations such as black and red, purple and black, orange and burgundy or green and black.
Add tiny stars or bats afterward.
57. Ombre Halloween Nails
Blend colors from one shade to another.
Some beautiful combinations include:
| Ombre combination | Overall effect |
|---|---|
| Black → Burgundy | Gothic and luxurious |
| Purple → Black | Mystical |
| Orange → Red | Fiery |
| Green → Black | Witchy |
| Nude → Black | Elegant |
| Brown → Caramel | Autumn-inspired |
| Pink → Purple | Cute and feminine |
58. Halloween Flame Nails
Flames aren’t only for summer.
Use black, orange, burgundy or purple flames for a dramatic Halloween manicure.
59. Gothic Heart Nails
Combine tiny black or burgundy hearts with gothic details.
A black heart surrounded by silver stars can look surprisingly elegant.
60. Haunted Doll Nails
Create miniature doll-like faces, bows, lace and eerie eyes.
Use pale pink, black, burgundy and white for a vintage gothic aesthetic.
61. Glamorous Halloween Party Nails
If you’re attending a Halloween party, don’t be afraid to combine several techniques.
Try:
black chrome + burgundy + rhinestones + metallic foil + spiderweb accents
The key is to keep one element dominant and use the others as accents.
62. Mix-and-Match Halloween Nails
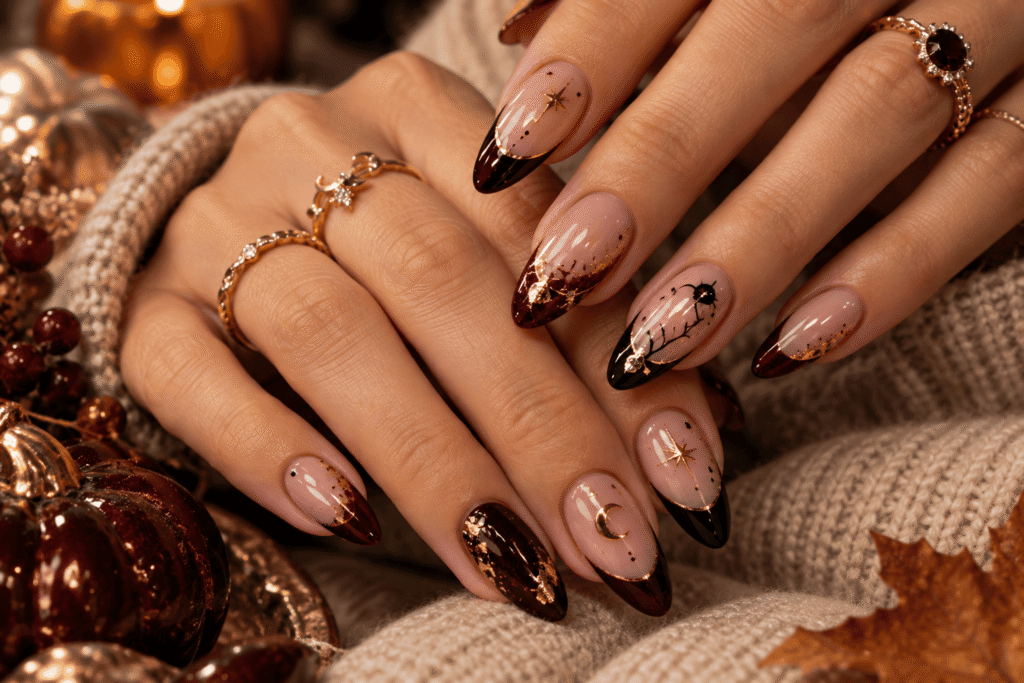
If you can’t choose just one design, don’t.
Create a different design on each nail while keeping the colors consistent.
For example:
- Spiderweb
- Ghost
- Black chrome
- Pumpkin
- Bat
- Burgundy French tip
A consistent color palette keeps the manicure from looking chaotic.
Best Halloween Nail Colors
The color palette you choose determines the entire mood of your manicure.
| Color | Mood | Best paired with |
|---|---|---|
| Black | Gothic, dramatic | Silver, orange, pink |
| Burgundy | Elegant, vampy | Gold, nude, black |
| Chocolate brown | Warm, sophisticated | Caramel, gold |
| Burnt orange | Traditional Halloween | Black, cream |
| Deep purple | Mystical | Silver, black |
| Emerald green | Witchy, luxurious | Gold, black |
| Blood red | Dramatic | Black, nude |
| Nude | Minimalist | Black, burgundy |
| Metallic gold | Glamorous | Black, brown |
| Silver chrome | Futuristic | Black, purple |
Which Nail Shape Is Best for Halloween Nail Art?
There isn’t one perfect nail shape. The best choice depends on the design.
| Nail shape | Best Halloween designs |
|---|---|
| Short round | Ghosts, pumpkins, dots |
| Short square | French tips, minimalist art |
| Almond | Spiderwebs, flames, elegant designs |
| Coffin | Detailed gothic artwork |
| Stiletto | Spiders, claws, dramatic designs |
| Long square | Illustrations and landscapes |
| Oval | Minimalist and sophisticated designs |
Step-by-Step: How to Create Halloween Spiderweb Nails at Home
Spiderweb nails look complicated, but the basic design is surprisingly easy.
Step 1: Prepare the nails
Remove old polish and gently shape your nails.
Push back the cuticles carefully and clean the nail plate so there is no oil or residue.
Step 2: Apply your base coat
A thin base coat protects the natural nail and helps the color adhere more evenly.
Allow it to dry or cure according to the product instructions.
Step 3: Apply the background color
For a dramatic Halloween look, use black.
For something softer, try:
- Nude
- Burgundy
- Purple
- Dark green
- Chocolate brown
Apply two thin coats rather than one thick coat.
Step 4: Draw the first lines
Using a fine nail-art brush, draw three or four thin lines that begin near one point and spread outward.
They don’t need to be perfectly symmetrical.
Step 5: Connect the lines
Create small curved lines between each spoke.
Work from the center outward.
Step 6: Add a contrasting color
For the style shown in the inspiration image, try neon pink over black.
You can also use:
- White
- Silver
- Gold
- Orange
- Purple
Step 7: Seal the design
Apply a quality top coat once the artwork is sufficiently dry.
Don’t drag the brush aggressively over the design because it can smear fine artwork.
Step-by-Step: Easy Halloween French Tips
If you’re a beginner, this is one of the easiest designs to recreate.
Step 1
Apply a sheer nude or milky base.
Step 2
Allow it to dry completely.
Step 3
Use a fine brush or French-tip guide to create a black, orange or burgundy tip.
Step 4
Add one small Halloween symbol to an accent nail.
A tiny spider, moon, bat or star is enough.
Step 5
Seal everything with a glossy or matte top coat.
Step-by-Step: Halloween Blood-Drip Nails
Start with a nude or pale base.
Apply two coats and allow them to dry.
Using a fine nail-art brush, place small red dots close to the tip of the nail.
Connect some of the dots to create irregular drips.
Make some drops longer and others shorter.
Add a glossy top coat to create a wet-looking finish.
For a more sophisticated result, use deep burgundy instead of bright red.
How to Make Halloween Nails Look More Expensive
The difference between an ordinary Halloween manicure and a luxury-looking manicure is usually restraint and detail.
Instead of putting five different colors and five different motifs on every nail, choose a controlled palette.
A sophisticated combination could be:
espresso brown + nude + burgundy + antique gold
Another option:
black + sheer nude + silver chrome
Or:
deep plum + black + metallic gold
Use one design as the focal point and let the other nails support it.
How to Make Halloween Nails Work With Your Outfit
Your manicure doesn’t have to match your costume exactly.
Instead, coordinate it with one or two colors from your outfit.
| Outfit | Nail idea |
|---|---|
| Little black dress | Black chrome + gold |
| Burgundy dress | Burgundy + nude |
| Orange sweater | Chocolate + burnt orange |
| Purple outfit | Plum + silver |
| Green dress | Emerald + black |
| Neutral outfit | Black French tips |
| Gothic outfit | Black + chrome |
| Romantic outfit | Burgundy + delicate gold |
Halloween Nail Ideas for Short Nails
Short nails can still have spectacular Halloween designs.
The most effective options are designs that use small, recognizable motifs.
Try:
- Tiny ghosts
- Black French tips
- Mini pumpkins
- Small bats
- Spiderweb corners
- Burgundy polish
- Chocolate brown
- Black-and-orange dots
- Tiny stars
- Minimalist eyes
Avoid trying to squeeze a large detailed illustration onto a very small nail. A simple design often looks more professional.
Halloween Nail Ideas for Long Nails
Long nails give you more space for detailed artwork.
Try:
- Full spiderwebs
- Haunted houses
- Graveyards
- Skeleton hands
- Large spiders
- Gothic portraits
- Flames
- 3D decorations
- Chrome effects
- Multi-color gradients
Stiletto nails are particularly effective for witchy and gothic designs because the shape itself creates a dramatic silhouette.
Halloween Nail Ideas for Darker Skin Tones
Halloween colors can look especially striking against deeper skin tones because of the contrast.
Rich shades such as chocolate, burgundy, emerald, plum, orange and metallic gold can create beautiful combinations.
For a particularly sophisticated look, try:
espresso brown + antique gold
burgundy + nude
emerald chrome + black
burnt orange + chocolate
deep plum + silver
black + metallic rose gold
Rather than following a strict “best color for your skin tone” rule, focus on contrast, undertone and the overall effect you want.
Halloween Nails for Beginners
If you’re new to nail art, start with designs that don’t require advanced drawing skills.
Beginner-friendly designs
- Black French tips
- Orange French tips
- Glitter nails
- Ghost stickers
- Pumpkin stickers
- Black-and-orange color blocking
- Tiny dots
- Metallic foil
- Simple spiderwebs
- Matte black nails
Nail stickers and stamping plates can also help you create detailed Halloween artwork without needing a professional level of precision.
What Tools Do You Need?
You don’t need an enormous collection of nail-art equipment.
| Tool | Purpose |
|---|---|
| Base coat | Protects natural nails |
| Nail polish | Creates the base color |
| Fine nail-art brush | Detailed lines |
| Dotting tool | Eyes and small dots |
| Tweezers | Applying decorations |
| Nail stickers | Easy detailed designs |
| Glitter | Adds sparkle |
| Chrome powder | Metallic effects |
| Top coat | Protects the finished design |
| Cuticle oil | Maintains surrounding skin |
How to Make Halloween Nail Art Last Longer
A beautiful manicure is much more enjoyable when it lasts.
Start with clean, dry nails.
Avoid applying polish directly over oily nails because it can reduce adhesion.
Use thin coats.
Allow each layer to dry or cure properly.
Seal the free edge of the nail when applying your top coat.
Avoid using your nails as tools.
Wear gloves when cleaning with strong household chemicals.
Apply cuticle oil regularly to keep the surrounding skin comfortable and moisturized.
If you notice lifting, cracking or significant damage, remove the manicure rather than repeatedly covering the damaged area.
Gel, Regular Polish or Acrylic: Which Is Best?
| Method | Advantages | Best for |
|---|---|---|
| Regular polish | Easy to remove | DIY beginners |
| Gel polish | Long-lasting | Detailed manicures |
| Builder gel | Strength and structure | Longer nails |
| Acrylic | Dramatic length | Advanced designs |
| Press-ons | Fast and convenient | Temporary Halloween looks |
The best option depends on your lifestyle and whether you want a temporary Halloween manicure or something that will last for several weeks.
Halloween Nail Safety Tips
Halloween nail art should be fun, but nail health should come first.
Don’t peel gel polish from the natural nail.
Don’t aggressively cut the cuticle.
Avoid filing the natural nail excessively.
Use products according to their instructions.
If using UV/LED-curable products, follow the manufacturer’s curing instructions carefully.
Don’t use nail products on irritated, injured or infected skin.
If a nail becomes painful, significantly discolored, swollen or separated from the nail bed, remove the cosmetic product and consider getting professional medical advice.
How to Choose Between Cute, Spooky and Glamorous Halloween Nails
If you’re struggling to choose a design, ask yourself what you want your manicure to communicate.
Cute: ghosts, pumpkins, candy, pastel colors and tiny hearts.
Spooky: spiders, blood drips, skulls, eyes and haunted houses.
Gothic: black, burgundy, chrome, lace and celestial motifs.
Glamorous: gold foil, rhinestones, chrome and rich jewel tones.
Minimalist: one tiny Halloween symbol on a neutral manicure.
Dramatic: long stiletto nails, 3D artwork and multiple textures.
How to Create a Cohesive Mix-and-Match Manicure
Mix-and-match nails can look incredible when the individual designs share the same visual language.
Choose a maximum of three or four main colors.
For example:
Black + orange + nude + gold
Then assign each color a role.
Black becomes the dominant color.
Orange provides the Halloween accent.
Nude creates negative space.
Gold provides luxury.
Now you can combine different designs without making the manicure visually chaotic.
10 Halloween Nail Combinations Worth Saving
| Combination | Style |
|---|---|
| Black + neon pink | Edgy and playful |
| Black + orange | Classic Halloween |
| Burgundy + gold | Elegant and vampy |
| Chocolate + caramel | Cozy autumn |
| Purple + silver | Mystical |
| Emerald + black | Witchy |
| Nude + black | Minimalist |
| Red + black | Dramatic |
| Orange + brown | Warm and seasonal |
| Black chrome + silver | Modern gothic |
Final Thoughts
Halloween nails don’t have to be complicated to make an impact. The best manicure is the one that fits your personal style, nail length and comfort level while still giving you that unmistakable October feeling.
If you’re drawn to the dramatic manicure in the inspiration image, black nails with contrasting neon spiderwebs are an excellent place to start. The dark background makes the web design immediately visible, while a bright pink or another neon shade gives the manicure a modern twist.
For something more wearable, try black French tips, tiny bats or miniature ghosts on a nude base. If you prefer sophisticated autumn beauty, burgundy, chocolate brown, deep plum, emerald and metallic gold can transform Halloween inspiration into an elegant manicure that works well beyond October 31.
And if you simply can’t choose one design, create a curated mix-and-match set. Combine a few of your favorite Halloween motifs while keeping the colors consistent. The result can feel much more intentional than using the same design on every nail.
The perfect Halloween manicure doesn’t have to follow a rule. It just needs one thing: a little personality.






