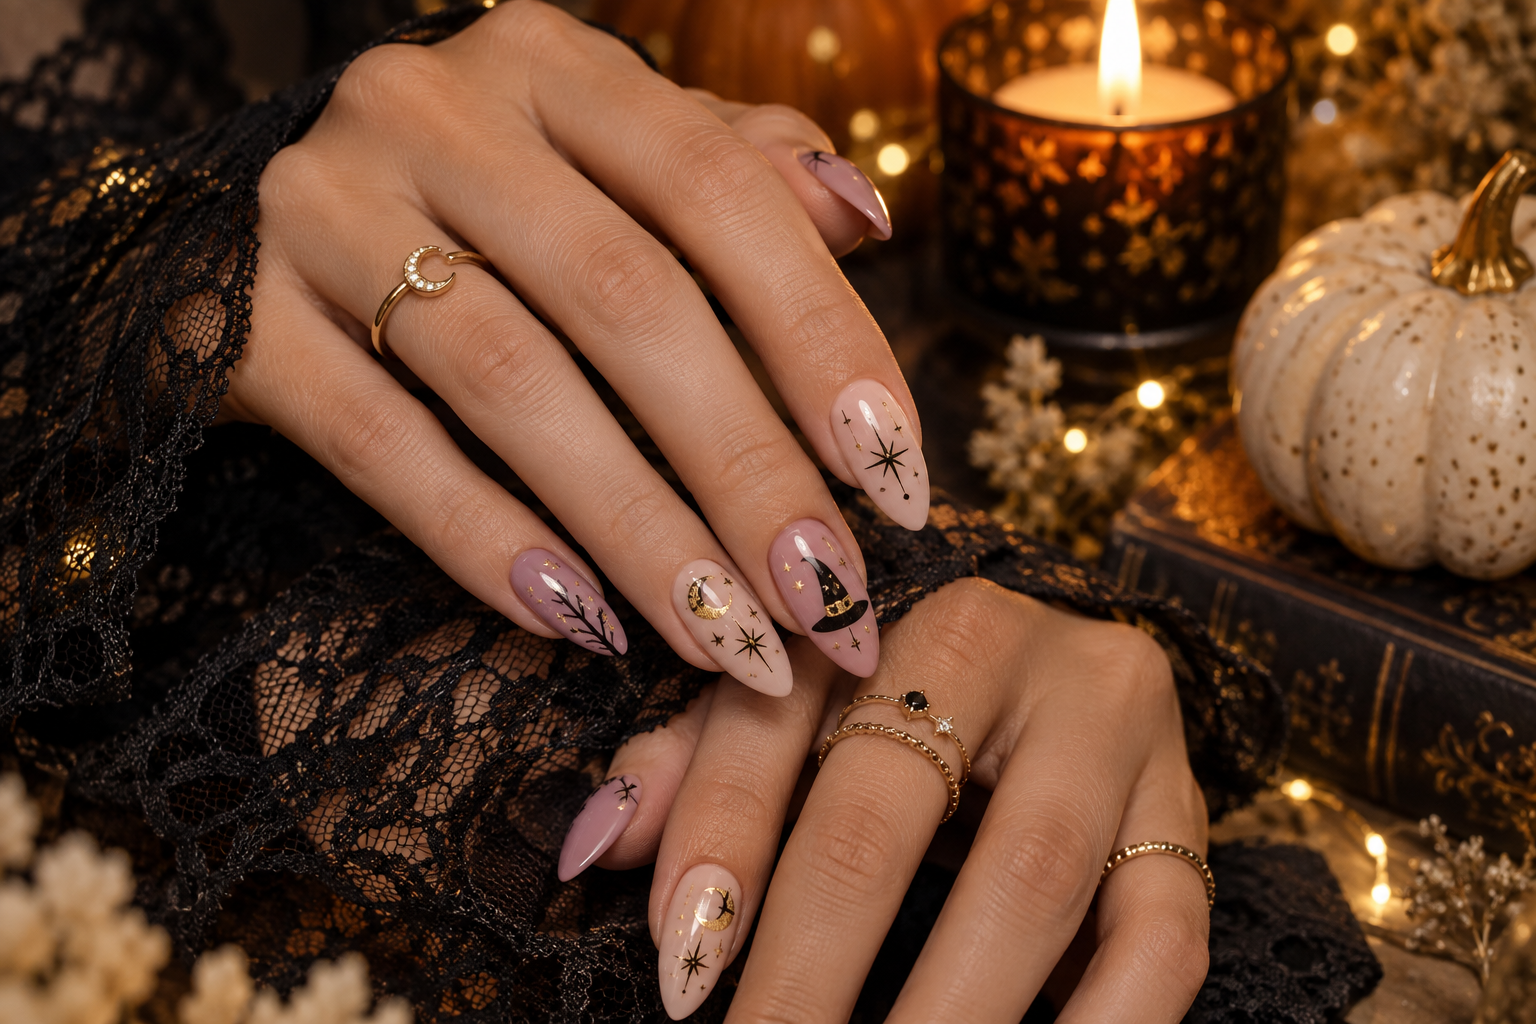
Halloween nails don’t have to be covered in skulls, blood drips, and bright orange pumpkins to feel festive. If you prefer a more feminine, elegant, and mysterious aesthetic, witchy Halloween nail art offers a completely different direction.
Think soft blush pink, muted lavender, glossy black, delicate gold, crescent moons, tiny stars, celestial lines, witch hats, bows, crystals, and subtle Halloween details.
The result is a manicure that feels magical rather than frightening and can work for Halloween parties, autumn dates, pumpkin-patch outings, costume events, or simply anyone who loves a celestial gothic aesthetic.
The manicure in the inspiration image captures this approach particularly well: soft lavender and blush tones create the base, while black and metallic-gold details introduce the witchy element. The contrast makes the manicure feel sophisticated instead of overly themed.
This guide explores 25 witchy and chic Halloween nail ideas, plus color palettes, nail-shape recommendations, detailed design tutorials, step-by-step preparation, DIY techniques, combination formulas, longevity tips, and ways to make Halloween nails look more expensive and polished.
What Makes Halloween Nails Look Witchy and Chic?
A witchy manicure doesn’t necessarily need an obvious Halloween symbol.
The aesthetic usually comes from combining a few recognizable elements:
- Crescent moons
- Tiny stars
- Celestial lines
- Witch hats
- Black accents
- Deep purple
- Lavender
- Burgundy
- Gold details
- Bows
- Crystals
- Mystical symbols
- Sheer or glossy finishes
- Negative space
- Fine-line artwork
The biggest difference between a cute Halloween manicure and a witchy elegant manicure is often restraint.
Instead of placing a pumpkin, ghost, spider, bat, and skull on every nail, choose one or two visual themes and repeat them consistently.
Witchy Halloween Nail Color Palette
Color selection is one of the easiest ways to create the aesthetic before you even add nail art.
| Color | Effect | Best Pairings |
|---|---|---|
| Soft Lavender | Feminine, mystical | Black, silver, gold |
| Blush Pink | Soft and romantic | Black, burgundy, gold |
| Deep Purple | Dramatic and witchy | Black, silver |
| Black | Gothic and elegant | Every shade |
| Burgundy | Dark romantic | Blush, gold, black |
| Champagne Gold | Luxurious | Lavender, black, nude |
| Silver | Celestial | Purple, black, sheer pink |
| Milky White | Soft contrast | Lavender, gold, black |
| Nude | Minimalist | Any Halloween accent |
| Midnight Blue | Mystical | Silver, lavender |
| Forest Green | Witchy botanical | Black, gold |
The easiest sophisticated formula
If you don’t know where to start, try:
Lavender + blush pink + black + gold
This combination creates almost exactly the balance between soft, feminine and witchy.
25 Witchy & Chic Halloween Nail Art Ideas
1. Lavender Crescent Moon Nails
Soft lavender nails become the background for tiny crescent moons.
Keep most of the nails simple and place a crescent moon on only two or three fingers.
Best details
- Gold moon
- Tiny black stars
- One delicate celestial line
- Glossy top coat
Best nail shapes
Almond and oval work especially well because the curved silhouette complements the moon motif.
2. Blush Pink Witch Hat Nails
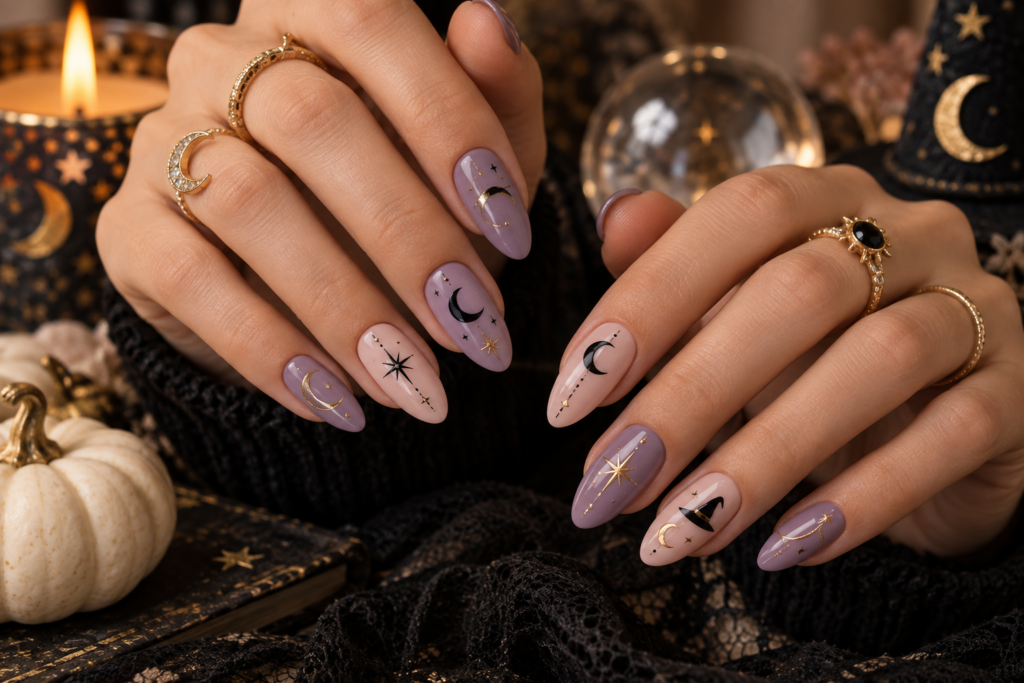
For a playful interpretation, use blush pink as the base and paint tiny black witch hats.
Keep the hats extremely small.
Add a tiny gold buckle or star if you want additional detail.
Why it works
The pink background prevents the design from becoming too dark while the black hat makes the Halloween theme immediately recognizable.
3. Lavender + Black Witchy French Tips
Instead of traditional white French tips, use black.
Create a lavender base and add:
Black French tip + tiny gold star
This gives you a Halloween manicure without requiring detailed nail art on every finger.
4. Celestial Starburst Nails
Create a soft lavender or blush base and add tiny starbursts.
A starburst can be made with four to six thin lines crossing at the center.
Use:
- Black for a graphic effect
- Gold for luxury
- White for a softer celestial look
5. Crescent Moon + Star Combination
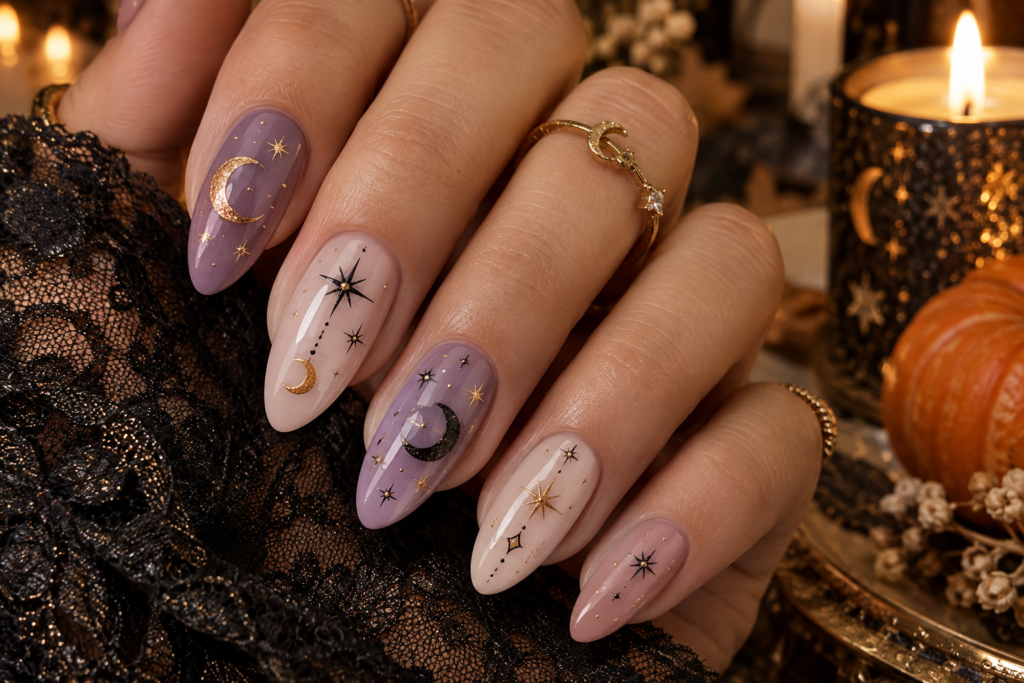
This is one of the most versatile witchy designs.
Use a nude, blush, or lavender base.
On one nail:
Crescent moon
On another:
Three tiny stars
On another:
Small celestial dots
This creates a cohesive set without making every nail identical.
6. Black Cat-Eye Witchy Nails
Cat-eye polish creates movement because the reflective pigment catches the light.
Use:
- Black
- Deep purple
- Burgundy
- Midnight blue
The magnetic effect can become the entire manicure, with only a few tiny stars added afterward.
Best for
Evening Halloween parties and dramatic outfits.
7. Lavender Chrome Witchy Nails
Start with a soft lavender base and add a subtle chrome finish.
Then add one or two black celestial symbols.
The combination of reflective lavender and black creates a modern witchy appearance.
8. Gold Celestial Nails
For a more luxurious version, use a sheer nude or blush base with delicate gold details.
Add:
- Crescent moons
- Stars
- Tiny dots
- Fine celestial lines
This is particularly elegant for longer almond nails.
9. Witchy Bow Nails
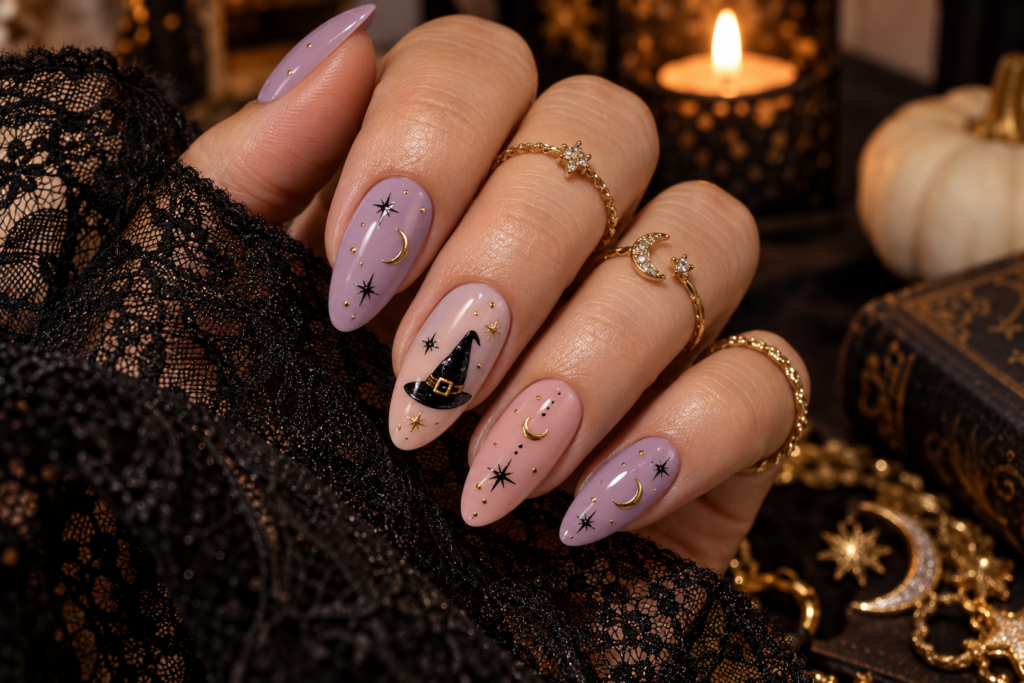
Combine the Halloween aesthetic with coquette-inspired details.
Use a blush or lavender base and paint:
- Tiny black bows
- Crescent moons
- Stars
- Fine gold accents
The bows soften the darker Halloween elements.
10. Black Lace Halloween Nails
Use black lace-inspired linework over a sheer pink or nude base.
You don’t need to cover the entire nail.
A small lace corner or French-tip treatment can be enough.
Best combination
Sheer pink + black lace + tiny gold dot
11. Moon Phase Nails
Instead of one crescent moon, show the phases of the moon across several nails.
For example:
New moon → crescent → half moon → full moon → crescent
Use a nude or lavender background.
This creates a cohesive manicure with a clear theme.
12. Witch’s Potion Nails
Create tiny potion-bottle-inspired designs.
Use:
- Deep purple
- Black
- Emerald green
- Gold
You can paint a miniature bottle on one accent nail and keep the others simple.
13. Crystal-Inspired Nails
Use tiny geometric shapes to imitate crystals.
Combine them with:
- Lavender
- Silver
- Clear gloss
- Tiny stars
This is perfect if you want a mystical manicure without obvious Halloween characters.
14. Gothic French Tips
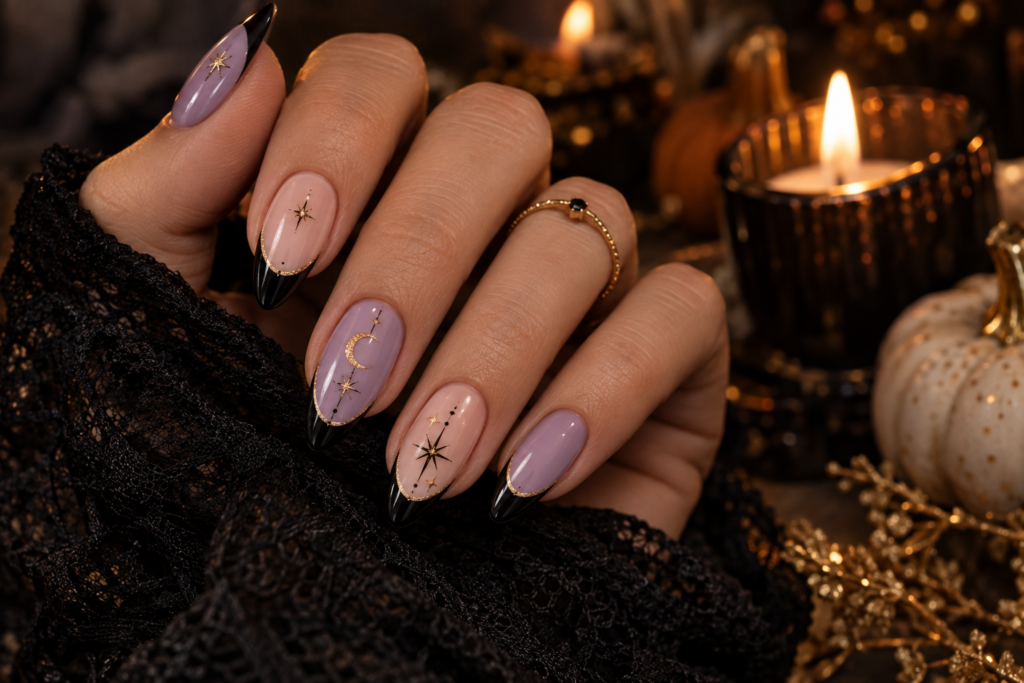
Keep the base sheer pink or milky nude.
Replace the traditional French tip with:
black
Then add one tiny gold star on the accent nail.
This is one of the easiest ways to make a manicure feel Halloween-ready while remaining wearable.
15. Purple Galaxy Nails
Create a soft gradient from:
Lavender → deep purple → black
Add tiny white or silver stars.
The galaxy effect works particularly well on almond and coffin nails.
16. Black + Lavender Swirls
Use a lavender base with thin black abstract swirls.
Add one or two gold accents.
This design feels witchy without depending on obvious Halloween imagery.
17. Evil Eye Witchy Nails
A tiny eye symbol can create a mystical aesthetic.
Use:
- Nude or lavender background
- Black outline
- Gold details
- Tiny blue accent
Keep the eye small so it feels decorative rather than cartoon-like.
18. Burgundy Witchy Nails
For a darker autumn version, replace lavender with deep burgundy.
Add:
- Black moons
- Gold stars
- Minimal celestial details
This combination is especially beautiful with gold jewelry.
19. Midnight Blue Moon Nails
Use midnight blue as the main color and add tiny silver moons.
The contrast gives the manicure a deeper nighttime appearance.
Best accent
One nail with a silver crescent and tiny stars.
20. Witchy Ombre Nails
Create an ombre from:
Blush pink → lavender → deep purple
Then add tiny black stars.
This is an excellent option when you want every nail to look coordinated without using identical artwork.
21. Matte Black + Glossy Celestial Details
Paint the nails matte black.
Then add glossy black moons, stars or lines.
Because the colors are technically the same, the design appears only when light hits the surface.
This is a very subtle interpretation of witchy nail art.
22. Sheer Pink + Black Moon Tips
Use a translucent pink or milky nude base.
Instead of a standard French tip, create a curved black moon-like tip.
Add tiny gold stars on one or two nails.
This is especially good for short nails.
23. Halloween French Mix
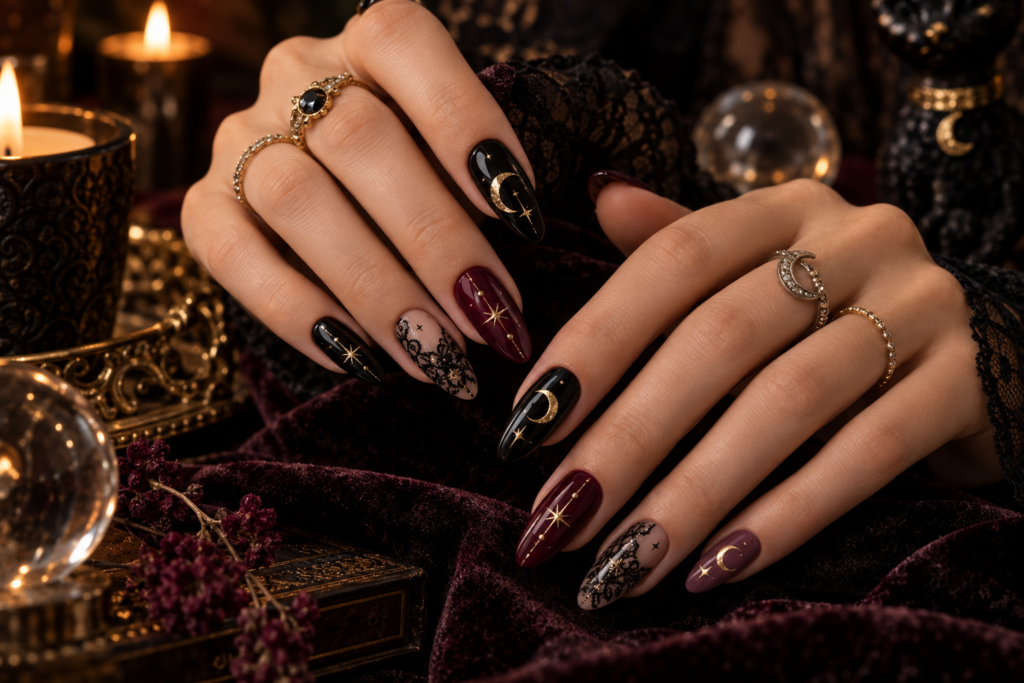
Create a different French detail on each nail:
- Black French
- Lavender French
- Gold French
- Moon French
- Star accent
Keep the base color consistent.
This gives you variety without visual chaos.
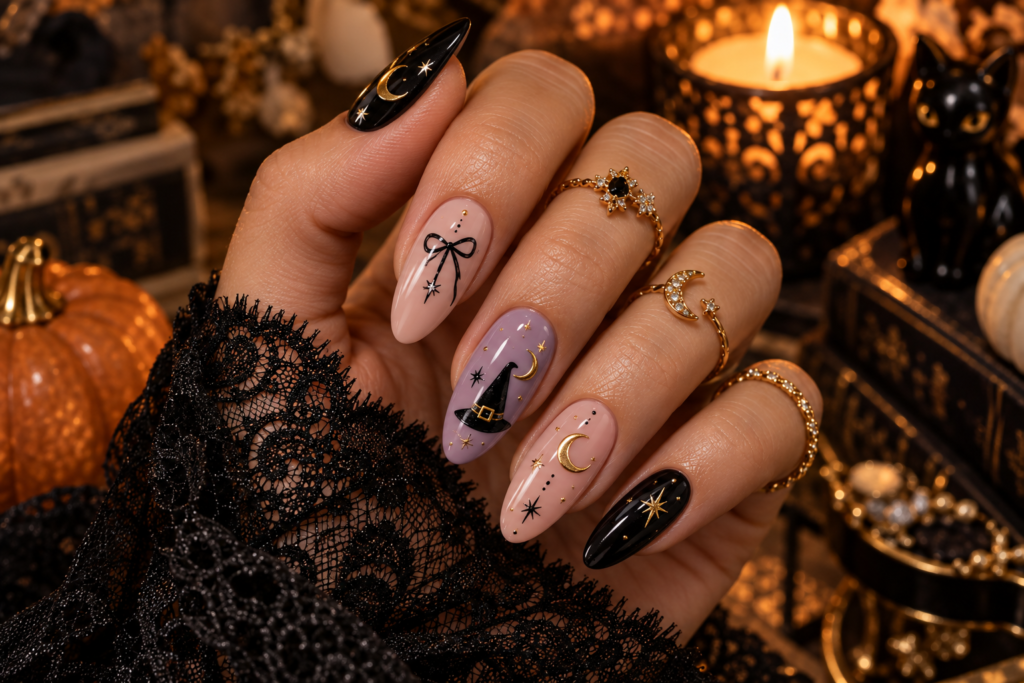
24. Witchy Celestial Mix
Combine:
- Crescent moon
- Stars
- Witch hat
- Bow
- Celestial line
Use only one motif per nail.
This is closest to the manicure shown in the inspiration image.
25. Ultimate Witchy & Chic Halloween Set
For a complete statement manicure, combine:
Blush pink + lavender + black + gold
Suggested layout:
| Nail | Design |
|---|---|
| Thumb | Lavender base + gold moon |
| Index | Blush + tiny stars |
| Middle | Black French + gold detail |
| Ring | Witch hat + moon |
| Pinky | Lavender + tiny stars |
This gives you a coordinated manicure without making every nail identical.
The Best Nail Shapes for Witchy Halloween Nails
Your nail shape can completely change how the artwork looks.
| Shape | Overall Effect | Best Witchy Designs |
|---|---|---|
| Almond | Elegant | Moons, stars, celestial |
| Oval | Soft | Lavender, blush, bows |
| Coffin | Dramatic | Gothic, galaxy, black |
| Stiletto | Bold | Witchy, black, celestial |
| Square | Modern | French tips, geometric |
| Squoval | Practical | Minimalist designs |
| Short round | Cute | Tiny moons, stars |
| Short square | Clean | French and minimalist art |
For the exact aesthetic in the inspiration image
Medium-long almond nails are particularly suitable.
The elongated shape gives enough space for tiny celestial artwork while keeping the manicure elegant.
How to Prepare Your Nails Before Halloween Nail Art
A beautiful manicure begins before the polish.
Step 1: Remove Old Polish
Use an appropriate remover and make sure the nail surface is clean.
Step 2: Shape the Nails
File all nails to approximately the same length.
Avoid aggressively sawing back and forth.
Step 3: Gently Manage the Cuticles
Soften them and gently push them back if appropriate.
Avoid cutting healthy living tissue.
Step 4: Clean the Nail Plate
Remove oils and residue so your base coat adheres properly.
Step 5: Apply Base Coat
A base coat can help improve adhesion and may help reduce staining from certain highly pigmented polishes.
Step-by-Step: Lavender Witchy Halloween Manicure
This is the closest DIY concept to the inspiration image.
Materials
You’ll need:
- Base coat
- Soft lavender polish
- Blush pink polish
- Black nail-art polish
- Gold nail-art polish
- Fine detail brush
- Dotting tool
- Top coat
- Small cleanup brush
Step 1: Apply Base Coat
Apply one thin layer and allow it to dry according to the product instructions.
Step 2: Create the Base
Paint:
- Lavender on two or three nails
- Blush pink on the remaining nails
Apply two thin coats rather than one thick coat.
Step 3: Create the Black Details
Use a fine detail brush.
Paint tiny:
- Stars
- Witch hat
- Moon outline
- Celestial curves
Don’t try to make every design perfectly identical.
Step 4: Add Gold
Use gold sparingly.
Add:
- Tiny star centers
- Crescent moon accents
- Fine lines
- Small dots
The gold should function as an accent, not cover the entire design.
Step 5: Clean the Edges
Dip a small cleanup brush into an appropriate remover and carefully clean around the cuticle area.
Step 6: Apply Top Coat
Once the artwork has set sufficiently according to your polish system, apply top coat carefully.
Don’t press the brush too hard across the artwork because it can drag fine details.
How to Paint a Tiny Crescent Moon
A crescent moon looks complicated but can be surprisingly simple.
Method 1: Brush Method
- Paint a small curved C shape.
- Fill the outer portion.
- Refine the inner curve.
- Allow it to dry.
- Add a tiny star beside it.
Method 2: Dotting Method
- Place a small gold or black dot.
- Use a clean dotting tool to remove a small crescent-shaped section.
- Refine the edges with a detail brush.
The second technique can produce a more uniform shape.
How to Paint Tiny Stars
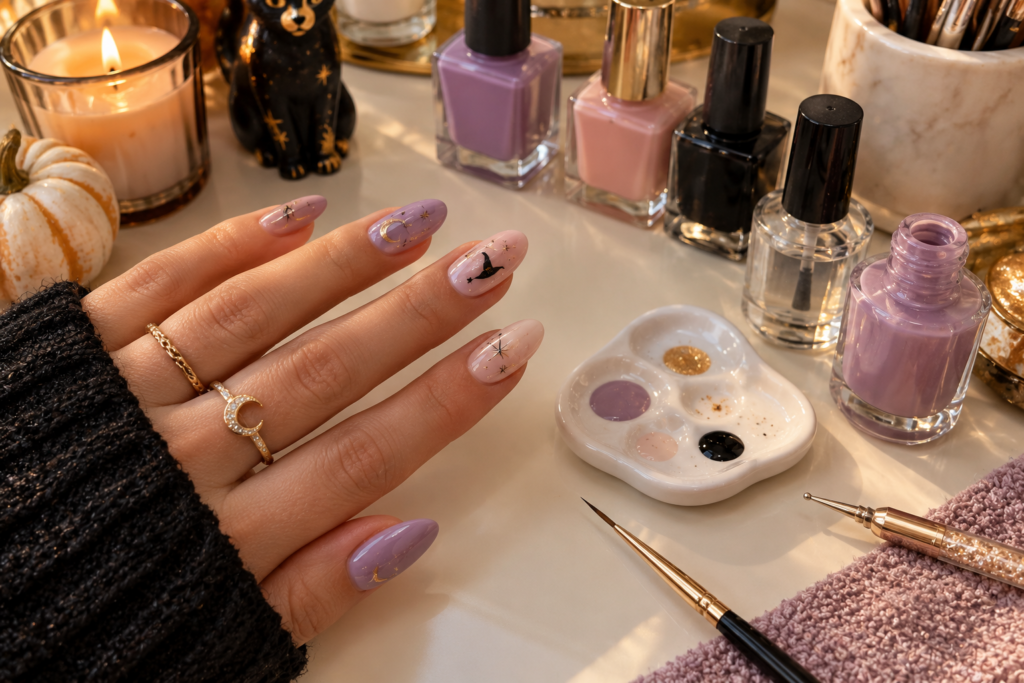
A simple four-point star is enough.
Step 1
Make a very thin vertical line.
Step 2
Add a horizontal line crossing it.
Step 3
Make the center slightly thicker.
Step 4
Add two smaller diagonal strokes if you want a more elaborate star.
For very small nails, don’t over-detail the stars.
A tiny four-point star often looks cleaner than a complicated five-point illustration.
How to Paint a Mini Witch Hat
Step 1
Paint a tiny triangle.
Step 2
Add a small curved brim underneath.
Step 3
Add a thin gold or lavender band.
Step 4
Add a tiny gold buckle.
Step 5
Finish with a glossy top coat.
Because the design is so small, prioritize the silhouette rather than tiny details.
How to Create Witchy French Tips
French tips are one of the easiest ways to make a Halloween manicure elegant.
Step 1
Apply a sheer pink or nude base.
Step 2
Let it dry.
Step 3
Using black polish, draw the smile line.
Step 4
Fill the tip.
Step 5
Add one tiny celestial accent.
Try:
Black tip + gold star
or:
Lavender tip + black moon
How to Create a Galaxy Nail
A galaxy effect doesn’t require perfect blending.
Step 1
Apply a dark purple base.
Step 2
Add a small amount of lavender.
Step 3
Use a sponge to blend the colors.
Step 4
Add tiny white dots.
Step 5
Add one or two larger stars.
Step 6
Finish with a glossy top coat.
The key is to avoid making every nail equally detailed.
How to Make Halloween Nail Art Look Expensive
The secret is usually restraint.
Use fewer colors
Three or four coordinated shades often look more sophisticated than seven unrelated colors.
Repeat visual elements
If you use gold, repeat it on at least two nails.
Leave negative space
An empty area can make intricate artwork stand out.
Keep the cuticle area clean
Messy polish around the edges can make even beautiful artwork look unfinished.
Use thin lines
Fine celestial details usually look more refined than thick lines.
Don’t overload every nail
Choose one or two statement nails.
Halloween Nail Design Formula
A simple formula for building your own manicure:
1 base color
1 dark accent
1 metallic
1 recurring motif
For example:
Lavender + black + gold + crescent moon
or:
Blush + burgundy + gold + stars
This gives you a cohesive manicure without copying a specific design.
Witchy Nail Combinations
| Base | Accent | Metallic | Motif |
|---|---|---|---|
| Lavender | Black | Gold | Moon |
| Blush | Black | Gold | Stars |
| Nude | Burgundy | Gold | Bows |
| Deep Purple | Black | Silver | Galaxy |
| Burgundy | Black | Gold | Crescent |
| Midnight Blue | Lavender | Silver | Stars |
| Milky White | Black | Gold | Witch Hat |
| Forest Green | Black | Gold | Moon |
How to Choose Between Glossy and Matte
Glossy
Best for:
- Lavender
- Blush
- Metallic details
- Galaxy designs
- French tips
Creates a polished, feminine finish.
Matte
Best for:
- Black
- Burgundy
- Deep purple
- Gothic designs
Creates a softer, more mysterious finish.
Matte + Glossy Combination
One of the most interesting options.
For example:
Matte black base + glossy black moons
The design becomes visible only when light reflects from the glossy details.
Short Witchy Halloween Nails
You don’t need long nails for this trend.
For short nails, simplify the designs.
Best choices
- Tiny moons
- One star
- Black French tips
- Lavender base
- Gold dots
- Minimal witch hat
- Simple celestial lines
Avoid trying to fit a detailed galaxy scene onto a very small nail.
Long Witchy Halloween Nails
Long almond, coffin and stiletto nails provide more space.
You can experiment with:
- Full moon phases
- Large celestial designs
- Gothic lace
- Witch hats
- Bows
- Galaxy gradients
- Chrome
- Ornamental details
The longer the nail, however, the more important balance becomes.
How to Choose the Right Design for Your Style
| Your Style | Try |
|---|---|
| Soft feminine | Blush + lavender + gold |
| Gothic | Black + burgundy |
| Witchy | Purple + black + moon |
| Minimalist | Nude + tiny stars |
| Romantic | Blush + bows + gold |
| Glamorous | Chrome + black + gold |
| Celestial | Midnight blue + silver |
| Playful | Pink + witch hats |
| Dark autumn | Burgundy + black |
| Elegant | Sheer nude + black French |
How to Match Your Nails to Your Halloween Outfit
You don’t necessarily need your nails to match your clothes exactly.
Instead, choose one color from your outfit.
Black outfit
Almost anything works.
Try lavender + gold for contrast.
Purple outfit
Use lavender, black and silver.
Burgundy outfit
Use blush, burgundy and gold.
Green outfit
Try forest green, black and gold.
Orange outfit
Keep the nails more neutral with black, nude and gold.
Witchy Halloween Nail Art for Different Occasions
| Occasion | Recommended Design |
|---|---|
| Halloween party | Black + purple + celestial |
| Pumpkin patch | Blush + lavender + gold |
| Date night | Burgundy + black + gold |
| Office | Nude + tiny moons |
| Costume party | Witch hat + stars |
| Everyday fall | Lavender French |
| Halloween dinner | Black lace |
| Concert/event | Chrome + black |
| Casual weekend | Blush + tiny stars |
How Long Should Halloween Nail Art Last?
Longevity depends on the manicure system, preparation, nail condition, products and daily activities.
To help your manicure last:
- Apply polish in thin layers.
- Allow appropriate drying/curing time.
- Seal the free edge when your system calls for it.
- Avoid using your nails as tools.
- Wear gloves when doing household chores that expose nails to prolonged water or chemicals.
- Keep nails and surrounding skin moisturized.
- Follow the specific instructions for your polish or gel system.
How to Prevent Chipping
Don’t apply extremely thick layers
Thick polish can take longer to dry and may be more prone to denting.
Seal the tips
Run a small amount of top coat across the free edge.
Avoid prolonged soaking
Repeated exposure to water can contribute to swelling and contraction of the natural nail.
Protect your hands
Gloves can help during cleaning and dishwashing.
DIY vs. Nail Salon
| Factor | DIY | Salon |
|---|---|---|
| Cost | Lower | Higher |
| Customization | High | High |
| Convenience | High at home | Requires appointment |
| Detailed artwork | Takes practice | Artist can help |
| Learning value | High | Low |
| Speed | Depends on skill | Usually faster |
| Finish | Depends on technique | Professional potential |
If you want extremely fine celestial artwork, a nail artist experienced in miniature nail art may be able to create details that are difficult to reproduce at home.
What to Ask Your Nail Artist
If you’re taking the inspiration image to a salon, don’t simply say:
“I want Halloween nails.”
Instead, explain:
- The preferred nail shape
- Desired length
- Base colors
- Whether you want glossy or matte
- Main motifs
- Metallic color
- Whether you want every nail different
- Which nails should be accent nails
A useful description would be:
“I’d like a soft lavender and blush base with delicate black celestial details, tiny crescent moons, stars, one witch-hat accent and subtle gold accents. I want it to feel elegant and witchy rather than scary.”
Common Halloween Nail Art Mistakes
Using Too Many Motifs
Choose a theme and repeat it.
Making Every Nail a Statement
One or two detailed nails can make the simpler nails look more intentional.
Choosing Colors That Fight Each Other
Black, lavender, blush and gold work together because they have a controlled palette.
Making Details Too Large
Tiny designs usually look more sophisticated when they have breathing room.
Forgetting the Base
The base color is part of the design.
Applying Top Coat Too Soon
This can smear delicate artwork.
Follow your polish system’s recommended timing.
Nail Health Considerations
Beautiful nail art should not come at the expense of nail or skin health.
Avoid picking or aggressively scraping off polish.
If you’re using gel systems, follow the product’s curing instructions and avoid deliberately peeling cured product from the natural nail.
If you develop persistent irritation, swelling, pain, significant redness, or another concerning reaction around the nail or surrounding skin, stop using the suspected product and consider seeking professional medical advice.
A Complete Witchy Halloween Nail Recipe
If you want to recreate the overall aesthetic from the inspiration image, try this five-nail layout:
| Nail | Base | Design |
|---|---|---|
| Thumb | Lavender | Gold crescent moon |
| Index | Blush pink | Tiny black stars |
| Middle | Lavender | Black witch hat + gold detail |
| Ring | Blush | Crescent moon + celestial lines |
| Pinky | Black/lavender | Gold star accents |
Full step-by-step
Step 1: Shape all nails into a medium almond.
Step 2: Apply base coat.
Step 3: Apply two thin coats of blush and lavender.
Step 4: Allow the base to dry or cure according to the polish system.
Step 5: Add black French details to one nail.
Step 6: Paint a tiny crescent moon on the accent nail.
Step 7: Add four-point stars.
Step 8: Paint the miniature witch hat.
Step 9: Add tiny gold accents.
Step 10: Clean around the cuticles.
Step 11: Apply top coat.
Step 12: Allow the manicure to fully set before exposing it to activities that could damage the finish.
10 Easy Mini Motifs for Witchy Nails
If you’re creating your own combinations, these motifs are particularly useful:
- Crescent moon
- Four-point star
- Tiny witch hat
- Bow
- Crystal
- Eye
- Tiny bat
- Moon phase
- Celestial line
- Tiny sparkle
You can combine two or three of these without creating an overloaded manicure.
The 3-Color Rule for Elegant Halloween Nails
If you’re unsure about your color palette, use:
Base + dark accent + metallic
Examples:
Lavender + black + gold
Blush + burgundy + gold
Nude + black + silver
Midnight blue + lavender + silver
This is one of the easiest ways to create a cohesive manicure.
Final Checklist Before Your Halloween Manicure
Before finishing your design, check:
☐ Are all nails the same general length?
☐ Is the shape consistent?
☐ Are the colors coordinated?
☐ Is there one clear visual theme?
☐ Are the smallest details actually visible?
☐ Did you leave enough negative space?
☐ Are the cuticle edges clean?
☐ Are metallic accents used consistently?
☐ Is the top coat evenly applied?
☐ Does the design still look elegant from a distance?
Frequently Asked Questions
What are witchy Halloween nails?
Witchy Halloween nails are Halloween-inspired manicures built around mystical and celestial elements such as moons, stars, witch hats, crystals, black accents, purple shades and gothic details.
What colors work best for witchy nails?
Black, lavender, deep purple, blush pink, burgundy, midnight blue, nude, silver and gold are particularly versatile.
Can witchy Halloween nails be elegant?
Absolutely. The easiest way is to use a restrained palette, fine-line artwork, negative space and only a few recognizable Halloween motifs.
Are lavender Halloween nails suitable for Halloween?
Yes. Lavender creates a softer witchy aesthetic and works particularly well with black, gold, silver and celestial motifs.
What nail shape is best for witchy nail art?
Almond is particularly versatile, but oval, coffin, stiletto, square and short nails can all work. The best shape depends on your preferred length and the amount of artwork you want.
Can I create witchy Halloween nails on short nails?
Yes. Choose tiny moons, stars, black French tips, gold dots and simple celestial details rather than highly detailed artwork.
How do I make Halloween nails look less childish?
Use muted colors, fewer motifs, fine lines, metallic accents and plenty of negative space. A sophisticated palette such as lavender + black + gold can immediately make the design feel more polished.
How can I make my Halloween manicure last longer?
Use proper nail preparation, thin polish layers, an appropriate top coat, and protect your nails during activities involving prolonged water or household chemicals.
What should I show my nail artist?
Bring your reference image and explain exactly which elements you like. Mention the colors, nail shape, length, finish and motifs rather than relying only on the phrase “Halloween nails.”
Final Thoughts
Halloween nail art doesn’t have to be loud to be memorable.
A manicure built around soft lavender, blush pink, black, gold, crescent moons and tiny stars can capture the mysterious feeling of Halloween while remaining feminine and sophisticated.
The secret is balance.
Choose one dominant color, one dark accent, one metallic detail and a small collection of recurring motifs. Let some nails remain relatively simple while one or two become the focal points.
For the aesthetic shown in the inspiration image, the combination of lavender + blush + black + gold is especially effective. Add crescent moons, tiny stars, a miniature witch hat and delicate celestial lines, and you get a manicure that feels magical without becoming overly costume-like.
Whether you’re doing your nails at home or taking the concept to a nail artist, start with a clear palette, keep the details small, and remember that negative space can be just as important as the nail art itself.