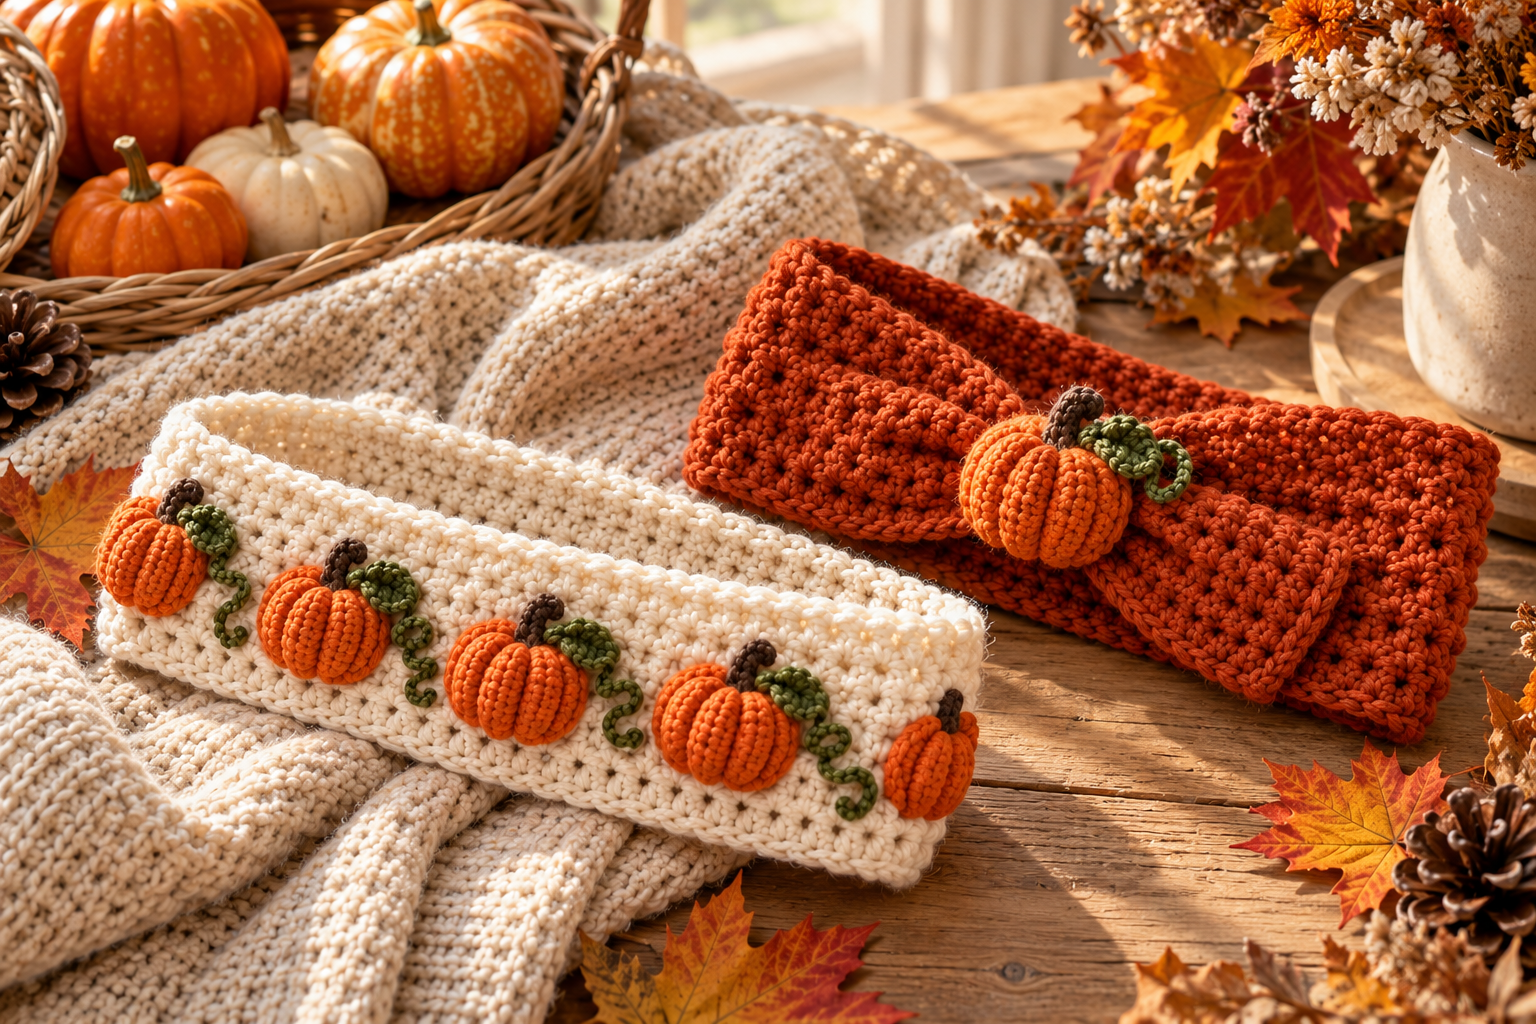
There is something especially cozy about handmade accessories in autumn. As the weather becomes cooler, a soft crochet headband can be the perfect little project: it keeps your ears warm, adds texture to an outfit, and gives you an opportunity to play with beautiful fall colors.
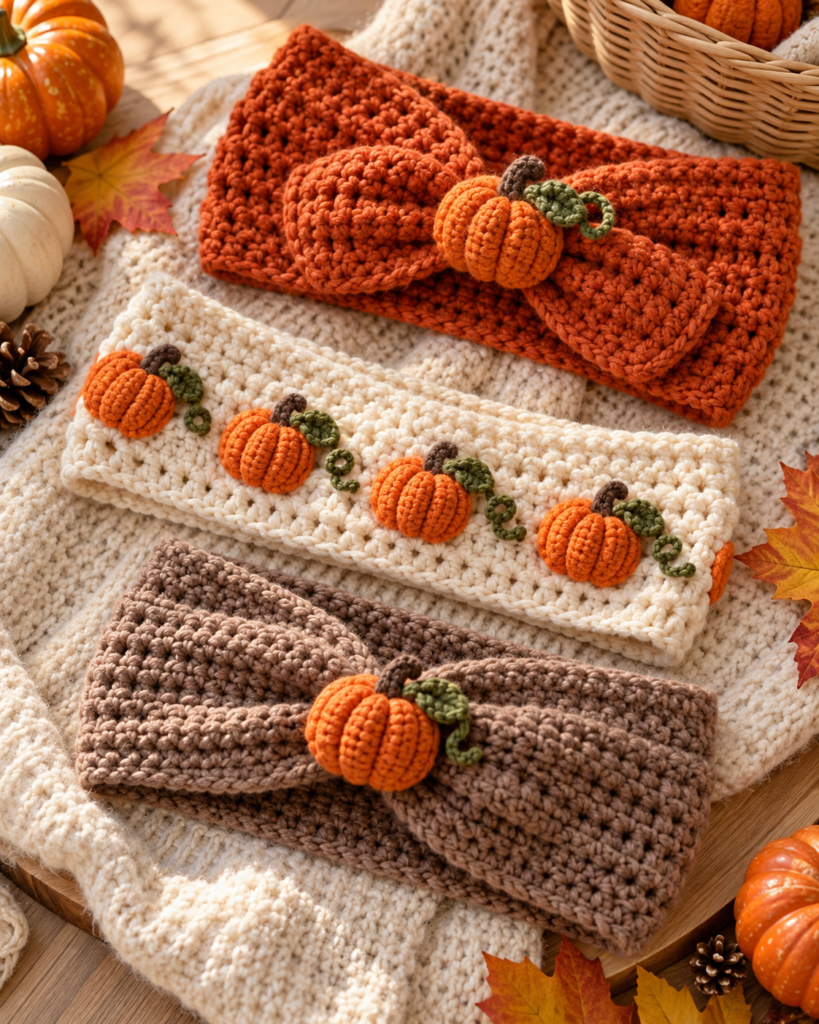
Pumpkin-inspired crochet headbands are especially fun because they combine a practical accessory with seasonal decoration. You can make a simple rust-colored ear warmer, add tiny crocheted pumpkins, create a large statement bow, or combine pumpkins with leaves and textured stitches.
The best part is that you don’t need an advanced crochet skill level to make many of these designs. A basic headband can be constructed from a simple rectangle, while the decorative elements can be crocheted separately and attached afterward.
This guide includes several original pattern variations, a complete beginner-friendly pumpkin headband tutorial, sizing information, yarn recommendations, stitch suggestions, customization ideas, troubleshooting tips, and ways to turn one basic pattern into many different autumn designs.
Why Crochet Headbands Are Perfect for Fall
A crochet headband is one of the easiest wearable crochet projects to customize.
Unlike a full hat, a headband requires relatively little yarn and can often be completed in a single sitting. This makes it particularly useful for beginners who want to practice working in rows, maintaining consistent tension, joining pieces, and creating decorative motifs.
A fall headband can also be adapted to different styles.
You can make it:
- narrow and minimalist
- wide and extra warm
- ribbed and stretchy
- textured with front-post stitches
- decorated with pumpkins
- decorated with leaves
- finished with a large crochet bow
- made in neutral colors
- made in traditional orange and rust
- designed for children
- designed for adults
- made as a matching mother-and-child set
Quick Project Overview
| Feature | Recommendation |
|---|---|
| Skill level | Beginner to intermediate |
| Main technique | Crochet in rows |
| Yarn | Worsted/DK weight |
| Hook | Approximately 4–5 mm |
| Construction | Rectangle joined at ends |
| Main stitch | Half double crochet |
| Season | Fall / Autumn |
| Decoration | Mini pumpkins, leaves, bows |
| Approximate time | 1–3 hours |
| Yarn required | Usually under 100 g |
| Customizable | Yes |
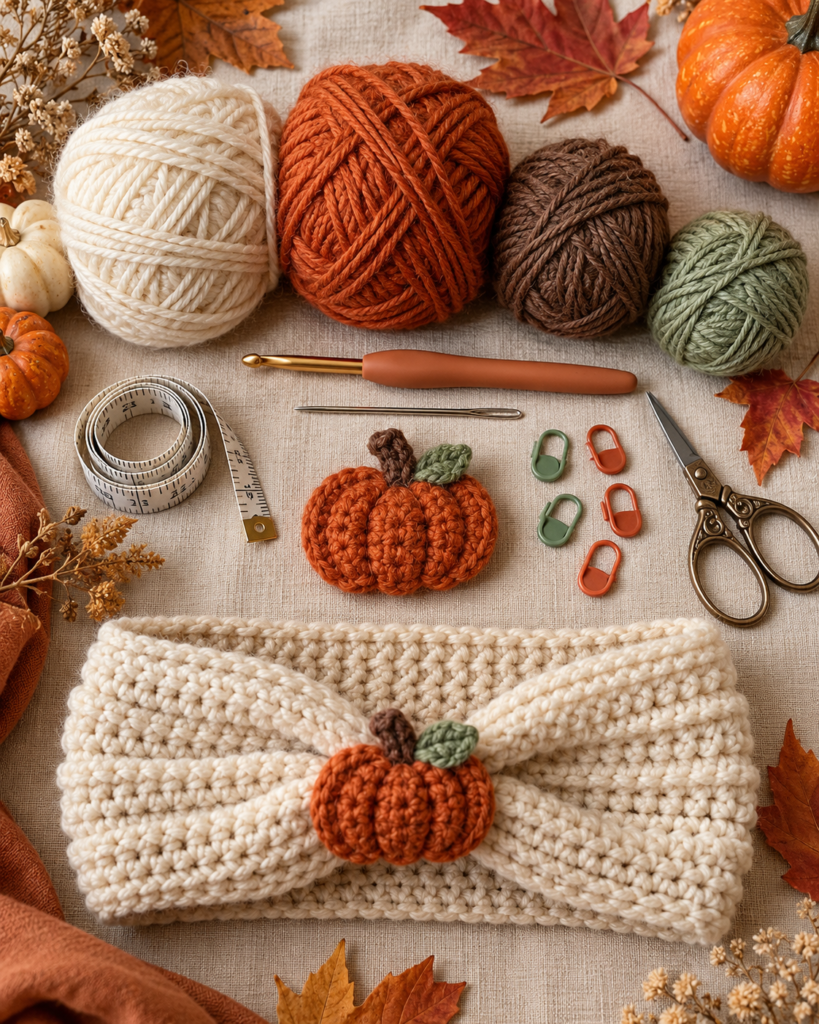
Materials You’ll Need
For the basic adult headband, gather:
- Worsted-weight or DK-weight yarn
- 4.0–5.0 mm crochet hook
- Yarn needle
- Scissors
- Measuring tape
- Stitch marker, optional
- Small amount of contrasting yarn for pumpkins
- Small amount of green yarn for leaves and stems
- Sewing needle if you prefer very secure embellishment
For the sample shown in the inspiration image, warm autumn shades work beautifully.
Recommended Fall Color Palette
| Color | Best use |
|---|---|
| Pumpkin orange | Main pumpkin motifs |
| Rust | Headband base |
| Cream | Neutral headband |
| Mustard | Decorative accents |
| Sage green | Leaves |
| Olive | Pumpkin stems |
| Chocolate brown | Rustic autumn designs |
| Burgundy | Rich seasonal accent |
| Dusty rose | Feminine variation |
| Beige | Soft neutral background |
Choosing the Right Yarn
Yarn choice makes a noticeable difference in the finished headband.
For a comfortable everyday accessory, choose a yarn that is soft enough to sit against the forehead and around the ears without feeling scratchy.
Worsted-weight yarn is a particularly convenient choice because it creates a substantial fabric without making the project excessively bulky.
DK-weight yarn creates a lighter headband, while chunky yarn produces a much warmer winter-style accessory.
| Yarn weight | Result | Best for |
|---|---|---|
| DK | Light and flexible | Mild autumn weather |
| Worsted | Medium and cozy | Everyday fall headbands |
| Bulky | Thick and warm | Cold weather |
| Super bulky | Very thick | Statement winter designs |
Avoid very stiff yarn for a headband. The accessory needs enough flexibility to stretch slightly around the head.
Pattern 1: Easy Ribbed Fall Crochet Headband
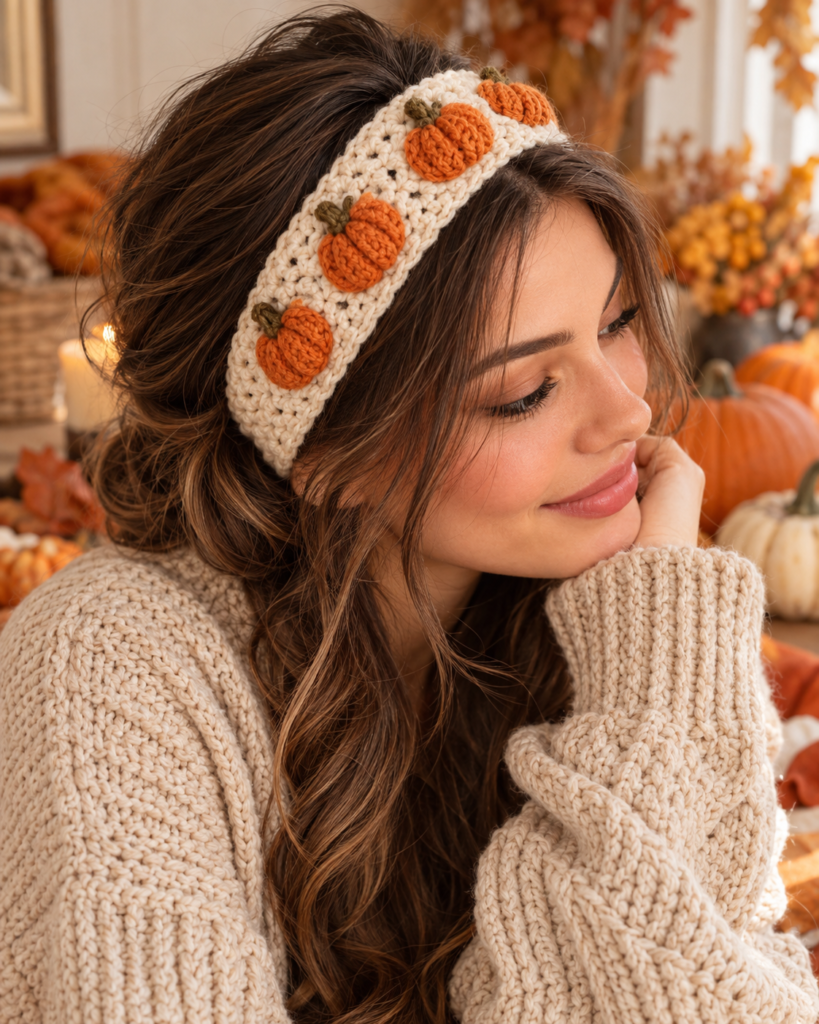
This is the foundation pattern you can use for almost every variation in this article.
The headband is worked as a rectangle and joined at the short ends.
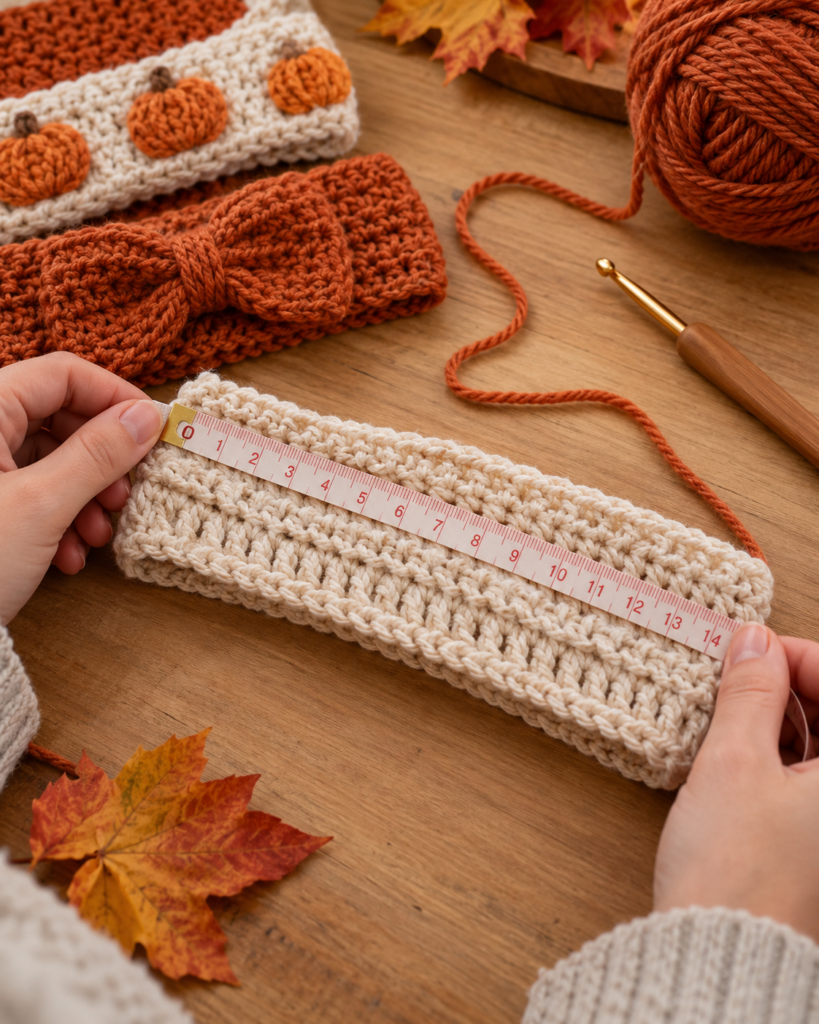
Finished Size
Adult medium:
- Circumference: approximately 20–21 inches
- Width: approximately 4 inches
Because crochet tension varies, measuring the actual head is preferable to relying only on the stitch count.
Abbreviations
| Abbreviation | Meaning |
|---|---|
| ch | Chain |
| sc | Single crochet |
| hdc | Half double crochet |
| dc | Double crochet |
| sl st | Slip stitch |
| BLO | Back loop only |
| st | Stitch |
| rep | Repeat |
| RS | Right side |
| WS | Wrong side |
Gauge
Gauge is not absolutely critical for a headband, but it affects the final dimensions.
A useful starting point is approximately:
16 hdc × 12 rows = 4 inches × 4 inches
If your fabric is much tighter, try a larger hook.
If it is much looser, try a smaller hook.
Adult Headband Pattern
Step 1: Create the Foundation Chain
Chain approximately 17 stitches.
This determines the width of your headband.
For a wider headband, increase the chain count.
Step 2: First Row
Half double crochet in the second chain from the hook.
Continue working one half double crochet across.
You should have approximately 16 stitches.
Chain 1 and turn.
Step 3: Continue the Rows
Work one half double crochet across the row.
Chain 1 and turn.
Repeat until the strip measures approximately 20 inches, or until it is slightly shorter than the wearer’s head circumference.
The small amount of negative ease allows the crochet fabric to sit securely rather than slipping.
Step 4: Test the Fit
Wrap the strip around the head.
The ends should meet comfortably without excessive stretching.
You want the band to feel secure but not tight.
Step 5: Join the Ends
Place the two short ends together.
You can join them using:
- slip stitches
- single crochet
- mattress stitch
- whip stitch
For a neat seam, mattress stitch is an excellent choice.
Weave in the yarn securely.
You now have a simple fall crochet headband.
How to Add Ribbed Texture
If you want the headband to look more like a commercial knitted ear warmer, use half double crochet through the back loop.
Instead of inserting the hook underneath both loops of the stitch, work through the back loop only.
This creates horizontal ridges.
Ribbed Version
Chain 17.
Row 1: Hdc across.
Row 2: Hdc BLO across.
Repeat Row 2 until the piece reaches the desired circumference.
The resulting fabric has more visible texture and a little extra flexibility.
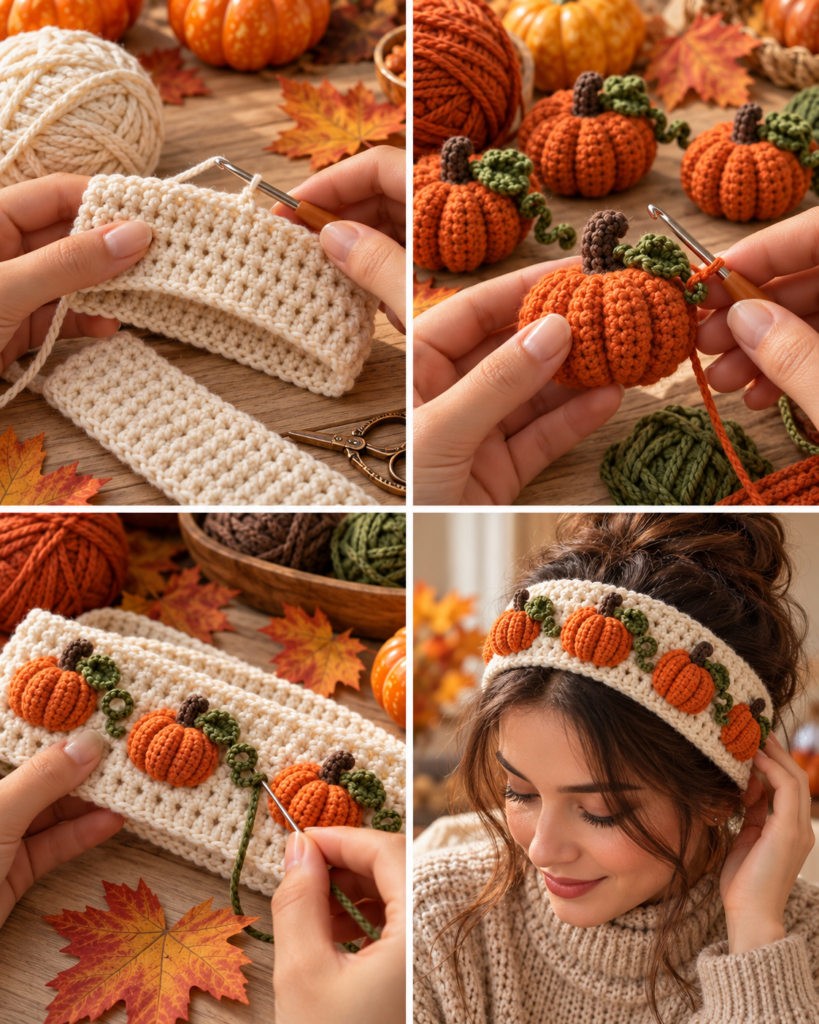
Pattern 2: Easy Pumpkin Appliqué
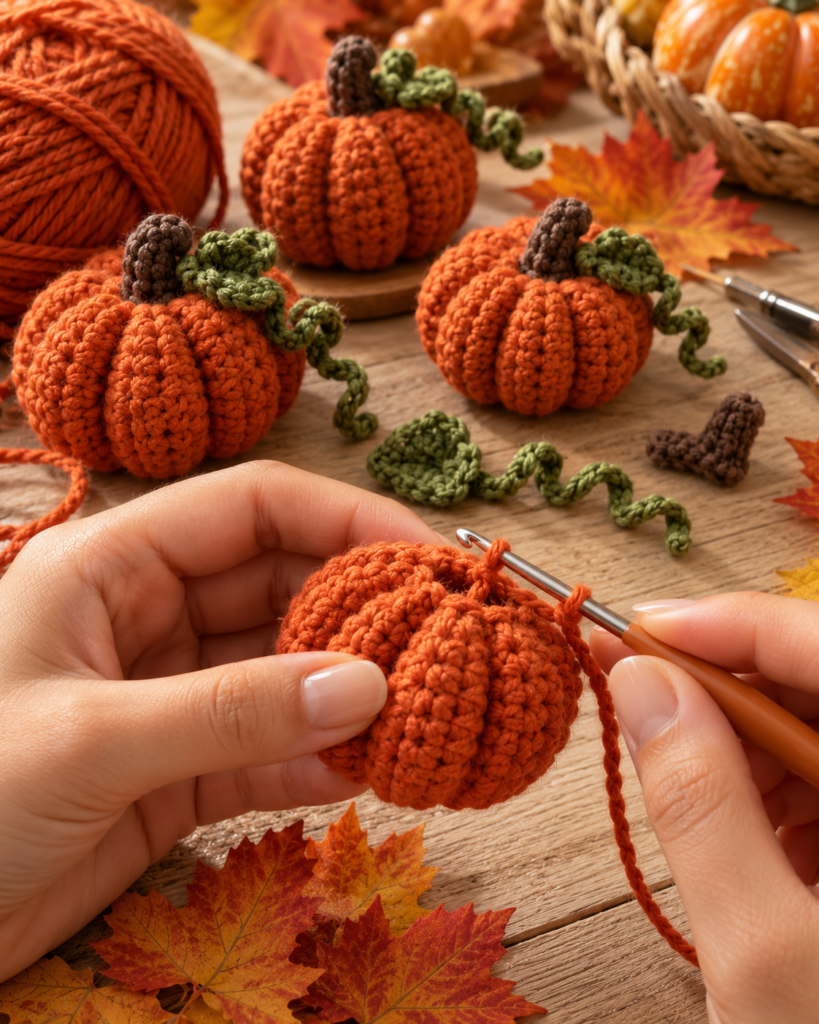
Now we can transform the basic headband into the pumpkin-inspired design shown in the inspiration image.
The pumpkin is crocheted separately and sewn onto the headband.
Materials
You need:
- small amount of orange yarn
- small amount of green or brown yarn
- crochet hook appropriate for the yarn
- yarn needle
- scissors
Pumpkin Pattern
Start with orange yarn.
Make a magic ring.
Round 1
Work 6 single crochet into the ring.
Pull the ring closed.
Do not turn.
Round 2
Increase in every stitch.
You should have 12 stitches.
Round 3
Sc in the next stitch, 2 sc in the next stitch.
Repeat around.
You should have approximately 18 stitches.
Round 4
Single crochet around.
Round 5
Sc in the next 2 stitches, increase in the next stitch.
Repeat around.
Round 6
Single crochet around.
Fasten off, leaving a long tail for sewing.
You now have a small rounded pumpkin.
Creating Pumpkin Ridges
Thread the long yarn tail onto a yarn needle.
Insert the needle through the center of the pumpkin and bring it out near the outside edge.
Pull gently.
Repeat at several points around the pumpkin.
This pulls the center slightly inward and creates the characteristic pumpkin sections.
Do not pull too tightly or the pumpkin may become excessively flattened.
Add the Stem
Using green or brown yarn, attach a small chain or a few stitches to the top.
A simple stem can be made by:
- Insert your hook into the top of the pumpkin.
- Attach green yarn.
- Chain 3.
- Slip stitch back toward the pumpkin.
- Fasten off.
For a more structured stem, crochet a tiny tube using single crochet.
Pattern 3: Tiny Crochet Pumpkin
If you want smaller pumpkins scattered across the headband, use this miniature version.
Mini Pumpkin
Magic ring.
Round 1: 6 sc into ring.
Round 2: Increase around — 12 stitches.
Round 3: Sc around.
Round 4: Sc around.
Round 5: Work decreases around until the opening is small.
Add a tiny amount of stuffing if desired.
Close the opening.
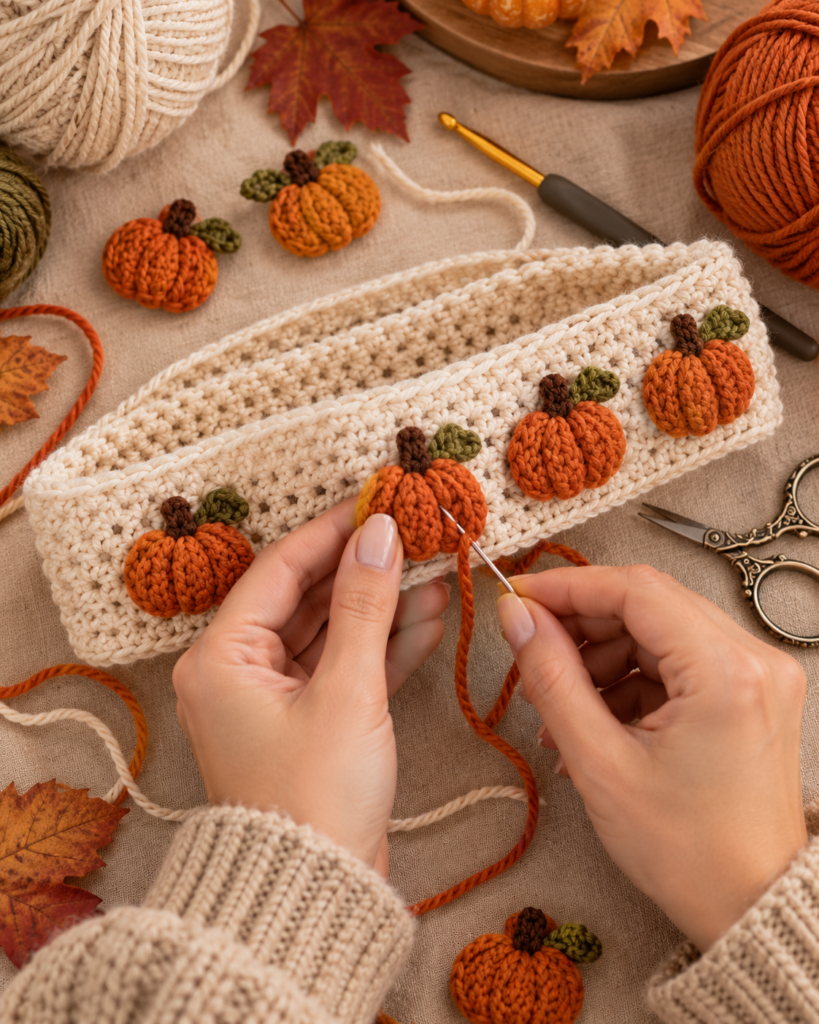
Sew the pumpkin securely to the headband.
These tiny pumpkins look particularly cute when arranged in a row.
Pattern 4: Simple Crochet Leaf
Pumpkins look even more autumnal when paired with small green leaves.
Use sage, olive, moss, or dark green yarn.
Leaf Pattern
Chain 7.
Starting in the second chain from the hook:
- slip stitch
- single crochet
- half double crochet
- double crochet
- half double crochet
- single crochet
Work a slip stitch at the end.
Then work back along the opposite side of the foundation chain using corresponding stitches.
Fasten off and leave a sewing tail.
The finished leaf should have a pointed shape.
For a more defined leaf, use a darker green yarn to embroider a central vein.
Pattern 5: Pumpkin Bow Headband
Instead of several pumpkins, create one decorative pumpkin bow.
Bow Pieces
Create two small rectangles.
For each rectangle:
Chain 11.
Row 1: Sc across.
Rows 2–8: Sc across.
Fasten off.
Fold each rectangle slightly and pinch the center.
Wrap contrasting yarn around the middle several times.
Secure the yarn at the back.
Attach a small pumpkin to the center.
Sew the bow to the headband.
This creates a cute autumn accessory that works particularly well with cream, beige, rust, or burgundy headbands.
Pattern 6: Pumpkin Patch Headband
For a more decorative version, create a miniature pumpkin patch.
Make:
- 3 large pumpkins
- 4 small pumpkins
- 5 leaves
- 2 small vines
Arrange them before sewing.
A good composition is:
small pumpkin → leaf → large pumpkin → small pumpkin → large pumpkin → leaf
Do not sew the pieces immediately.
Lay everything on the headband first and photograph the arrangement.
This makes it much easier to adjust the spacing.
How to Attach the Decorations
This step is important because decorative pieces can pull away from the headband if they are attached with only one or two stitches.
Place the pumpkin on the headband.
Using the yarn tail and a yarn needle, sew around several points of the pumpkin.
For a larger pumpkin, secure:
- top
- bottom
- left side
- right side
Then weave the yarn through the headband fabric before trimming.
Security Tip
If the headband is intended for a young child, avoid loose small decorations that could become detached.
For adult accessories, sewn-on decorations are generally easier to secure.
Headband Size Guide
A comfortable headband should usually be slightly smaller than the head circumference because crochet fabric can stretch.
| Wearer | Approx. head circumference | Suggested finished band |
|---|---|---|
| Baby | 14–16 in | 13–15 in |
| Toddler | 17–19 in | 16–18 in |
| Child | 19–20 in | 18–19 in |
| Teen | 20–21 in | 19–20 in |
| Small adult | 21–22 in | 20–21 in |
| Medium adult | 22–23 in | 21–22 in |
| Large adult | 23–24 in | 22–23 in |
These are starting measurements rather than rigid rules because yarn, stitch, and tension all affect stretch.
How to Make the Headband Any Size
The easiest method is to measure the intended wearer.
Measure around the head where the headband will sit.
Then subtract approximately 1–2 inches for a stretchy fabric.
For example:
Head circumference: 22 inches
Desired finished band: approximately 20.5–21 inches
Crochet the rectangle until it reaches the target length.
This method is more reliable than trying to calculate the exact number of rows beforehand.
How to Make a Wider Headband
The width of the band is determined primarily by the foundation chain.
| Width | Approximate chain |
|---|---|
| 2.5 in | 11–12 |
| 3 in | 13–14 |
| 4 in | 17 |
| 5 in | 21–22 |
| 6 in | 25–26 |
The exact number depends on your yarn and tension.
A 4-inch headband is a good everyday size.
A 5–6-inch version creates more warmth and gives you additional space for decorative pumpkins.
Best Crochet Stitches for Fall Headbands
Different stitches produce completely different looks.
| Stitch | Texture | Stretch | Difficulty |
|---|---|---|---|
| Single crochet | Dense | Low | Beginner |
| Half double crochet | Soft | Medium | Beginner |
| Hdc BLO | Ribbed | Good | Beginner |
| Double crochet | Open | Medium | Beginner |
| Front-post stitches | Textured | Medium | Intermediate |
| Moss stitch | Subtle | Medium | Beginner |
| Alpine stitch | Highly textured | Medium | Intermediate |
For a first headband, half double crochet through the back loop is one of the easiest options.
Adding a Decorative Border
A simple border can make the finished headband look much more polished.
Attach yarn to one corner.
Work single crochet evenly around the edge.
At corners, add an extra stitch if necessary to prevent curling.
Join with a slip stitch.
For a decorative version, try a picot border.
A simple picot can be created by:
sc, chain 3, slip stitch into the first chain
Repeat along the edge.
How to Create a Two-Tone Headband
You don’t have to use a single color.
Try dividing the headband into two colors.
For example:
cream + pumpkin orange
or
rust + sage
or
burgundy + beige
You can change colors every few rows for a striped effect.
For a more subtle design, keep the headband solid and use contrasting colors only for the pumpkins and leaves.
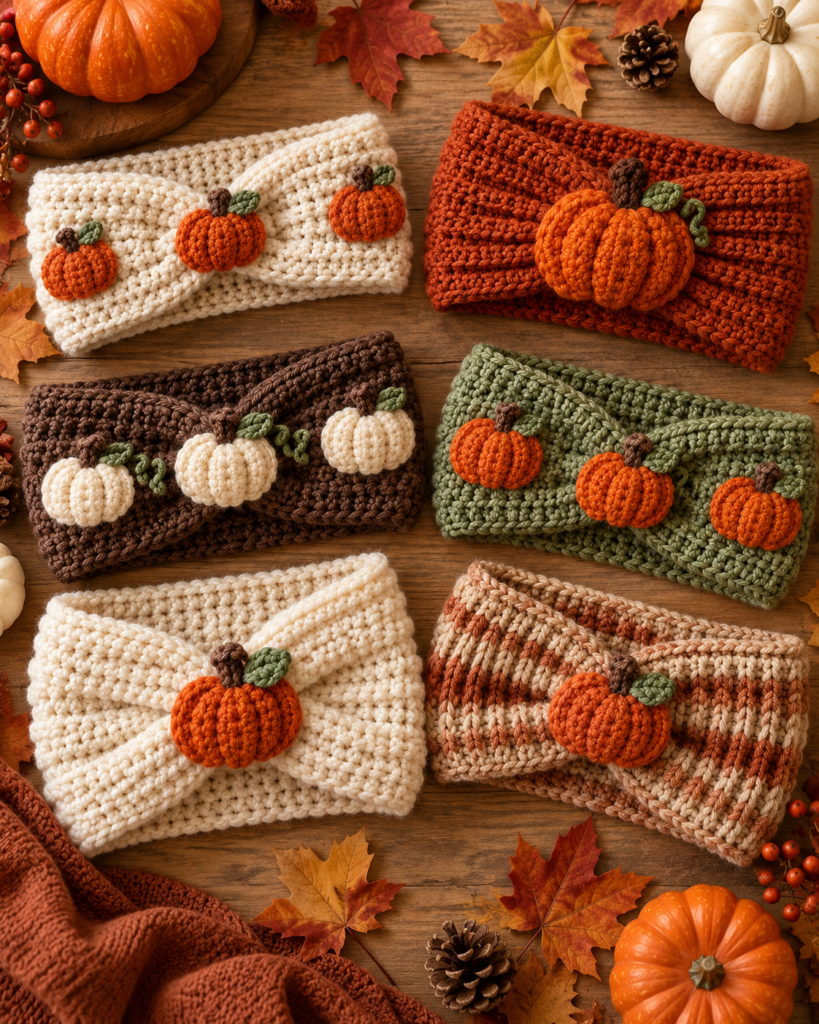
Beautiful Fall Color Combinations
| Headband | Pumpkin | Leaf | Style |
|---|---|---|---|
| Cream | Rust | Sage | Soft farmhouse |
| Rust | Cream | Olive | Rustic |
| Beige | Orange | Moss | Natural |
| Burgundy | Mustard | Olive | Rich autumn |
| Brown | Pumpkin | Sage | Woodland |
| Sage | Cream | Olive | Minimalist |
| Mustard | Rust | Forest green | Vintage |
| Dusty rose | Terracotta | Sage | Feminine |
Five Ways to Customize the Same Pattern
One basic headband pattern can become several different products.
1. Minimal Pumpkin Headband
Use one large pumpkin in the center.
Best for someone who likes subtle seasonal accessories.
2. Pumpkin Patch Headband
Add several pumpkins and leaves across the front.
This creates a more playful autumn look.
3. Rustic Neutral Headband
Use cream yarn with beige pumpkins and sage leaves.
This works well with neutral fall wardrobes.
4. Halloween Version
Use black, orange, purple, and white.
Add tiny ghosts, bats, spiders, or pumpkins.
5. Thanksgiving Version
Use rust, mustard, brown, cream, and olive.
Keep the decorations simple for a more sophisticated seasonal accessory.
How to Add a Crochet Bow
A bow can completely change the appearance of the headband.
Crochet a rectangle approximately:
4–5 inches wide × 2–3 inches tall
Fold the rectangle and pinch the center.
Wrap yarn around the middle.
Sew the bow securely to the headband.
For an autumn bow, use:
- rust
- cream
- mustard
- burgundy
- plaid-inspired color combinations
A pumpkin can be attached to the center of the bow.
Adding a Hanging Leaf Detail
For a more elaborate accessory, make two small leaves and attach them to a short crocheted chain.
At the end of each chain, sew a small wooden bead or crochet ball.
Attach the top of the chain behind the pumpkin.
The leaves will hang slightly below the headband, creating movement.
This is particularly attractive for photographs and seasonal outfits.
Beginner-Friendly Construction Tips
If you’re making your first crochet headband, keep these principles in mind.
Count your stitches
If the first row has 16 stitches, try to maintain 16 stitches throughout.
Losing stitches can cause the headband to become narrower.
Check your tension
If your headband feels stiff, your tension may be too tight.
Try relaxing your hands or moving up a hook size.
Measure before finishing
Do not wait until the end to discover that your headband is too large.
Test the fit every few inches.
Hide your yarn tails carefully
Weave the ends through several stitches in different directions.
For decorative pieces, secure the tail particularly well because the pieces will experience movement when worn.
Common Problems and Solutions
| Problem | Possible cause | Solution |
|---|---|---|
| Headband is too tight | Too little negative ease | Add length |
| Headband keeps slipping | Too loose | Reduce finished circumference |
| Edges curl | Tension or stitch structure | Add border |
| Pumpkin looks flat | Too little shaping | Add center shaping |
| Headband feels stiff | Tight tension | Use larger hook |
| Decoration moves | Insufficient attachment | Add more sewing points |
| Rows look uneven | Uneven tension | Practice consistent stitches |
| Headband twists | Seam alignment | Match edges carefully before joining |
How to Make the Pumpkin Look More Realistic
A flat orange circle is recognizable as a pumpkin, but a few additional details make it much more convincing.
First, shape the pumpkin with the yarn tail.
Second, add a small stem.
Third, create a tiny leaf.
Fourth, embroider subtle vertical lines.
You can also use two slightly different shades of orange.
For example, make the pumpkin in burnt orange and add a few darker orange embroidery lines.
Adding Texture to the Pumpkin
For a more three-dimensional pumpkin, use a slightly larger hook and lightly stuff the motif.
Do not overstuff it.
You want a soft, rounded shape rather than a firm ball.
After stuffing, close the opening and use the yarn tail to create the vertical sections.
This technique gives the pumpkin more depth.
How to Wash Your Crochet Headband
Always check the yarn label first.
For many acrylic yarns, gentle machine washing may be possible.
However, hand washing is a safer option when the headband contains delicate embellishments.
Use:
- Cool or lukewarm water
- Mild detergent
- Gentle handling
- A clean towel
- Flat drying
Avoid twisting the headband aggressively because this can distort the crochet stitches.
Styling Ideas for Your Fall Crochet Headband
A pumpkin headband can be worn with much more than a Halloween outfit.
Try pairing it with:
- cream sweaters
- denim jackets
- oversized cardigans
- flannel shirts
- neutral coats
- knit dresses
- corduroy jackets
- scarves
- ankle boots
- jeans and a chunky sweater
For a more understated outfit, choose a neutral headband with only one small pumpkin.
For a playful fall outfit, use several bright pumpkins.
Gift Ideas
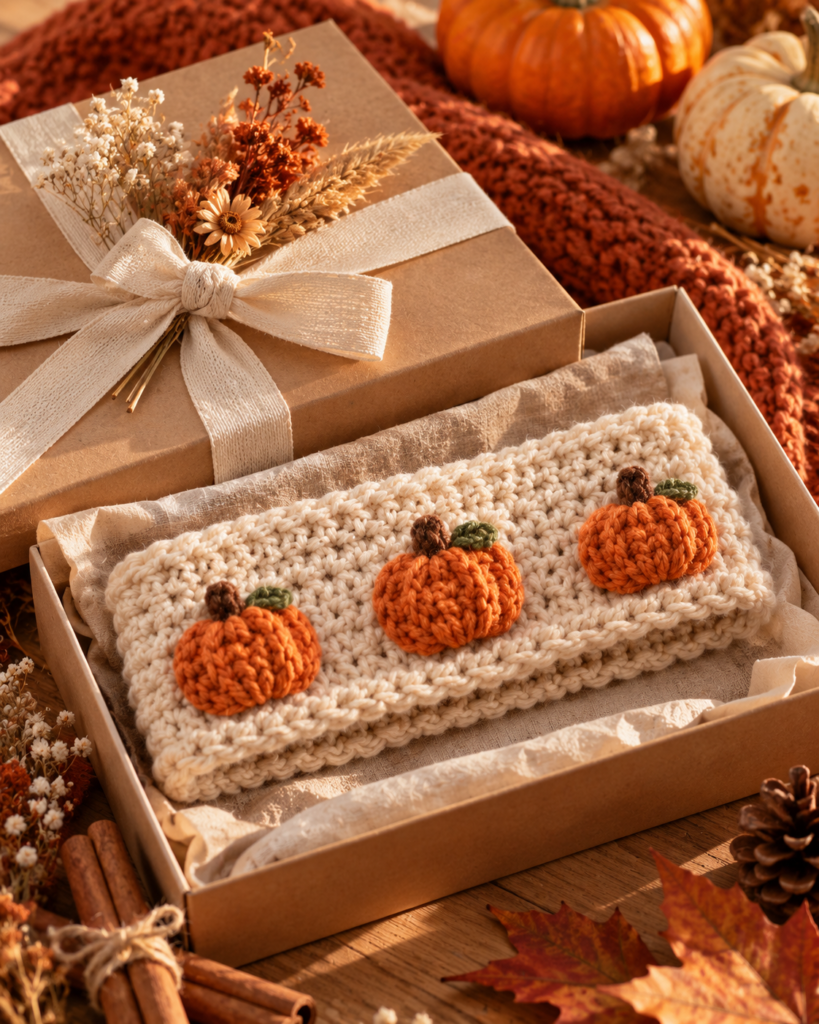
A handmade crochet headband makes a useful small gift because it is practical, customizable, and relatively quick to make.
You could create a fall gift set containing:
| Item | Suggested color |
|---|---|
| Crochet headband | Rust |
| Mini pumpkin | Orange |
| Leaf accessory | Sage |
| Small crochet flower | Cream |
| Gift packaging | Kraft paper |
You can also create matching sets for:
- mother and daughter
- sisters
- friends
- coworkers
- bridesmaids
- fall photo sessions
Selling Handmade Crochet Headbands
If you make these headbands for sale, calculate the cost of materials, your time, packaging, platform fees, and other expenses before choosing a price.
Consider offering several variations instead of producing only one design.
For example:
Classic Pumpkin
Pumpkin Patch
Neutral Autumn
Halloween
Rustic Harvest
This allows customers to choose according to their style.
If selling finished handmade items, clearly state the materials and approximate measurements.
Photographing Your Crochet Headband
Good photography can make a handmade crochet accessory much more appealing.
For product photographs, capture:
Front View
Show the complete headband clearly.
Close-Up
Show the pumpkin stitches, leaves, and texture.
Worn Photograph
Show how the headband looks when worn.
Side Angle
Show the thickness and construction.
Detail Photograph
Focus on the pumpkin, bow, or decorative stitching.
A warm background containing a few autumn elements—such as leaves, pumpkins, knitted blankets, or wooden accessories—can reinforce the seasonal theme without distracting from the crochet work.
A Simple Beginner Project Plan
If you’re new to crochet, don’t try to make the most complicated version immediately.
Follow this progression:
Project 1: Plain single-color headband
Project 2: Ribbed headband
Project 3: Headband with one pumpkin
Project 4: Pumpkin + leaf
Project 5: Pumpkin patch headband
Project 6: Textured or two-color version
This gives you the opportunity to develop your crochet skills gradually.
Quick Reference: Basic Pattern
Headband
Chain 17.
Row 1: Hdc across.
Row 2: Hdc BLO across.
Repeat Row 2 until the strip reaches the desired circumference.
Join the short ends.
Weave in the ends.
Pumpkin
Magic ring.
Round 1: 6 sc.
Round 2: Increase around — 12.
Round 3: Sc 1, inc around — 18.
Rounds 4–5: Sc around.
Add shaping and close.
Leaf
Chain 7.
Sl st, sc, hdc, dc, hdc, sc along one side.
Continue around the opposite side.
Fasten off.
Assembly
Position the pumpkin and leaves.
Sew securely.
Weave in all ends.
Block lightly if necessary.
Frequently Asked Questions
How long does it take to crochet a fall headband?
A simple headband can often be completed within a few hours, depending on your experience, yarn weight, stitch pattern, and desired size.
Is this a good crochet project for beginners?
Yes. The basic rectangular construction is beginner-friendly, particularly when using single crochet or half double crochet.
Can I make this pattern with chunky yarn?
Yes. You will need to adjust the hook size and stitch count because chunky yarn creates a thicker fabric.
Can I make the headband smaller?
Absolutely. Measure the intended wearer’s head and adjust the length of the rectangular band accordingly.
Can I use cotton yarn?
Yes. Cotton can produce a structured headband, although it may have less elasticity than some acrylic or wool-blend yarns.
How do I stop the headband from slipping?
Make the finished circumference slightly smaller than the head circumference and choose a stitch with some natural stretch.
Can I replace the pumpkins with other motifs?
Definitely. The same headband can be decorated with crochet:
- leaves
- flowers
- acorns
- apples
- mushrooms
- ghosts
- bats
- stars
- hearts
- bows
Final Thoughts
A fall crochet headband is one of those projects that gives you a lot of creative freedom without requiring a huge amount of yarn or time.
Start with the simple rectangular base, experiment with ribbed stitches, and then add your favorite seasonal details. A single pumpkin can create an elegant minimalist design, while several pumpkins, leaves, bows, and textured elements can turn the same basic pattern into a statement accessory.
The most useful technique to take away from this project is not just the headband itself. Once you understand how to measure the head, create the basic rectangle, join it securely, and attach small crochet appliqués, you can use the same construction method to design dozens of seasonal accessories.
Try a rust-and-cream pumpkin headband for a classic autumn look, sage and beige for something softer, or orange and black for Halloween. You can even keep the base completely neutral and change the detachable decorations throughout the season.
One simple crochet rectangle can become an entire collection of handmade fall accessories.