

Halloween is the perfect excuse to experiment with nail art that feels a little darker, bolder, and more creative than your everyday manicure. From glossy blood-red accents and matte black nails to creepy skull illustrations, spooky French tips, and delicate spiderweb patterns, Halloween-themed nail designs offer endless ways to express your personal style.
The best part? You do not need extremely long nails or professional nail-art skills to create a manicure that looks impressive. Some designs rely on nothing more than black polish and a fine brush, while others combine several colors, detailed illustrations, and glossy or matte finishes for a dramatic effect.
Whether you prefer scary Halloween nails, elegant gothic manicures, cute spooky details, or bold designs that stand out at a Halloween party, there is an option for every nail length and skill level.
In this guide, you will discover 25 Halloween-themed nail designs, learn how to recreate several of them step by step, and find practical tips for choosing the right colors, nail shapes, tools, and finishes for your October manicure.
Table of Contents
- Classic Matte Black Halloween Nails
- Skull Accent Nails
- Blood-Drip Halloween Nails
- Black and Red Gothic Nails
- Ghost Halloween Nails
- Spiderweb Nail Art
- Black Cat Halloween Nails
- Bloody French Tips
- Vampire-Inspired Nails
- Spider Accent Nails
- Haunted House Nail Art
- Black and Orange Halloween Nails
- Minimalist Bat Nails
- Pumpkin Halloween Nails
- Skeleton Hand Nails
- Witchy Green Halloween Nails
- Black Chrome Halloween Nails
- Gothic Lace Nails
- Creepy Eyeball Nails
- Haunted Graveyard Nails
- Cute Ghost French Tips
- Purple and Black Halloween Nails
- Halloween Flame Nails
- Elegant Burgundy Halloween Nails
- Mix-and-Match Halloween Nails
Why Halloween-Themed Nail Designs Are So Popular
Halloween nail art allows you to experiment with colors, patterns, and textures that might feel too dramatic for an everyday manicure. Black, burgundy, blood red, deep purple, and burnt orange become especially appealing during the autumn season.
Another reason these designs are popular is their versatility. You can choose a simple black manicure with one spooky accent nail, create a playful set with tiny ghosts and pumpkins, or opt for long almond nails decorated with intricate gothic illustrations.
Halloween nails can also complement your costume, evening outfit, or everyday fall wardrobe. A black-and-red manicure works beautifully with a vampire-inspired look, while burgundy nails with subtle gold details offer a more sophisticated alternative for people who prefer understated seasonal beauty.
The secret is choosing a design that matches your comfort level, nail shape, and personal aesthetic rather than trying to recreate the most complicated manicure you see online.
25 Halloween-Themed Nail Designs to Try
1. Classic Matte Black Halloween Nails
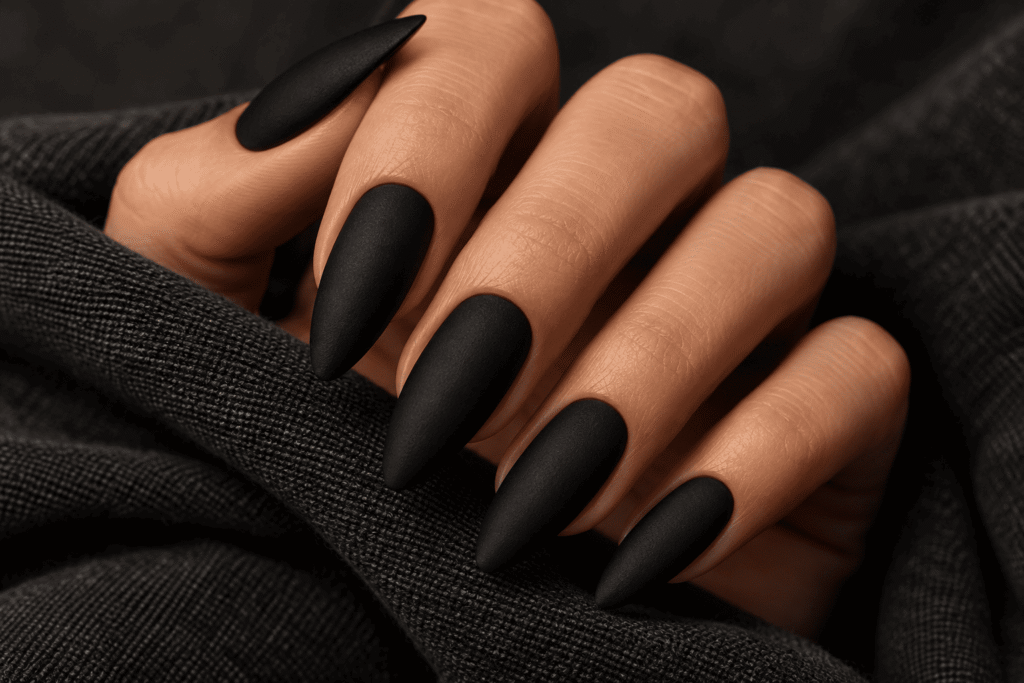
Matte black nails are one of the most versatile choices for Halloween. Their smooth, velvety finish creates a mysterious gothic appearance without requiring detailed nail art.
This design is especially attractive on almond, coffin, and square-shaped nails. The dark finish makes the manicure look bold, while the absence of shine gives it a modern, understated quality.
How to style the look:
- Choose a deep black nail polish with an opaque finish.
- Apply two thin coats rather than one thick coat.
- Finish with a matte top coat designed for your polish system.
- Add one glossy black accent nail if you want a subtle contrast.
For an extra Halloween-inspired touch, decorate one nail with a tiny silver star, a delicate spiderweb, or a small black bat.
Best for: Minimalist gothic styles, everyday October manicures, and people who want a dramatic look without complicated nail art.
2. Skull Accent Nails
Skull nails are a classic choice for anyone who wants a recognizable Halloween design. The contrast between a dark background and a pale skull illustration creates an instantly spooky effect.
A black-and-white skull works well on one accent nail, while the remaining nails can stay solid black, burgundy, or deep red. This keeps the manicure visually balanced and allows the illustration to stand out.
How to recreate it:
- Apply a base coat and let it dry.
- Paint the nails black or another dark shade, leaving the accent nail for the skull.
- Apply a pale ivory or white base to the accent nail.
- Use a fine nail-art brush to outline the skull.
- Add two dark eye sockets, a small nose shape, and delicate lines for the mouth.
- Allow the design to dry before applying a compatible top coat.
If drawing a skull feels difficult, use a nail-art sticker or stamping plate. You can achieve a similar effect without needing to paint every detail by hand.
Best for: Gothic manicures, horror-inspired costumes, and statement nails.
3. Blood-Drip Halloween Nails
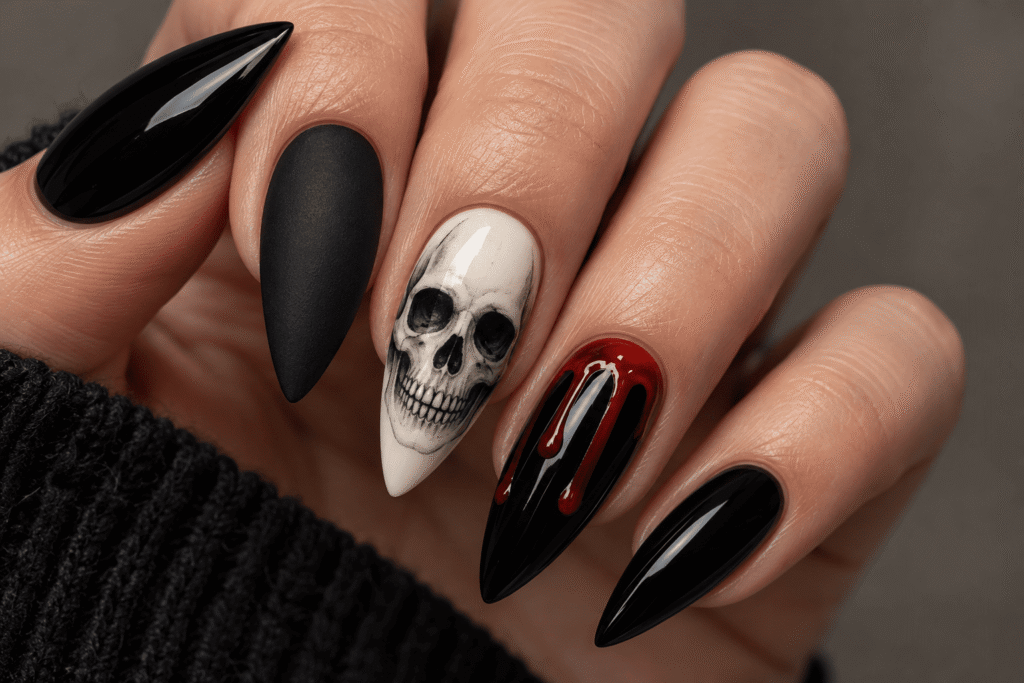
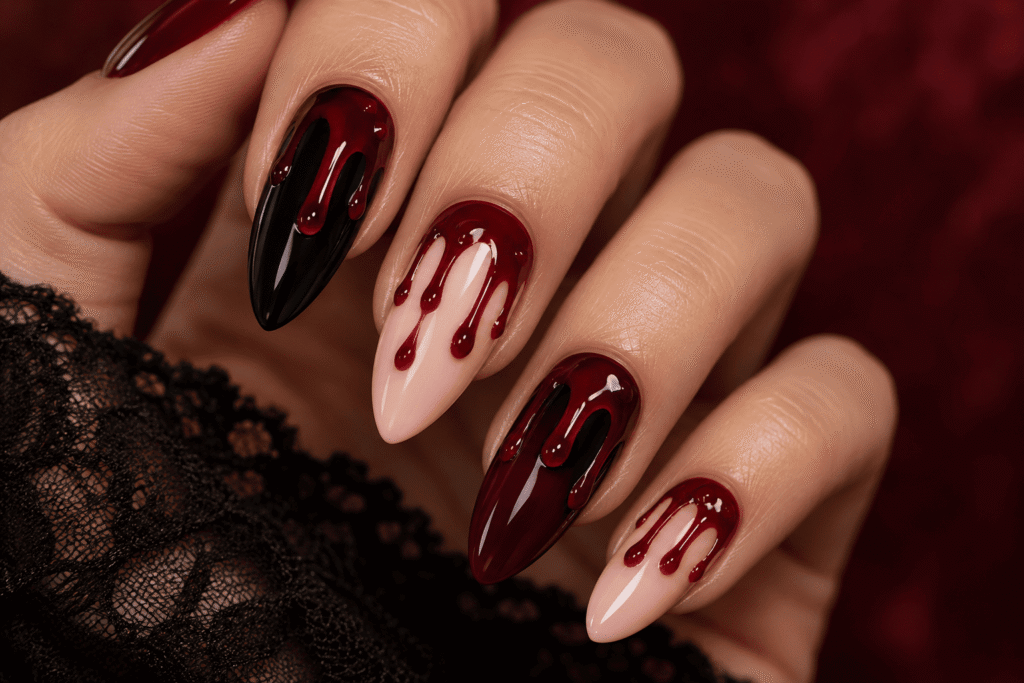
Blood-drip nails are dramatic, recognizable, and surprisingly adaptable. The design usually combines a pale nude or pink base with deep red polish that resembles dripping blood.
For a bold version, use a black base and glossy crimson drips. For a softer look, place the red details over a translucent blush-pink polish.
Step-by-step tutorial:
- Prepare the nails and apply a base coat.
- Paint two thin coats of nude, pale pink, or black polish.
- Once the base is dry, place a small amount of deep red polish near the tip of the nail.
- Use a fine liner brush to pull several narrow lines downward.
- Round the ends of the lines to create a dripping effect.
- Vary the length and width of the drips so they look natural rather than identical.
- Let the artwork dry thoroughly and seal it with a suitable top coat.
A deep cherry red or burgundy often looks richer than a bright primary red. A glossy finish enhances the effect and gives the manicure a polished appearance.
Best for: Vampire costumes, horror-themed parties, and bold Halloween looks.
4. Black and Red Gothic Nails
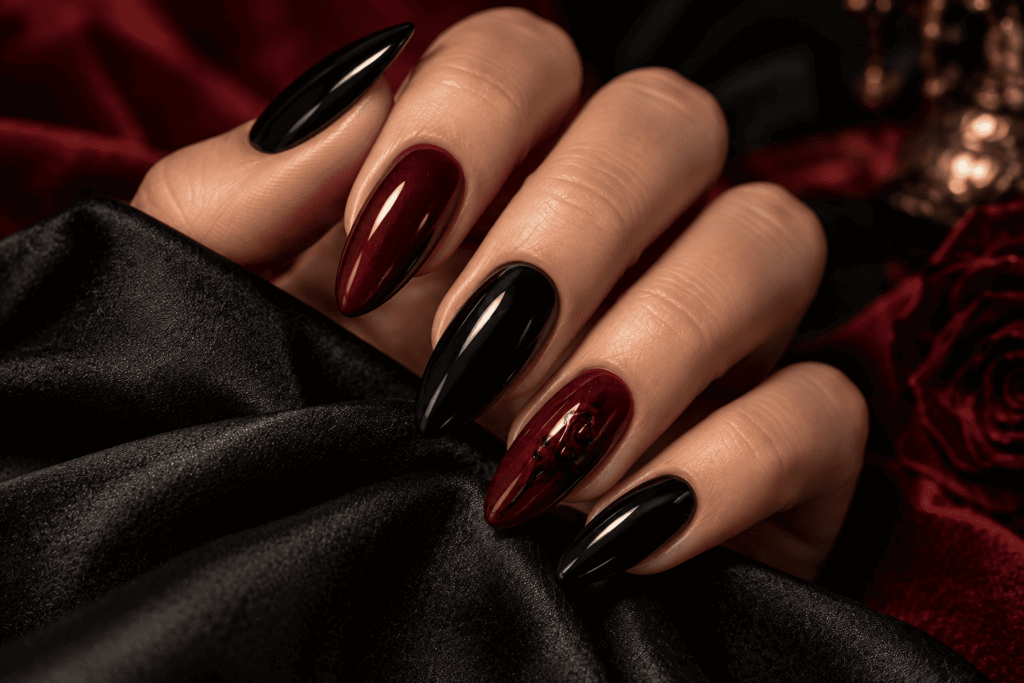
Black and red create a striking combination that feels dark, dramatic, and sophisticated. You can alternate the two colors, create red French tips, or combine glossy black nails with a single crimson accent.
For a luxurious finish, choose a deep wine red rather than a very bright shade. This gives the manicure a gothic aesthetic that can also work throughout autumn.
Try pairing glossy black nails with one red nail featuring a tiny black heart, delicate dripping detail, or subtle spiderweb.
Design tip: Keep the number of decorative elements limited if you want the color combination to remain the main focus.
Best for: Gothic fashion, vampire-inspired outfits, and elegant Halloween parties.
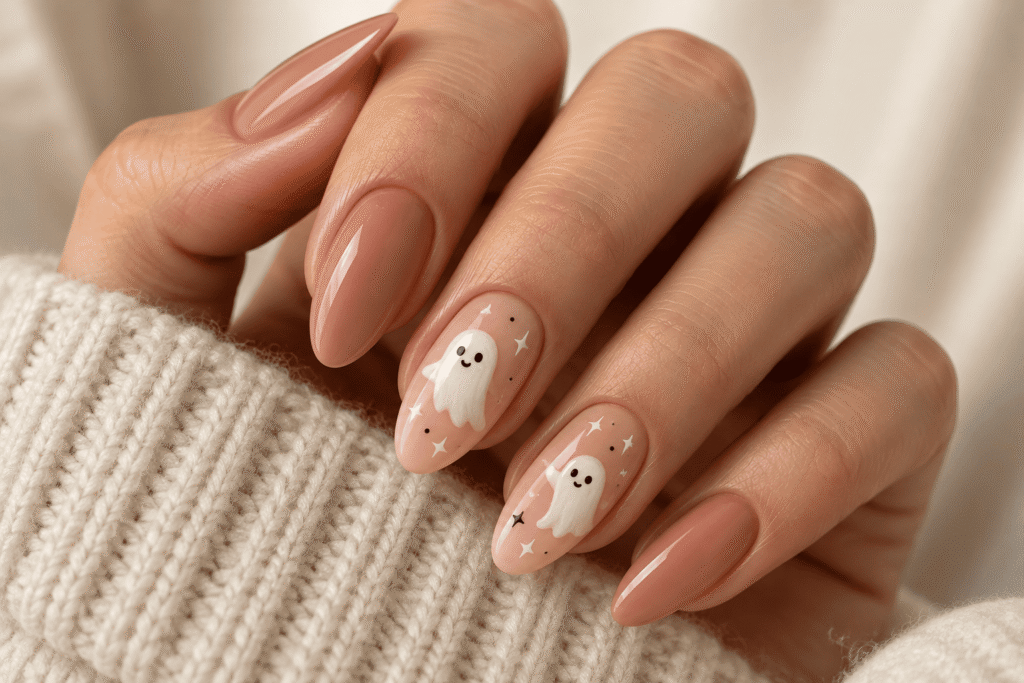
5. Ghost Halloween Nails
Ghost nails are a playful option for anyone who wants something festive without making the manicure too frightening.
A tiny white ghost on a nude or black background is easy to recognize, and the design works on short natural nails as well as longer extensions.
How to create a simple ghost:
- Apply a base color and let it dry.
- Use white polish to paint a small rounded shape near the tip or center of the nail.
- Extend the lower part slightly to create a soft, flowing ghost shape.
- Add two tiny black eyes using a dotting tool.
- Draw a small smile if desired.
- Finish with a top coat once the artwork is dry.
You can create several different expressions to make the manicure look more playful. A single ghost accent nail also works beautifully with an otherwise solid black manicure.
Best for: Cute Halloween outfits, beginners, and people who prefer friendly rather than scary nail art.
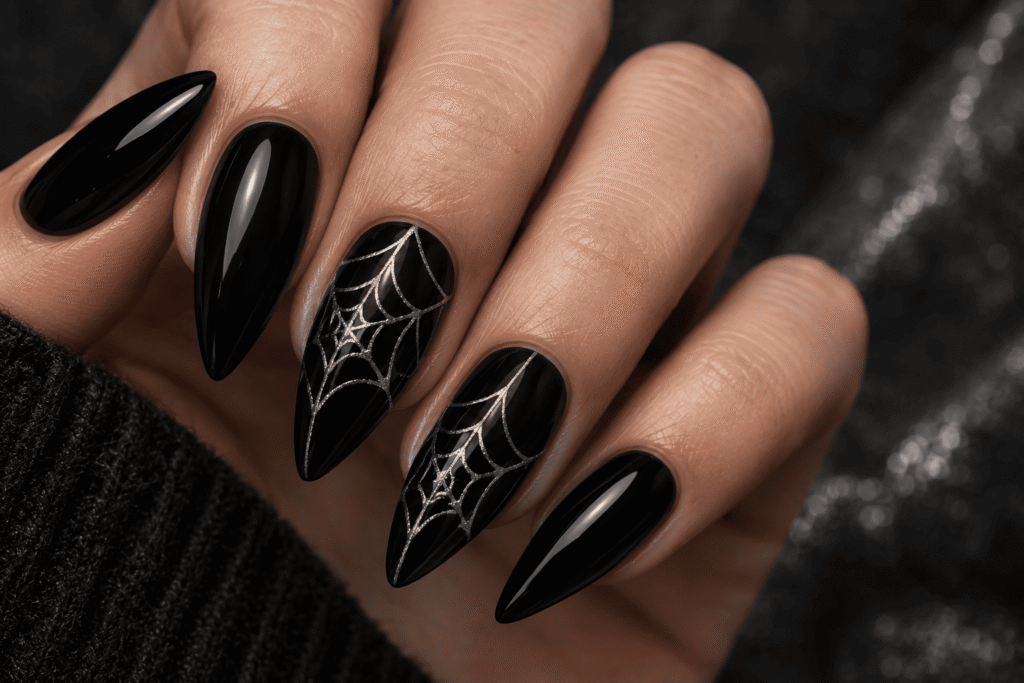
6. Spiderweb Nail Art
Spiderweb nails bring intricate detail to a Halloween manicure without requiring a complicated color palette. The classic version uses thin white or silver lines over a black background, although black webs on nude polish can look more delicate.
A spiderweb accent nail is often easier to create than a full set of webs. It adds a spooky detail while leaving enough negative space for the manicure to feel refined.
Step-by-step spiderweb tutorial:
- Apply a black, nude, or deep-purple base color.
- Let the polish dry completely.
- Use a thin liner brush to draw three or four lines radiating outward from one corner of the nail.
- Connect the lines with small curved strokes.
- Keep the curves slightly uneven for a natural web effect.
- Add a tiny spider near the web if desired.
- Seal the design with a top coat after the artwork has dried.
For an elegant result, use a silver liner over black polish. For a more traditional spooky effect, choose white lines over a deep charcoal background.
Best for: Gothic manicures, medium-to-long nails, and detailed Halloween nail art.
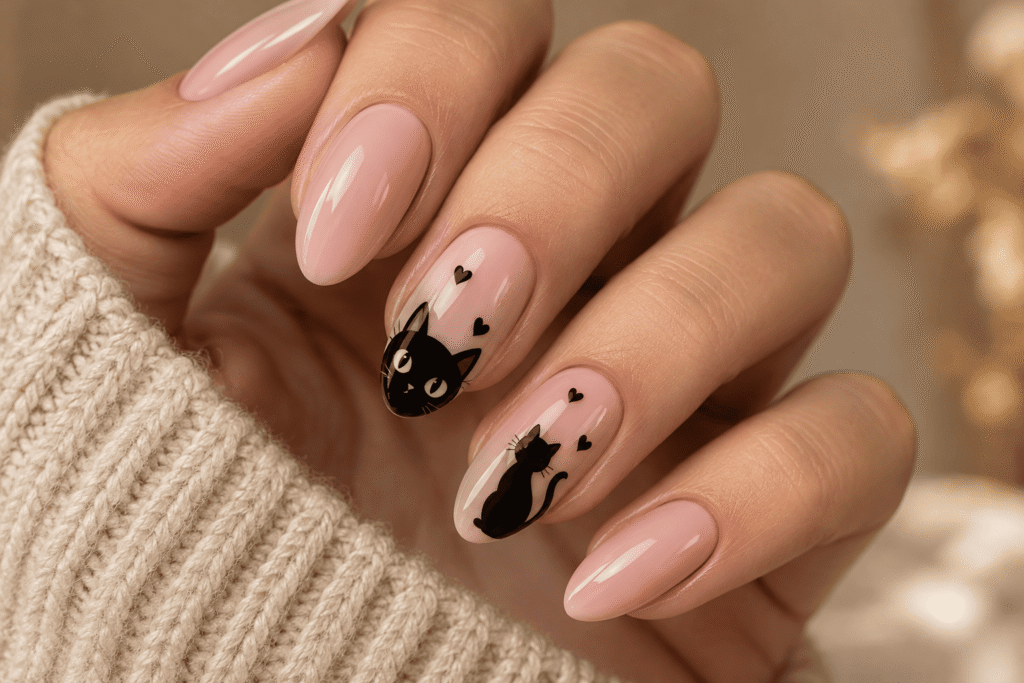
7. Black Cat Halloween Nails
Black cat nails are ideal for anyone who enjoys mysterious, slightly playful Halloween designs. A tiny cat silhouette, pointed ears, or glowing eyes can transform a simple manicure into something seasonal.
For a minimalist design, paint small black cat heads over a pale nude base. If you prefer a darker look, use black nails with gold or green cat eyes.
Ways to style the design:
- Tiny black cat silhouettes on nude polish.
- A single cat face on an accent nail.
- Black French tips with small pointed ears.
- Black cats paired with moons and stars.
- Cat-eye magnetic polish for a mysterious, reflective finish.
Keep the illustrations simple if you are doing the manicure yourself. Two small triangles for ears, a rounded head, and tiny eyes can be enough to communicate the design.
Best for: Cute gothic aesthetics, cat lovers, and minimalist Halloween manicures.
8. Bloody French Tips
Bloody French tips offer a dramatic alternative to the traditional white French manicure. Instead of a white edge, the nail tips are painted deep red with irregular drip-like details.
This design looks particularly striking over a sheer nude or milky pink base because the contrast keeps the red details visible.
How to recreate it:
- Apply a sheer nude or pale pink base.
- Let it dry thoroughly.
- Paint a thin deep-red line along the free edge.
- Use a fine brush to pull a few red drips downward from the tip.
- Vary the length of the drips across the nails.
- Clean up the edges with a small brush and appropriate remover.
- Apply a compatible top coat when the design is completely dry.
For a more subtle manicure, create the effect on just two or three nails rather than the entire set.
Best for: Medium and long nails, vampire-inspired styling, and people who enjoy dramatic French manicures.
9. Vampire-Inspired Nails
Vampire nails combine deep red, black, and sometimes metallic accents for a mysterious and glamorous finish.
The simplest approach is to alternate glossy black and burgundy polish. More elaborate designs can include tiny fangs, red drops, dark hearts, or pointed French tips.
For a refined interpretation, choose a glossy wine-red base with one black accent nail. This gives the manicure a vampy appearance without relying on graphic illustrations.
Styling ideas:
- Deep burgundy almond nails.
- Black nails with crimson French tips.
- Red-and-black ombré nails.
- Glossy black nails with tiny ivory fangs.
- Burgundy nails with delicate silver details.
A high-shine top coat is particularly effective with dark red shades because it enhances their depth and creates a glass-like finish.
Best for: Halloween parties, dramatic evening outfits, and gothic glamour.
10. Spider Accent Nails
Spider nails are another classic Halloween option. You can create a tiny black spider on a pale base, a silver spider on dark polish, or a small spider hanging from a delicate web.
The design works best when the spider is clearly visible against the background. Avoid using too many details on a very small nail because the illustration may become difficult to recognize.
How to paint a simple spider:
- Apply and dry your chosen base color.
- Use a dotting tool to place a small round dot for the spider’s body.
- Add a smaller dot for the head.
- Draw four fine legs on each side with a liner brush.
- Add a short thread above the spider if desired.
- Allow the artwork to dry before applying top coat.
Black spiders over a nude base create a high-contrast look, while silver spiders over black polish feel more glamorous.
Best for: Spooky accent nails, short manicures, and beginner-friendly nail art.
11. Haunted House Nail Art
Haunted house nails turn your manicure into a miniature Halloween scene. Dark silhouettes, crooked rooftops, tiny windows, and a pale moon can create a dramatic nighttime effect.
This design needs more space than a simple accent, so it is often easier on longer nails. However, a simplified haunted-house silhouette can also work on a single short nail.
Design elements to include:
- A black house silhouette.
- A pale yellow or white moon.
- Tiny glowing windows.
- Dark trees or bats.
- A deep-purple or midnight-blue background.
To keep the manicure cohesive, repeat the same dark base color on the other nails and reserve the detailed landscape for one or two accent nails.
Best for: Creative Halloween manicures, detailed nail art, and people who enjoy miniature illustrations.
12. Black and Orange Halloween Nails
Black and orange are the traditional colors of Halloween, making them an easy choice for a festive manicure.
You can alternate black and orange polish, create orange French tips over black nails, or combine the colors with tiny bats, pumpkins, and stars.
For a more sophisticated finish, use burnt orange instead of neon orange. It pairs beautifully with chocolate brown, cream, and deep burgundy during autumn.
Ideas to try:
- Glossy black nails with orange accent nails.
- Orange French tips on a nude base.
- Black-and-orange checkerboard patterns.
- Tiny pumpkins on a dark background.
- Orange ombré with black tips.
If you prefer a subtle design, use orange only on one or two nails.
Best for: Traditional Halloween styling, casual autumn outfits, and playful nail art.
13. Minimalist Bat Nails
Tiny bats are an excellent choice for people who love Halloween but prefer understated designs.
A simple black bat silhouette on a nude or pale pink base can look elegant, particularly when the rest of the manicure remains neutral.
How to create minimalist bat nails:
- Apply a nude, beige, or pale pink base.
- Allow the polish to dry.
- Use a fine brush to create a small central body.
- Draw two angular wings extending outward.
- Add tiny pointed ears if the design has enough space.
- Finish with a top coat.
You can place one bat on each accent nail or create a few tiny silhouettes across the set for a flying-bat effect.
Best for: Short nails, understated Halloween designs, and minimalist aesthetics.
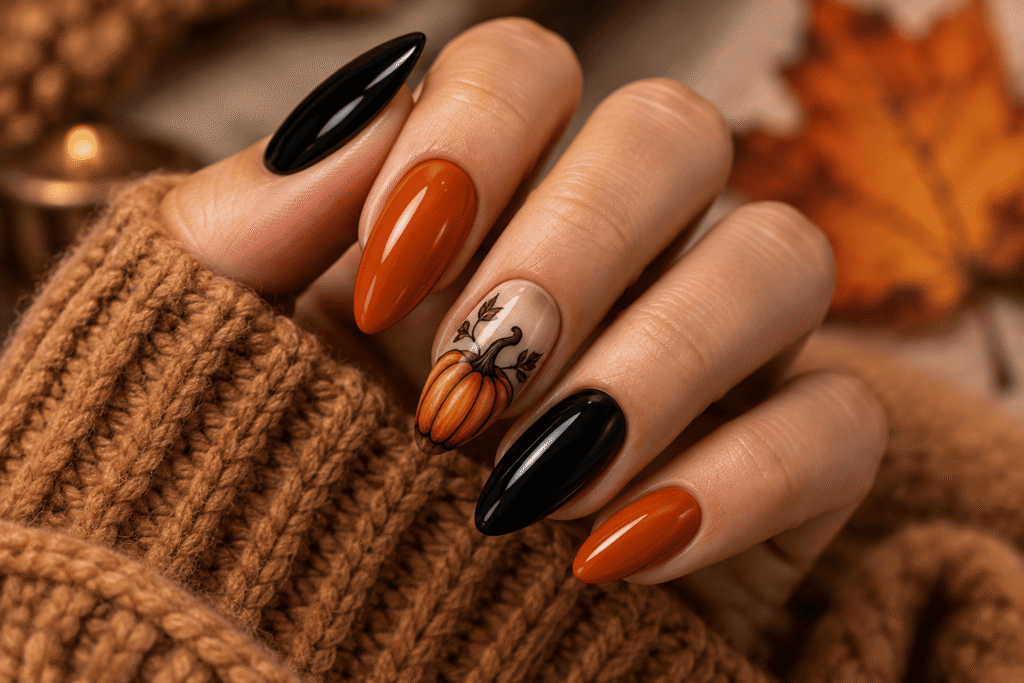
14. Pumpkin Halloween Nails
Pumpkin nails are a cheerful alternative to darker Halloween designs. They work especially well with burnt orange, chocolate brown, cream, and muted green.
A simple orange pumpkin with a tiny green stem is recognizable even when painted on a short nail. For a more detailed manicure, add a smiling jack-o’-lantern face or combine pumpkins with leaves and stars.
How to paint a simple pumpkin:
- Apply a nude, cream, or dark base.
- Use orange polish to create a small rounded oval.
- Add two or three curved vertical lines to suggest the pumpkin’s segments.
- Paint a short green or brown stem.
- Add a face if you want a jack-o’-lantern design.
- Allow the illustration to dry before sealing it.
For a coordinated look, use solid burnt-orange polish on some nails and pumpkin art on just one or two.
Best for: Cute Halloween manicures, autumn nail art, and festive everyday styles.
15. Skeleton Hand Nails
Skeleton hand nails feature delicate white bone-like lines painted over a black or dark background. They can look dramatic, especially on long nails where there is enough room for the details.
A full skeleton-hand illustration can be challenging to paint freehand. Beginners can create a simpler version using a few fine white lines that suggest bones or choose nail decals.
How to approach the design:
- Paint the nail black and allow it to dry.
- Use a thin white liner brush.
- Draw a narrow central line or simplified palm shape.
- Add several short lines branching outward to suggest finger bones.
- Keep the lines thin and evenly spaced.
- Apply a compatible top coat when the design is dry.
For a more wearable look, reserve the skeleton hand for one accent nail and keep the remaining nails solid black.
Best for: Gothic nail art, horror-inspired outfits, and long nail shapes.
16. Witchy Green Halloween Nails
Deep green nails offer a fresh alternative to the usual black-and-red palette. Emerald, forest green, and dark olive shades can create a witchy aesthetic without looking overly costume-like.
Pair green polish with black, gold, or deep purple. You can also add moons, stars, tiny potion bottles, or delicate metallic lines.
Color combinations to try:
- Forest green and matte black.
- Emerald and antique gold.
- Dark olive and chocolate brown.
- Green chrome with black accents.
- Deep green and muted purple.
For a luxurious finish, choose a dark emerald polish with a high-shine top coat. A single gold star or crescent moon can add just enough Halloween character.
Best for: Witch-inspired outfits, gothic beauty styles, and people who want something different from traditional Halloween colors.
17. Black Chrome Halloween Nails
Black chrome nails create a reflective, almost metallic appearance that looks dramatic under evening lighting.
The effect can be achieved with a suitable chrome nail system or by using a metallic black polish. The exact application depends on the product, so always follow the manufacturer’s instructions.
For Halloween, black chrome looks especially striking with spiderwebs, tiny stars, red accents, or a single glossy black nail.
Ways to wear the look:
- Full black chrome on every nail.
- Black chrome with matte black accents.
- Chrome nails with a burgundy accent.
- Metallic black French tips.
- Black chrome with tiny silver stars.
Keep the decorative details restrained if you want the reflective finish to remain the main attraction.
Best for: Glamorous Halloween parties, futuristic gothic looks, and dramatic evening manicures.
18. Gothic Lace Nails
Gothic lace nails combine delicate patterns with a dark, romantic color palette. Fine black lines over a nude, blush, or translucent base can resemble lace, while black-on-black designs create a subtler textured effect.
This manicure is particularly attractive when paired with almond-shaped nails and a glossy finish.
How to style gothic lace nails:
- Choose a sheer nude or dark base.
- Use a fine liner brush or nail stamping plate.
- Create delicate loops, small arches, and curved lines.
- Add tiny dots to fill selected spaces.
- Keep the pattern concentrated on one or two accent nails.
- Finish with a compatible top coat.
The key is keeping the lines delicate. Thick, crowded patterns can obscure the lace effect, especially on shorter nails.
Best for: Romantic gothic aesthetics, elegant Halloween outfits, and detailed manicures.
19. Creepy Eyeball Nails
Eyeball nails are a fun option for anyone who enjoys slightly unsettling Halloween art.
A simple version features a white circle, a colored iris, and a black pupil on a dark background. You can create one eye per accent nail or use smaller eyes across the manicure.
Step-by-step design:
- Apply a dark base and let it dry.
- Paint a small white oval or circle.
- Add a smaller colored circle in blue, green, red, or gray.
- Place a black dot in the center.
- Add a tiny white highlight if desired.
- Seal the illustration once the layers have dried.
Keep the circles small and clean for the best result. A dotting tool can make the process easier than a standard brush.
Best for: Playful horror manicures, Halloween parties, and bold nail art.
20. Haunted Graveyard Nails
Graveyard nails feature silhouettes of tombstones, dark trees, moons, and sometimes tiny bats against a night-sky background.
A deep-purple, midnight-blue, or black base creates the atmosphere. Gray, white, or muted yellow details can represent moonlight and distant windows.
For a cohesive set, use one or two nails for detailed graveyard scenes and keep the rest in solid dark colors.
Elements to include:
- Small tombstone silhouettes.
- Bare black trees.
- A pale crescent moon.
- Tiny flying bats.
- A misty gray or purple background.
This design requires patience because the illustrations are small. Use a fine liner brush and allow each layer to dry before adding the next.
Best for: Detailed Halloween nail art, long nails, and people who enjoy miniature landscapes.
21. Cute Ghost French Tips
Ghost French tips combine a traditional manicure shape with a playful Halloween detail. The result is festive without being too dark or dramatic.
Instead of painting a standard white tip, shape the white polish into tiny ghost silhouettes along the nail edge. Add small black eyes and a smile to complete the look.
How to create ghost French tips:
- Apply a sheer pink or nude base.
- Use white polish to create rounded ghost shapes along the free edge.
- Extend the lower part of each shape slightly to suggest a flowing ghost.
- Add two tiny black eyes.
- Keep the design simple and consistent across the nails.
- Finish with a glossy top coat.
For a more subtle version, create ghost French tips on two accent nails and use a classic nude manicure on the others.
Best for: Cute Halloween nails, short-to-medium lengths, and people who prefer playful designs.
22. Purple and Black Halloween Nails
Purple and black make a rich, mysterious combination that works particularly well for witchy and gothic nail art.
Deep plum, aubergine, and midnight purple create a more sophisticated appearance than bright violet, although a vivid purple accent can make the manicure feel more playful.
Design ideas:
- Black nails with purple French tips.
- Purple chrome with black accents.
- Purple ombré fading into black.
- Tiny silver stars over dark purple.
- Black spiderwebs over a purple base.
A glossy finish creates depth, while a matte top coat gives the colors a more dramatic, velvety appearance.
Best for: Witchy Halloween looks, gothic styles, and people who enjoy jewel-toned manicures.
23. Halloween Flame Nails
Flame nails add movement and drama to a Halloween manicure. Traditional versions use orange and red flames over black, but you can also use burgundy flames over nude polish or black flames over a pale base.
The shape of the flames is important. Long, tapered curves help the design look intentional rather than like random streaks of color.
How to create flame nails:
- Apply a solid base color.
- Use a fine liner brush to outline the flame shapes.
- Draw curved points that extend upward from the nail tip or side.
- Fill the shapes with your chosen color.
- Add a second shade inside the flames if desired.
- Allow the artwork to dry before applying top coat.
For a more sophisticated manicure, use deep red and burgundy rather than bright orange and yellow.
Best for: Long nails, bold Halloween outfits, and dramatic nail art.
24. Elegant Burgundy Halloween Nails
Not every Halloween manicure needs ghosts, skulls, or dripping blood. Deep burgundy nails are a beautiful choice if you prefer a more elegant interpretation of the season.
Burgundy sits between red and purple, making it rich enough for Halloween while remaining wearable throughout autumn.
You can wear it as a solid glossy manicure or pair it with subtle black details, delicate gold accents, or a single spiderweb.
Ways to style burgundy nails:
- Glossy burgundy almond nails.
- Burgundy French tips over nude polish.
- Burgundy and black alternating nails.
- Deep wine nails with gold accents.
- Burgundy chrome with a glossy finish.
For a polished result, apply thin, even coats and clean the edges carefully. Dark colors make uneven application more noticeable, so precision matters.
Best for: Elegant Halloween parties, everyday autumn manicures, and understated gothic styles.
25. Mix-and-Match Halloween Nails
A mix-and-match manicure lets you combine several Halloween motifs without committing to one design.
For example, one nail can feature a skull, another a blood-drip pattern, and another a matte black finish. The remaining nails can incorporate a spiderweb or a tiny ghost.
The trick is choosing a consistent color palette. Too many unrelated colors and illustrations can make the manicure look busy.
How to create a coordinated set:
- Choose two or three main colors, such as black, burgundy, and ivory.
- Select one main motif, such as skulls or spiderwebs.
- Choose two supporting designs that complement the main motif.
- Use solid-color nails to create visual breathing room.
- Repeat at least one color across the entire set.
- Finish all nails with the appropriate top coat for a consistent appearance.
A useful combination is matte black, glossy blood-red accents, and one ivory skull nail. The contrast between the finishes and colors makes the set interesting without overcrowding it.
Best for: Creative personalities, Halloween parties, and anyone who cannot decide on just one design.
How to Choose the Best Halloween Nail Design
With so many styles available, it helps to narrow your choices by considering your nail length, preferred aesthetic, available time, and the occasion.
Choose a design based on your style
| Your preferred style | Halloween nail ideas to consider |
|---|---|
| Minimalist | Matte black, tiny bats, subtle spiderwebs |
| Cute and playful | Ghosts, pumpkins, black cats |
| Gothic | Skull accents, black and red nails, gothic lace |
| Glamorous | Black chrome, burgundy, metallic accents |
| Scary and dramatic | Blood drips, eyeballs, skeleton hands |
| Elegant and understated | Burgundy, dark green, black French tips |
| Creative and artistic | Haunted houses, graveyards, mix-and-match designs |
You do not have to choose a design simply because it is traditionally associated with Halloween. A deep burgundy manicure or a glossy black French tip can feel just as seasonal as a full set of ghosts and pumpkins.
Choose the right design for your nail length
Short nails are excellent for simple designs that remain visible without requiring a large painting surface. Tiny bats, miniature ghosts, solid black polish, and delicate French tips are particularly suitable.
Medium-length nails provide more room for accents and small illustrations. You can experiment with spiderwebs, blood-drip details, and small skulls.
Long nails allow more elaborate artwork, including haunted houses, skeleton hands, graveyard scenes, and multi-color flames.
Remember that nail art does not have to cover every nail. A single detailed accent can be more effective than several crowded illustrations.
Choose the right nail shape
| Nail shape | Designs that work particularly well |
|---|---|
| Round | Ghosts, pumpkins, simple black polish |
| Square | Black French tips, geometric designs, blood drips |
| Squoval | Minimalist bats, tiny spiders, solid burgundy |
| Almond | Vampire nails, chrome finishes, elegant spiderwebs |
| Coffin | Skeleton hands, flames, detailed gothic art |
| Stiletto | Dramatic blood drips, black-and-red designs, sharp French tips |
These are styling suggestions rather than strict rules. Almost any design can be adapted to a different nail shape with a few adjustments to scale and placement.
The Best Halloween Nail Colors
Color is one of the easiest ways to give a manicure a Halloween aesthetic. You can use traditional seasonal shades or choose a more muted palette for a sophisticated look.
| Color | Effect | Colors to pair it with |
|---|---|---|
| Matte black | Mysterious and modern | Burgundy, silver, nude |
| Blood red | Dramatic and gothic | Black, ivory, deep purple |
| Burgundy | Elegant and rich | Black, gold, blush pink |
| Burnt orange | Warm and festive | Black, cream, chocolate brown |
| Deep purple | Witchy and mysterious | Black, silver, emerald |
| Forest green | Dark and unusual | Gold, black, plum |
| Ivory white | Clean and high contrast | Black, red, purple |
| Metallic silver | Glamorous and reflective | Black, charcoal, burgundy |
If you want a manicure that remains wearable after October, consider burgundy, chocolate brown, forest green, or glossy black. These shades complement autumn clothing and do not rely on overtly spooky illustrations.
How to Prepare Your Nails Before Halloween Nail Art
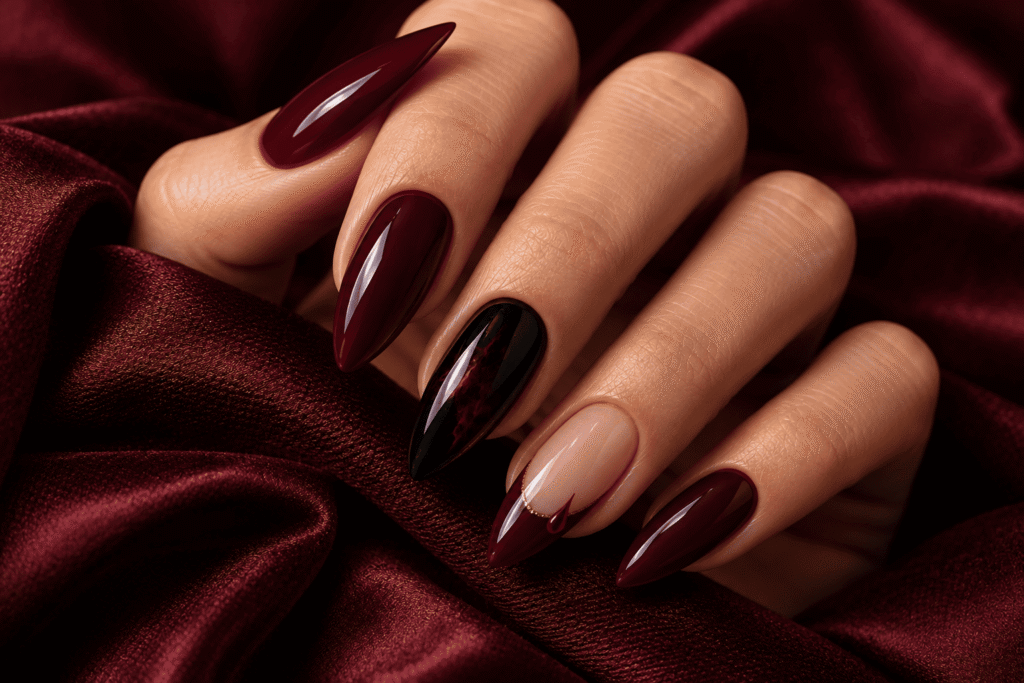
Good preparation helps nail polish apply more evenly and improves the finished appearance of your manicure.
Step 1: Remove old polish
Use a nail-polish remover suitable for your current manicure. Avoid aggressively scraping or peeling off gel polish because this can damage the natural nail plate.
If you have an existing gel or acrylic set, follow the appropriate removal procedure or consult a qualified nail technician.
Step 2: Shape your nails
Use a clean nail file to shape the free edges. File gently in a consistent direction where practical, and avoid excessive filing of the natural nail surface.
Choose a shape that feels comfortable for your daily activities. A dramatic design is not worth sacrificing comfort or nail health.
Step 3: Care for your cuticles
Gently push back cuticles only if you are comfortable doing so. Avoid cutting living cuticle tissue or using sharp tools aggressively.
Apply cuticle oil after your manicure to help keep the surrounding skin moisturized.
Step 4: Clean the nail surface
Remove dust and residue before applying polish. Follow the preparation instructions for your chosen product, particularly if you are using gel polish.
Avoid applying nail products to irritated or damaged skin.
Step 5: Apply a base coat
A suitable base coat helps create a smoother surface and may reduce staining from strongly pigmented colors such as black, burgundy, and red.
Allow the base coat to dry or cure according to the manufacturer’s instructions before proceeding.
Step-by-Step Tutorial: Black and Red Halloween Nails
If you want to recreate the dramatic look shown in the inspiration image, a black-and-red manicure with blood-drip accents is an excellent starting point.
You can create the effect at home using ordinary nail polish, a fine liner brush, and a little patience.
What you will need
- Base coat.
- Black nail polish.
- Deep red or burgundy nail polish.
- Fine nail-art liner brush.
- Matte top coat, if desired.
- Glossy top coat.
- Nail-polish remover and a small cleanup brush.
- Cuticle oil.
Choose a deep, opaque red if you want the drips to contrast strongly with the black base.
Step 1: Prepare the nails
Remove old polish, shape the nails, and gently clean the nail surface. Make sure the nails are dry before applying your base coat.
Step 2: Apply the base coat
Apply a thin layer of base coat and let it dry completely. Avoid allowing polish to flood the cuticle area or touch the surrounding skin.
Step 3: Paint the black nails
Apply one thin layer of black polish. Allow it to dry, then add a second thin coat if necessary.
For the closest version of the inspiration look, keep most nails black and choose one or two nails for red accents.
Step 4: Create the blood-drip effect
Place a small amount of red polish on a palette or another clean surface.
Use your liner brush to create a curved red line near the top or side of the accent nail. Pull a few narrow lines downward, varying their length. Round the ends to create the appearance of dripping liquid.
Work slowly and use a small amount of polish at a time. Thick blobs are harder to control and can take longer to dry.
Step 5: Add contrast
For a dramatic look, keep the red accents glossy. If you want a more complex finish, use matte black on the other nails and reserve the shine for the red details.
Always check that the matte and glossy products are compatible with the polish system you are using.
Step 6: Allow the design to dry
Do not apply top coat while the artwork is still wet. Wait until the layers have dried sufficiently, following the product instructions.
Step 7: Seal the manicure
Apply a suitable top coat to protect the design and enhance the finish. Avoid flooding the cuticle area.
Finish by moisturizing the surrounding skin with cuticle oil.
Result: A bold black-and-red Halloween manicure inspired by vampire aesthetics and classic horror nail art.
Step-by-Step Tutorial: Skull Accent Nails
Skull nails are a great choice if you want to recreate the white skull detail in the inspiration image.
What you will need
- Black nail polish.
- White or ivory nail polish.
- Base coat and top coat.
- Fine nail-art brush.
- Dotting tool or the tip of a suitable nail-art tool.
Step 1: Create the background
Apply a base coat, then paint the nail black. Allow it to dry thoroughly.
Step 2: Draw the skull shape
Use ivory polish to create a rounded oval near the center of the nail. Extend the lower part slightly to suggest the jaw.
Do not worry about making the skull perfectly symmetrical. Small variations can make the design look more handmade and characterful.
Step 3: Add the eye sockets
Use black polish and a fine brush or dotting tool to create two dark eye sockets.
Step 4: Add the nose and mouth
Create a small dark nose shape. Then add a few short lines or dots to suggest teeth.
Step 5: Refine the details
Use the fine brush to clean up the outline and improve the contrast. Keep the design simple enough to remain recognizable at the size of your nail.
Step 6: Apply top coat
Once the illustration is completely dry, seal it with a compatible top coat.
Beginner tip: If freehand painting feels difficult, use a skull decal or nail sticker over a black background. The finished manicure can still look professional.
Step-by-Step Tutorial: Matte Black Halloween Nails
Matte black nails are among the easiest Halloween manicures to recreate because they require almost no detailed artwork.
Step 1: Prepare the nail plate
Remove old polish, shape the nails, and apply a suitable base coat.
Step 2: Apply black polish
Paint one thin layer of black polish and allow it to dry. Add a second coat if needed for full coverage.
Step 3: Apply a matte top coat
Use a matte top coat designed for your polish system. Follow the product’s drying or curing instructions.
Step 4: Add an optional accent
For a subtle variation, leave one nail glossy black or add a small silver spiderweb.
If you use a glossy accent, apply the appropriate glossy top coat only to that nail.
Step 5: Finish the manicure
Clean up any excess polish and moisturize the surrounding skin once the manicure is finished.
Styling tip: Matte black nails look particularly striking with silver jewelry, dark knitwear, leather accessories, and burgundy clothing.
How to Make Your Halloween Manicure Last Longer
A Halloween manicure can lose its appeal if the tips chip or the detailed artwork begins to peel. A few practical habits can help maintain its appearance.
Use thin layers. Thick polish layers may remain soft underneath even when the surface appears dry. Thin coats are easier to control and generally dry more evenly.
Seal the free edge. When appropriate for your polish system, lightly cap the free edge with top coat to help reduce tip wear.
Allow enough drying time. Avoid immediately washing dishes, taking a hot shower, or performing tasks that may mark fresh polish.
Wear gloves for cleaning. Household cleaning products and prolonged exposure to water can affect your manicure. Protective gloves can help reduce contact.
Moisturize your hands. Apply hand cream regularly and use cuticle oil to keep the surrounding skin comfortable.
Avoid using your nails as tools. Opening cans, scraping labels, and prying objects can cause chips or breakage.
Touch up small chips carefully. If a small section chips, smooth the edge and repair it with the appropriate polish rather than repeatedly picking at the damaged area.
If you use gel polish, follow the manufacturer’s curing instructions and never peel off the product. Avoid applying gel products to the skin, and use the appropriate lamp and safety procedures for the system.
Common Halloween Nail-Art Mistakes to Avoid
Even a beautiful design can look messy if the preparation and application are rushed.
Applying too much polish
Large amounts of polish can pool around the cuticles and make fine details difficult to control. Use a small amount on your brush and build coverage gradually.
Choosing too many competing designs
A manicure with ghosts, skulls, pumpkins, spiders, flames, and several unrelated colors can become visually crowded.
Choose one main motif and two complementary details. Repeat your main colors throughout the set to create cohesion.
Painting before the base is dry
If the base coat is still wet, the fine details may smear or drag through the polish. Give each layer enough time to dry according to the product instructions.
Using the wrong brush
Large brushes are not suitable for tiny skull teeth, spider legs, or narrow blood drips. A fine liner brush or dotting tool makes these details easier to control.
Applying top coat too early
A top coat can drag or smear artwork that has not dried sufficiently. Wait until the decorative layers are ready for sealing.
Ignoring nail health
Do not continue with nail art if your nails or surrounding skin are irritated, painful, or damaged. Avoid peeling off gel polish and seek professional advice when you are unsure how to remove a product safely.
Halloween Nail Designs for Different Occasions
Your manicure can be adapted to the event you are attending.
| Occasion | Recommended designs |
|---|---|
| Everyday October wear | Matte black, burgundy, minimalist bats |
| Halloween party | Blood drips, skulls, vampire nails |
| Costume event | Skeleton hands, haunted houses, graveyard scenes |
| Work or university | Burgundy, black French tips, tiny spiderwebs |
| Casual weekend | Cute ghosts, pumpkins, black cats |
| Glamorous evening | Black chrome, burgundy, metallic accents |
| At-home manicure | Matte black, simple ghosts, basic spiderwebs |
If your outfit already includes dramatic accessories or elaborate makeup, a simpler manicure may create a more balanced overall appearance. If your outfit is understated, a detailed Halloween manicure can become the main statement.
Frequently Asked Questions
What are the most popular Halloween nail designs?
Classic black nails, blood-drip designs, skull accents, ghosts, spiderwebs, pumpkins, vampire-inspired manicures, and black-and-red combinations are all recognizable Halloween choices. The best design depends on whether you prefer cute, gothic, glamorous, or frightening nail art.
What are the easiest Halloween nails to do at home?
Matte black nails, alternating black and burgundy polish, tiny ghost accents, simple pumpkins, and minimalist bats are good starting points. These designs require fewer details than full haunted-house scenes or skeleton hands.
Can you create Halloween nail art on short nails?
Yes. Short nails work beautifully with solid black polish, tiny ghosts, small bats, delicate spiderwebs, and simple French tips. Keep illustrations small and avoid overcrowding the nail surface.
Which colors are best for Halloween nails?
Black, deep red, burgundy, purple, burnt orange, forest green, ivory, and metallic silver are excellent choices. You can use traditional combinations for a recognizable Halloween look or choose burgundy, chocolate brown, and forest green for a more understated autumn manicure.
How can I make Halloween nails look more elegant?
Use a restrained palette, choose a glossy or matte finish deliberately, and limit intricate art to one or two accent nails. Deep burgundy, black French tips, delicate spiderwebs, and subtle metallic details can feel sophisticated without losing their seasonal character.
How long do Halloween nail designs last?
The lifespan depends on the product, application, nail condition, and daily activities. Regular nail polish may last several days before noticeable wear, while a properly applied gel manicure can last longer. Extensions and press-on nails have different maintenance requirements. Follow the instructions for your chosen system and avoid picking or peeling the product.
Can I combine matte and glossy finishes?
Yes. Matte black nails with glossy blood-red accents create a particularly striking contrast. You can also combine matte burgundy with glossy black or use a glossy accent nail in an otherwise matte manicure. Make sure the finishing products are compatible with the polish system.
Are Halloween nail stickers worth using?
Nail stickers can be useful if you want detailed skulls, bats, spiders, or other small illustrations without painting them freehand. Apply them according to the manufacturer’s instructions and seal them with a compatible top coat when appropriate.
What is the best Halloween nail design for beginners?
A solid matte black manicure with one red accent nail is an excellent option. It is easy to recreate, looks dramatic, and does not require advanced drawing skills. Once you feel comfortable, you can add a tiny spiderweb or a simple ghost.
Final Thoughts
Halloween-themed nail designs are a creative way to celebrate the season while expressing your personal style. Whether you choose matte black nails, creepy skull accents, glossy blood drips, delicate spiderwebs, or elegant burgundy polish, the right manicure can make your October look feel complete.
If you are new to nail art, start with a simple base color and add one recognizable Halloween detail. If you enjoy experimenting, combine different textures, illustrations, and colors while keeping the overall palette consistent.
The most successful Halloween manicures are not necessarily the most complicated ones. A clean black manicure with a single skull accent can be just as striking as a full set of elaborate illustrations.
Choose a design that makes you feel confident, take your time with the details, and enjoy creating a manicure that is perfectly suited to your version of Halloween.






