
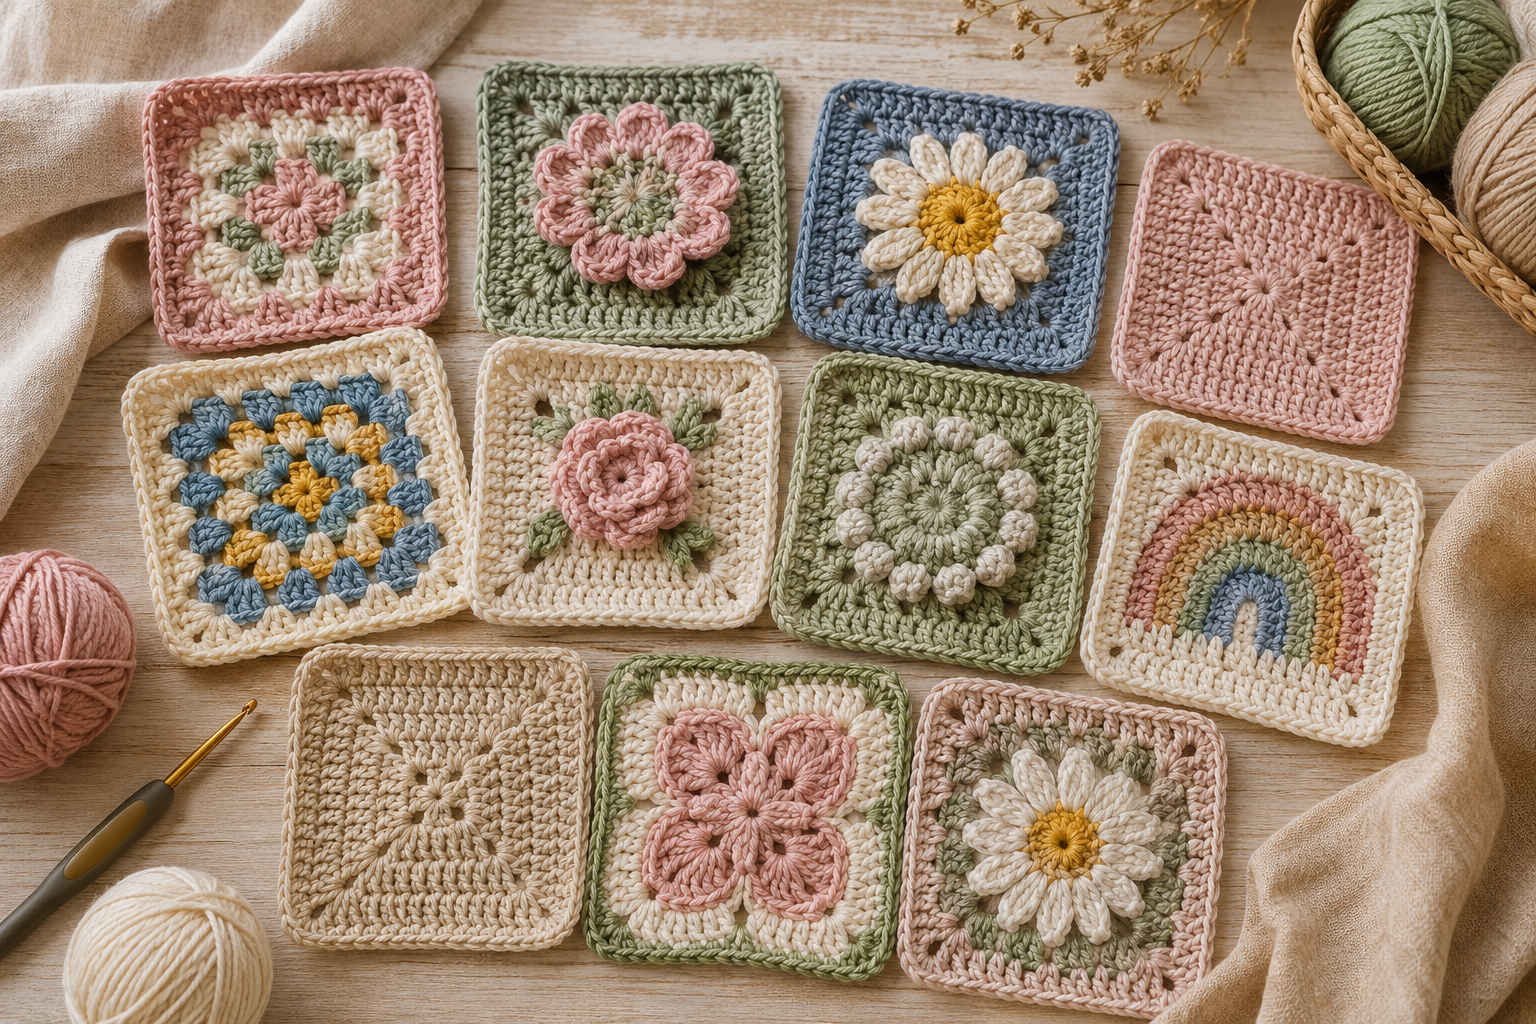
Granny squares are one of those crochet projects that never really go out of style. They are small enough to make anywhere, easy to customize with different yarn colors, and versatile enough to become blankets, bags, cardigans, cushions, coasters and countless other handmade projects.
If you’re looking for free granny square crochet patterns, this collection gives you 10 different designs to try, from a classic traditional square to floral, pastel, textured and modern variations.
The patterns below use US crochet terms and are written with beginners in mind. Each design includes the materials, stitch information, color suggestions and step-by-step instructions so you can choose a square that matches your skill level and project.
Important: These are original pattern variations written for this tutorial. The inspiration image shows the general granny-square aesthetic, but the written patterns below are not a transcription of the source image.
Table of Contents
- What Is a Granny Square?
- Why Granny Squares Are Great for Beginners
- Materials You’ll Need
- Crochet Abbreviations
- Basic Granny Square Construction
- 10 Free Granny Square Crochet Patterns
- 1. Classic Four-Corner Granny Square
- 2. Pastel Flower Granny Square
- 3. Daisy Center Granny Square
- 4. Solid Center Granny Square
- 5. Two-Color Granny Square
- 6. Vintage Rose Granny Square
- 7. Puff-Stitch Granny Square
- 8. Rainbow Granny Square
- 9. Minimal Neutral Granny Square
- 10. Flower-Petal Granny Square
- Granny Square Size Guide
- Color Combination Ideas
- How Many Granny Squares Do You Need?
- How to Keep Your Squares the Same Size
- How to Block Granny Squares
- How to Join Granny Squares
- Project Ideas
- Troubleshooting
- Frequently Asked Questions
- Related Crochet Posts
- Final Thoughts
What Is a Granny Square?
A granny square is a small crocheted motif that is traditionally worked from the center outward in rounds.
The classic design is made primarily from groups of three double crochets separated by chain spaces. As additional rounds are added, the square becomes larger.
The beauty of granny squares is that you can stop whenever you’ve reached the size you need.
You can also change colors between rounds to create completely different looks.
A simple square can become:
- A blanket
- Pillow cover
- Tote bag
- Cardigan
- Scarf
- Baby blanket
- Table runner
- Coasters
- Placemat
- Pouch
- Market bag
- Clothing accessories
Why Granny Squares Are Great for Beginners
Granny squares are particularly useful when you’re learning crochet because the individual motifs are small and manageable.
Instead of working on a large blanket from beginning to end, you can practice one small square at a time.
Beginner advantages
| Benefit | Why It Helps |
|---|---|
| Small project | Easy to finish |
| Repeating stitches | Builds muscle memory |
| Simple shaping | No complicated garment construction |
| Color changes | Helps practice joining yarn |
| Portable | Easy to crochet anywhere |
| Customizable | Experiment with colors |
| Modular | Make as many as needed |
| Versatile | Many possible finished projects |
Once you understand the basic granny-square construction, many more complicated patterns become easier to understand.
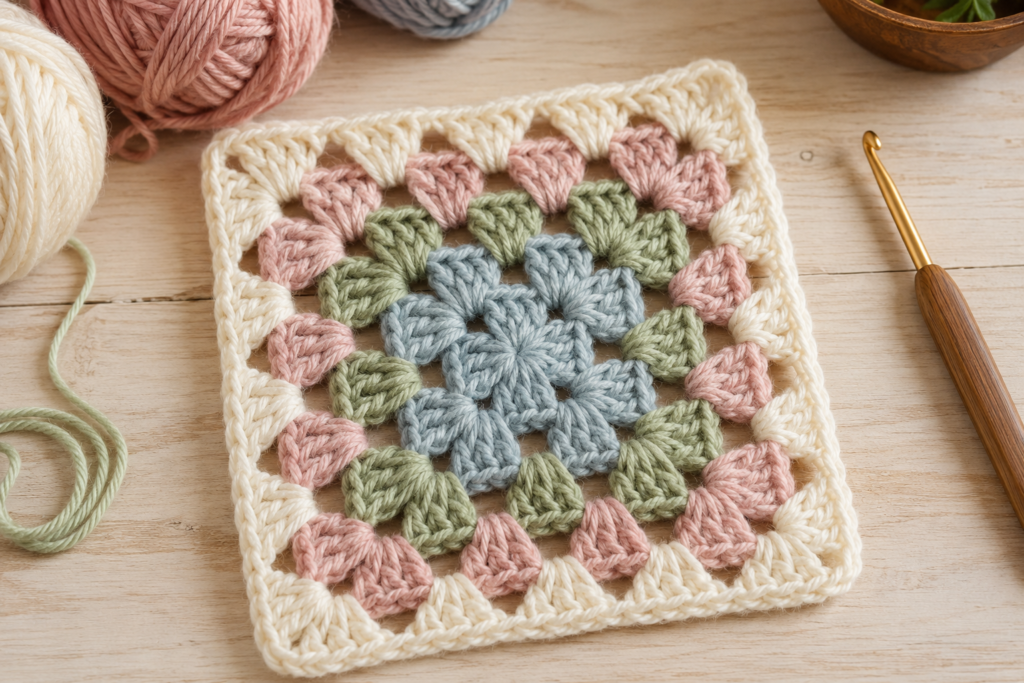
Materials You’ll Need
For most of these patterns, you can use the same basic supplies.
Yarn
Worsted-weight yarn is a convenient choice for beginners.
You can also use:
- DK yarn
- Cotton yarn
- Acrylic yarn
- Cotton-acrylic blends
- Leftover yarn scraps
For a traditional granny square, cotton is particularly useful when making home accessories because it has good stitch definition.
Crochet Hook
For worsted-weight yarn, try a:
5 mm crochet hook
However, always check the yarn label and adjust according to your tension.
Other Supplies
- Yarn needle
- Scissors
- Stitch marker
- Measuring tape
- Blocking mats or pins for finishing
Crochet Abbreviations
The patterns below use US crochet terminology.
| Abbreviation | Meaning |
|---|---|
| ch | Chain |
| sl st | Slip stitch |
| sc | Single crochet |
| hdc | Half double crochet |
| dc | Double crochet |
| st | Stitch |
| sp | Space |
| sk | Skip |
| rep | Repeat |
| rnd | Round |
| cluster | Group of stitches worked together |
| ch-sp | Chain space |
Important
In these patterns:
ch 2 or ch 3 at the beginning of a round does not always count as a stitch.
The instructions will specify when it does.
Basic Granny Square Construction
Before trying the variations, it’s useful to understand the basic structure.
A traditional granny square has:
Center → four corners → four sides → additional rounds
The corners are created by working:
3 dc, ch 2, 3 dc
into the same corner space.
The side sections are usually made from:
3 dc
worked into the chain space.
As you add rounds, the number of side clusters increases.
10 Free Granny Square Crochet Patterns
1. Classic Four-Corner Granny Square
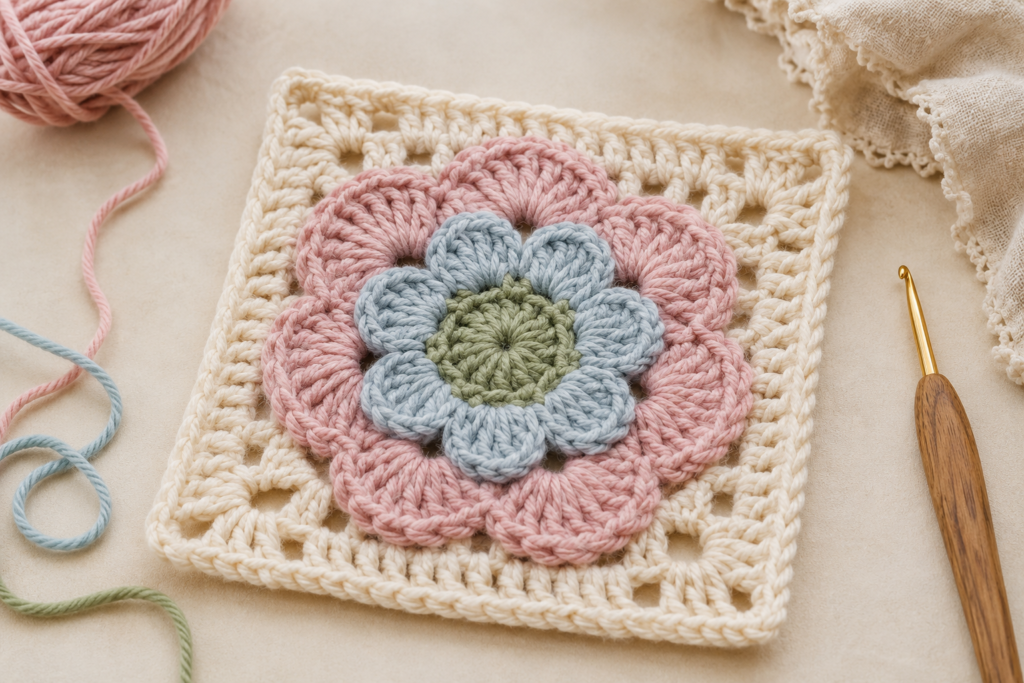
This is the perfect starting point if you’re completely new to granny squares.
Skill Level
Beginner
Suggested Colors
- Cream
- Sage
- Dusty pink
- Soft blue
Pattern
Start: Make a magic ring.
Alternatively, chain 4 and join with a slip stitch to form a ring.
Round 1
Ch 3.
Work 2 dc into the ring.
Ch 2.
Repeat:
3 dc, ch 2
three more times.
Join with a sl st to the top of the beginning chain.
You should have four corner spaces.
Round 2
Sl st into the next corner space.
Ch 3.
Work:
2 dc, ch 2, 3 dc
into the same corner.
Ch 1.
In the next corner:
3 dc, ch 2, 3 dc
Ch 1.
Repeat around.
Join with a sl st.
Round 3
Move to a corner space.
Work:
3 dc, ch 2, 3 dc
in the corner.
Ch 1.
Work 3 dc into the next side space.
Ch 1.
Continue around.
Round 4
Repeat the same structure.
Each corner receives:
3 dc, ch 2, 3 dc
Each side space receives:
3 dc
Separate clusters with ch 1.
Continue until your square reaches the desired size.
2. Pastel Flower Granny Square
This design gives you the soft floral appearance seen in many modern granny-square projects.
Skill Level
Easy
Suggested Colors
| Round | Color |
|---|---|
| Center | Sage green |
| Petals | Pale blue |
| Border | Dusty pink |
| Final round | Cream |
Pattern
Round 1 — Center
Make a magic ring.
Ch 2.
Work 12 hdc into the ring.
Join with a sl st.
Round 2 — Petals
Join the new color.
For each petal:
3 dc in the same stitch, ch 1
Repeat around.
Join with a slip stitch.
You should have a circular flower center with raised-looking petal groups.
Round 3 — Begin the Square
Join the border color.
Work sc around the flower while strategically placing increases at four evenly spaced points.
At each corner area, work:
sc, ch 2, sc
This begins transforming the circular flower into a square.
Round 4
Work sc across each side.
At every corner:
sc, ch 2, sc
Continue around and join.
Finishing
Fasten off and weave in the ends.
3. Daisy Center Granny Square
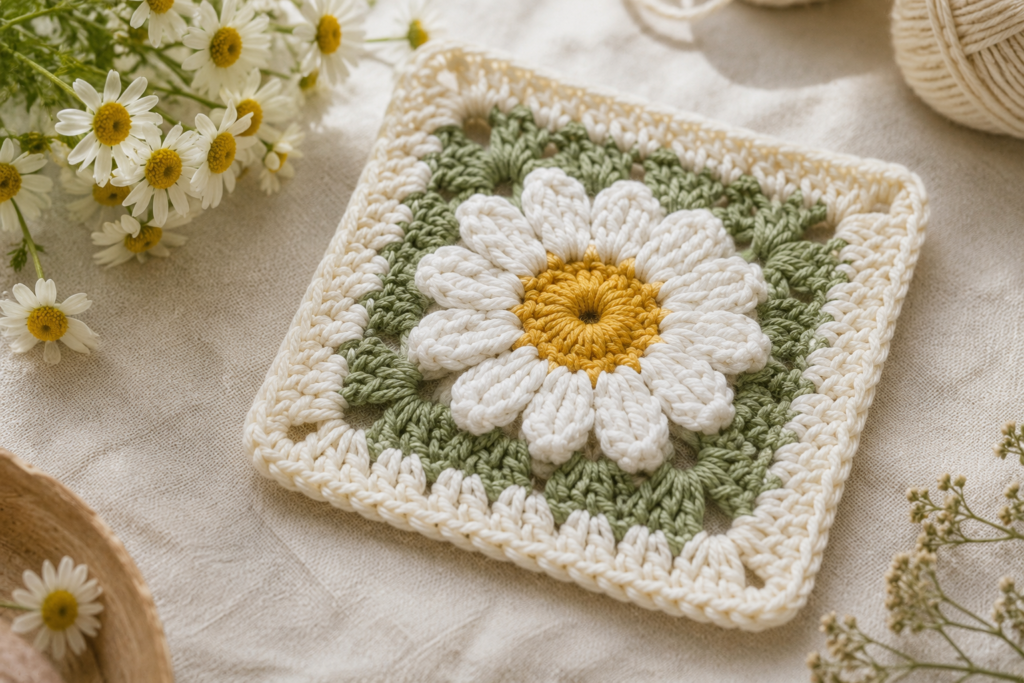
This version is ideal if you want a recognizable flower in the center.
Skill Level
Easy
Color Plan
- Yellow center
- White petals
- Sage green round
- Cream border
Round 1
With yellow yarn:
Make a magic ring.
Ch 2.
Work 12 dc into the ring.
Join.
Round 2
Join white yarn.
Create six larger petals by working approximately:
3 dc in one stitch, 3 dc in the next stitch
with a slip stitch between petal sections.
Adjust slightly according to your yarn and tension so the petals lie flat.
Round 3
Join green yarn.
Work around the flower using sc.
At four evenly spaced points, create corners with:
sc, ch 2, sc
Round 4
Work sc around.
At each corner:
sc, ch 2, sc
Round 5
Add a cream border using sc.
Keep your tension relaxed enough that the square stays flat.
4. Solid Center Granny Square
If you prefer a cleaner and more modern look, try this version.
Skill Level
Beginner
Best Colors
This looks particularly good in:
- Cream + beige
- Sage + cream
- Dusty pink + white
- Terracotta + oatmeal
Pattern
Round 1
Make a magic ring.
Ch 3.
Work 2 dc into the ring.
Ch 2.
Repeat the corner sequence four times:
3 dc, ch 2
Join.
Round 2
Work 3 dc in each corner space.
At each corner:
3 dc, ch 2, 3 dc
Connect the sides with ch 1.
Round 3
Work 3 dc into every side space.
At corners:
3 dc, ch 2, 3 dc
Round 4+
Continue the same structure.
The result is a traditional granny square with a clean, solid appearance.
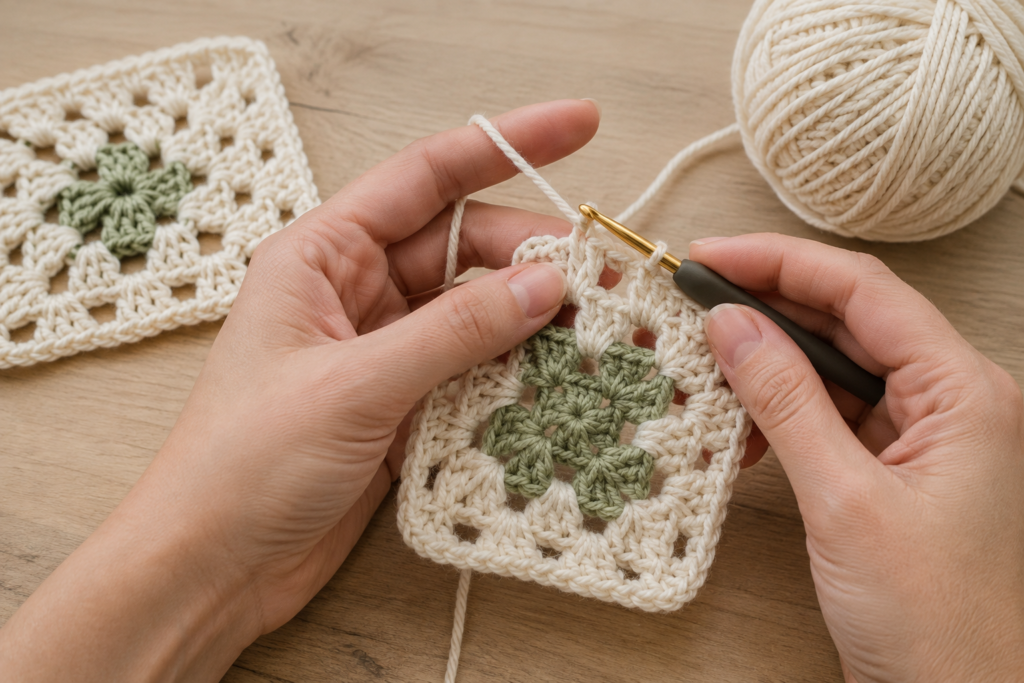
5. Two-Color Granny Square
This is one of the easiest ways to make a simple square look much more interesting.
Skill Level
Beginner
Choose:
Color A: Cream
Color B: Dusty pink
Pattern
Work Rounds 1 and 2 with Color A.
Fasten off.
Join Color B in any corner.
Work the next round.
Continue alternating colors.
Color Arrangement
Try:
A → B → A → B
or:
A → A → B → B
The second option creates wider color bands.
6. Vintage Rose Granny Square
This design is inspired by vintage floral crochet palettes.
Suggested Palette
- Dusty rose
- Cream
- Sage
- Muted yellow
Center
Use dusty rose for a small circular center.
Flower
Work several petal groups using cream.
Square Border
Use sage to turn the flower into a square.
Final Border
Finish with cream.
This combination gives the square a soft vintage appearance without requiring complicated stitches.
7. Puff-Stitch Granny Square
If you want more texture, add puff stitches.
Skill Level
Intermediate beginner
Puff Stitch
Yarn over and insert the hook into the stitch.
Pull up a loop.
Repeat several times in the same stitch until you have multiple loops on the hook.
Yarn over and pull through the loops.
Secure with a chain if necessary.
Pattern Structure
Create a small granny-square center.
On the next round, replace selected dc clusters with puff stitches.
Keep the corners as traditional granny-square corners:
3 dc, ch 2, 3 dc
The puff stitches create a raised floral or textured appearance.
8. Rainbow Granny Square
This is an excellent scrap-yarn project.
Color Sequence
Try:
- Pink
- Peach
- Yellow
- Green
- Blue
- Lavender
- Cream
You don’t have to follow these exact colors.
Construction
Work a traditional granny square.
Change color after every round.
Tip
Don’t worry about having exactly the same amount of every color.
Scrap yarn is part of the charm of this design.
9. Minimal Neutral Granny Square
For a modern home, keep everything neutral.
Suggested Palette
- Oatmeal
- Cream
- Taupe
- Beige
- Soft gray
Pattern
Use the traditional granny-square construction.
Instead of changing colors every round, change colors every two rounds.
This creates subtle horizontal bands.
Styling
These squares work especially well for:
- Cushion covers
- Blankets
- Table runners
- Baskets
- Neutral home decor
10. Flower-Petal Granny Square
This is the most decorative design in the collection.
Skill Level
Intermediate beginner
Color Palette
- Golden yellow
- Soft pink
- Pale blue
- Cream
Center
Create a small yellow circle.
Petals
Use pink or white to create rounded petal clusters around the center.
Square Border
Use cream.
Work sc around the flower, creating four corners with:
sc, ch 2, sc
Continue with another border round.
The result is a floral square with a clean outer edge.
Granny Square Size Guide
Your finished size depends on:
- Yarn weight
- Hook size
- Crochet tension
- Number of rounds
- Stitch pattern
Here’s a useful starting point:
| Finished Size | Approximate Use |
|---|---|
| 2–3 inches | Coasters, appliqué |
| 4 inches | Small accessories |
| 5–6 inches | Bags, cushions |
| 7–8 inches | Clothing |
| 9–10 inches | Baby blankets |
| 10+ inches | Large blankets |
Always make a test square before beginning a large project.
Color Combination Ideas
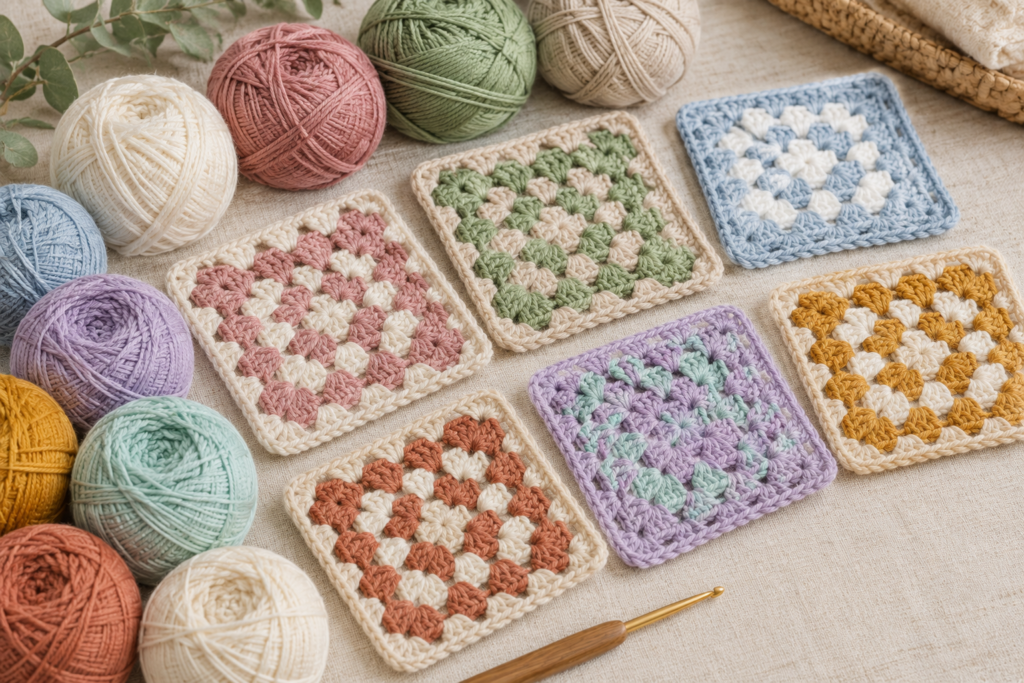
Color is one of the easiest ways to completely change the personality of a granny square.
| Style | Colors |
|---|---|
| Cottage | Cream + sage + pink |
| Vintage | Dusty rose + mustard + cream |
| Coastal | Pale blue + white + sand |
| Boho | Rust + mustard + olive |
| Modern | Cream + taupe + gray |
| Spring | Pink + yellow + green |
| Pastel | Pink + lavender + mint |
| Autumn | Rust + brown + mustard |
| Classic | Red + white + blue |
| Monochrome | Black + gray + cream |
How Many Granny Squares Do You Need?
The answer depends on the size of each square and the finished project.
Here’s a rough guide:
| Project | Approximate Squares |
|---|---|
| Coaster | 1 |
| Small pouch | 2–4 |
| Mini bag | 6–8 |
| Cushion | 9–16 |
| Scarf | 15–30 |
| Baby blanket | 40–80 |
| Throw blanket | 80–150 |
| Large blanket | 150+ |
These are estimates rather than fixed numbers.
Always calculate according to your desired finished dimensions.
How to Keep Your Squares the Same Size
This becomes extremely important when making blankets.
If one square measures 5 inches and another measures 5½ inches, joining them can create problems.
Keep these things consistent:
Use the same yarn weight.
Don’t combine a thick bulky yarn with lightweight yarn unless you’re intentionally changing the design.
Use the same hook.
Switching hook sizes can dramatically change the dimensions.
Maintain consistent tension.
If you crochet very tightly on one square and loosely on another, they’ll come out differently.
Count your rounds.
Two squares with different numbers of rounds will naturally be different sizes.
How to Block Granny Squares
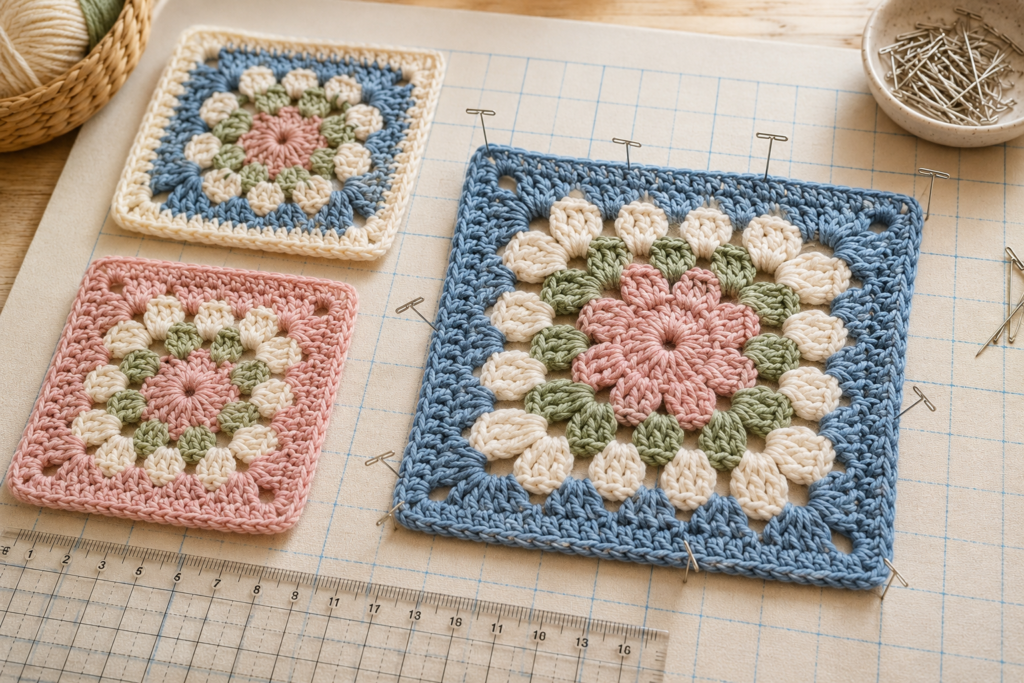
Blocking helps your squares become more uniform.
Wet or steam blocking
Depending on your yarn fiber, you can use wet blocking or gentle steam blocking.
Basic process
- Lightly dampen the square if appropriate for your yarn.
- Place it on a blocking mat.
- Gently stretch it into a square.
- Measure the sides.
- Pin the corners.
- Pin the sides.
- Allow it to dry completely.
- Remove the pins.
Important
Always check the yarn manufacturer’s care instructions before using heat.
Acrylic yarn can behave differently from cotton or wool.
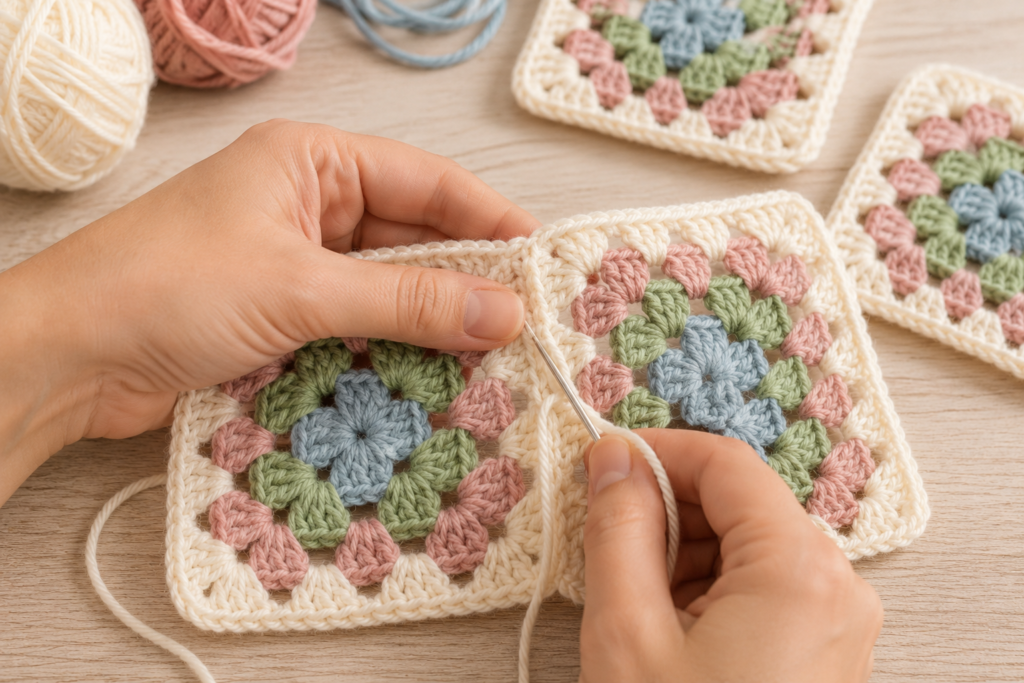
How to Join Granny Squares
There are several ways to connect your squares.
Slip-Stitch Join
Creates a slightly raised seam.
Good for:
- Blankets
- Bags
- Decorative projects
Single-Crochet Join
Creates a visible textured ridge.
Good when you want the joining line to become part of the design.
Whip Stitch
A simple sewing method using a yarn needle.
This is particularly useful for beginners.
Invisible or Flat Join
Creates a cleaner appearance.
This works well when you want the individual squares to visually blend together.
Granny Square Project Ideas
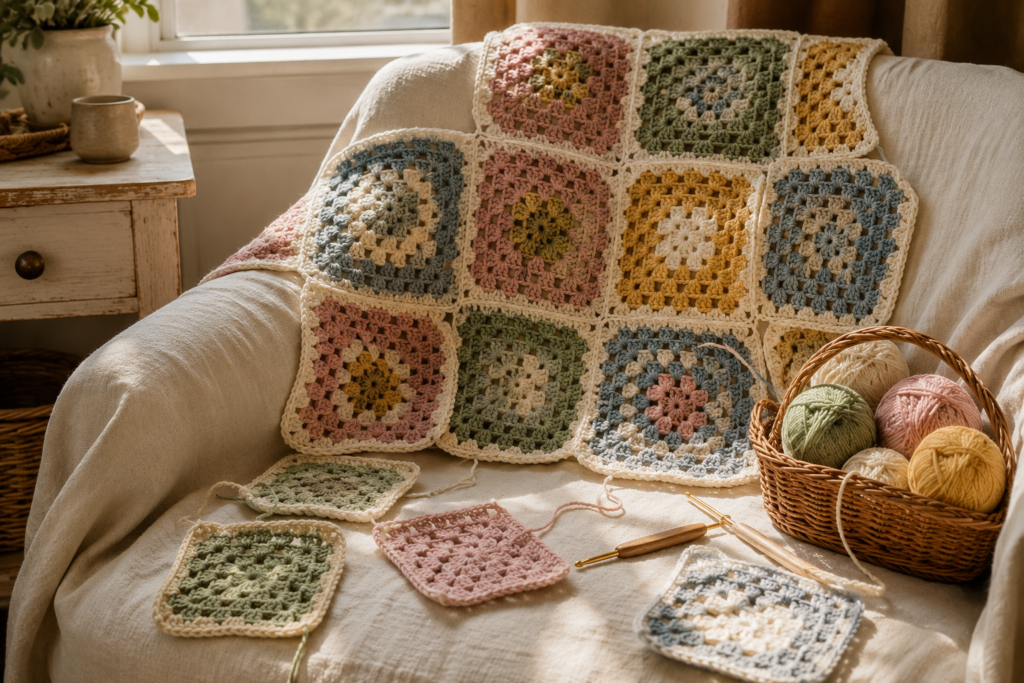
Once you’ve made a few squares, don’t stop at blankets.
1. Crochet Blanket
The classic project.
Combine several colors and arrange your squares in a planned pattern or randomly.
2. Granny Square Tote Bag
Make two large panels and join them.
Add straps and a lining if desired.
3. Cushion Cover
Use granny squares on the front and a simple crocheted or fabric backing.
4. Baby Blanket
Pastel floral granny squares are especially beautiful for baby projects.
5. Table Runner
Arrange squares in a long rectangle.
6. Coasters
Use cotton yarn and make small, tightly crocheted squares.
7. Crochet Cardigan
Join squares into panels and shape the garment around the body.
8. Market Bag
Use cotton yarn and breathable construction.
How to Make Your Granny Squares Look More Professional
Small finishing details make a huge difference.
Weave in ends properly
Don’t simply cut the yarn immediately after fastening off.
Use a yarn needle to weave the end through several stitches.
Block your squares
Especially important for blankets and garments.
Use a consistent border
Adding the same final border to every square creates cohesion.
Plan the color layout
Before joining dozens of squares, lay them out on the floor or a large table.
Take a photograph.
This makes it easier to rearrange the colors before sewing everything together.
Troubleshooting
Why is my granny square curling?
Your tension may be too tight, or you may have too few stitches.
Try:
- A larger hook
- Looser tension
- Checking your stitch count
Why is my square becoming a circle?
You may not be creating clear corner increases.
The four corners need to expand consistently.
Why are the edges wavy?
You may have too many stitches or be working too loosely.
Check your stitch count and compare your work with the previous round.
Why aren’t my corners sharp?
Make sure you’re placing the correct number of stitches into the corner space.
For the traditional structure:
3 dc, ch 2, 3 dc
creates the corner.
Why are my squares different sizes?
Check:
- Yarn weight
- Hook size
- Number of rounds
- Tension
- Stitch counts
Blocking can help with small differences.
Frequently Asked Questions
Are granny squares easy for beginners?
Yes. The classic granny square is one of the most approachable crochet motifs for beginners because it uses repeating stitch groups and simple increases.
What is the easiest granny square pattern?
The traditional four-corner granny square is usually the best place to begin.
What yarn is best for granny squares?
Worsted-weight yarn is easy to work with, while cotton is excellent for projects such as bags, coasters and home accessories.
What crochet hook should I use?
A 5 mm hook is a useful starting point for worsted-weight yarn, but your yarn label and personal tension should determine the final hook choice.
Can I use leftover yarn for granny squares?
Absolutely. Granny squares are one of the best crochet projects for using small amounts of leftover yarn.
Why do granny squares curl?
Curling can result from tight tension, insufficient stitches or a hook that is too small.
Should I block granny squares?
Blocking is highly recommended for projects where uniformity matters, particularly blankets, bags and garments.
How do I join granny squares?
You can use a whip stitch, slip stitch, single crochet or a flatter joining method depending on the look you want.
Can I make granny squares without changing colors?
Yes. A single-color granny square can look beautiful, especially with textured yarn or a neutral palette.
Can granny squares be used for clothing?
Yes. Granny squares are commonly used to create cardigans, sweaters, vests, skirts, bags and accessories.
Affiliate Disclosure
Affiliate Disclosure: This post may contain affiliate links. If you purchase something through one of these links, we may earn a small commission at no additional cost to you. We only recommend products that we believe can be useful for your crochet projects. Thank you for supporting our content.
Related Crochet Posts
If you’re building a collection of crochet projects, these would make excellent internal links from this article:
Crochet Duck With Strawberry Hat: Free Amigurumi Pattern & Step-by-Step Tutorial
A small floral crochet project that uses simple stitches and is suitable for beginners.
Free Crochet Penguin Amigurumi Pattern
A cute amigurumi project with step-by-step instructions for making the body, wings, feet and face.
Free Lying Duck Crochet Pattern
A charming amigurumi duck project with a detailed strawberry-inspired hat.
[Crochet Cat Coaster Pattern]
A small practical crochet project combining a cute cat silhouette with an easy coaster construction.
[Free Crochet Dog Toy Patterns]
A collection of handmade crochet toys designed for small crochet projects.
These related posts can create a strong crochet pattern content cluster and help readers discover more projects after finishing their granny squares.
Printable Granny Square Checklist
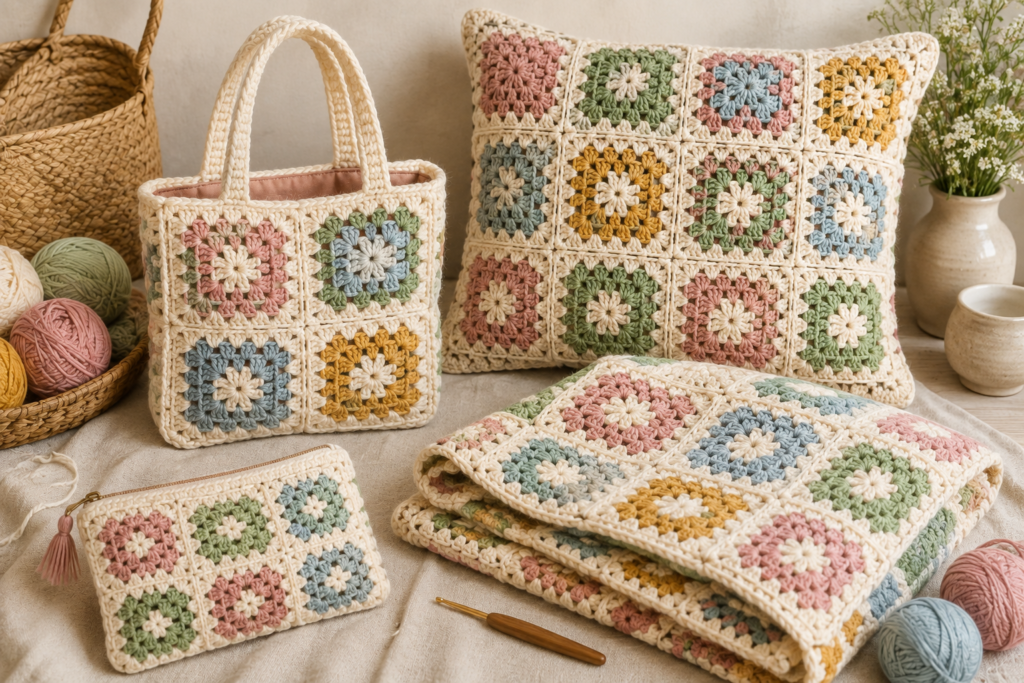
Before starting a large project, check:
- Choose your yarn
- Choose your crochet hook
- Pick a color palette
- Make one test square
- Count your rounds
- Check your measurements
- Block the square
- Make the remaining squares
- Lay out the color arrangement
- Choose your joining method
- Join the squares
- Add a final border
- Weave in all ends
- Block the finished project
Final Thoughts
Granny squares are much more than a simple crochet motif. Once you understand the basic construction, you can change the colors, center, stitches, borders and size to create completely different designs.
If you’re a beginner, start with the Classic Four-Corner Granny Square. Once you’re comfortable with the basic structure, try the Pastel Flower, Daisy Center or Puff-Stitch designs.
And don’t feel like every square needs to match.
Some of the most beautiful crochet blankets are created by combining different colors and motifs while keeping one element consistent, such as the yarn weight, border color or overall palette.
For a soft cottage-style project, try cream, dusty pink, sage and pale blue. For a vintage look, combine mustard, rose, cream and muted green. And if you have a large collection of leftover yarn, a rainbow granny-square blanket is an excellent way to turn those scraps into something useful.
The best part is that you don’t have to decide on the final project before you begin. Crochet a few squares, experiment with colors, and let the project develop as you go.







