
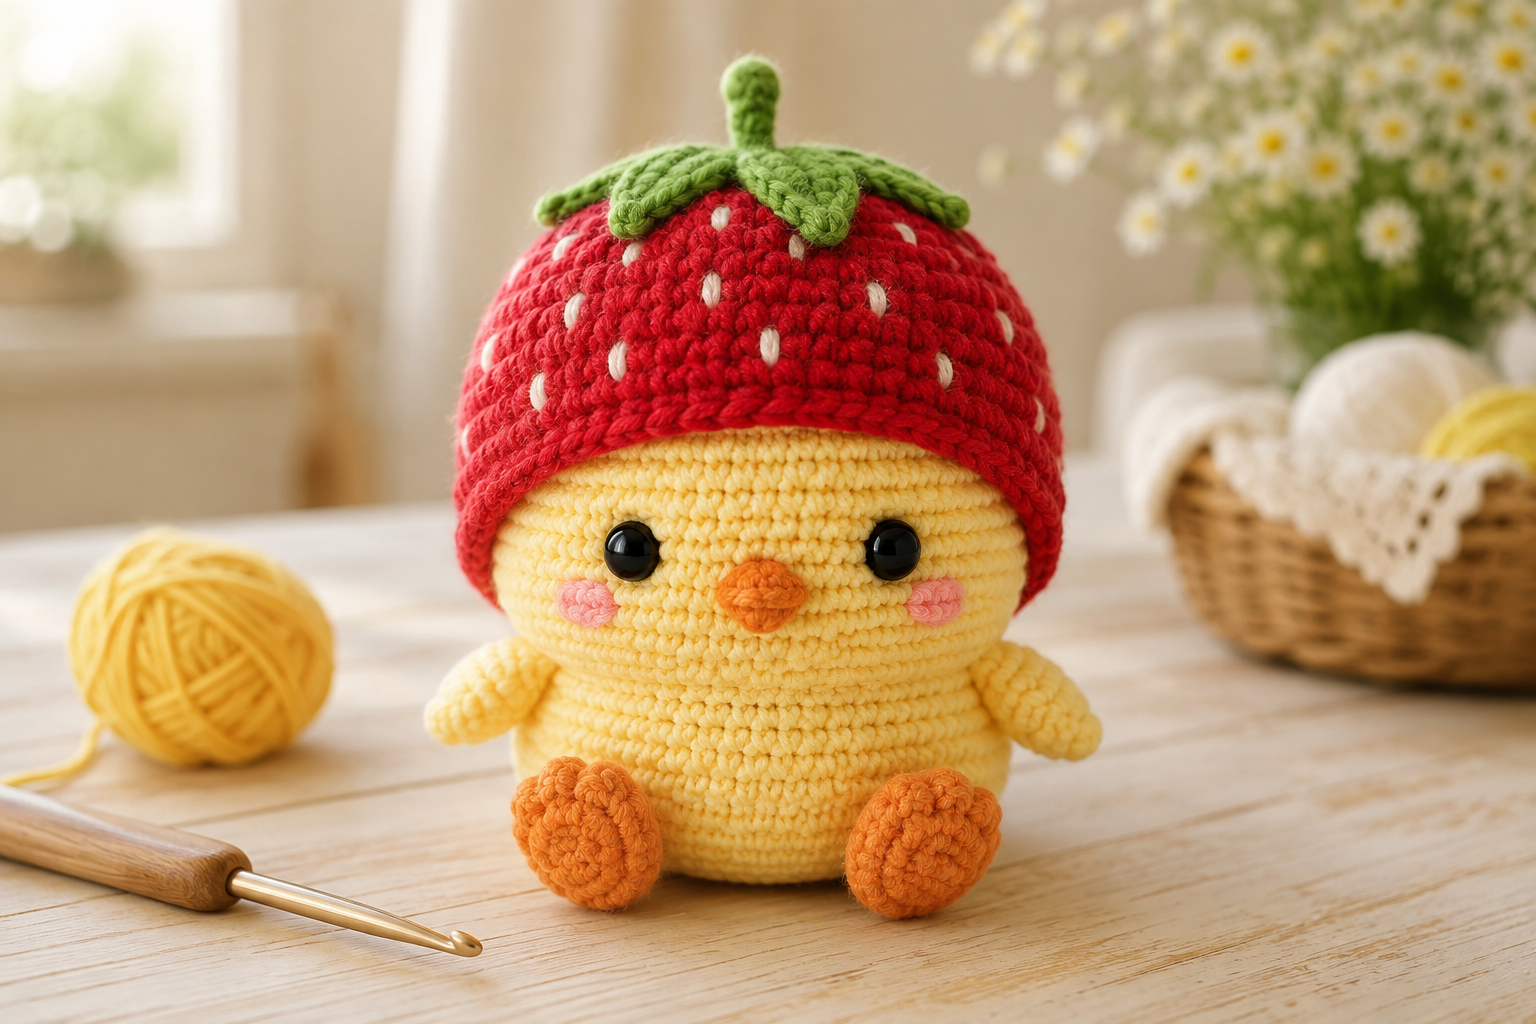
If you love cute amigurumi projects, this crochet duck with a strawberry hat is a fun project to add to your collection. The finished duck combines a soft yellow body, tiny orange feet and beak, little wings, and an adorable red strawberry-inspired hat topped with green leaves.
The pattern uses mostly basic amigurumi stitches, making it a good project for confident beginners who are comfortable crocheting in continuous rounds.
You can make the duck as a desk decoration, shelf ornament, handmade gift, nursery accessory, or part of a seasonal crochet collection.
Pattern note: The instructions below are an original, expanded written pattern based on the visual design shown in the inspiration image. They are not a transcription of a copyrighted pattern or book.
Table of Contents
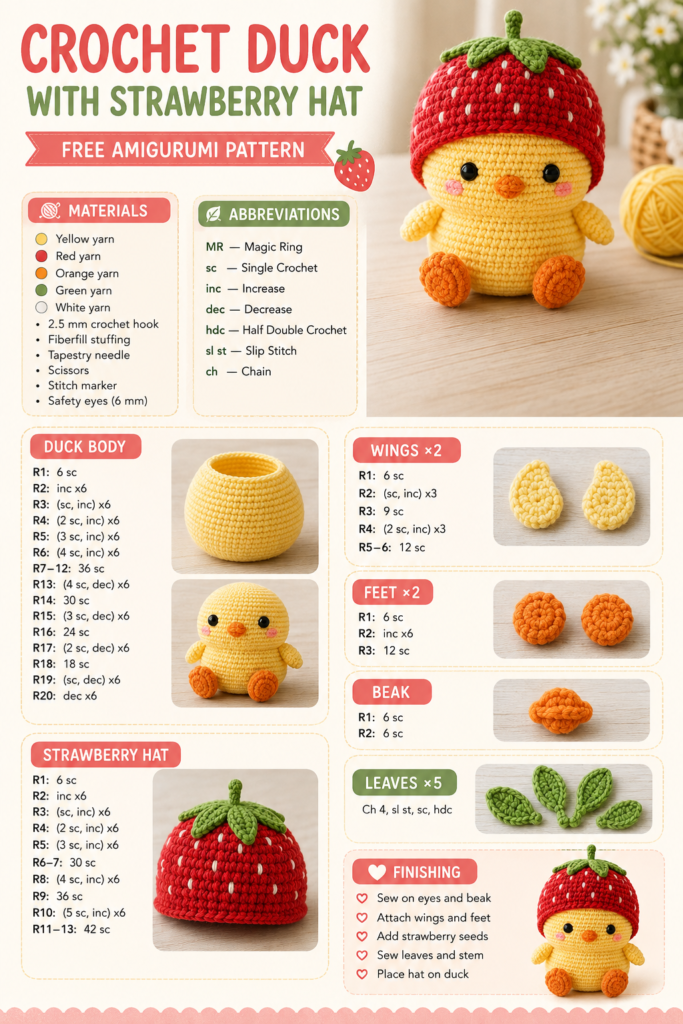
- Why You’ll Love This Pattern
- Project Details
- Materials You’ll Need
- Yarn and Color Guide
- Crochet Abbreviations
- Important Amigurumi Techniques
- Before You Start
- Crochet Duck Body Pattern
- Crochet Duck Wings
- Crochet Duck Feet
- Crochet Duck Beak
- Strawberry Hat Pattern
- Strawberry Leaves
- Strawberry Hat Stem
- White Strawberry Seeds
- Face and Embroidery
- Final Assembly
- Step-by-Step Finishing
- How to Get the Best Shape
- Common Problems and Solutions
- Color Variations
- How to Customize Your Duck
- Safety Notes
- Care Instructions
- Quick Printable Pattern
- Frequently Asked Questions
- Related Crochet Projects
- Final Thoughts
Why You’ll Love This Crochet Duck Pattern
This little duck has several details that make it especially fun to crochet.
The basic body is simple and rounded, while the strawberry hat gives the finished amigurumi its personality.
You can also make the pieces separately and assemble everything at the end, which makes the project easier to manage.
This pattern is:
- Beginner-friendly with basic amigurumi experience
- Worked mainly in single crochet
- A great stash-yarn project
- Easy to customize
- Suitable for handmade gifts
- Small enough to finish relatively quickly
- Fun for spring and summer décor
- Adorable as part of an animal-themed crochet collection
Crochet Duck With Strawberry Hat: Project Details
| Feature | Details |
|---|---|
| Project type | Amigurumi |
| Skill level | Beginner / confident beginner |
| Crochet style | Worked in continuous rounds |
| Main stitch | Single crochet |
| Approximate finished size | 10–12 cm |
| Main yarn | Worsted-weight yarn |
| Hook | 2.5 mm |
| Filling | Polyester fiberfill |
| Eyes | Safety eyes or embroidery |
| Sewing | Required for assembly |
| Hat | Removable or sewn on |
| Construction | Body + wings + feet + beak + hat |
The final size will vary depending on your yarn, hook, tension, and stuffing.
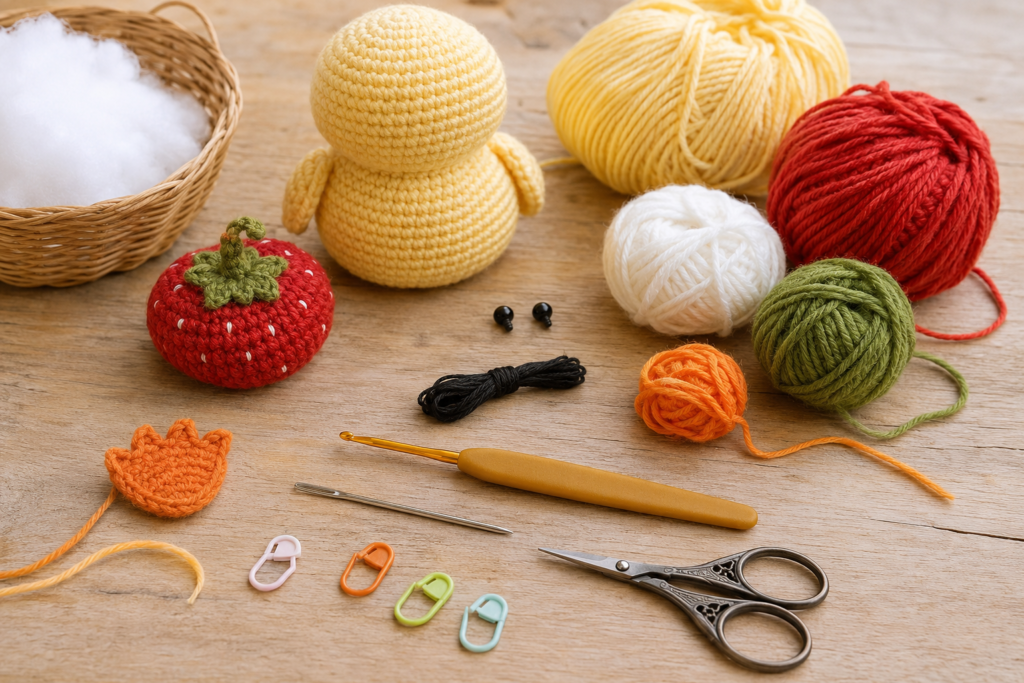
Materials You’ll Need
Yarn
You will need small quantities of several colors.
| Color | Used For |
|---|---|
| Yellow | Duck body and wings |
| Orange | Beak and feet |
| Red | Strawberry hat |
| Green | Leaves and stem |
| White | Strawberry seeds |
| Black | Eyes or embroidery |
| Pink | Optional cheeks |
A worsted-weight yarn works well for the proportions shown in the inspiration design.
Other Supplies
- 2.5 mm crochet hook
- Polyester fiberfill
- Tapestry needle
- Scissors
- Stitch marker
- 6–8 mm safety eyes, optional
- Pins for positioning pieces
- Small amount of embroidery thread
Choosing Yarn
For amigurumi, choose yarn that produces a firm, compact fabric.
A smooth yarn is particularly helpful because you want to see your stitches clearly while shaping the body.
Why cotton or cotton-blend yarn works well
Cotton yarn:
- Shows stitch definition clearly
- Holds its shape well
- Creates a neat amigurumi surface
- Is easy to embroider
- Works well for small detailed projects
Acrylic yarn can also work, particularly if you want a softer, more plush-looking duck.
Choosing the Hook
For worsted-weight yarn, a 2.5 mm crochet hook creates a relatively tight fabric.
This is important for amigurumi because you don’t want large gaps between the stitches where stuffing can become visible.
If your stitches are very loose, try a smaller hook.
If the fabric becomes extremely stiff and difficult to work, try going up by 0.25–0.5 mm.
Crochet Abbreviations
The pattern uses US crochet terminology.
| Abbreviation | Meaning |
|---|---|
| MR | Magic ring |
| sc | Single crochet |
| inc | Increase — 2 sc in one stitch |
| dec | Invisible decrease |
| hdc | Half double crochet |
| sl st | Slip stitch |
| ch | Chain |
| st | Stitch |
| sts | Stitches |
| FO | Fasten off |
| R | Round |
Pattern notation
(sc, inc) × 6
means:
Repeat 1 sc, then 1 increase six times.
The number in parentheses at the end of a round tells you how many stitches you should have.
Important Amigurumi Techniques
Magic Ring
The magic ring gives you a tightly closed center.
If you prefer, you can chain 2 and work the first round into the second chain, but the magic ring usually produces a neater result.
Invisible Decrease
For a cleaner amigurumi surface:
- Insert your hook through the front loop of the next stitch.
- Insert it through the front loop of the following stitch.
- Yarn over.
- Pull through both front loops.
- Yarn over again.
- Pull through the remaining loops.
This creates a less noticeable decrease.
Continuous Rounds
Most of the body is worked continuously rather than joining every round.
Use a stitch marker to mark the first stitch of each round.
Move the marker upward as you work.
Before You Start
There are three things that will make this project much easier.
1. Use a stitch marker
Amigurumi can quickly become difficult to count without one.
2. Count every round
If your stitch count is incorrect, the body can become too wide, too narrow, or asymmetrical.
3. Stuff gradually
Don’t wait until the final round to add all the stuffing.
Add small amounts as you work toward the top.
Part 1: Crochet Duck Body
Use yellow yarn.
The body is worked from the bottom upward.
Round 1
Make a magic ring.
Work:
6 sc
6 sts
Pull the ring closed.
Round 2
Work:
inc × 6
12 sts
Round 3
Work:
(sc, inc) × 6
18 sts
Round 4
Work:
(2 sc, inc) × 6
24 sts
Round 5
Work:
(3 sc, inc) × 6
30 sts
Round 6
Work:
(4 sc, inc) × 6
36 sts
Rounds 7–12
Work:
36 sc
for each round.
The body should now begin to look like a small rounded oval.
Round 13
Work:
(4 sc, dec) × 6
30 sts
Round 14
Work:
30 sc
Round 15
Work:
(3 sc, dec) × 6
24 sts
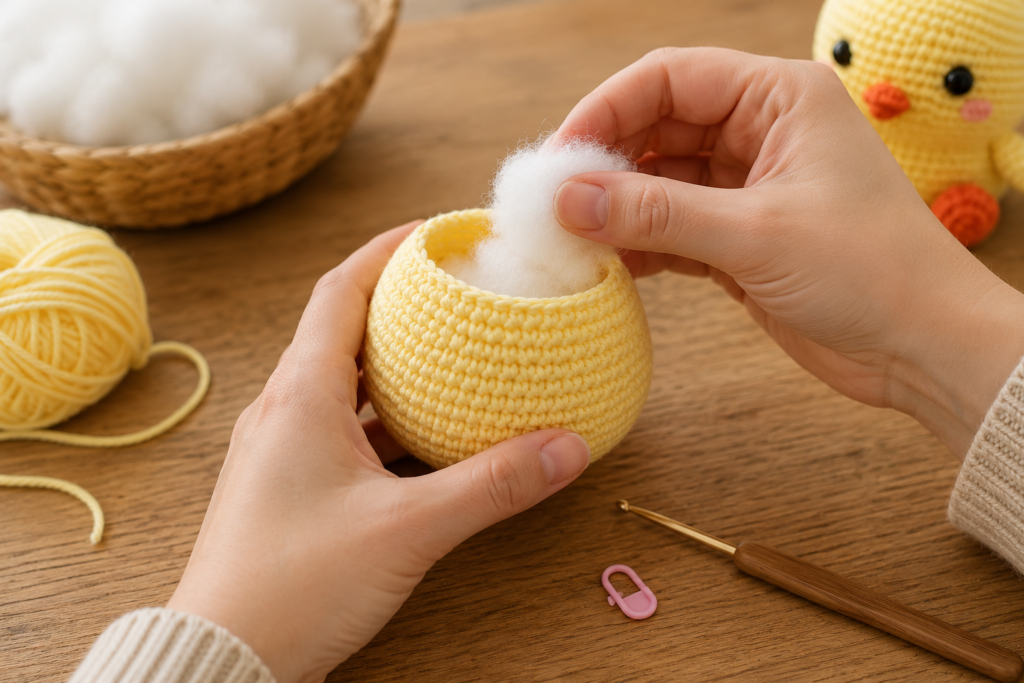
Begin Stuffing
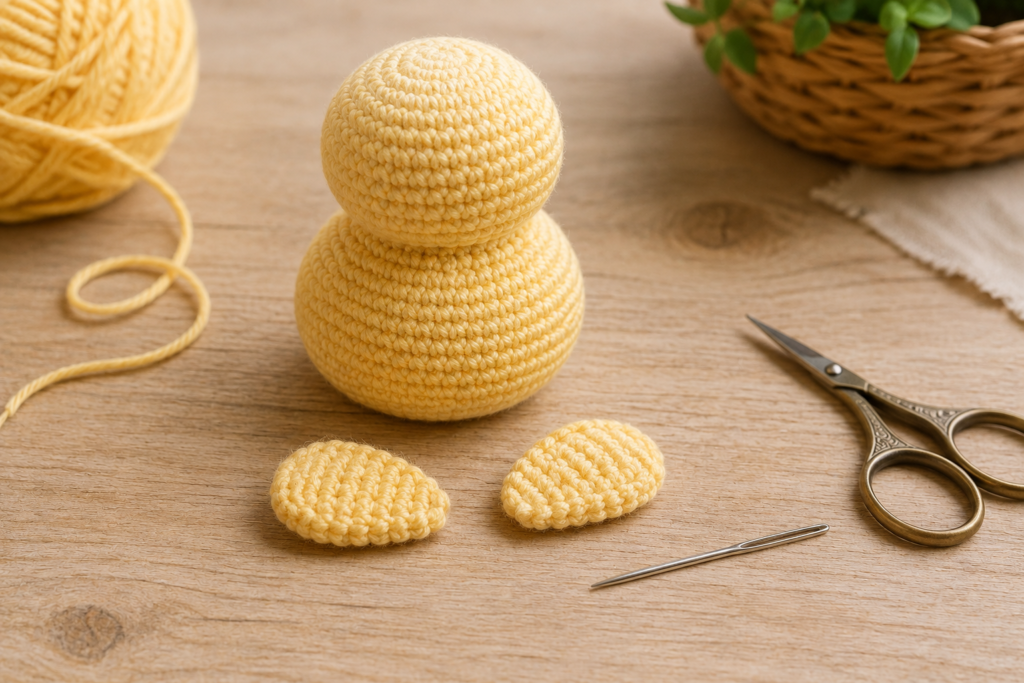
At this stage, add polyester fiberfill.
Don’t overfill.
The body should feel firm but still have a little flexibility.
Use your crochet hook or the blunt end of a tapestry needle to gently push stuffing into the lower curves.
Round 16
Work:
24 sc
Round 17
Work:
(2 sc, dec) × 6
18 sts
Round 18
Work:
18 sc
Add more stuffing.
Check the shape from several angles.
Round 19
Work:
(sc, dec) × 6
12 sts
Round 20
Work:
dec × 6
6 sts
Fasten off.
Thread the remaining yarn through the front loops of the final stitches.
Pull gently to close the opening.
Weave in the end securely.
Body tip
The finished body should resemble a rounded little duck rather than a tall egg.
If your body is very elongated, your tension may be looser than the sample. A smaller hook can help.
Part 2: Crochet the Wings
Make 2 wings using yellow yarn.
The wings are intentionally small and slightly flattened.
Round 1
Make a magic ring.
Work:
6 sc
6 sts
Round 2
Work:
(sc, inc) × 3
9 sts
Round 3
Work:
9 sc
Round 4
Work:
(2 sc, inc) × 3
12 sts
Rounds 5–6
Work:
12 sc
Fasten off.
Leave a long tail for sewing.
Don’t overstuff the wings
You can leave them unstuffed or add only a tiny amount of fiberfill.
Flatten each wing gently before attaching it.
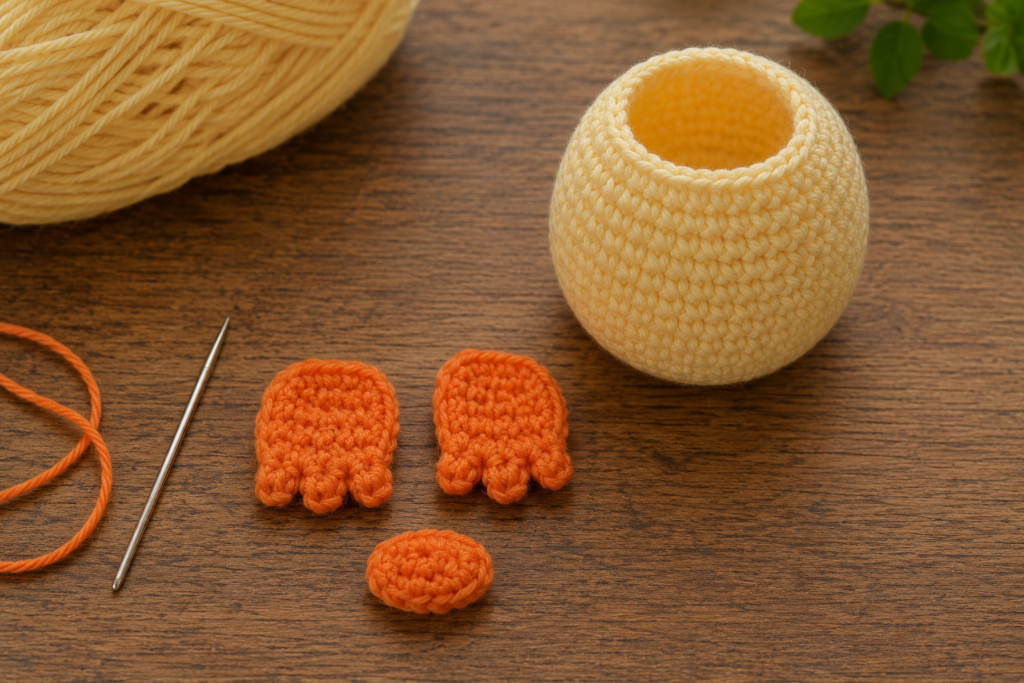
Part 3: Crochet the Feet
Make 2 feet with orange yarn.
The feet are small and rounded.
Round 1
Magic ring.
6 sc
6 sts
Round 2
inc × 6
12 sts
Round 3
12 sc
Fasten off.
Leave a sewing tail.
Flatten each foot slightly.
You can use your tapestry needle to create a subtle division that suggests small toes.
Part 4: Crochet the Beak
Use orange yarn.
The beak is a tiny flattened oval.
Round 1
Magic ring.
Work:
6 sc
6 sts
Round 2
Work:
6 sc
Fasten off.
Leave a long tail for sewing.
Flatten the piece between your fingers.
You can sew through the middle once or twice to create a slightly pointed duck-bill shape.
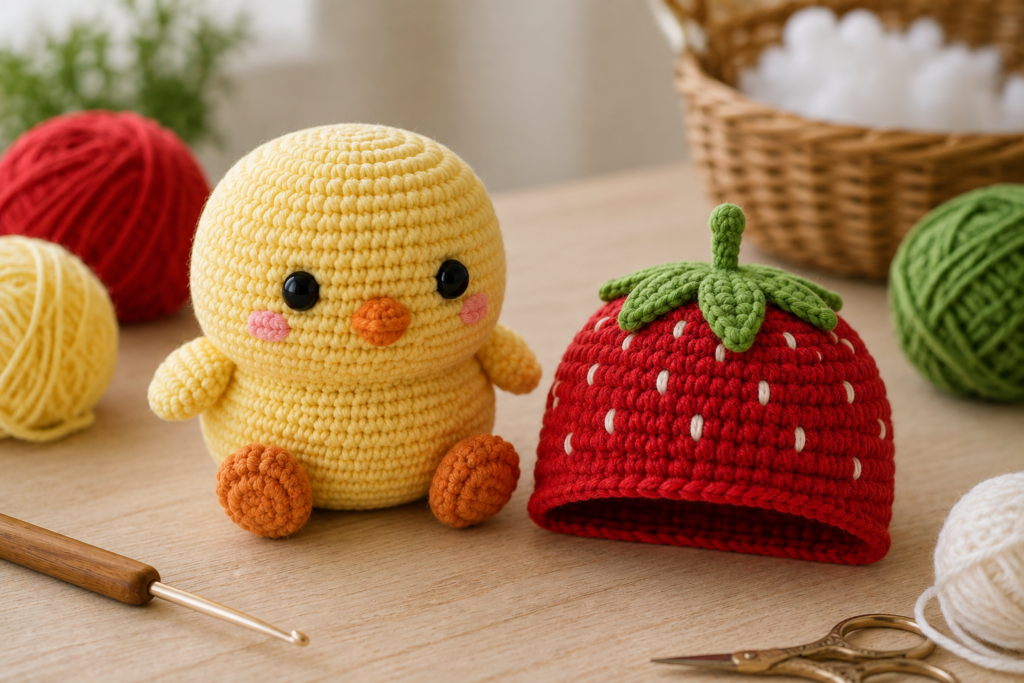
Part 5: Strawberry Hat
The strawberry hat is the most decorative part of this project.
Use red yarn.
The hat should fit over the top of the duck’s head.
Round 1
Magic ring.
6 sc
6 sts
Round 2
inc × 6
12 sts
Round 3
(sc, inc) × 6
18 sts
Round 4
(2 sc, inc) × 6
24 sts
Round 5
(3 sc, inc) × 6
30 sts
Rounds 6–7
30 sc
Round 8
Work:
(4 sc, inc) × 6
36 sts
Round 9
36 sc
Round 10
Work:
(5 sc, inc) × 6
42 sts
Rounds 11–13
Work:
42 sc
The hat should now have enough depth to sit over the duck’s head.
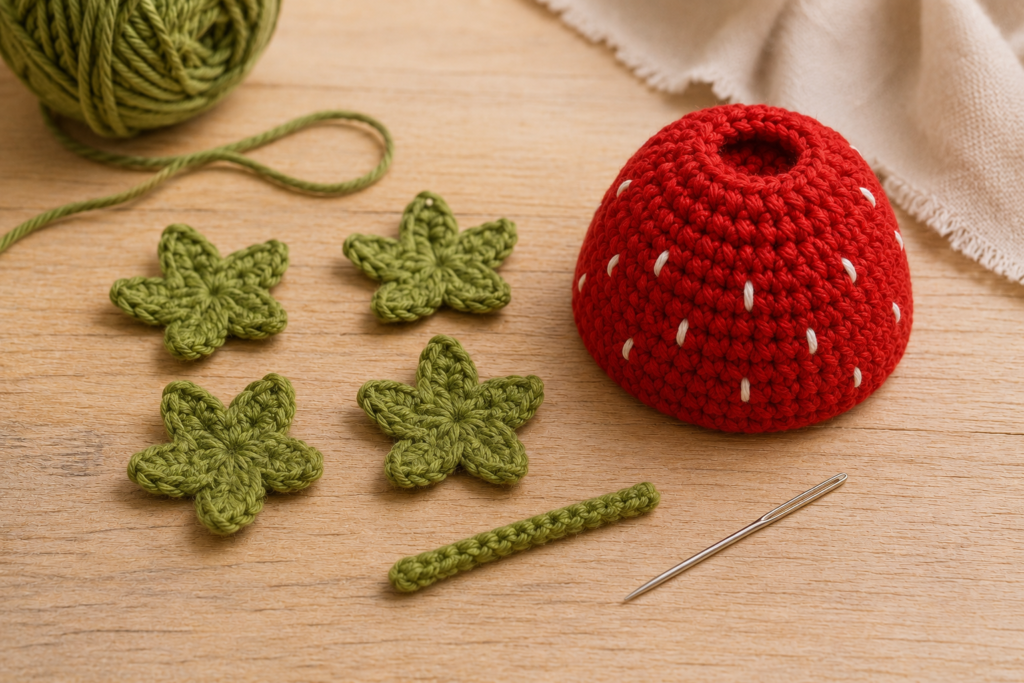
Shaping the Hat
The strawberry hat should have a slightly rounded cap rather than a completely flat cylinder.
If the hat feels too tight around the duck’s head, add another increase round before continuing.
If it is too loose, stop increasing earlier.
Because yarn tension varies, fit the hat over the finished duck before fastening off.
Strawberry Hat Brim
For a soft rolled edge, work one final round:
42 sc
Then work a round of slip stitches or single crochet using slightly relaxed tension.
Fasten off.
Weave in the end.
Part 6: Strawberry Seeds
The little white seed details are what make the hat immediately recognizable as a strawberry.
There are several ways to create them.
Option 1: Embroidered Seeds
This is my preferred method.
Use white yarn or embroidery thread.
Create small vertical stitches across the red hat.
Space them irregularly rather than placing them in perfectly straight rows.
This produces a more natural strawberry appearance.
Suggested placement
Add approximately:
- 5–7 seeds around the upper section
- 5–7 around the middle
- 3–5 around the lower section
You don’t need an exact number.
The goal is balanced coverage.
Part 7: Strawberry Leaves
Use green yarn.
Make approximately 5 small leaves.
Leaf Pattern
Chain 4.
Starting in the second chain from the hook:
sl st, sc, hdc
Then work a slip stitch back toward the base.
Fasten off.
Leave a sewing tail.
Repeat to make five leaves.
Arrange them around the top of the strawberry hat.
Part 8: Strawberry Stem
Use green yarn.
Chain 6.
Starting in the second chain from the hook:
sl st in each chain
Fasten off.
Roll or twist the stem slightly and sew it into the center of the leaves.
Part 9: Assemble the Strawberry Top
Arrange the five leaves around the center of the hat.
The points should face outward.
Sew them securely.
Then attach the small green stem in the middle.
The finished top should resemble the leafy crown of a strawberry.
Part 10: Duck Face
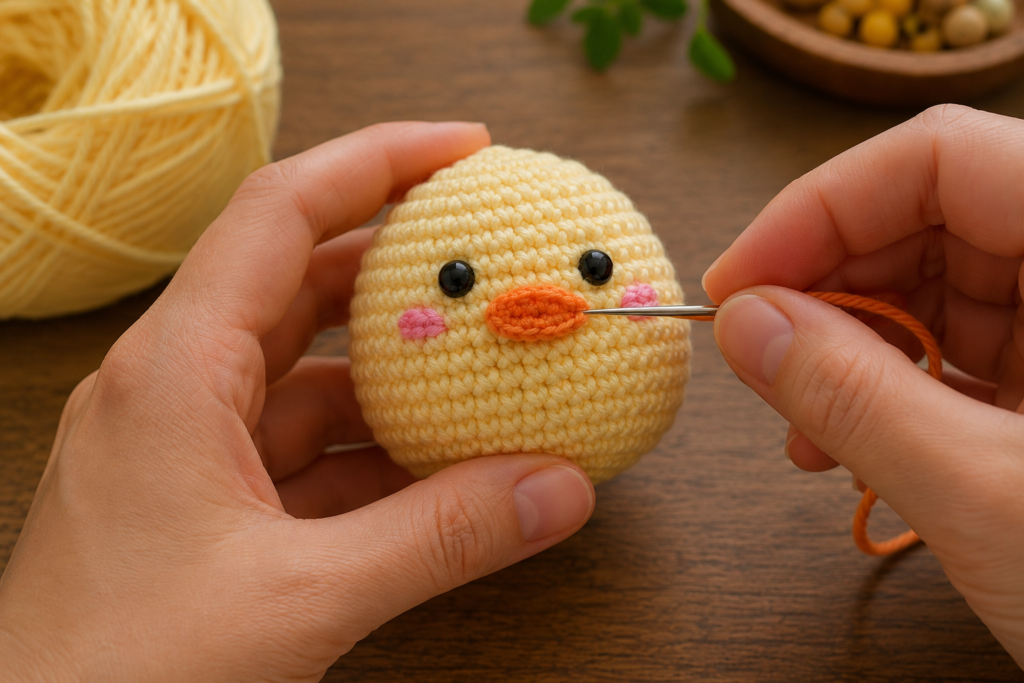
Now comes the part that gives your duck its personality.
Eyes
You have two options.
Safety eyes
Insert them before the head is completely closed and stuffed.
Place them approximately:
5–7 stitches apart
depending on your finished duck size.
Embroidered eyes
For a baby-safe version, embroidered eyes are preferable.
Use black embroidery thread and make two small oval or circular eyes.
Keep them approximately symmetrical.
Adding Cheeks
The inspiration design uses soft pink cheeks.
This is optional.
Use a tiny amount of pink yarn or embroidery thread.
Make two small circular patches below the eyes.
You can also lightly brush a small amount of textile-safe blush onto the surface if appropriate for your materials, but embroidery is the more durable option.
Attaching the Beak
Position the orange beak between the eyes.
The top of the beak should sit approximately level with the lower part of the eyes.
Pin it first.
Look at the duck from the front.
If the beak looks too high or too low, adjust it.
Then sew around the outer edge.
Use small, secure stitches.
Attaching the Wings
Place one wing on each side of the body.
The top of each wing should sit slightly below the head.
A good starting position is around:
Rounds 9–13
of the body.
Pin both wings before sewing.
Check that they are symmetrical.
Then sew each wing securely to the body.
Attaching the Feet
Position the feet near the bottom of the duck.
Place them slightly apart rather than directly underneath the center.
This gives the duck a stable standing position.
Sew each foot securely.
If necessary, use a small amount of extra yarn to anchor the feet so the duck doesn’t tip over.
Putting the Strawberry Hat on the Duck
Once the duck is completely assembled, place the strawberry hat over its head.
Adjust the position so that:
- The hat sits evenly
- The brim doesn’t cover the eyes
- The leaves sit centrally
- The duck’s face remains visible
You can leave the hat removable, which makes the project more versatile.
Alternatively, add a few discreet stitches around the inside of the hat to keep it permanently attached.
Step-by-Step Final Assembly
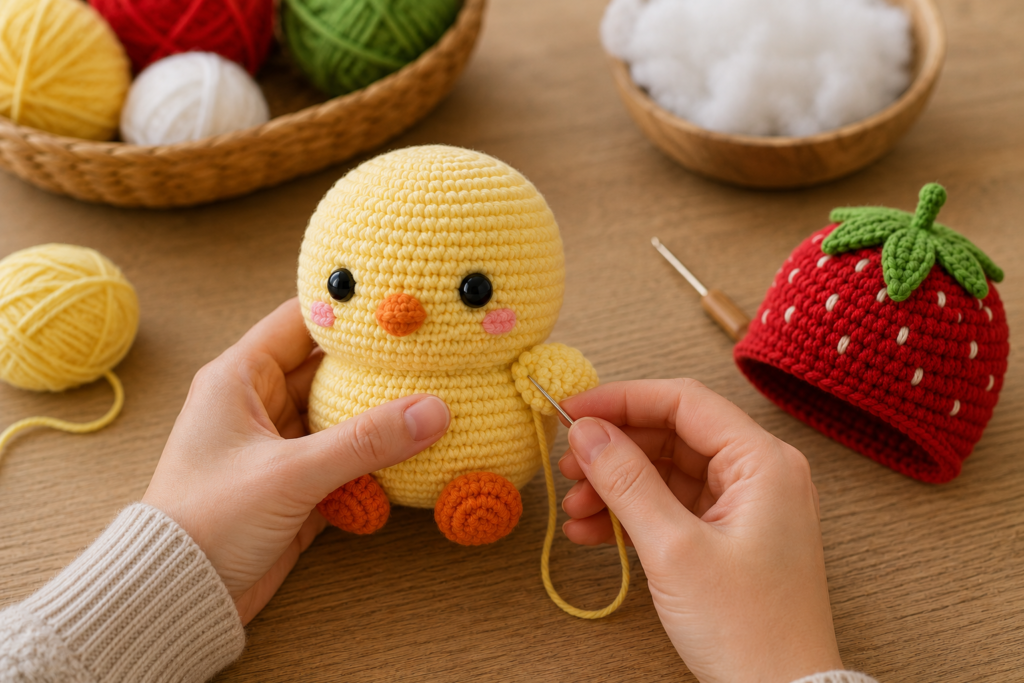
Here’s the easiest order to assemble everything:
Step 1
Finish and stuff the yellow body.
Step 2
Add the eyes.
Step 3
Attach the orange beak.
Step 4
Add optional pink cheeks.
Step 5
Flatten and sew the wings.
Step 6
Attach the orange feet.
Step 7
Finish the strawberry hat.
Step 8
Embroider the white strawberry seeds.
Step 9
Sew the green leaves to the top.
Step 10
Attach the stem.
Step 11
Place the hat on the duck.
Step 12
Check all seams and weave in remaining ends.
How to Get a Professional Amigurumi Shape
The difference between a homemade-looking amigurumi and a polished one often comes down to stuffing and assembly rather than complicated stitches.
Stuff firmly but gradually
Add stuffing every few rounds.
Don’t push one huge amount inside at the end.
Shape while stuffing
Use your fingers to push stuffing toward the edges.
This prevents hollow areas.
Avoid overstuffing
If the stitches begin to stretch and you can see stuffing through the fabric, you’ve added too much.
Check symmetry
Before permanently sewing the wings and feet, place them temporarily and look at the duck from the front.
Small adjustments can make a huge difference.
Troubleshooting Guide
| Problem | Likely Cause | Solution |
|---|---|---|
| Stuffing shows through | Hook too large or tension too loose | Use a smaller hook |
| Body looks too tall | Loose tension | Try a smaller hook |
| Body looks too small | Tight tension | Try a slightly larger hook |
| Hat doesn’t fit | Head size differs | Adjust hat increase rounds |
| Duck tips forward | Feet positioned too far back | Move feet slightly forward |
| Wings aren’t even | Attached without checking placement | Pin both first |
| Hat looks flat | Not enough shaping | Add an additional increase/decrease round |
| Strawberry looks plain | Too few seeds | Add more embroidered details |
| Duck looks expressionless | Face placement | Move eyes/beak slightly |
| Body feels lumpy | Uneven stuffing | Add small amounts gradually |
Cute Color Variations
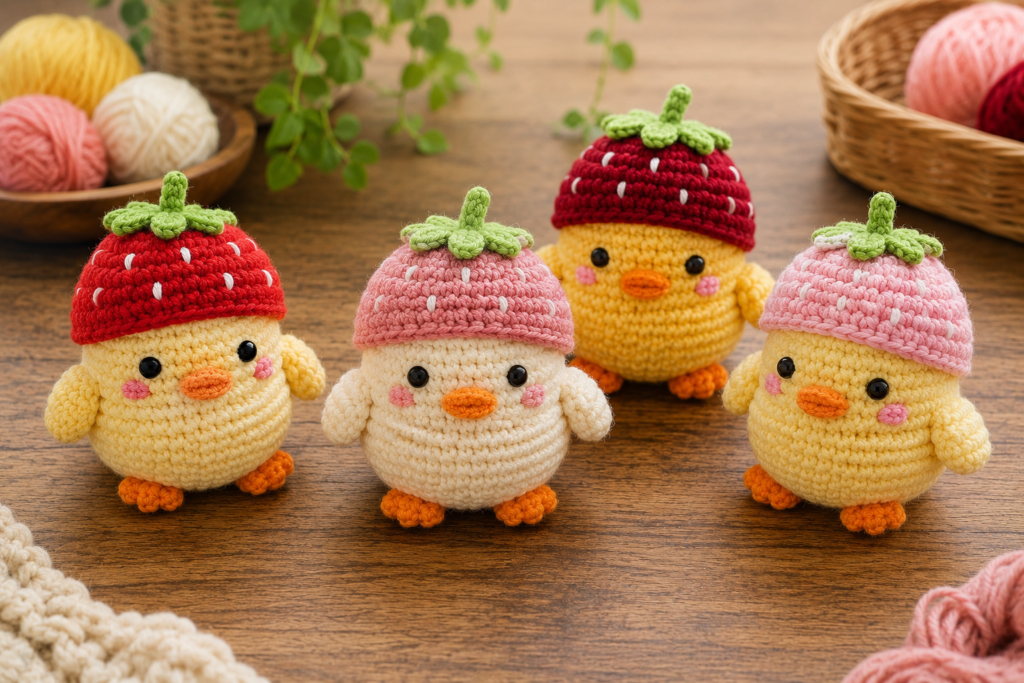
You don’t have to make the duck exactly like the original inspiration.
Classic Strawberry Duck
- Yellow body
- Orange beak
- Orange feet
- Red hat
- Green leaves
- White seeds
This is the most recognizable version.
Pink Strawberry Duck
Try:
- Creamy yellow body
- Soft pink hat
- Dark pink seeds
- Sage green leaves
This gives the project a softer pastel appearance.
Lemon Duck
Replace the strawberry hat with:
- Bright yellow hat
- White details
- Green leaves
Blueberry Duck
Use:
- Blue or purple hat
- White or pale blue details
- Green leaves
Halloween Duck
Use:
- Orange body
- Black hat
- Purple or green leaves
This creates a fun seasonal version.
How to Customize Your Duck
Once you’ve completed the basic version, there are many ways to personalize it.
Add a tiny scarf
Crochet a narrow strip and wrap it around the neck.
Add a flower
Replace the strawberry leaves with a small crochet flower.
Make the hat removable
This allows you to make several interchangeable hats.
Add a bow
Attach a small ribbon or crochet bow around the neck.
Change the expression
Move the eyes slightly closer together or embroider different eyebrows.
Make a duck family
Create:
- Mama duck
- Papa duck
- Baby duck
Use different sizes and colors.
Making a Smaller Duck
To make a miniature version, use:
- Sport-weight yarn
- 2–2.25 mm hook
- Smaller safety eyes
You can also reduce the number of increase rounds in the body.
The important thing is to maintain the same proportions between:
body → wings → feet → hat.
Making a Larger Duck
For a larger decorative version:
- Use bulky yarn
- Increase the hook size appropriately
- Add additional increase rounds
- Continue straight rounds before decreasing
Remember to enlarge the hat, beak, wings and feet proportionally.
Handmade Gift Ideas
This strawberry duck would make a cute handmade gift for:
- Crochet lovers
- Animal lovers
- Children, when made with appropriate safety features
- Baby-shower décor
- Spring-themed gifts
- Strawberry-themed gifts
- Easter baskets
- Handmade gift boxes
You could also make a small collection of fruit-themed ducks.
For example:
Strawberry Duck + Blueberry Duck + Lemon Duck
would make a particularly cute display.
Safety Notes
If you’re making this amigurumi for a baby or young child, avoid safety eyes and other small detachable parts.
Instead:
- Embroider the eyes securely.
- Avoid buttons and beads.
- Secure all sewn pieces thoroughly.
- Check seams regularly.
- Use age-appropriate materials.
Safety eyes are not automatically child-safe simply because they are called safety eyes. They can still become a choking hazard if they are pulled out.
For young children, embroidered facial features are the safer choice.
Care Instructions
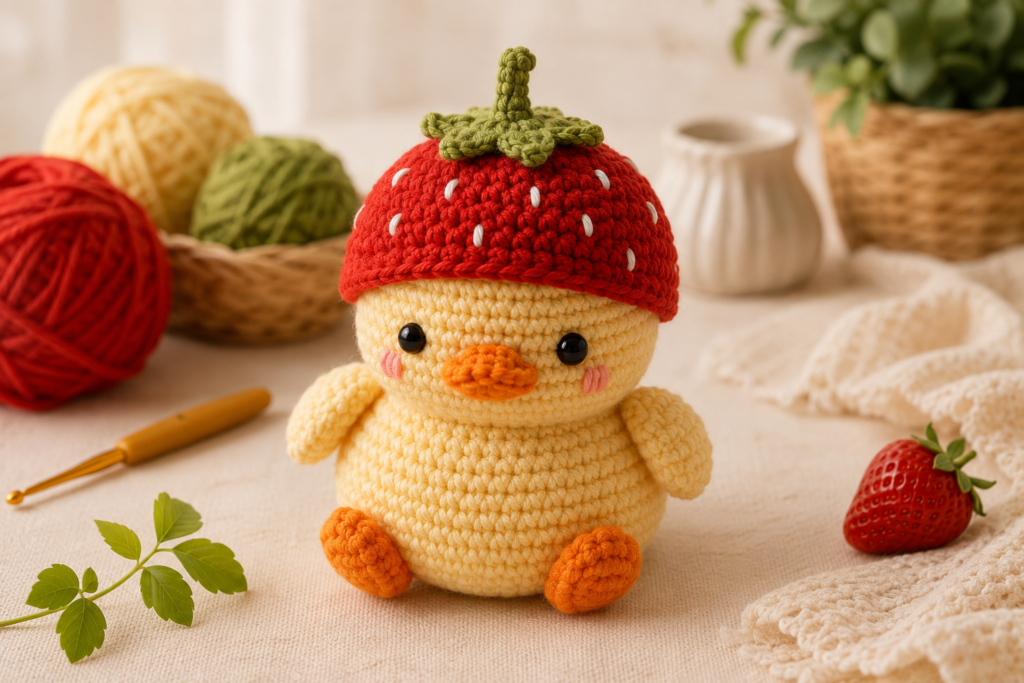
Because amigurumi contains stuffing and several sewn components, gentle care is best.
For light cleaning
Use a damp cloth and gently spot-clean the surface.
For deeper cleaning
Follow the washing instructions for the yarn you used.
Avoid aggressive washing or high heat, particularly if the project contains safety eyes.
After washing, reshape the duck and allow it to dry completely.
Quick Printable Pattern
DUCK BODY — YELLOW
R1: MR, 6 sc — 6
R2: inc × 6 — 12
R3: (sc, inc) × 6 — 18
R4: (2 sc, inc) × 6 — 24
R5: (3 sc, inc) × 6 — 30
R6: (4 sc, inc) × 6 — 36
R7–12: 36 sc
R13: (4 sc, dec) × 6 — 30
R14: 30 sc
R15: (3 sc, dec) × 6 — 24
R16: 24 sc
R17: (2 sc, dec) × 6 — 18
R18: 18 sc
R19: (sc, dec) × 6 — 12
R20: dec × 6 — 6
Stuff gradually while working.
Fasten off and close.
WINGS — YELLOW ×2
R1: MR, 6 sc — 6
R2: (sc, inc) × 3 — 9
R3: 9 sc
R4: (2 sc, inc) × 3 — 12
R5–6: 12 sc
Fasten off and leave a sewing tail.
Flatten before attaching.
FEET — ORANGE ×2
R1: MR, 6 sc — 6
R2: inc × 6 — 12
R3: 12 sc
Fasten off and leave a sewing tail.
BEAK — ORANGE
R1: MR, 6 sc — 6
R2: 6 sc
Fasten off.
Flatten and sew to the face.
STRAWBERRY HAT — RED
R1: MR, 6 sc — 6
R2: inc × 6 — 12
R3: (sc, inc) × 6 — 18
R4: (2 sc, inc) × 6 — 24
R5: (3 sc, inc) × 6 — 30
R6–7: 30 sc
R8: (4 sc, inc) × 6 — 36
R9: 36 sc
R10: (5 sc, inc) × 6 — 42
R11–13: 42 sc
Finish with one relaxed round of sc or sl st.
Fasten off.
LEAVES — GREEN ×5
Ch 4
sl st, sc, hdc
Fasten off.
Leave a long tail for sewing.
Arrange five leaves around the top of the hat.
STEM — GREEN
Ch 6
sl st in each chain
Fasten off.
Sew into the center of the leaves.
Pattern at a Glance
| Part | Color | Quantity |
|---|---|---|
| Body | Yellow | 1 |
| Wings | Yellow | 2 |
| Feet | Orange | 2 |
| Beak | Orange | 1 |
| Strawberry hat | Red | 1 |
| Leaves | Green | 5 |
| Stem | Green | 1 |
| Seeds | White | Several |
| Eyes | Black | 2 |
| Cheeks | Pink | Optional |
Frequently Asked Questions
Is this crochet duck pattern suitable for beginners?
Yes, especially for beginners who already understand single crochet, increases, decreases and working in continuous rounds.
If you’re completely new to crochet, practice making a small sphere first.
How long does this duck take to crochet?
The time depends on your experience, yarn and pace. A beginner may need several hours, while an experienced amigurumi crocheter can work much faster.
The hat and small accessories add additional assembly time.
What yarn is best for this duck?
A smooth worsted-weight cotton or cotton-blend yarn works very well.
What size crochet hook should I use?
A 2.5 mm hook is a good starting point for worsted-weight yarn.
The fabric should be tight enough that stuffing doesn’t show through.
Can I make the strawberry hat removable?
Yes. In fact, keeping it removable is a great option if you want to create different hats for the same duck.
Can I sell finished ducks made from this pattern?
If you’re using this original written pattern, you can make finished items for personal use or sale. However, don’t redistribute, republish, or sell the written pattern itself as your own.
If you use someone else’s specific pattern, always check that designer’s individual licensing terms.
Can I use safety eyes?
Yes for appropriate projects, but safety eyes can still become choking hazards if removed. For babies and young children, embroidered eyes are the safer option.
Why is my amigurumi body lumpy?
Uneven tension or uneven stuffing is usually responsible.
Add stuffing gradually and shape the body with your fingers as you work.
Why can I see the stuffing?
Your stitches may be too loose.
Try a smaller hook or tighten your crochet tension.
How do I stop the duck from falling over?
Check the position of the feet.
Place them slightly forward and apart, then test the duck’s balance before sewing them permanently.
Related Crochet Projects
If you enjoyed this strawberry duck, you may also enjoy:
Free Crochet Cat Coaster Pattern
A cute practical project featuring a simple cat-head silhouette and beginner-friendly construction.
Crochet Dog Toy Patterns
Small crochet projects for dog lovers, including simple toy shapes and construction ideas.
Crochet Panda Patterns
Adorable panda-inspired amigurumi projects that make fun handmade gifts.
Easy Crochet Baby Patterns
Small crochet projects that are perfect for handmade baby gifts and nursery décor.
More Crochet Animal Patterns
Build an entire collection of cute handmade animals using the same basic amigurumi techniques.
Affiliate Disclosure
Some links on this page may be affiliate links. If you purchase a product through one of these links, we may earn a small commission at no additional cost to you. We only recommend products that are relevant to the project and useful for our readers.
Final Thoughts
This crochet duck with strawberry hat is a great example of how a simple amigurumi body can become much more interesting with a few carefully chosen details.
The basic duck uses familiar stitches, while the strawberry hat gives you plenty of opportunities to practice shaping, embroidery and assembly.
For your first version, I recommend following the classic combination of yellow, orange, red, green and white. Once you’ve finished it, experiment with pastel colors or make a whole collection of fruit-themed ducks.
The most important thing is not to rush the assembly. Take your time positioning the eyes, beak, wings and feet before sewing them permanently. Small adjustments here can make a surprisingly big difference to the personality and proportions of the finished amigurumi.
Grab your hook, choose your colors, and give this little strawberry duck a try!







