
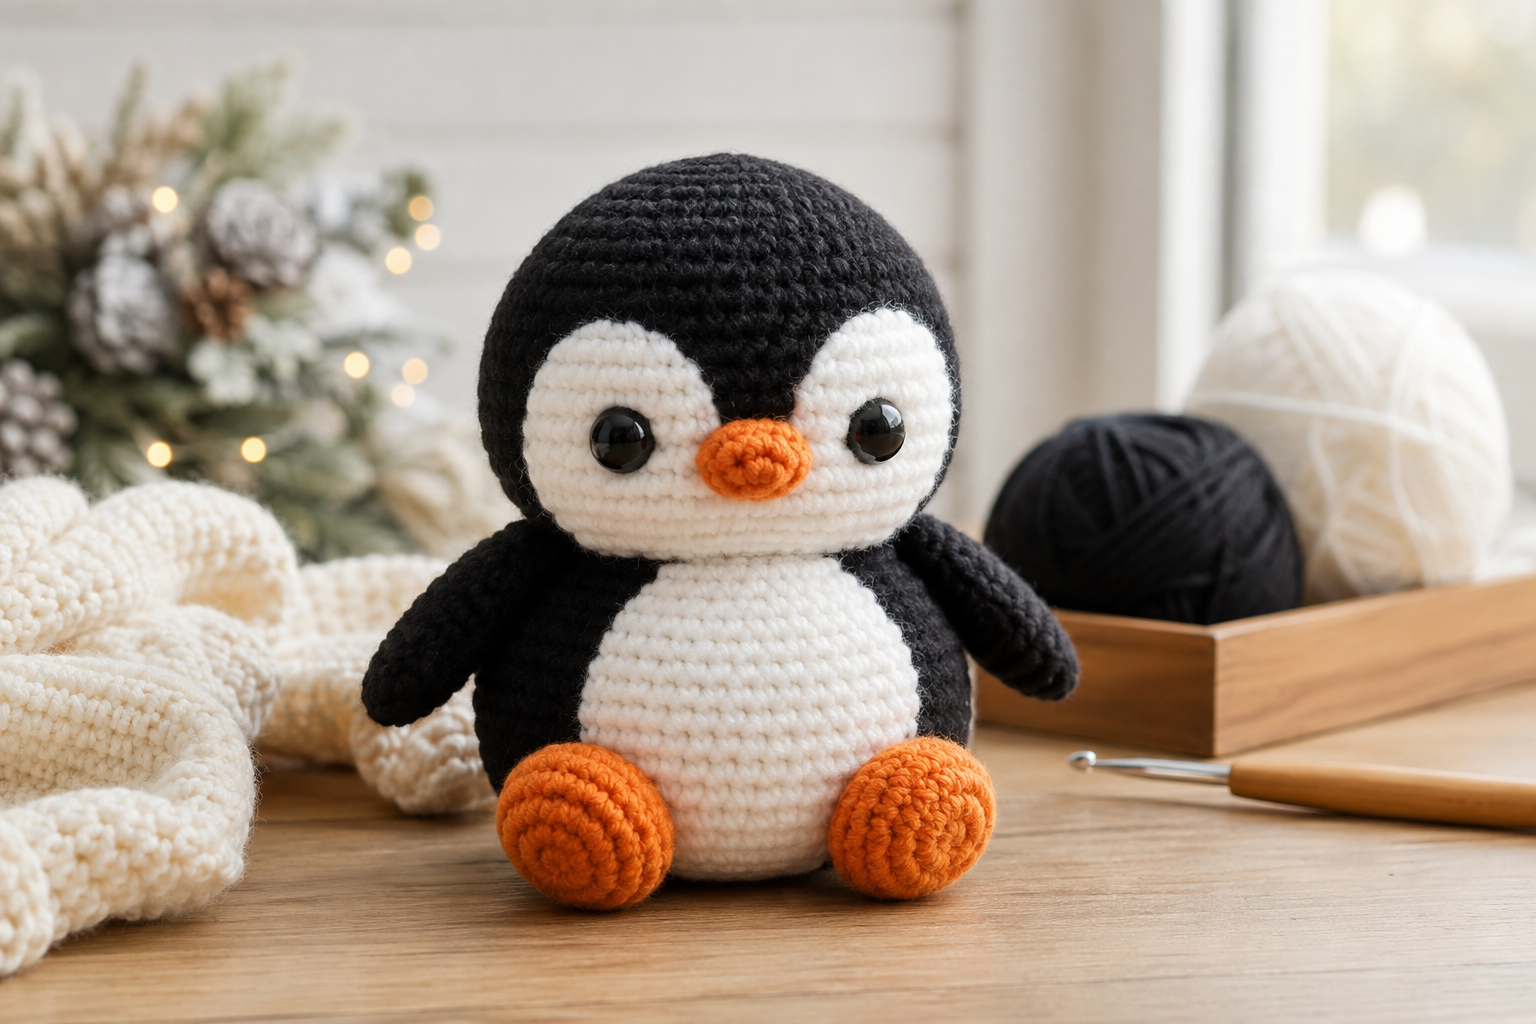
Easy Beginner-Friendly Penguin With Step-by-Step Tutorial
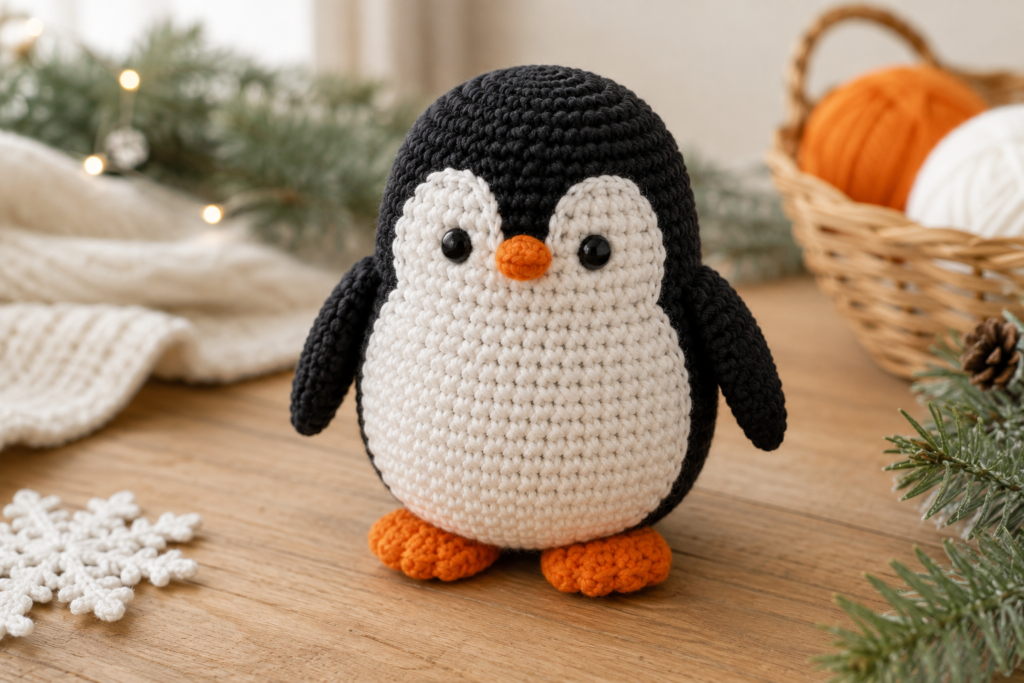
Looking for a cute crochet animal that is small, cuddly, and beginner-friendly? This crochet penguin amigurumi pattern is a fun project for practicing basic amigurumi techniques while creating an adorable little penguin with a classic black-and-white tuxedo look.
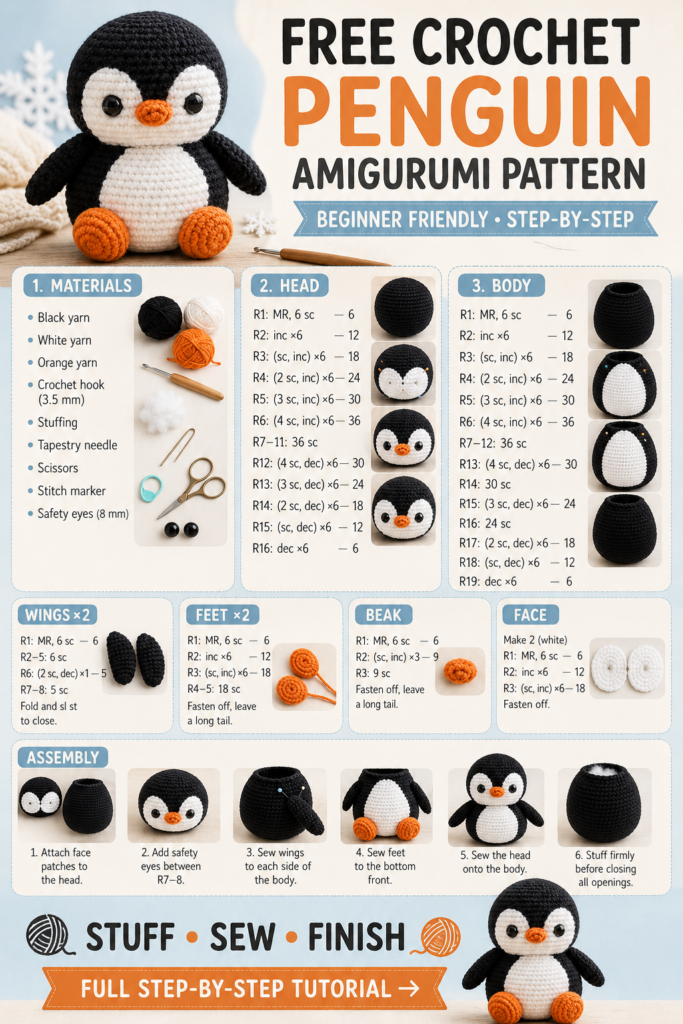
The penguin is made from several simple pieces: a rounded head, an oval body, two wings/flippers, two feet, a small orange beak, and embroidered facial details. Once everything is assembled, you can add your own personality with different eye sizes, expressions, scarves, hats, or seasonal accessories.
This pattern is designed to be easy to follow, with US crochet terminology, stitch counts, tables, detailed instructions, assembly guidance, troubleshooting tips, and customization ideas.
Pattern note: The written instructions below are an original pattern created for this tutorial. They are not a transcription of the pattern shown in the reference image.
Table of Contents
- Why You’ll Love This Penguin Pattern
- Project Details
- Materials You’ll Need
- Yarn & Color Guide
- Crochet Abbreviations
- Important Techniques
- Gauge & Finished Size
- Before You Start
- Crochet Penguin Head Pattern
- White Face Patch
- Crochet Penguin Body Pattern
- White Belly Patch
- Crochet Wings / Flippers
- Crochet Feet
- Crochet Beak
- Eye & Face Details
- Assembly
- Step-by-Step Finishing
- How to Make Your Penguin Stand
- Troubleshooting Guide
- Color Variations
- Customization Ideas
- Seasonal Penguin Ideas
- Gift Ideas
- Safety Notes
- Care Instructions
- Quick Printable Pattern
- Frequently Asked Questions
- Related Crochet Patterns
- Affiliate Disclosure
- Final Thoughts
1. Why You’ll Love This Crochet Penguin Pattern
This penguin is a particularly nice project if you want something smaller than a blanket or sweater.
You’ll practice:
- Magic rings
- Single crochet
- Increases
- Invisible decreases
- Working in continuous rounds
- Basic shaping
- Stuffing amigurumi
- Sewing crochet pieces together
- Simple embroidery
- Creating facial details
The finished penguin has a soft rounded shape and can be made using relatively small amounts of yarn.
Perfect for:
- Beginner amigurumi crocheters
- Penguin lovers
- Handmade gifts
- Winter décor
- Christmas crochet collections
- Children’s room décor
- Crochet animal collections
- Small craft projects
- Market or handmade-shop projects
2. Project Details
| Feature | Details |
|---|---|
| Project | Crochet Penguin |
| Type | Amigurumi |
| Skill Level | Beginner / Confident Beginner |
| Crochet Terms | US terminology |
| Main Stitch | Single crochet |
| Yarn Weight | Worsted / medium weight |
| Hook | 3.0–4.0 mm |
| Approx. Size | 15–18 cm |
| Construction | Separate pieces |
| Stuffing | Polyester fiberfill |
| Eyes | Safety eyes or embroidery |
| Main Colors | Black, white, orange |
| Worked In | Continuous rounds |
The exact size will depend on your yarn, hook and tension.
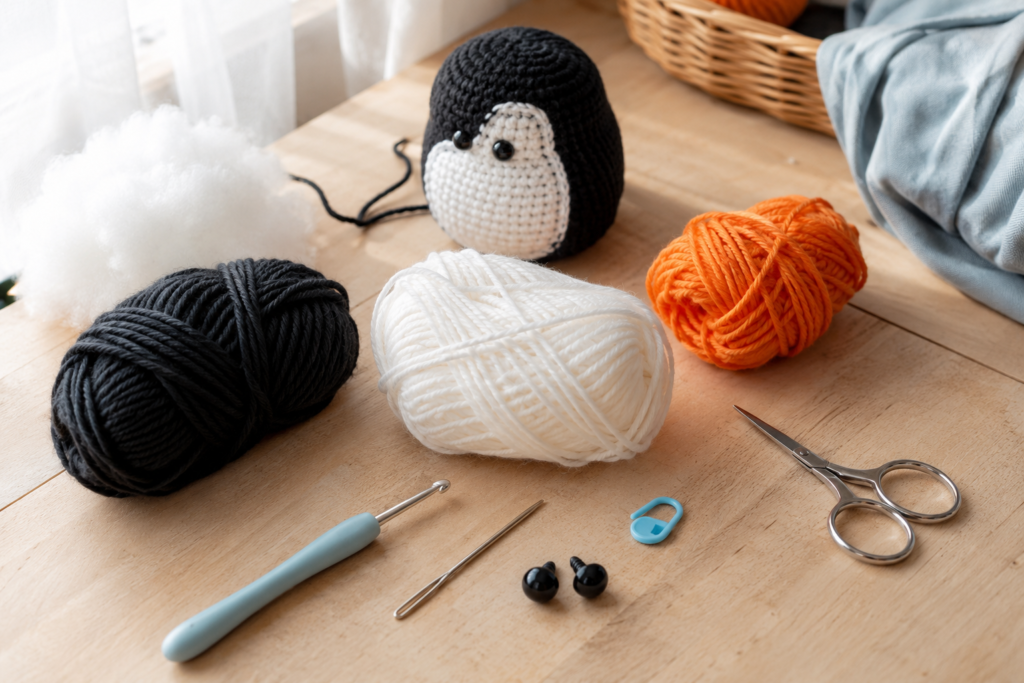
3. Materials You’ll Need
Yarn
You’ll need:
- Black worsted-weight yarn
- White worsted-weight yarn
- Orange worsted-weight yarn
- Small amount of pink yarn, optional
- Black embroidery thread if using embroidered eyes
You don’t need large quantities because this is a relatively small project.
Other Supplies
- 3.0–4.0 mm crochet hook
- Polyester fiberfill
- Tapestry needle
- Scissors
- Stitch marker
- Pins
- 8–10 mm safety eyes, optional
- Embroidery needle
4. Yarn & Color Guide
| Color | Where It’s Used |
|---|---|
| Black | Head, body, wings |
| White | Face and belly |
| Orange | Beak and feet |
| Pink | Optional cheeks |
| Black thread | Optional embroidered eyes |
Want a softer penguin?
Try charcoal gray instead of black.
Want a winter version?
Use:
- Cream
- Soft gray
- White
- Burnt orange
Want a kawaii version?
Try pastel colors with a white belly and oversized eyes.
5. Crochet Abbreviations
All instructions use US crochet terminology.
| Abbreviation | Meaning |
|---|---|
| MR | Magic ring |
| ch | Chain |
| sc | Single crochet |
| hdc | Half double crochet |
| inc | Increase |
| dec | Invisible decrease |
| sl st | Slip stitch |
| st | Stitch |
| sts | Stitches |
| FO | Fasten off |
| R | Round |
What does “inc” mean?
An increase means working 2 single crochets into the same stitch.
What does “dec” mean?
A decrease combines two stitches into one.
For amigurumi, an invisible decrease is recommended because it creates a cleaner surface.
6. Important Amigurumi Techniques
Magic Ring
Start by creating a magic ring and crochet your first stitches inside it.
Pull the yarn tail to close the center.
This prevents a hole from forming in the middle of the piece.
Continuous Rounds
Most pieces are worked in continuous rounds.
Don’t join each round with a slip stitch unless specifically instructed.
Use a stitch marker to mark the first stitch.
Invisible Decrease
Insert your hook into the front loop only of the next stitch, then the front loop of the following stitch.
Yarn over and pull through both loops.
Yarn over again and pull through the remaining loops.
This gives the penguin a smoother finish.
7. Gauge & Finished Size
For this project, exact gauge isn’t critical.
However, your stitches should be tight enough that stuffing doesn’t show through.
With medium-weight yarn and a small hook, the finished penguin should be approximately:
15–18 cm tall
Your penguin may be larger or smaller depending on your materials.
8. Before You Start
Tip 1: Crochet tightly
Amigurumi requires a tighter fabric than garments.
Tip 2: Count your stitches
The numbers in parentheses are your expected stitch counts.
Tip 3: Stuff gradually
Don’t wait until the last round.
Tip 4: Pin before sewing
This is especially important for the wings and feet.
Tip 5: Check the face from the front
Facial placement dramatically changes the personality of your penguin.
9. Crochet Penguin Head Pattern
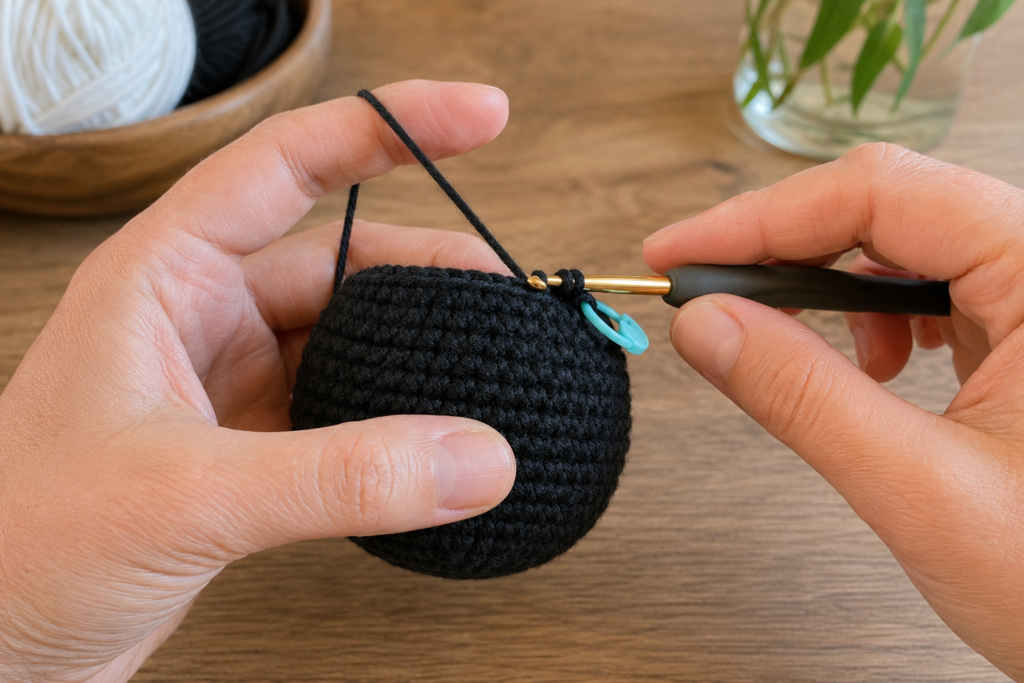
Use black yarn.
The head is worked as a rounded sphere.
Round-by-Round Instructions
| Round | Instructions | Total |
|---|---|---|
| R1 | MR, 6 sc | 6 |
| R2 | inc × 6 | 12 |
| R3 | (sc, inc) × 6 | 18 |
| R4 | (2 sc, inc) × 6 | 24 |
| R5 | (3 sc, inc) × 6 | 30 |
| R6 | (4 sc, inc) × 6 | 36 |
| R7–11 | 36 sc | 36 |
| R12 | (4 sc, dec) × 6 | 30 |
| R13 | (3 sc, dec) × 6 | 24 |
| R14 | (2 sc, dec) × 6 | 18 |
| R15 | (sc, dec) × 6 | 12 |
| R16 | dec × 6 | 6 |
Fasten off.
Leave a long tail if you plan to sew the head to the body.
When should you add the eyes?
If using safety eyes, place them around Rounds 8–9, after positioning the white face patch or before final assembly depending on your construction.
10. White Face Patch
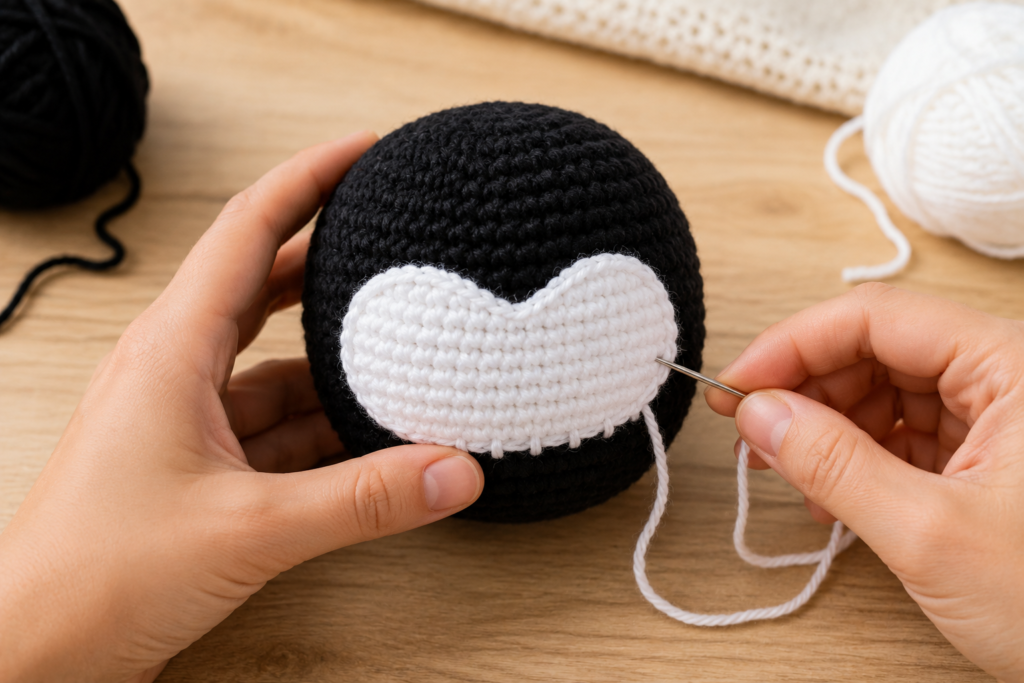
The white face patch gives the penguin its classic appearance.
Use white yarn.
Rather than making a complicated separate sphere, we’ll create a simple rounded patch that can be sewn onto the front of the black head.
Face Patch
Round 1
MR, 6 sc.
6 sts
Round 2
inc × 6.
12 sts
Round 3
(sc, inc) × 6.
18 sts
Round 4
(2 sc, inc) × 6.
24 sts
Round 5
(3 sc, inc) × 6.
30 sts
Round 6
30 sc.
Fasten off and leave a long sewing tail.
Placement
Position the patch vertically on the front of the head.
It should extend from beneath the eyes toward the lower part of the head.
Pin it before sewing.
11. Crochet Penguin Body Pattern
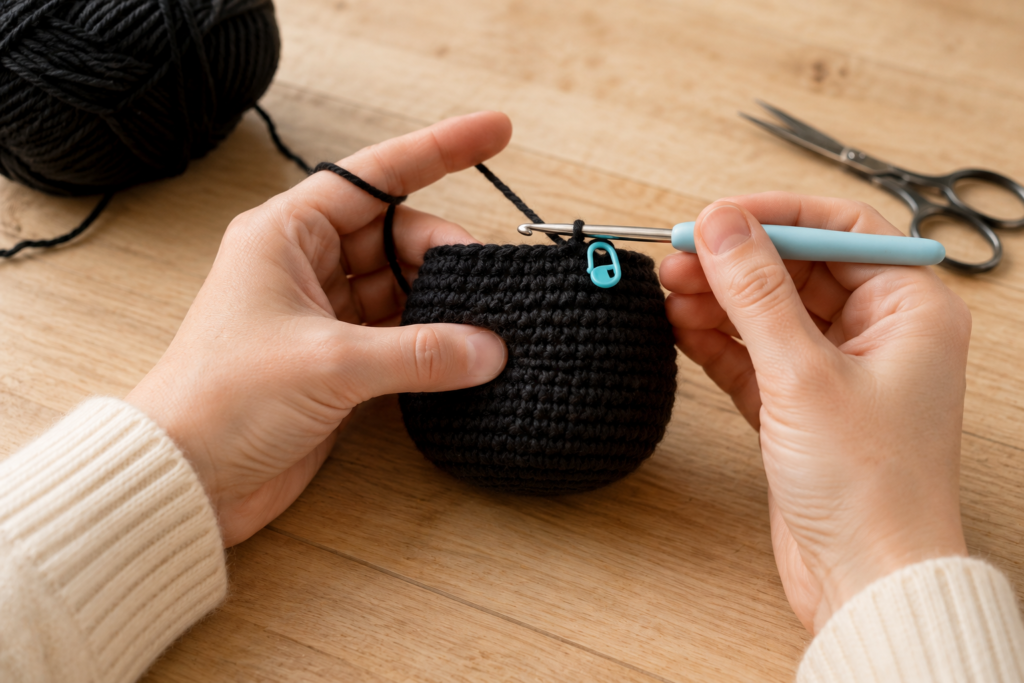
Use black yarn.
The body is slightly larger and more elongated than the head.
| Round | Instructions | Total |
|---|---|---|
| R1 | MR, 6 sc | 6 |
| R2 | inc × 6 | 12 |
| R3 | (sc, inc) × 6 | 18 |
| R4 | (2 sc, inc) × 6 | 24 |
| R5 | (3 sc, inc) × 6 | 30 |
| R6 | (4 sc, inc) × 6 | 36 |
| R7–12 | 36 sc | 36 |
| R13 | (4 sc, dec) × 6 | 30 |
| R14 | 30 sc | 30 |
| R15 | (3 sc, dec) × 6 | 24 |
| R16 | 24 sc | 24 |
| R17 | (2 sc, dec) × 6 | 18 |
| R18 | (sc, dec) × 6 | 12 |
| R19 | dec × 6 | 6 |
Start adding stuffing around Round 10.
Continue adding small amounts as you shape the body.
Fasten off and close.
12. White Belly Patch
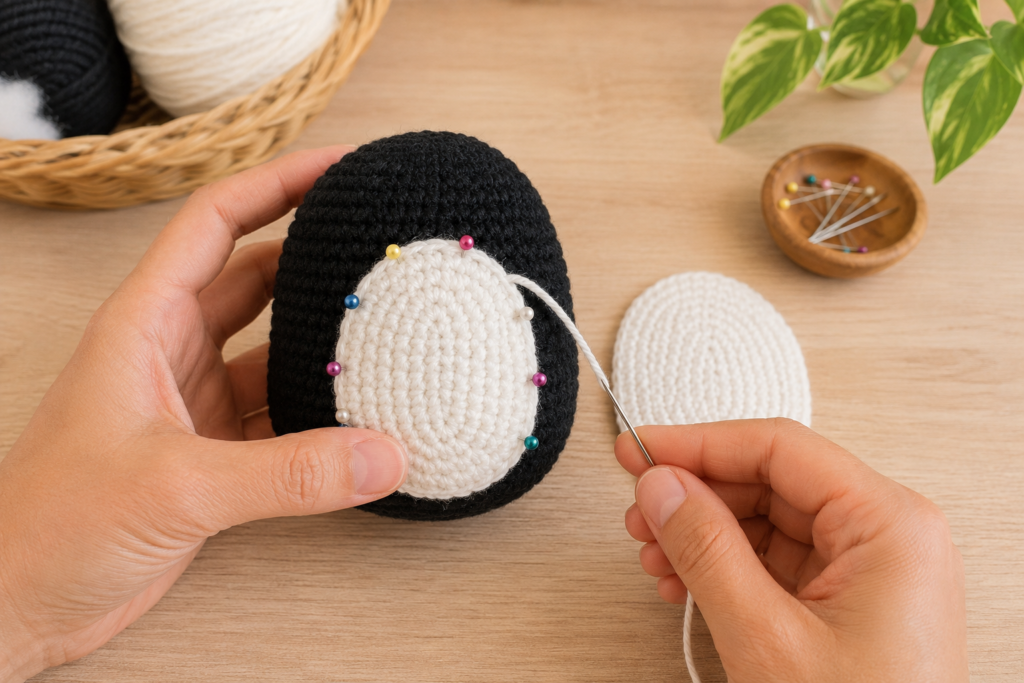
The belly is a simple white oval sewn onto the front of the black body.
For an easy beginner version, use a chain-and-row oval.
Row 1
With white yarn:
ch 11
Starting in the second chain from the hook:
10 sc
Turn.
Row 2
ch 1, 10 sc
Turn.
Row 3
ch 1, inc, 8 sc, inc
12 sts
Turn.
Row 4
ch 1, 12 sc
Turn.
Row 5
ch 1, inc, 10 sc, inc
14 sts
Turn.
Rows 6–8
ch 1, 14 sc
Turn after each row.
Row 9
ch 1, dec, 10 sc, dec
12 sts
Row 10
ch 1, 12 sc
Row 11
ch 1, dec, 8 sc, dec
10 sts
Fasten off.
Leave a long sewing tail.
Shape
Gently stretch the piece into a rounded oval.
Pin it vertically onto the front of the body.
Sew around the edge.
13. Crochet Wings / Flippers
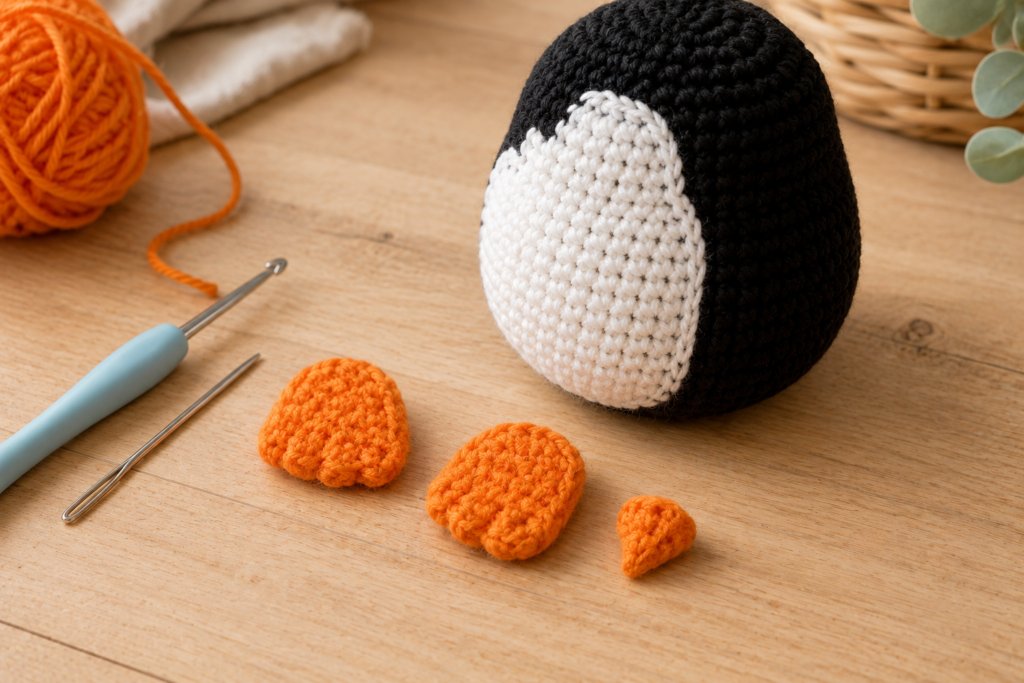
Make 2 using black yarn.
These pieces should remain relatively flat.
Wing Pattern
Round 1
MR, 6 sc.
6 sts
Round 2
inc × 6.
12 sts
Round 3
12 sc.
Round 4
(sc, inc) × 6.
18 sts
Round 5
18 sc.
Round 6
(2 sc, dec) × 6.
18 sts
Round 7
(2 sc, dec) × 6.
12 sts
Round 8
12 sc.
Fasten off.
Leave a long sewing tail.
Flatten gently.
Do not overstuff.
14. Crochet Feet
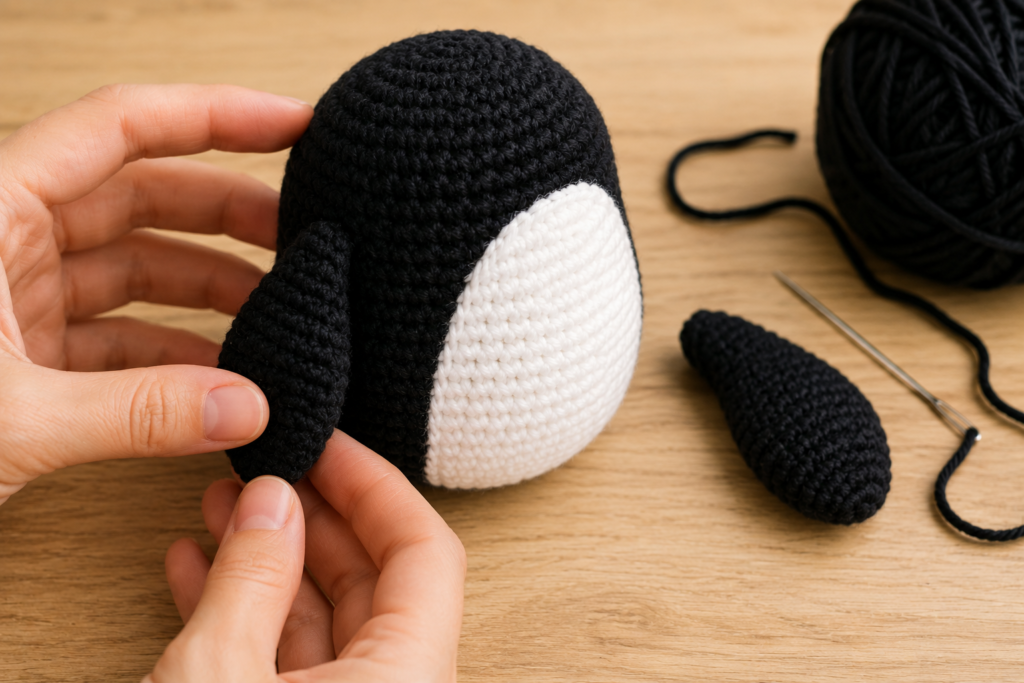
Make 2 using orange yarn.
The feet are slightly wider than the beak and help the penguin stand.
Round 1
MR, 6 sc.
6 sts
Round 2
inc × 6.
12 sts
Round 3
(sc, inc) × 6.
18 sts
Round 4
18 sc.
Round 5
(2 sc, dec) × 6.
12 sts
Round 6
12 sc.
Fasten off.
Leave a long tail.
Add a very small amount of stuffing if desired.
Flatten slightly.
15. Crochet Beak
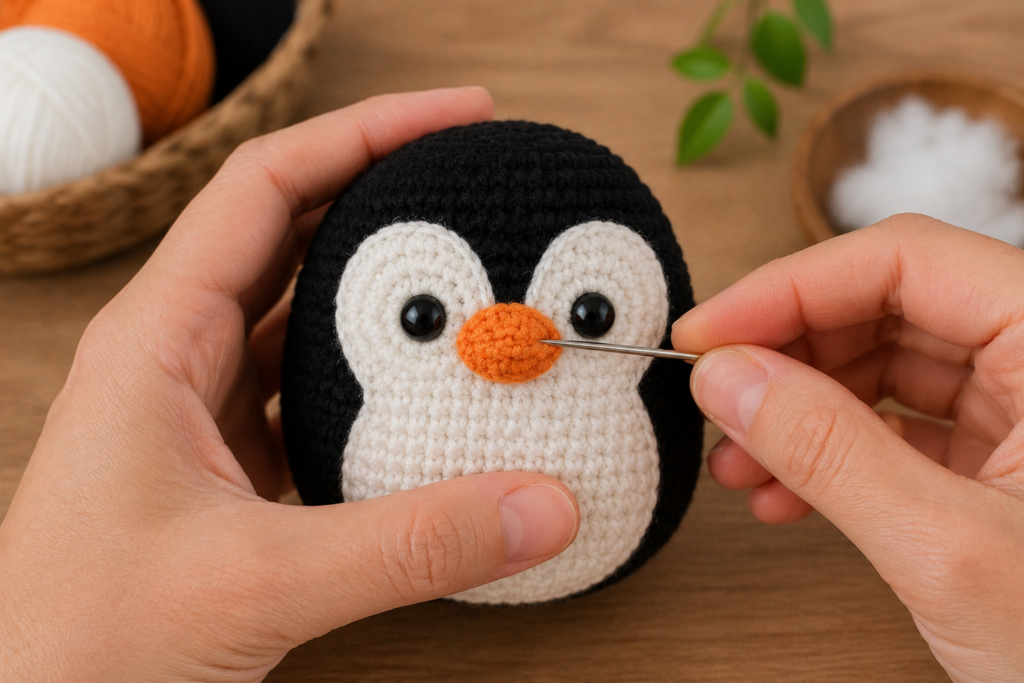
Use orange yarn.
The beak is intentionally small.
Round 1
MR, 6 sc.
6 sts
Round 2
(sc, inc) × 3.
9 sts
Round 3
9 sc.
Fasten off.
Leave a sewing tail.
Flatten the piece slightly.
Tip
Pinch the center gently to create a subtle pointed shape before sewing.
16. Eye & Face Details
Now it’s time to give your penguin personality.
Safety Eyes
For the classic plush look, use approximately 8–10 mm safety eyes.
Place them symmetrically on the white face patch.
Don’t rush this step.
Pin the eyes first and look at the penguin from several angles.
Embroidered Eyes
For a baby-safe version, embroider the eyes instead.
Use black embroidery thread.
Make two small vertical or oval shapes.
Keep the stitches tight and secure.
Optional Cheeks
Add tiny pink embroidered cheeks underneath the eyes.
This creates a softer, kawaii appearance.
17. Assembly
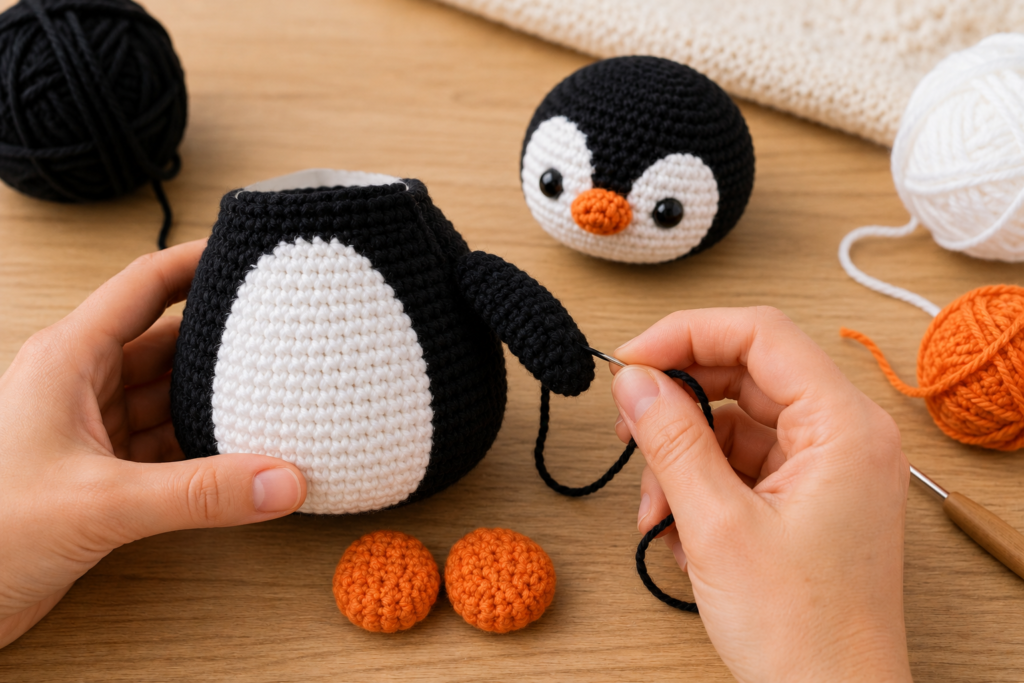
Assembly is easier if you follow a specific order.
Recommended order:
- Sew the white face patch onto the head.
- Add the eyes.
- Attach the beak.
- Sew the white belly onto the body.
- Attach the wings.
- Attach the feet.
- Attach the head.
- Check the balance.
- Add optional facial details.
- Weave in all remaining ends.
18. Step-by-Step Finishing
Step 1 — Attach the Face
Place the white face patch on the black head.
Pin it securely.
Sew around the entire perimeter with white or matching black yarn.
Keep your stitches small.
Step 2 — Add the Eyes
Position the eyes symmetrically.
For a cute expression, place them slightly closer together.
For a more realistic penguin, space them a little farther apart.
Step 3 — Sew the Beak
Place the orange beak between the eyes.
The upper edge should sit around the middle-to-lower portion of the eyes.
Sew securely around the entire beak.
Step 4 — Attach the Belly
Center the white oval on the front of the body.
Pin the top, bottom and sides first.
Then sew around the perimeter.
Important
Don’t pull the sewing yarn too tightly.
You want the belly to remain smooth rather than puckering.
Step 5 — Attach the Wings
Place one wing on each side.
A good starting position is around the upper-middle portion of the body.
Pin both wings first.
Step back and check symmetry.
Then sew securely.
Step 6 — Attach the Feet
Place the feet at the bottom of the body.
Keep them slightly separated.
This creates a stable base.
Sew them securely.
Step 7 — Attach the Head
Place the head on top of the body.
Use pins to hold it in position.
Sew around the neck opening using strong, even stitches.
Move around the entire circumference several times if necessary.
19. How to Make Your Penguin Stand
If your penguin keeps falling over, don’t immediately add more stuffing.
Check the feet first.
Good positioning:
- Feet slightly apart
- Feet slightly forward
- Body centered between them
- Equal distance from each side
You can also flatten the bottom of the body slightly while stuffing it.
A useful trick
Place the penguin on the table before permanently sewing the feet.
Adjust their position until the penguin stands naturally.
Then sew them in place.
20. Troubleshooting Guide
| Problem | Cause | Solution |
|---|---|---|
| Stuffing visible | Stitches too loose | Use a smaller hook |
| Head looks too small | Tight tension | Use a slightly larger hook |
| Body looks too long | Too many straight rounds | Remove 1–2 rounds |
| Penguin won’t stand | Feet poorly positioned | Move feet forward |
| Face looks crooked | Patch attached unevenly | Pin before sewing |
| Eyes look uneven | Attached too quickly | Mark positions first |
| Belly puckers | Sewing tension too tight | Loosen stitches |
| Wings look floppy | Too much stuffing | Flatten and reduce stuffing |
| Hat/decoration doesn’t fit | Different tension | Adjust accessory size |
| Body feels lumpy | Uneven stuffing | Add small amounts gradually |
21. Color Variations
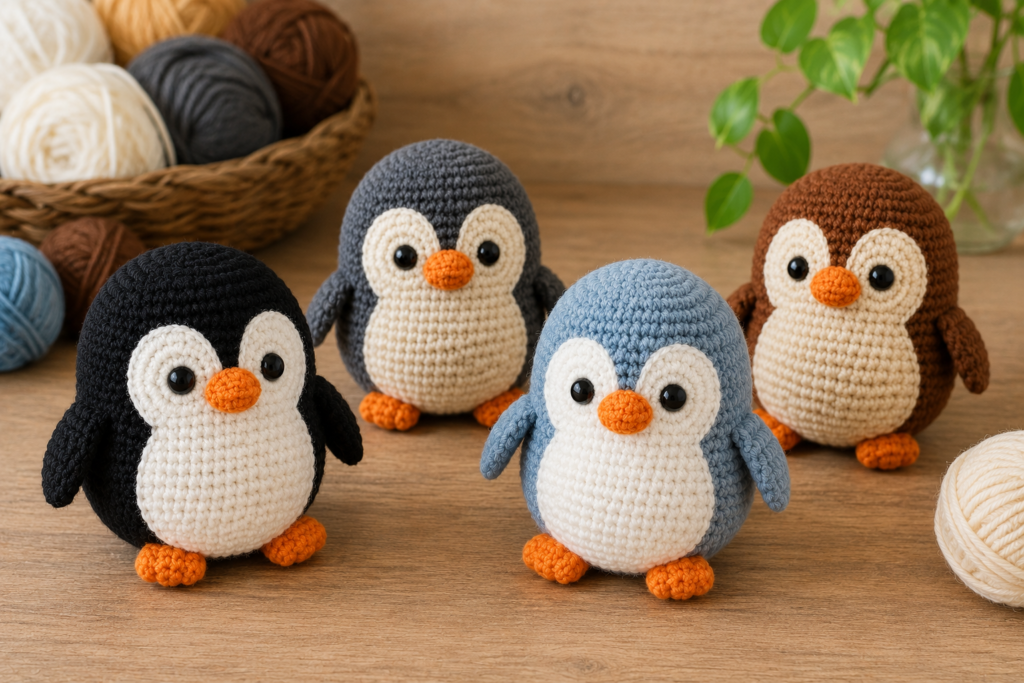
The classic black-and-white penguin is beautiful, but there are plenty of ways to customize it.
Classic Penguin
- Black
- White
- Orange
Pastel Penguin
- Dusty blue
- Cream
- Peach
Pink Penguin
- Soft pink
- White
- Coral orange
Winter Penguin
- Charcoal
- Cream
- White
- Burnt orange
Rainbow Penguin
Keep the body black and use a different color for:
- Beak
- Feet
- Scarf
- Hat
This creates a playful version without changing the main pattern.
22. Customization Ideas
Add a Scarf
Crochet a narrow strip and wrap it around the neck.
Use red and white for Christmas.
Use blue and white for a winter look.
Add a Tiny Hat
A simple crochet beanie can transform the penguin into a winter character.
Add a Heart
Sew a small red or pink crochet heart onto the belly.
This makes a sweet Valentine’s Day version.
Make a Baby Penguin
Use a smaller hook and thinner yarn.
Keep the proportions the same but reduce the overall size.
Make a Giant Penguin
Use chunky yarn and a larger hook.
The same basic construction can become a large cuddly plush.
23. Seasonal Penguin Ideas
Christmas Penguin 🎄
Add:
- Santa hat
- Red scarf
- Tiny Christmas buttons
Valentine’s Penguin ❤️
Add:
- Pink cheeks
- Red heart
- Pink bow
Halloween Penguin 🎃
Add:
- Mini witch hat
- Orange scarf
- Purple accessories
Winter Penguin ❄️
Add:
- Blue scarf
- White hat
- Snowflake embroidery
24. Gift Ideas
A finished crochet penguin makes a lovely handmade gift.
You can give it as:
- A birthday gift
- Christmas gift
- Winter gift
- Handmade nursery decoration
- Desk companion
- Animal-lover gift
- Crochet-lover gift
- Small stocking stuffer
Gift set idea
Make a small themed bundle:
Penguin + mini scarf + crochet snowflake
Place everything inside a simple gift box with tissue paper.
25. Safety Notes
If this penguin is intended for babies or very young children, take additional precautions.
For baby-safe versions:
- Don’t use safety eyes.
- Embroider the eyes securely.
- Avoid buttons.
- Avoid beads.
- Avoid loose ribbons.
- Secure every sewn component carefully.
- Check the finished item regularly for loose seams.
Safety eyes can become choking hazards if they are pulled out.
For young children, embroidered facial features are the safer choice.
26. Care Instructions
Because this is a stuffed handmade item, gentle cleaning is recommended.
Spot cleaning
Use a damp cloth and gently clean the affected area.
Washing
If your yarn allows washing, follow the yarn manufacturer’s instructions.
Avoid high heat because it can affect the yarn, stuffing and plastic components.
Allow the penguin to dry completely before storing it.
27. Quick Printable Pattern
HEAD — BLACK
R1: MR, 6 sc — 6
R2: inc ×6 — 12
R3: (sc, inc) ×6 — 18
R4: (2 sc, inc) ×6 — 24
R5: (3 sc, inc) ×6 — 30
R6: (4 sc, inc) ×6 — 36
R7–11: 36 sc
R12: (4 sc, dec) ×6 — 30
R13: (3 sc, dec) ×6 — 24
R14: (2 sc, dec) ×6 — 18
R15: (sc, dec) ×6 — 12
R16: dec ×6 — 6
FACE PATCH — WHITE
R1: MR, 6 sc — 6
R2: inc ×6 — 12
R3: (sc, inc) ×6 — 18
R4: (2 sc, inc) ×6 — 24
R5: (3 sc, inc) ×6 — 30
R6: 30 sc
Fasten off and sew to head.
BODY — BLACK
R1: MR, 6 sc — 6
R2: inc ×6 — 12
R3: (sc, inc) ×6 — 18
R4: (2 sc, inc) ×6 — 24
R5: (3 sc, inc) ×6 — 30
R6: (4 sc, inc) ×6 — 36
R7–12: 36 sc
R13: (4 sc, dec) ×6 — 30
R14: 30 sc
R15: (3 sc, dec) ×6 — 24
R16: 24 sc
R17: (2 sc, dec) ×6 — 18
R18: (sc, dec) ×6 — 12
R19: dec ×6 — 6
Stuff gradually.
WINGS ×2 — BLACK
R1: MR, 6 sc — 6
R2: inc ×6 — 12
R3: 12 sc
R4: (sc, inc) ×6 — 18
R5: 18 sc
R6: (2 sc, dec) ×6 — 18
R7: (2 sc, dec) ×6 — 12
R8: 12 sc
Flatten and sew.
FEET ×2 — ORANGE
R1: MR, 6 sc — 6
R2: inc ×6 — 12
R3: (sc, inc) ×6 — 18
R4: 18 sc
R5: (2 sc, dec) ×6 — 12
R6: 12 sc
Fasten off.
BEAK — ORANGE
R1: MR, 6 sc — 6
R2: (sc, inc) ×3 — 9
R3: 9 sc
Fasten off and flatten.
28. Frequently Asked Questions
Is this penguin pattern beginner-friendly?
Yes. The pattern primarily uses single crochet, increases, decreases and basic sewing.
A complete beginner may want to practice the magic ring and invisible decrease before starting.
What yarn is best for crochet penguins?
Smooth worsted-weight yarn works particularly well because it produces clear stitches and a firm fabric.
Chenille yarn can also create a very soft plush penguin, although it can be harder for beginners to see their stitches.
What size hook should I use?
A 3.0–4.0 mm hook is a good starting range for worsted-weight yarn.
Use the smallest hook that gives you a comfortable, dense fabric.
Why is my stuffing showing?
Your stitches are probably too loose.
Try using a smaller crochet hook.
How do I make the penguin bigger?
Use thicker yarn and a larger hook.
You can also add additional increase and straight rounds, but remember that the wings, feet and face details will need to be enlarged proportionally.
Can I make this penguin without sewing?
Some assembly is unavoidable because the pattern uses separate wings, feet and facial pieces.
However, you can simplify the design by embroidering the face instead of sewing on a separate patch.
Can I use safety eyes?
Yes, for appropriate projects.
For babies and very young children, embroidered eyes are recommended instead.
How do I keep the penguin standing?
Position the feet slightly apart and slightly forward.
Always test the balance before sewing them permanently.
Can I sell finished penguins made from this pattern?
Yes, you can make finished items from this original pattern for personal use or sale.
However, don’t redistribute or sell the written pattern itself as though you created it.
If you’re working from another designer’s pattern, always follow that designer’s individual licensing terms.
29. Related Crochet Patterns
If you enjoyed this penguin, you may also like these projects from your crochet collection:
🐼 Crochet Panda Patterns
Try another adorable black-and-white amigurumi animal with cute facial details and beginner-friendly construction.
🐱 Crochet Cat Coaster Pattern
Turn your crochet skills toward a practical home project with cute cat-shaped coasters.
🦆 Crochet Duck With Strawberry Hat: Free Amigurumi Pattern & Step-by-Step Tutorial
Continue the animal theme with an adorable little duck wearing a strawberry-inspired crochet hat.
🐶 Crochet Dog Toy Patterns
Looking for something practical? Explore simple crochet toy designs and learn more about construction, shaping and finishing.
👶 Easy Crochet Baby Patterns
Small crochet projects are perfect when you want to practice stitches while making handmade gifts.
Free Lying Duck Crochet Pattern
Crochet Kitty Plush Pattern: Cute, Soft & Beginner-Friendly Cat Amigurumi
Affiliate Disclosure
This post may contain affiliate links. If you purchase something through one of our links, we may earn a small commission at no additional cost to you. We only recommend products and supplies that are relevant to the project and useful for our readers.
30. Final Thoughts
This crochet penguin amigurumi pattern is a great little project when you want something cute without committing to a large crochet piece.
The construction is straightforward: make the head and body, crochet the small accessories, add the classic white face and belly, and then bring everything together with careful assembly.
The most important part isn’t crocheting quickly — it’s taking your time with the shaping and placement.
Spend a few extra minutes positioning the eyes, beak, belly, wings and feet before sewing them permanently. Those tiny adjustments can completely change the expression and posture of your finished penguin.
And once you’ve made the classic black-and-white version, don’t stop there. Try a pastel penguin, a Christmas penguin with a tiny Santa hat, or a winter penguin with a scarf.
Pick your yarn, grab your hook, and let’s make a tiny penguin! 🐧🧶







