
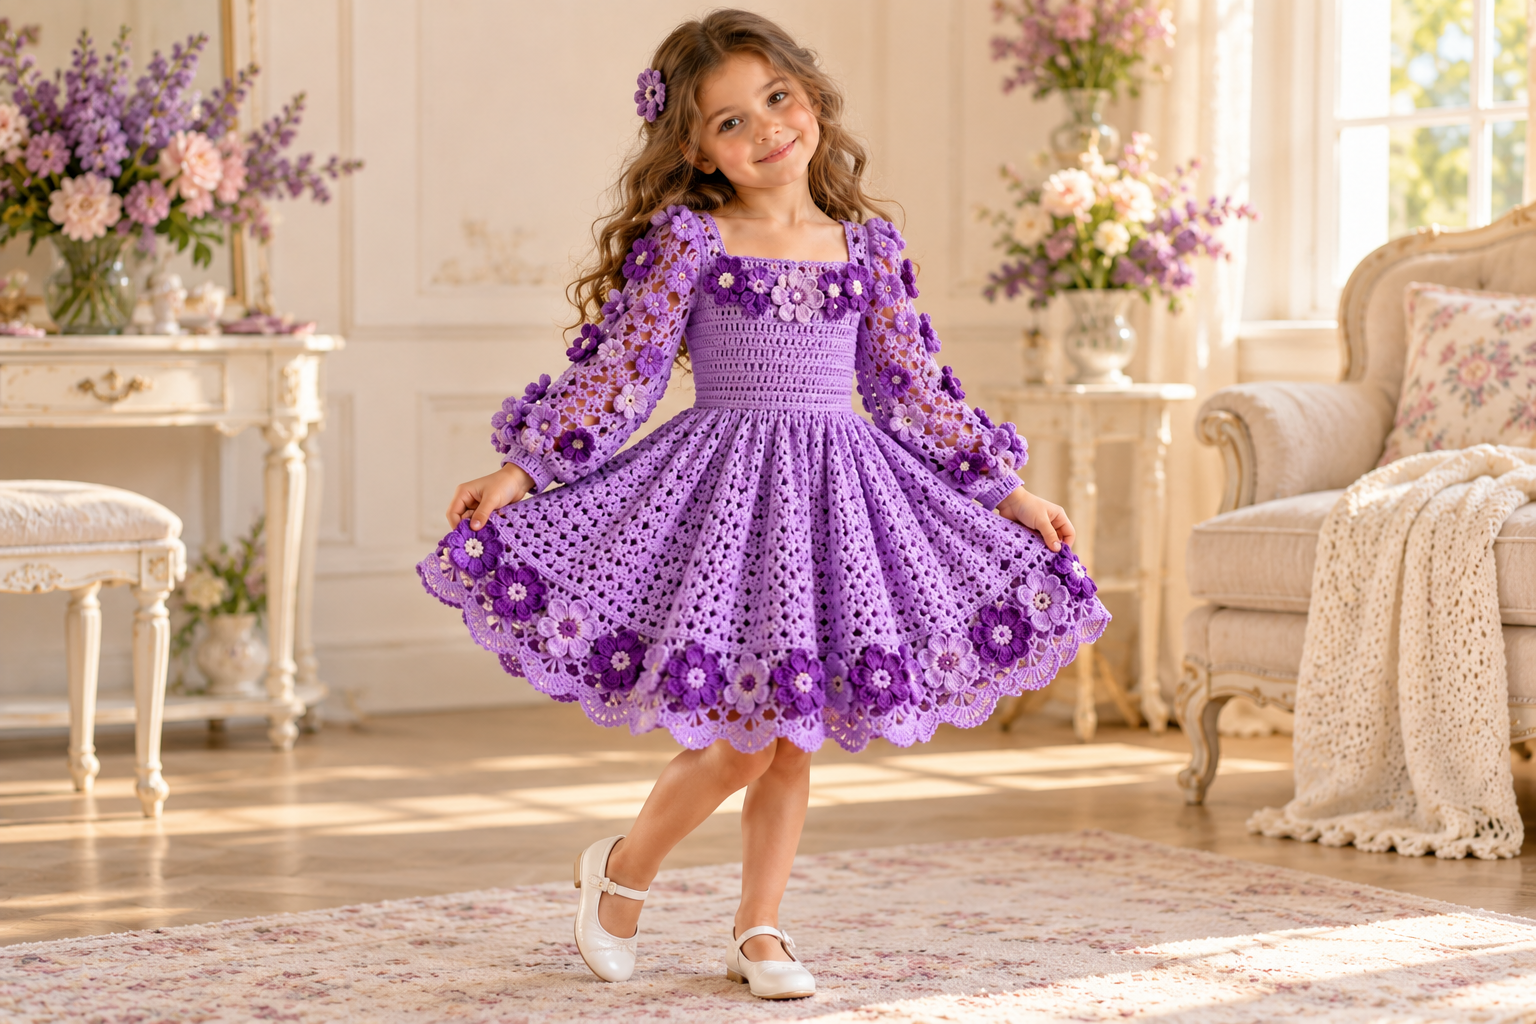
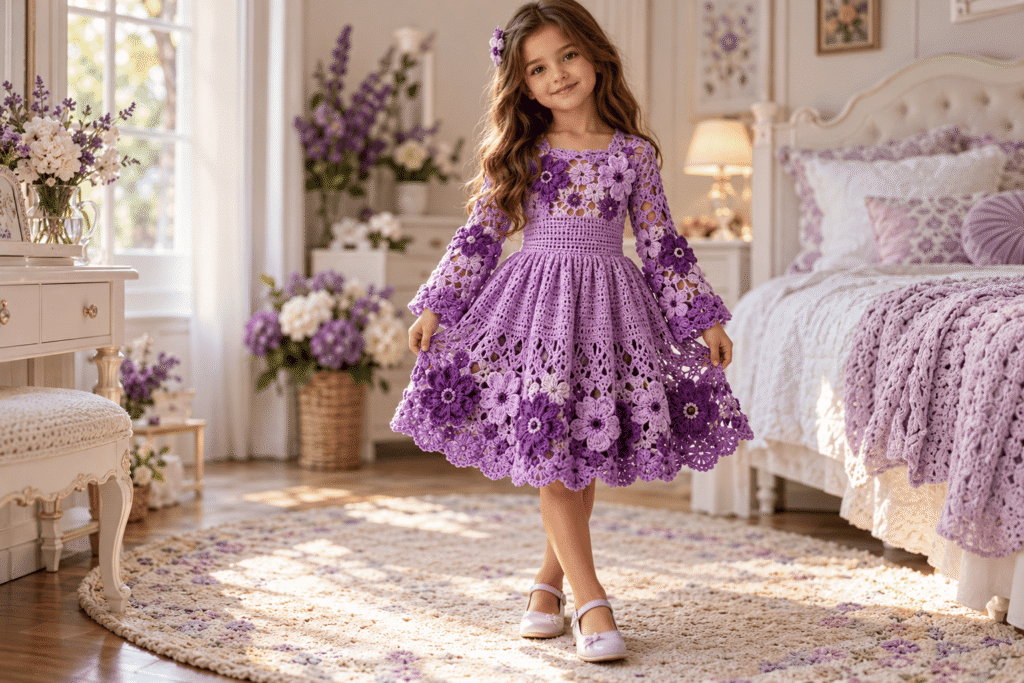
A beautiful crochet dress can turn a simple handmade project into something truly special, and this floral crochet dress is a perfect example. Inspired by the lavender dress shown in the reference, this design combines a structured crochet bodice with an airy skirt, puffed sleeves, and three-dimensional flower motifs around the neckline, sleeves, and hem.
The result is a charming handmade dress that works beautifully for birthdays, photo sessions, family celebrations, spring and summer outings, flower-girl outfits, and special occasions.
This tutorial breaks the project into manageable sections so you can understand exactly how the dress is constructed. You will learn how to crochet the bodice, create the skirt flare, build the floral lace sections, make the sleeves, add the flower motifs, and finish the dress neatly.
Pattern note: The reference image is used as visual inspiration. The tutorial below is an original, adaptable crochet construction rather than a claim that the pictured dress is an existing published pattern.
What Makes This Crochet Dress Special?
The beauty of this design comes from combining several crochet techniques instead of relying on one stitch throughout the entire garment.
The upper bodice has a relatively dense stitch structure that creates shape and stability. The skirt becomes progressively wider, creating a soft, full silhouette. Floral motifs add texture and dimension, while the openwork sections make the dress lighter and more decorative.
The sleeves use the same floral concept, creating a coordinated look from the shoulders down to the cuffs.
Main Features
| Feature | Description |
|---|---|
| Dress style | Floral crochet girl’s dress |
| Main silhouette | Fitted bodice with flared skirt |
| Sleeve style | Long puff sleeves |
| Decorative element | 3D crochet flowers |
| Neckline | Rounded neckline |
| Back | Keyhole/button opening |
| Main stitch | Single crochet and mesh/openwork |
| Skill level | Intermediate |
| Best yarn | DK/light worsted yarn |
| Hook | Approximately 3.0–4.0 mm |
| Construction | Worked in sections |
| Customization | Very easy |
| Best seasons | Spring, summer, autumn |
Materials You’ll Need
Choose a soft yarn that has enough structure to hold the floral motifs without becoming stiff.
Recommended Materials
| Material | Suggested Choice |
|---|---|
| Main yarn | DK/light worsted weight |
| Main color | Lavender, lilac, pink, cream or white |
| Crochet hook | 3.0–4.0 mm |
| Smaller hook | 2.5–3.0 mm for flowers |
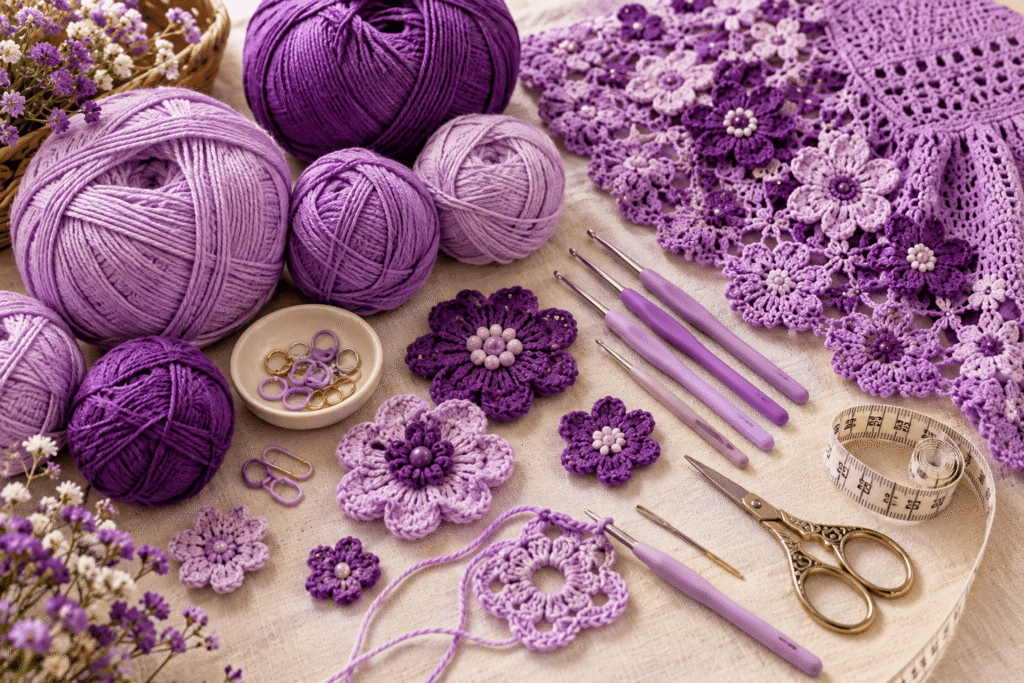
| Tapestry needle | For sewing and weaving ends |
| Stitch markers | 4–8 |
| Scissors | Sharp yarn scissors |
| Measuring tape | For body measurements |
| Buttons | 1–3 small buttons |
| Sewing needle | Optional for button attachment |
For a dress with a look similar to the reference, a soft lavender or violet yarn works especially well.
You can also create a completely different mood with:
- blush pink + cream flowers
- sage green + ivory flowers
- sky blue + white flowers
- butter yellow + cream
- dusty rose + white
- peach + lavender
- soft mint + pink
- ivory + pastel rainbow flowers
How Much Yarn Will You Need?
The exact amount depends on the child’s size, yarn weight, hook size, stitch density, sleeve length and desired skirt fullness.
As a starting point:
| Size | Approximate Yarn |
|---|---|
| 2–3 years | 500–650 g |
| 4–5 years | 600–750 g |
| 6–7 years | 700–850 g |
| 8–9 years | 800–950 g |
| 10–12 years | 900–1,100 g |
Buy a little extra if you are making many flowers because the floral edging can consume more yarn than expected.
Crochet Abbreviations
This tutorial uses standard US crochet terminology.
| Abbreviation | Meaning |
|---|---|
| ch | Chain |
| sc | Single crochet |
| hdc | Half double crochet |
| dc | Double crochet |
| tr | Treble crochet |
| sl st | Slip stitch |
| st | Stitch |
| sts | Stitches |
| sk | Skip |
| inc | Increase |
| dec | Decrease |
| BLO | Back loop only |
| FLO | Front loop only |
| rep | Repeat |
| rnd | Round |
| RS | Right side |
| WS | Wrong side |
Before You Begin: Make a Gauge Swatch
Gauge is particularly important for children’s clothing.
If your stitches are too loose, the dress may become too large and heavy. If your stitches are too tight, the dress may become uncomfortable and smaller than expected.
Make a small swatch using the yarn and hook you plan to use.
For example, you might aim for approximately:
20–22 stitches × 24–26 rows = 10 × 10 cm
This is only a starting point. Your actual gauge will depend on your yarn and tension.
If your swatch is too large, use a smaller hook.
If your swatch is too small, use a larger hook.
Taking the Child’s Measurements
Don’t choose the size based only on age.
Children grow at different rates, so measurements are much more reliable.
Measure:
- Chest circumference
- Waist circumference
- Shoulder width
- Shoulder-to-waist length
- Waist-to-knee length
- Total desired dress length
- Upper-arm circumference
- Wrist circumference
Suggested Finished Measurements
These are useful starting points for customization.
| Size | Chest | Waist | Bodice Length | Dress Length |
|---|---|---|---|---|
| 2–3Y | 54–56 cm | 52–54 cm | 18–20 cm | 48–52 cm |
| 4–5Y | 58–60 cm | 54–56 cm | 21–23 cm | 55–60 cm |
| 6–7Y | 62–64 cm | 56–58 cm | 24–26 cm | 62–68 cm |
| 8–9Y | 66–69 cm | 58–61 cm | 27–29 cm | 69–75 cm |
| 10–12Y | 71–76 cm | 61–65 cm | 30–32 cm | 76–84 cm |
These measurements are guidelines rather than fixed sizing standards. Always compare them with the child you’re making the garment for.
Part 1: Crochet the Bodice
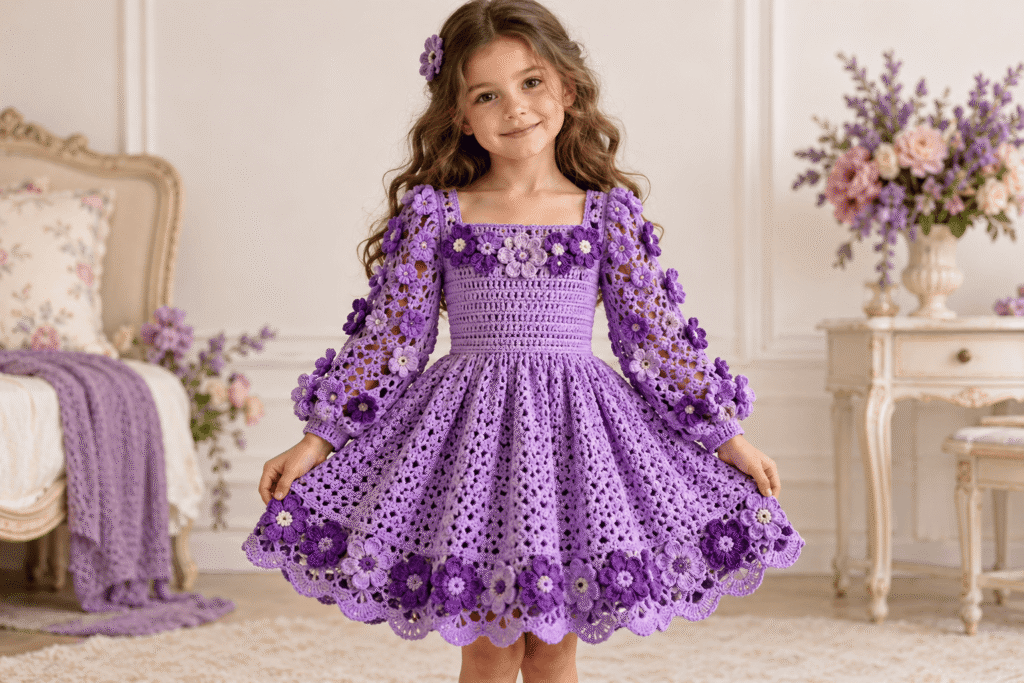
The bodice is the foundation of the entire dress.
For a structured appearance similar to the reference, use a relatively dense stitch such as single crochet or waistcoat-style single crochet.
Step 1: Create the Foundation Chain
Measure around the child’s chest.
You want the finished bodice to have enough ease to allow comfortable movement.
A good starting point is:
Body chest measurement + approximately 2–4 cm ease
Create a chain long enough to reach approximately half the desired circumference if you are working the bodice in two pieces.
Alternatively, you can construct the bodice as a continuous tube.
Step 2: Work the First Row
Single crochet across the foundation chain.
At the end of the row:
ch 1, turn.
Continue working rows of single crochet until the bodice reaches the desired underarm-to-waist measurement.
Keep checking your work against the child’s measurements.
Step 3: Shape the Waist
If you want a slightly fitted waist, reduce a small number of stitches gradually.
For example:
Row: sc across
Next row: sc2tog at selected points
Following rows: sc across
Don’t remove too many stitches at once.
A child’s dress should remain comfortable rather than tightly fitted.
Step 4: Shape the Armholes
When you reach the upper bodice, mark the positions for the armholes.
Leave the center section for the chest and back while creating openings for the arms.
You can shape the armholes by skipping several stitches and working chains over the opening.
For example:
sc across to marker, skip 5–7 sts, ch 6–8, skip 5–7 sts, continue sc.
Adjust this according to the child’s arm circumference.
Step 5: Create the Neckline
For the neckline, work toward the center and gradually decrease stitches.
A simple rounded neckline can be created by:
- working fewer stitches near the center
- decreasing one or two stitches on each side
- continuing until the neckline reaches the desired depth
For the reference-inspired look, leave the neckline relatively modest and rounded.
Part 2: Add the Back Opening
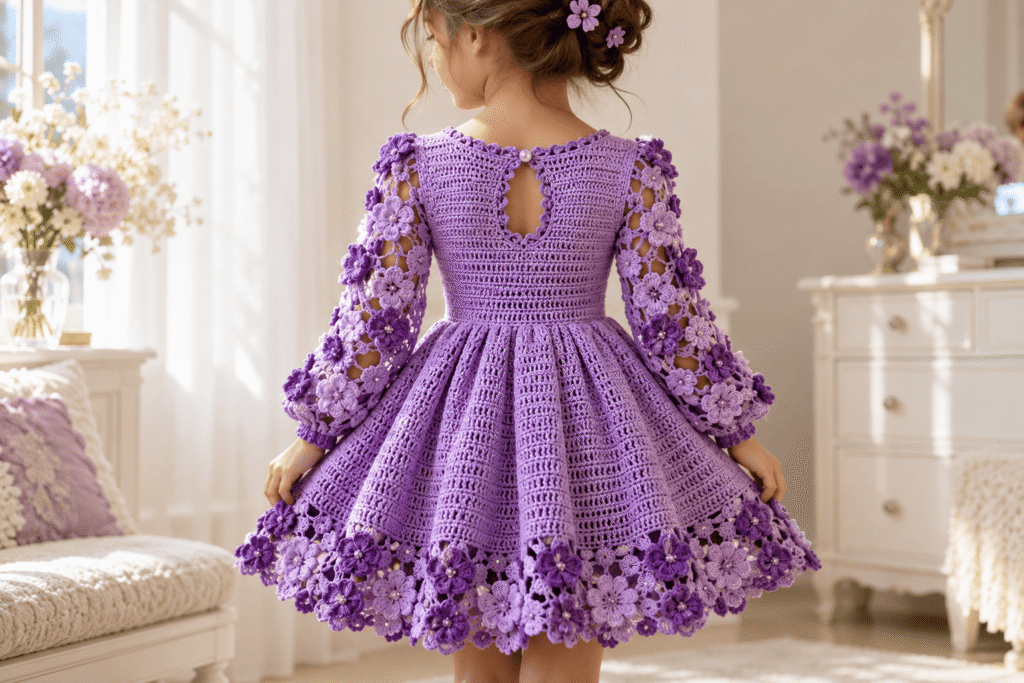
The reference design has an elegant opening near the upper back.
This is also useful because it makes dressing easier.
At the center back, leave an opening approximately:
5–8 cm long
Depending on the size of the child.
Finish the edges with single crochet.
For the closure, you can use:
- one button
- two small buttons
- crochet-covered buttons
- a small tie
- a loop-and-button closure
Simple Button Loop
At the top of the opening:
ch 5–7, sl st into the same area.
Adjust the chain length according to your button size.
Part 3: The Crochet Floral Motif
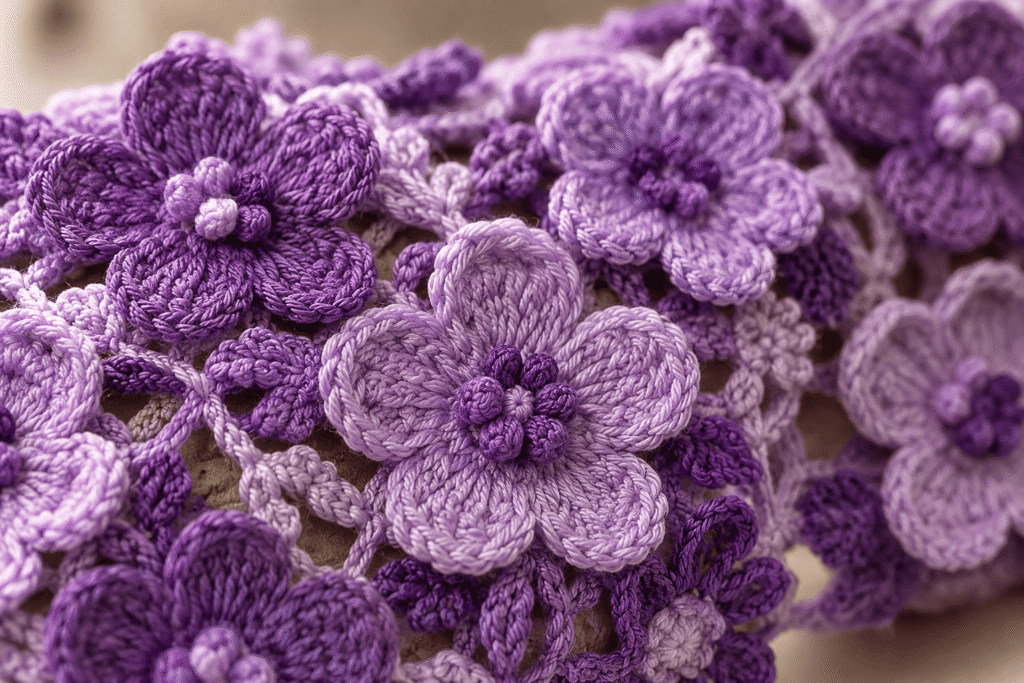
The flowers are one of the most important elements of this design.
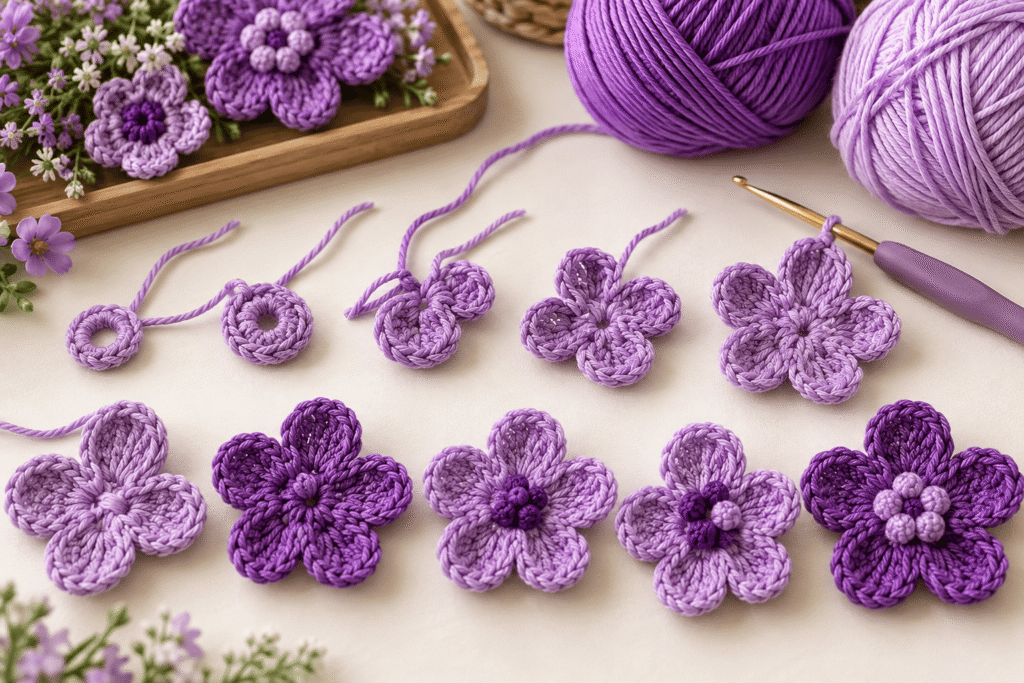
You can use small five-petal flowers around the neckline, sleeves and skirt.
Simple Five-Petal Crochet Flower
Round 1
Make a magic ring.
Work:
ch 2, 10 dc into ring, sl st to first dc.
Pull the center tight.
Round 2: Petals
Attach the contrasting flower color if desired.
For each petal:
sl st into next stitch, ch 2, 3 dc, ch 2, sl st into same stitch.
Repeat around.
You should have approximately five petals.
Fasten off.
Weave in the ends.
Make the Flower More Three-Dimensional
For a raised flower, use:
4 dc or 5 dc per petal
instead of 3 dc.
The larger petals create more dimension.
You can also sew a small contrasting bead or crochet circle into the center.
For children’s garments, make sure decorative pieces are securely attached and age-appropriate.
Part 4: Crochet the Floral Lace Band
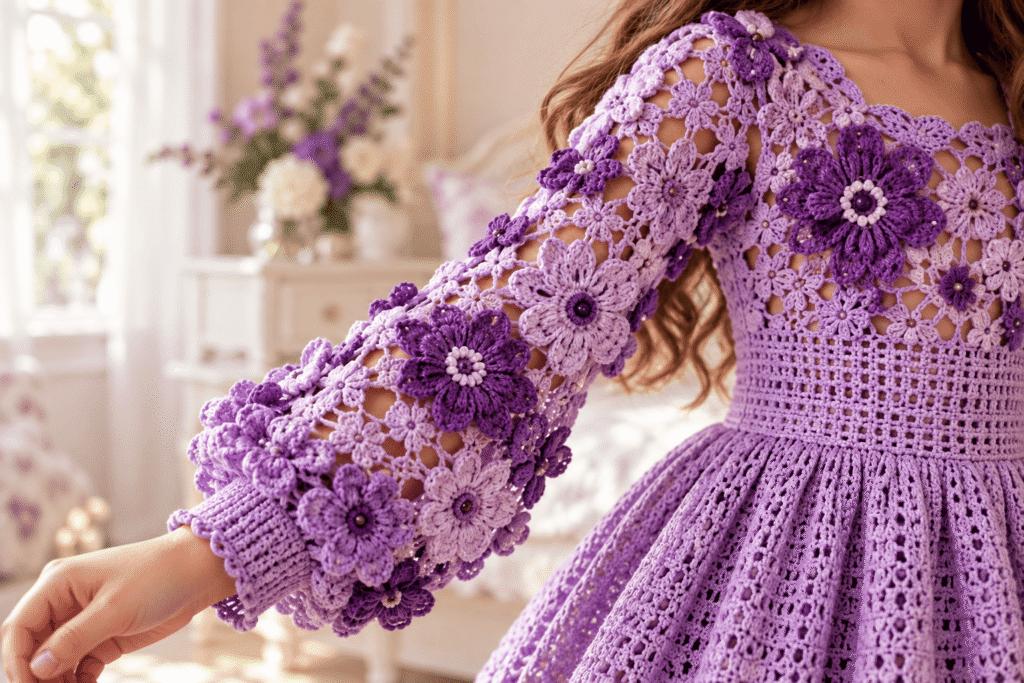
The reference dress has flowers arranged around the neckline and lower skirt.
Instead of sewing every flower individually, you can create connected floral motifs.
Start with a chain long enough to fit the area you are decorating.
Create a flower.
Then chain several stitches.
Create another flower.
Continue until you have the desired length.
This creates a flexible floral trim.
Connecting Two Flowers
After completing the first flower:
ch 3–5
Then begin the next flower.
On the final petal, attach it to the previous flower using a slip stitch.
This creates a connected lace effect.
Part 5: Create the Skirt
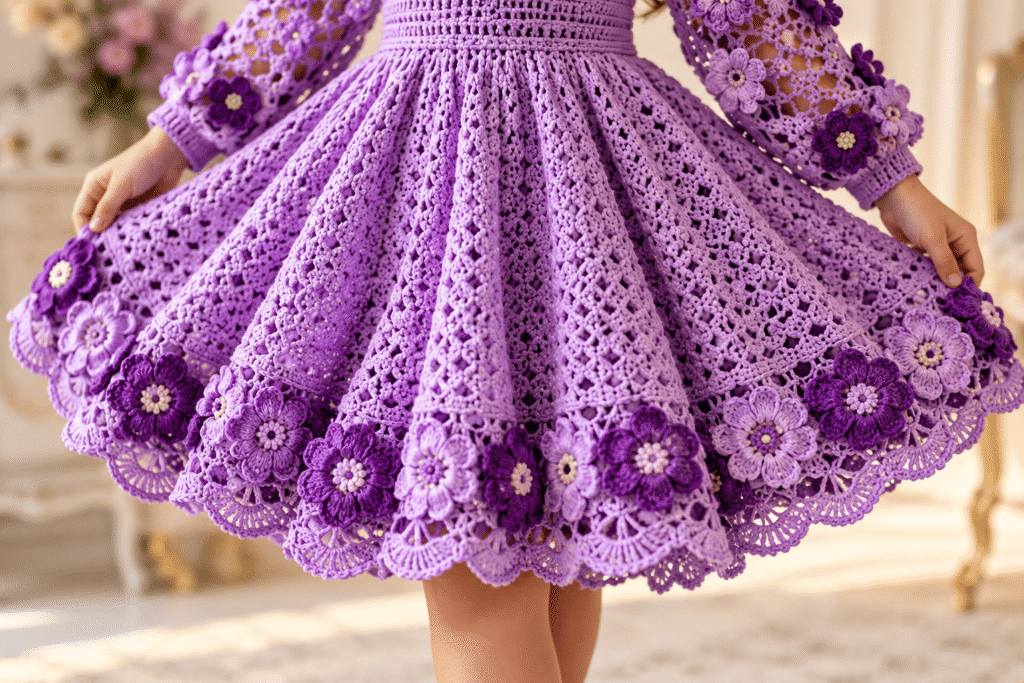
The skirt should gradually become wider than the bodice.
This is where the dress gets its beautiful flare.
Attach your yarn around the bottom edge of the bodice.
Round 1
Work single crochet evenly around the entire waist.
Do not make this round too tight.
Round 2: Begin Increasing
Work:
sc 2, 2 sc in next stitch
Repeat around.
This creates gradual fullness.
Round 3
Work one stitch into each stitch.
Round 4
Increase again at regular intervals.
The more frequently you increase, the fuller the skirt will become.
Example Increase Pattern
| Round | Suggested Construction |
|---|---|
| 1 | sc evenly |
| 2 | sc, inc repeated |
| 3 | sc around |
| 4 | sc 2, inc repeated |
| 5 | sc around |
| 6 | sc 3, inc repeated |
| 7 | sc around |
| 8 | sc 4, inc repeated |
You don’t have to follow these exact numbers.
The important principle is:
Increase gradually and evenly.
Part 6: Create the Openwork Skirt
To reproduce the lighter, decorative appearance from the reference, introduce an open mesh pattern.
A simple mesh row can be:
ch 1, sc in next stitch, ch 2, skip 2 stitches, sc in next stitch.
Repeat around.
On the following row, work:
sc into each chain space, ch 2.
This creates small open spaces.
For a more solid skirt, use fewer mesh rows.
For a more lace-like dress, add additional mesh sections.
Part 7: Create the Flower Border
The lower border is where you can make the dress look especially dramatic.
Work several rows of openwork first.
Then attach your floral motifs.
A simple flower border can alternate:
flower → chain → flower → chain → flower
around the circumference.
For an even fuller hem, attach two flowers to some of the chain spaces.
This creates a layered floral effect.
Part 8: Create the Puff Sleeves
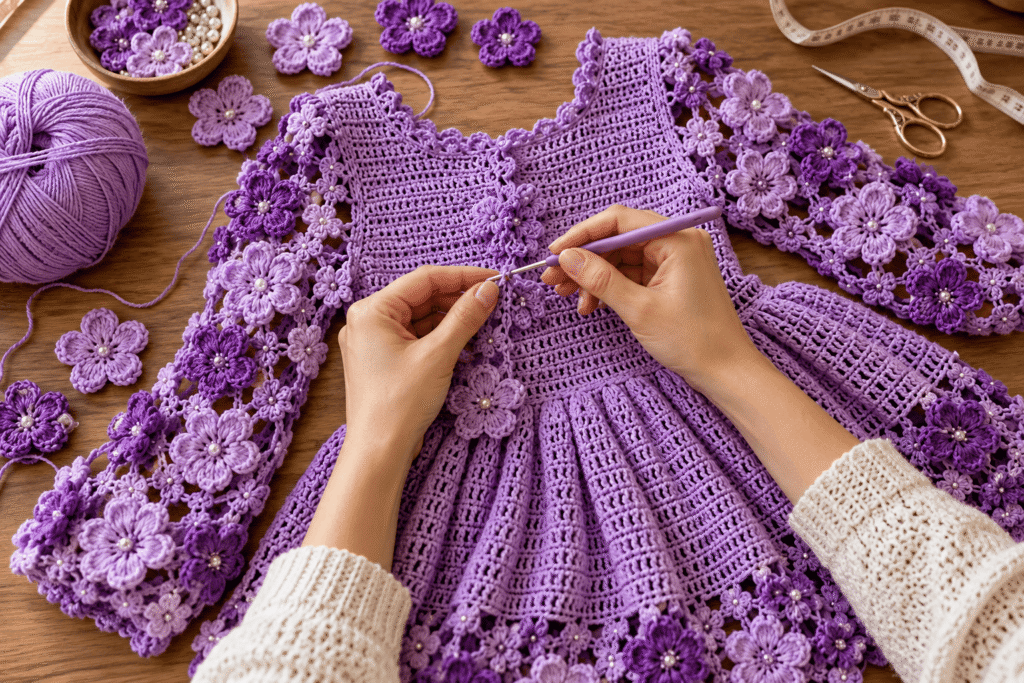
The sleeves are one of the defining characteristics of this dress.
Start at the armhole.
Attach yarn around the armhole opening.
Sleeve Round 1
Work single crochet evenly around the armhole.
Sleeve Round 2
Increase gradually.
For example:
sc 2, inc
repeated around.
Sleeve Round 3–6
Continue working evenly while increasing slightly.
This creates the puffed shape.
Add Floral Openwork
After establishing the sleeve volume, switch to an openwork stitch.
Use:
sc, ch 2, skip 2
repeated around.
Continue for several rounds.
Part 9: Add Flowers to the Sleeves
Make approximately 5–10 small flowers per sleeve depending on the child’s size.
Arrange them around:
- the upper sleeve
- outer arm
- lower sleeve
- cuff
Sew them securely using matching yarn.
For a more integrated appearance, attach flowers while crocheting rather than sewing them afterward.
Part 10: Crochet the Cuffs
The cuffs should be slightly narrower than the sleeve.
Work several rounds of single crochet.
If you want a ribbed cuff:
Work single crochet through the back loop only.
Repeat until the cuff reaches approximately:
3–5 cm
depending on size.
This creates a soft fitted finish.
Part 11: Crochet the Neckline
The neckline should have a clean finish.
Attach yarn around the neckline and work:
1–2 rounds of sc
For a more decorative edge, use:
sc, ch 2, skip 1
or a small shell stitch.
Avoid making the neckline too tight.
Part 12: Decorative Flower Neckline
For a design closer to the reference, add small flowers around the upper chest and shoulder area.
Place flowers symmetrically.
A good arrangement is:
small flower → space → flower → space → flower
around the neckline.
Then add a second layer of flowers near the shoulder seams.
This creates the floral lace appearance visible in the reference.
Part 13: Add the Skirt’s Floral Hem
For the most dramatic finish, create a large floral border.
You can use the same five-petal flower but increase the petal size.
Larger Flower
Make a magic ring.
Work:
10–12 dc into ring
Join.
For each petal:
ch 2, 4–5 dc, ch 2, sl st
Repeat.
These larger flowers can be arranged along the bottom edge.
The result is a scalloped floral hem similar to the inspiration image.
Part 14: Finishing the Dress
Once all sections are complete, inspect the entire dress carefully.
Check:
- neckline
- armholes
- sleeve seams
- waist
- skirt
- floral attachments
- button opening
- loose yarn ends
Weave all ends securely.
Trim excess yarn only after confirming that the ends are properly secured.
Blocking the Dress
Blocking can dramatically improve the final appearance.
Gently dampen the finished dress.
Lay it flat on a clean towel or blocking mat.
Shape:
- neckline
- sleeves
- skirt
- floral border
- hem
Allow it to dry completely.
Do not aggressively stretch children’s crochet garments.
How to Customize the Dress
One of the biggest advantages of this pattern is how easy it is to customize.
Shorter Version
For a summer dress, reduce the skirt length.
Longer Version
Continue the skirt rounds until it reaches the desired length.
Sleeveless Version
Stop after the bodice and finish the armholes with a decorative crochet border.
Short-Sleeve Version
Work only 4–6 sleeve rounds before finishing with a floral cuff.
More Fullness
Increase more frequently around the waist.
Less Fullness
Use fewer increases.
Color Combination Ideas
| Style | Main Color | Flower Color |
|---|---|---|
| Lavender Garden | Lavender | White |
| Rose Garden | Dusty pink | Cream |
| Spring Meadow | Sage | Ivory |
| Sweet Blue | Baby blue | White |
| Sunshine | Butter yellow | Cream |
| Berry Blossom | Mauve | Burgundy |
| Fairy Garden | Lilac | Pink + cream |
| Neutral Vintage | Beige | Brown + ivory |
Three Easy Flower Variations
You don’t have to use the same flower throughout the dress.
Tiny Flower
Use:
5–6 dc
in the center.
Best for:
- neckline
- cuffs
- shoulder details
Medium Flower
Use:
8–10 dc
in the center.
Best for:
- sleeves
- bodice
- upper skirt
Large Flower
Use:
10–12 dc
and larger petals.
Best for:
- skirt hem
- waist
- statement details
How to Make the Dress Fit Better
The most important measurement is not the child’s age.
It’s the chest and waist circumference.
If the bodice is too tight, add additional stitches.
If the bodice is too loose, remove stitches gradually.
For the skirt, don’t worry about matching the exact number of stitches from another size.
Instead, focus on achieving the correct circumference and desired fullness.
Troubleshooting Guide
| Problem | Likely Cause | Solution |
|---|---|---|
| Bodice is too tight | Gauge too small | Use larger hook |
| Bodice is too loose | Gauge too large | Use smaller hook |
| Skirt doesn’t flare | Too few increases | Add increase rounds |
| Skirt looks too full | Too many increases | Reduce increases |
| Flowers curl | Too much tension | Relax tension |
| Neckline stretches | Too many stitches | Add a tighter edging |
| Sleeves look flat | Not enough increases | Add increase rounds |
| Hem waves excessively | Too many increases | Reduce increase frequency |
| Dress feels heavy | Yarn is too thick | Choose lighter yarn |
| Flowers look hidden | Motifs too small | Use larger flowers |
Beginner Tips for a Better Result
If you’re making this dress for the first time, don’t begin with the entire garment.
Start with one granny-style floral motif.
Practice until your tension is consistent.
Then make a small bodice swatch.
Once you’re happy with the fabric, begin the actual dress.
It’s much easier to correct a small swatch than an entire finished garment.
Another useful technique is to keep a written record of every round.
For example:
Round 1 — 72 sts
Round 2 — 72 sts
Round 3 — 80 sts
Round 4 — 80 sts
This makes resizing and repeating the project much easier.
How to Make Different Sizes
The easiest way to resize this dress is to modify the bodice first.
To Make It Smaller
Reduce:
- foundation stitches
- bodice rows
- armhole width
- sleeve circumference
Then adjust the skirt accordingly.
To Make It Larger
Increase:
- foundation stitches
- bodice width
- number of skirt stitches
- sleeve circumference
Always check the actual body measurement instead of simply adding a fixed number of stitches.
Styling the Finished Crochet Dress
This floral crochet dress is already decorative, so simple accessories work beautifully.
Try pairing it with:
- white Mary Jane shoes
- ballet flats
- cream tights
- a simple crochet headband
- a matching flower hair clip
- white ankle socks
- a tiny cardigan
- a handmade crochet purse
For photographs, soft neutral backgrounds help the floral crochet details stand out.
Matching Crochet Accessories
You can turn this into a complete handmade outfit.
Crochet Flower Headband
Make a narrow crochet band and attach one or three matching flowers.
Crochet Baby Purse
Use the same yarn color and create a small rectangular or circular purse.
Crochet Hair Clips
Make miniature versions of the flowers and attach them to clip bases.
Matching Shoes
Simple crochet Mary Jane-style shoes can complement the dress beautifully.
Mini Crochet Cardigan
Use the same flower motif around the cuffs and neckline to create a coordinated outfit.
Photo Ideas for Your Finished Dress
If you’re photographing your project for a crochet blog or Pinterest, create several different images.
Photo 1: Full Front View
Show the entire dress clearly from neckline to hem.
Photo 2: Back View
Highlight the keyhole opening and button closure.
Photo 3: Sleeve Close-Up
Capture the floral sleeve texture.
Photo 4: Hem Close-Up
Show the three-dimensional flowers.
Photo 5: Bodice Detail
Focus on the dense crochet stitches.
Photo 6: Flat Lay
Arrange the finished dress with:
- crochet hook
- yarn
- flowers
- scissors
- measuring tape
Photo 7: Making Process
Photograph hands crocheting the floral motif.
This is particularly useful for demonstrating that the project is handmade.
Care Instructions
Because this is a children’s crochet garment, gentle care is important.
Wash according to the yarn manufacturer’s instructions.
For most handmade pieces, gentle hand washing is a safer choice.
Use cool or lukewarm water.
Avoid aggressive wringing.
Instead, gently press excess water out with a towel.
Lay the dress flat to dry and reshape the skirt and flowers while damp.
Avoid hanging a wet crochet dress because the weight of the water can stretch the garment.
Safety Notes for Children’s Crochet Clothing
If the dress is intended for a baby or very young child, take extra care with decorative components.
Secure all flowers firmly.
Avoid loose beads, detachable embellishments, or small pieces that could become choking hazards.
Check buttons regularly.
Make sure there are no long loose yarn strands inside the garment.
For babies and toddlers, simpler sewn or crocheted details are generally preferable to detachable decorations.
Quick Pattern Overview
| Section | Main Technique |
|---|---|
| Bodice | Dense sc fabric |
| Waist | Gradual shaping |
| Armholes | Chain-space openings |
| Neckline | Sc edging |
| Skirt | Increasing rounds |
| Lace section | Ch-space mesh |
| Flowers | 5-petal crochet motifs |
| Sleeves | Increasing rounds + lace |
| Cuffs | BLO sc |
| Hem | Large floral motifs |
| Back | Keyhole + button |
Project Checklist
Before starting:
☐ Take measurements
☐ Choose yarn
☐ Make gauge swatch
☐ Select hook size
☐ Decide color combination
☐ Prepare stitch markers
During construction:
☐ Crochet bodice
☐ Shape waist
☐ Create armholes
☐ Shape neckline
☐ Add back opening
☐ Crochet skirt
☐ Add increases
☐ Add lace sections
☐ Crochet sleeves
☐ Make flowers
☐ Attach floral details
☐ Finish cuffs
☐ Finish hem
Before wearing:
☐ Weave in ends
☐ Check seams
☐ Check buttons
☐ Check flowers
☐ Block garment
☐ Allow to dry completely
☐ Check overall fit
Final Thoughts
This floral crochet dress is a wonderful project if you want something more special than a basic children’s crochet garment. The combination of a structured bodice, flowing skirt, puff sleeves and dimensional flowers creates a dress that feels both vintage-inspired and whimsical.
The most important thing is not to treat the stitch counts as unchangeable rules. Crochet garments work best when you use the pattern structure together with the child’s actual measurements.
Start with the bodice, establish a comfortable fit, then build the skirt outward with controlled increases. Once the basic garment is complete, the floral details allow you to make the dress completely your own.
Change the colors, make the flowers larger or smaller, shorten the sleeves, extend the skirt, add a matching headband, or create an entire coordinated crochet outfit.
The basic construction gives you the foundation, while the floral details are where you can really make the design unique.







