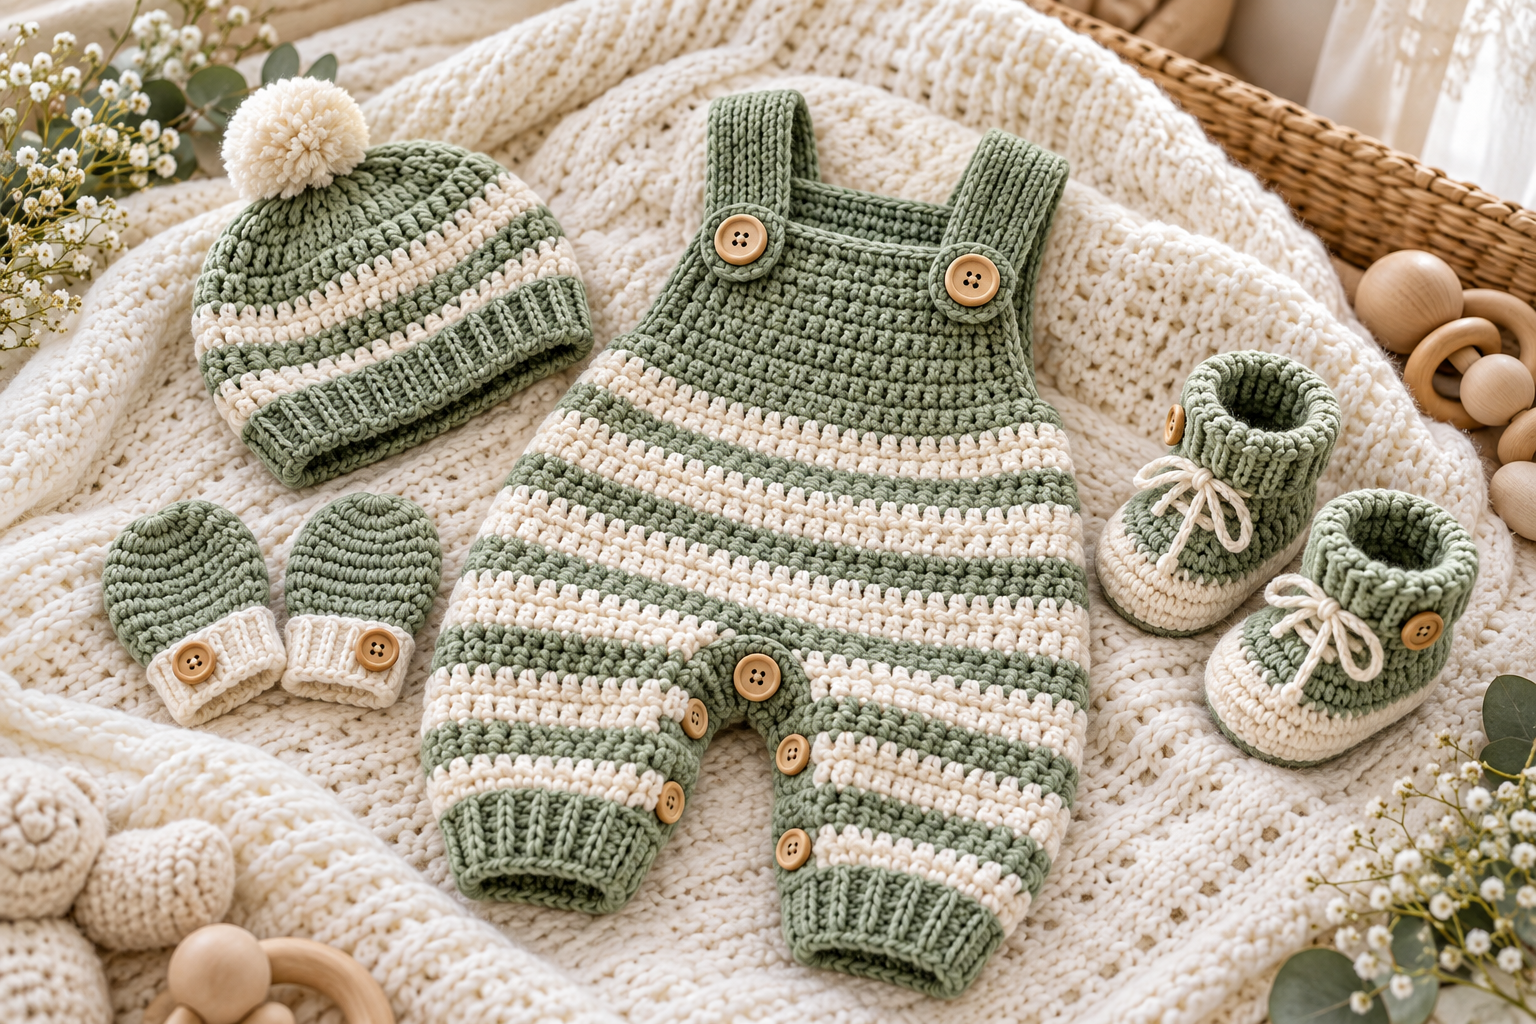
A handmade crochet baby set is one of those projects that feels special from the very first stitch. A coordinated romper, matching hat, tiny mittens, and little booties can become a beautiful newborn gift, a coming-home outfit, or a cozy handmade set for everyday wear.
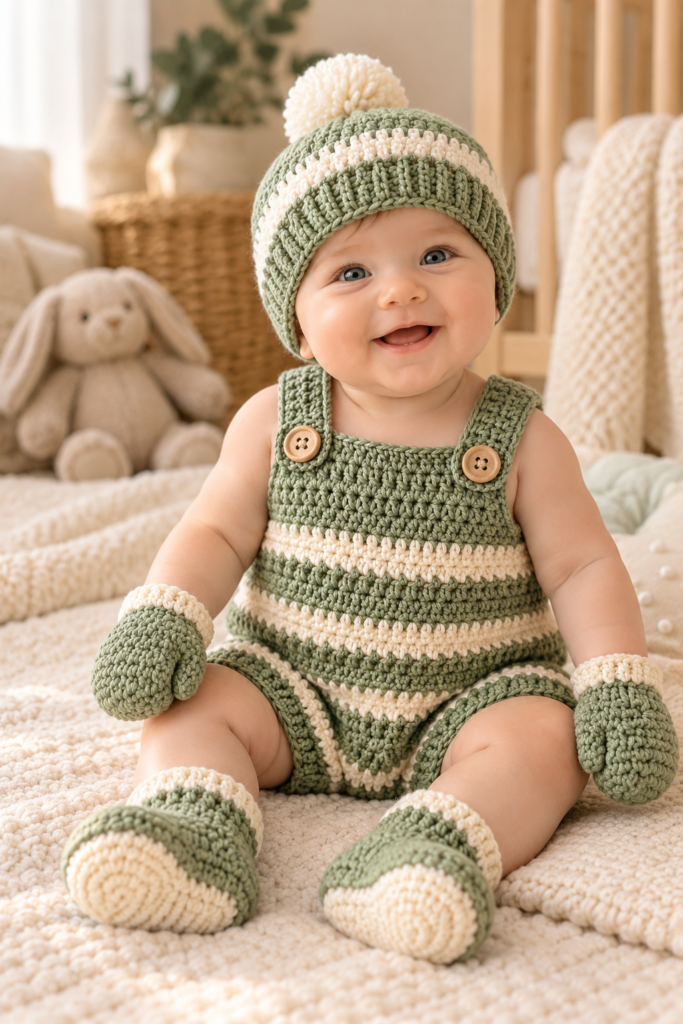
The inspiration for this set is a soft sage green and ivory striped crochet baby outfit, with a simple rectangular texture, buttoned shoulder straps, a matching beanie, tiny mittens, and booties. The design below is written as an original, adaptable pattern inspired by the look, rather than a transcription of the pattern shown in the image.
The set uses beginner-friendly stitches and simple shaping, so you can customize the colors, length, stripe width, and sizing without having to completely redesign the project.
What You Will Make
| Piece | Difficulty | Approx. finished size | Main technique |
|---|---|---|---|
| Baby romper | Easy–Intermediate | 0–12 months | Rows, shaping, seaming |
| Ribbed-style hat | Easy | 0–12 months | Rounds |
| Baby mittens | Easy | 0–12 months | Rounds |
| Baby booties | Easy–Intermediate | 0–12 months | Rounds + shaping |
| Optional straps | Easy | Adjustable | Rows + buttons |
The pattern is designed around US crochet terminology.
Materials
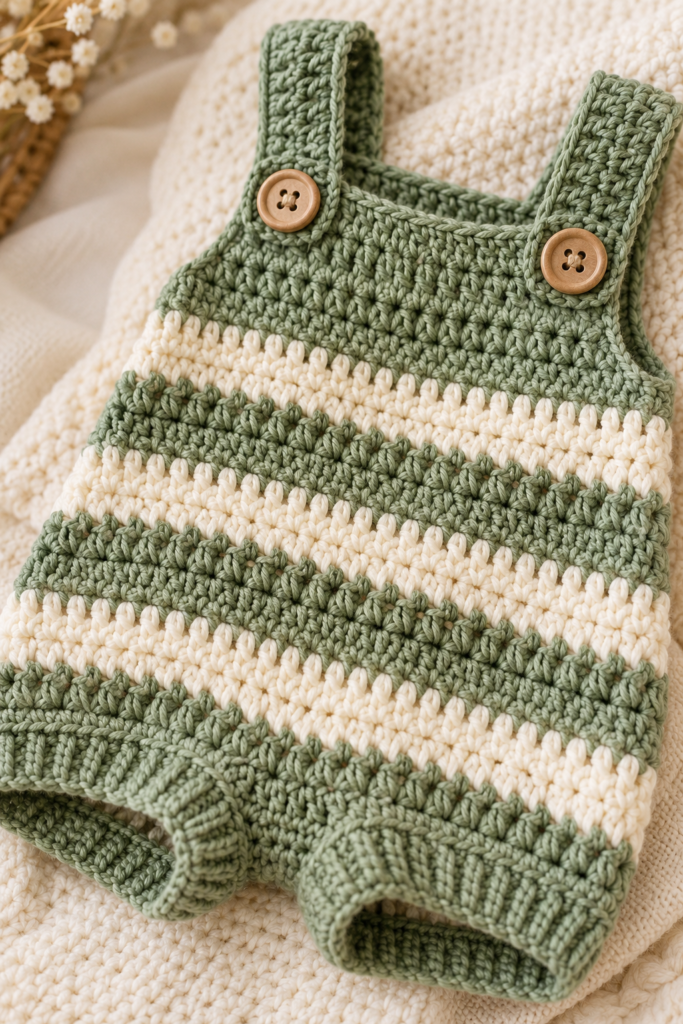
For the complete set, prepare:
- DK or light worsted-weight baby yarn
- Main color: approximately 150–250 g depending on size
- Contrast color: approximately 50–100 g
- 3.5 mm crochet hook
- 3.0 mm crochet hook for tighter cuffs, if desired
- Yarn needle
- Stitch markers
- Scissors
- Measuring tape
- 4–6 small baby-safe buttons
- Optional: sewing thread for attaching buttons
- Optional: small amount of elastic for the leg openings
Recommended Yarn
Choose a soft yarn intended for baby garments.
A good combination is:
Color A: sage green
Color B: ivory or cream
You can also reverse the colors:
Color A: cream
Color B: sage green
For a more modern look, try:
| Main Color | Contrast |
|---|---|
| Sage green | Ivory |
| Dusty blue | Cream |
| Terracotta | Oatmeal |
| Soft pink | Natural |
| Mustard | Cream |
| Lavender | White |
| Chocolate brown | Beige |
Avoid very fuzzy yarn for this project because the stitch definition becomes difficult to see and loose fibers can be inconvenient around babies.
Crochet Abbreviations
| Abbreviation | Meaning |
|---|---|
| ch | chain |
| sc | single crochet |
| hdc | half double crochet |
| dc | double crochet |
| sl st | slip stitch |
| st | stitch |
| sts | stitches |
| inc | increase |
| dec | decrease |
| BLO | back loop only |
| FLO | front loop only |
| rep | repeat |
| rnd | round |
| RS | right side |
| WS | wrong side |
Gauge
For the romper, work a small swatch using the same yarn and hook.
A useful starting gauge is approximately:
18–20 sc × 20–22 rows = 10 × 10 cm
Gauge can vary considerably depending on yarn and tension, so don’t rely only on the hook size.
For baby clothing, measure the fabric itself and adjust your hook if necessary.
If your fabric is too loose:
→ use a smaller hook.
If your fabric is too tight:
→ use a larger hook.
Part 1: Crochet Baby Romper
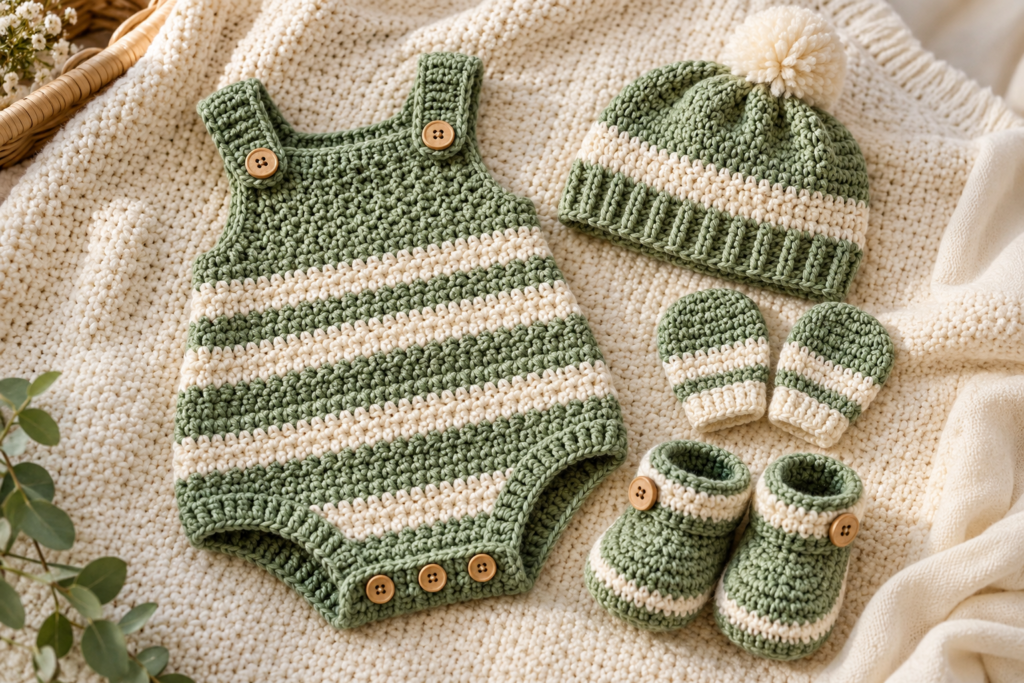
The romper is constructed from two main leg sections that are joined at the center, followed by the body and shoulder straps.
The design intentionally keeps the construction simple so you can modify the length.
Suggested Finished Measurements
| Size | Approx. chest | Approx. body length | Leg opening |
|---|---|---|---|
| 0–3 months | 40 cm | 32 cm | 10 cm |
| 3–6 months | 43 cm | 35 cm | 11 cm |
| 6–12 months | 46 cm | 38 cm | 12 cm |
These are approximate garment measurements rather than exact baby measurements.
For a growing baby, a little positive ease is useful.
Stripe Plan
The striped appearance is created by alternating two colors.
An easy sequence is:
4 rows Color A + 2 rows Color B
Repeat this sequence throughout the body.
For a more subtle design:
6 rows Color A + 2 rows Color B
For narrow stripes:
2 rows Color A + 2 rows Color B
Important Stripe Tip
Don’t cut the yarn after every stripe.
Carry the unused color neatly up the side when possible, or change colors at the final yarn-over of the last stitch.
This reduces the number of ends you need to weave in.
Romper: Left Leg
With Color A, chain:
34 ch for approximately 0–3 months.
For larger sizes:
- 3–6 months: 38 ch
- 6–12 months: 42 ch
Adjust the starting chain if necessary to achieve your desired leg-opening circumference.
Row 1
Sc in the second chain from hook.
Sc across.
You should have:
33 sc
for the smallest size.
Row 2
Ch 1.
Turn.
Sc across.
Rows 3–8
Repeat Row 2.
You now have a short rectangular leg section.
For the larger sizes, work additional rows until the leg length measures approximately:
- 0–3 months: 7–8 cm
- 3–6 months: 8–9 cm
- 6–12 months: 9–10 cm
Fasten off.
Right Leg
Repeat exactly the same process.
Do not fasten off at the end if you want to join the legs immediately.
Joining the Legs
Place the two leg pieces side by side.
The inside edges should face each other.
Use stitch markers to hold the center approximately 8–10 stitches together.
Joining Row
With Color A:
Ch 1.
Sc across the first leg.
Continue directly across the joining chains.
Sc across the second leg.
You now have one long row connecting both legs.
This creates the crotch area.
Why This Construction Works
The separate leg sections give the romper a natural opening between the legs while allowing the upper body to remain one continuous piece.
It also makes the garment easier to customize.
Building the Body
Continue working sc rows across the entire width.
For the striped effect, change colors according to your stripe plan.
Body Row
Ch 1.
Sc across.
Turn.
Repeat.
Continue until the body section measures approximately:
| Size | Body length from crotch |
|---|---|
| 0–3 months | 18–20 cm |
| 3–6 months | 20–22 cm |
| 6–12 months | 22–25 cm |
Keep checking the garment against your measurements rather than relying only on row counts.
Creating the Armholes
When the body reaches the desired length, mark the approximate armhole positions.
For a simple symmetrical construction:
- Count the total stitches.
- Divide them into three sections.
- Mark the center body section.
- Leave approximately 4–6 stitches unworked on each side for the armholes.
The exact number can be adjusted depending on your gauge.
Front Section
Work across the first section.
Turn.
Continue for approximately 4–6 rows.
Fasten off.
Back Section
Rejoin yarn at the opposite armhole.
Work the same number of rows.
Keep the two sides symmetrical.
Shoulder Straps
The straps can be made separately or continued directly from the upper edge.
For each strap:
Ch 8.
Sc across.
Continue working rows until the strap measures approximately:
8–10 cm
For a longer adjustable strap, make it 10–12 cm.
At the end of the strap, create a buttonhole.
Buttonhole Row
Sc 2.
Ch 2.
Skip 2 sts.
Sc across.
The opening should be large enough for your chosen button.
Work one final row of sc.
Fasten off.
Repeat for the second strap.
Romper Edging
A simple edging gives the garment a cleaner finished appearance.
Join Color B around one leg opening.
Work:
sc around
Join with sl st.
Repeat around the second leg.
You can also add a decorative border:
sc, ch 1, skip 1, sc
Repeat around the opening.
This creates a delicate openwork edge.
Optional Buttoned Crotch
For easier diaper changes, add buttons along the bottom.
Place 2–3 buttons evenly across one side.
On the opposite side, crochet corresponding buttonholes.
This makes the romper much more practical for everyday use.
Button Placement
| Size | Suggested buttons |
|---|---|
| 0–3 months | 2 |
| 3–6 months | 2–3 |
| 6–12 months | 3 |
Use securely attached, baby-safe buttons and inspect them regularly.
Part 2: Matching Crochet Baby Hat
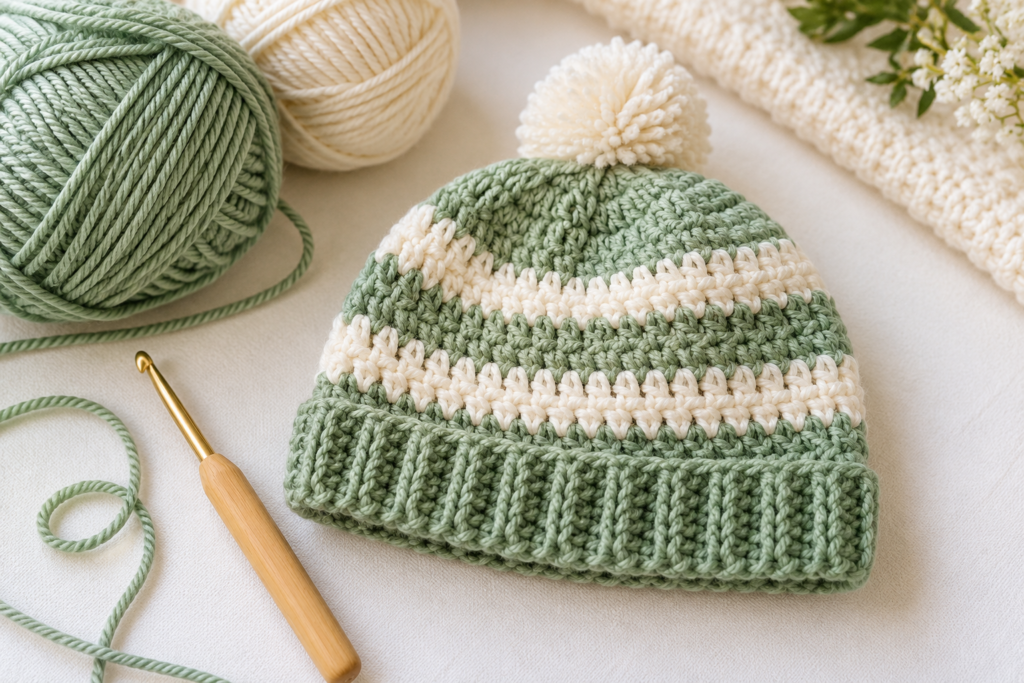
The matching hat uses simple increases followed by straight rounds.
The basic construction is:
crown → sides → brim
Hat Size Guide
| Size | Approx. head circumference |
|---|---|
| Newborn | 32–35 cm |
| 0–3 months | 35–38 cm |
| 3–6 months | 38–42 cm |
| 6–12 months | 42–45 cm |
For the best fit, measure the baby’s head circumference and make the hat approximately 1–2 cm smaller because crochet fabric has some stretch.
Hat Pattern
Using Color A, make a magic ring.
Round 1
6 sc into magic ring.
6 sts
Round 2
Inc in each stitch.
12 sts
Round 3
(sc, inc) around.
18 sts
Round 4
(2 sc, inc) around.
24 sts
Round 5
(3 sc, inc) around.
30 sts
Continue increasing in this manner until the crown reaches the appropriate diameter.
A useful formula is:
finished crown diameter ≈ head circumference ÷ 3.14
For example:
40 cm head circumference ÷ 3.14 ≈ 12.7 cm crown diameter.
Once the crown reaches the required diameter, stop increasing.
Hat Sides
Work sc around without increases.
Continue until the hat reaches:
- Newborn: approximately 12 cm
- 0–3 months: approximately 13 cm
- 3–6 months: approximately 14 cm
- 6–12 months: approximately 15–16 cm
Try the hat on a measuring form or compare it with your baby’s measurements.
Hat Stripe Pattern
For the look shown in the inspiration image:
Rounds 1–6: Color A
Rounds 7–8: Color B
Rounds 9–14: Color A
Rounds 15–16: Color B
Continue the sequence.
For a stronger striped appearance, alternate every 2 rounds.
Hat Brim
Switch to Color B.
Work:
BLO sc around
for 4–6 rounds.
The back-loop-only technique creates horizontal ridges and gives the brim a ribbed appearance.
Fasten off and weave in the ends.
Optional Pom-Pom
Make a small pom-pom using Color A.
Attach it securely to the top of the hat.
For a baby garment, avoid excessively large or loosely attached decorative pieces.
Part 3: Crochet Baby Mittens
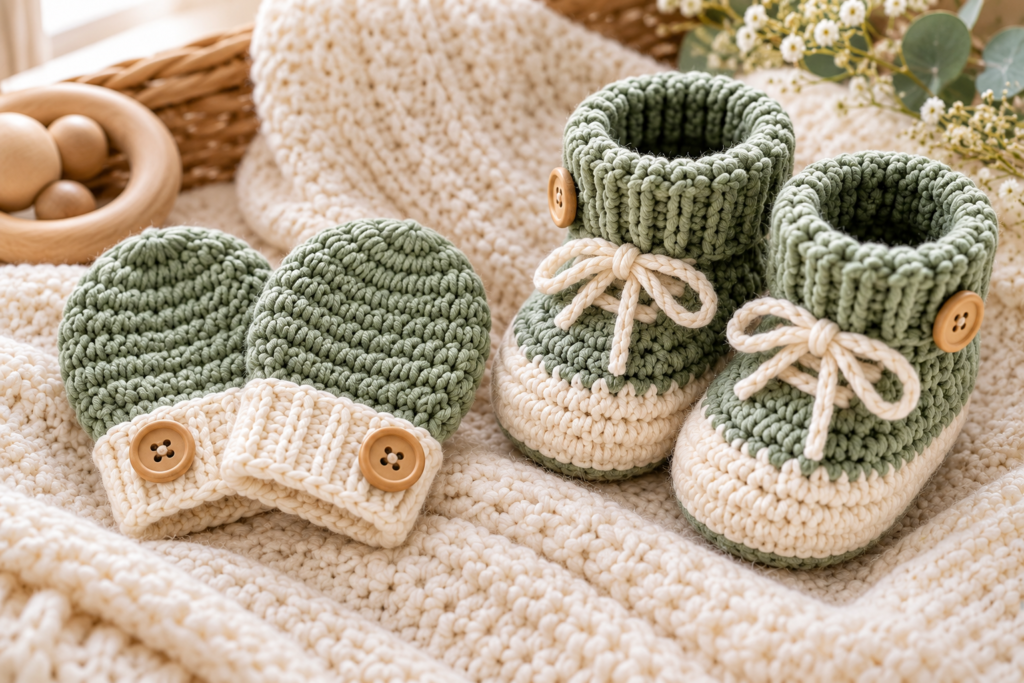
These tiny mittens are quick and use very little yarn.
Make two identical pieces.
Cuff
Using Color A:
Ch 11.
Sc in second chain from hook.
Sc across.
Repeat for approximately 8–10 rows.
Fold the rectangle in half.
Slip stitch the short edges together to form the cuff.
Turn the cuff right side out.
Mitten Body
Join yarn around the cuff opening.
Work sc evenly around.
For a small mitten, approximately 20–24 stitches is a useful starting point.
Round 1
Sc around.
Round 2
Sc around.
Round 3
Sc around.
Continue until the mitten measures approximately 7–9 cm from cuff to top.

Shaping the Top
Work decreases evenly:
sc 2, dec
Repeat around.
Next round:
sc, dec
Repeat.
Continue decreasing until approximately 6–8 stitches remain.
Cut yarn.
Thread the tail through the remaining stitches.
Pull closed.
Weave in securely.
Optional Thumb
For a simpler newborn mitten, you can leave the mitten without a thumb.
For older babies, add a small thumb section.
Join yarn approximately 4–5 stitches from the side.
Work:
4–6 sc around.
Continue for 3–4 rounds.
Decrease and close.
This gives the mitten more natural shaping.
Part 4: Crochet Baby Booties
The booties are worked from the sole upward.
Make two identical booties.
Sole
Using Color B:
Ch 8.
Round 1
Sc in second chain from hook.
Sc across the chain.
Work 3 sc in the final chain.
Continue along the opposite side of the chain.
Sc across.
Work 2 sc in the final stitch.
Join with sl st.
You should now have an oval-shaped sole.
Round 2
Ch 1.
Sc around.
Increase around both rounded ends as needed to maintain the oval shape.
The exact stitch count will depend on your starting chain and yarn gauge.
Round 3
Continue sc around.
Check the sole against the baby’s foot.
For a 0–3 month bootie, aim for approximately:
9–10 cm sole length
For 3–6 months:
10–11 cm
For 6–12 months:
11–12 cm
These are starting measurements rather than strict requirements.
Creating the Bootie Sides
Once the sole reaches the correct length:
Work one round of sc through the back loop only.
This creates a visual ridge separating the sole from the upper.
Then continue working sc around for approximately 4–6 rounds.
Shaping the Toe
Place a marker at the center front.
Work decreases across the front portion.
Example:
sc 3, dec
Repeat across the toe area.
Continue working the remaining stitches normally.
The front should gradually curve upward.
Bootie Cuff
Switch to Color A.
Work:
BLO sc around
for 3–5 rounds.
This creates a stretchy ribbed-looking cuff.
Fasten off.
Optional Button Detail
For a decorative finish, sew one small button onto the outer side of each bootie.
Make sure the button is firmly attached and appropriate for the baby’s age.
Color-Change Method for the Entire Set

One of the easiest ways to make the whole project look professionally coordinated is to keep the color distribution consistent.
Try this:
| Component | Color A | Color B |
|---|---|---|
| Romper | Main body | Thin stripes |
| Hat | Crown + main body | Brim + stripes |
| Mittens | Main | Cuff |
| Booties | Main | Sole + cuff |
This creates a cohesive handmade set without requiring complicated colorwork.
How to Get Clean Stripes
Color changes can easily become messy in single crochet.
For a cleaner transition:
- Work the last stitch of the old color.
- Insert hook into the final stitch.
- Yarn over with the old color.
- Pull through.
- Place the new color on the hook.
- Complete the final yarn-over with the new color.
- Continue crocheting with the new color.
This makes the color transition much cleaner.
How to Keep the Romper From Becoming Too Wide
A common problem with baby garments is accidentally adding stitches at the edges.
At the beginning of every row:
Ch 1 does not count as a stitch.
Place the first sc into the first actual stitch.
At the end of the row, count your stitches.
Your stitch count should remain consistent unless you are intentionally increasing or decreasing.
How to Customize the Pattern
This design is particularly easy to adapt.
Make It Wider
Add stitches to the starting chain.
For every approximately 2 cm of additional width, add around 4 stitches, depending on your gauge.
Make It Longer
Simply add additional rows to the body.
Make the Legs Longer
Add additional rows before joining the legs.
Make the Straps Adjustable
Instead of sewing the buttons permanently, add two or three buttonholes along each strap.
This allows the romper to grow with the baby.
Size Adjustment Formula
If your gauge differs from the pattern, use this simple formula:
Desired width ÷ stitches per cm = starting stitches
For example, if your gauge gives:
2 stitches per cm
and you want:
20 cm
Then:
20 × 2 = 40 stitches
This gives you a starting point for modifying the pattern.
Troubleshooting Guide
| Problem | Likely cause | Solution |
|---|---|---|
| Hat is too loose | Too many increases | Stop increasing earlier |
| Hat is too tight | Too few stitches | Add an increase round |
| Romper twists | Uneven tension | Check stitch counts |
| Stripes look uneven | Inconsistent rows | Count rows carefully |
| Bootie sole curls | Too few increases | Add increases around curves |
| Bootie becomes wavy | Too many increases | Reduce increases |
| Mittens are too wide | Excessive stitches | Reduce starting circumference |
| Fabric feels stiff | Hook too small | Go up one hook size |
| Fabric has large holes | Hook too large | Go down one hook size |
Making the Set More Comfortable
Baby clothing should prioritize softness and ease of movement.
Avoid making the romper extremely tight.
The shoulder straps should sit comfortably without pulling.
The leg openings should allow enough room for movement and diaper changes.
The hat should not leave deep marks around the baby’s head.
The mittens should not have tight wrist openings.
The booties should allow the baby’s toes to move freely.
Washing and Care
Handmade baby garments need gentle care.
A practical routine is:
- Wash with mild detergent.
- Use cool or lukewarm water.
- Avoid harsh bleach.
- Do not aggressively wring the garment.
- Press gently between towels to remove excess water.
- Reshape while damp.
- Lay flat to dry.
Always check the yarn manufacturer’s washing instructions because fiber content varies.
Gift-Wrapping the Crochet Baby Set
This set makes a beautiful baby-shower gift.
Fold the romper carefully and place it in a shallow gift box.
Arrange the hat above it.
Place the mittens and booties around the sides.
Use tissue paper in:
- cream
- sage
- dusty blue
- blush pink
- oatmeal
A small handmade tag can say:
Handmade With Love
or:
Made Especially for Baby
Quick Project Checklist
Before starting:
☐ Choose two colors
☐ Check your yarn label
☐ Make a gauge swatch
☐ Measure the baby’s size
☐ Prepare your hook
☐ Prepare stitch markers
☐ Prepare buttons
During crocheting:
☐ Count each row
☐ Check measurements regularly
☐ Keep stripes consistent
☐ Weave in ends securely
☐ Check symmetry
Before gifting:
☐ Inspect every seam
☐ Check button attachment
☐ Check for loose yarn ends
☐ Wash according to yarn instructions
☐ Reshape and dry flat
Approximate Yarn Requirements
| Size | Main color | Contrast color | Total |
|---|---|---|---|
| Newborn | 120–150 g | 40–60 g | 160–210 g |
| 0–3 months | 150–180 g | 50–70 g | 200–250 g |
| 3–6 months | 180–220 g | 60–80 g | 240–300 g |
| 6–12 months | 220–270 g | 70–100 g | 290–370 g |
Yarn usage depends heavily on yarn weight, tension, hook size, stripe frequency, and the amount of ease built into the garment.
Three Easy Variations
1. Sage & Cream Classic Set
Use:
Sage green + ivory
This gives the same calm handmade appearance as the inspiration.
Add wooden-style buttons for a natural finish.
2. Dusty Blue Baby Set
Use:
Dusty blue + cream
Keep the stripes narrow and add a cream ribbed brim to the hat.
This works particularly well as a newborn gift.
3. Neutral Oatmeal Set
Use:
Oatmeal + beige
For a minimalist look, make the romper mostly one color and use the contrast shade only for the cuffs, hat brim, and booties.
Beginner-Friendly Construction Summary
If you’re new to crochet garments, don’t feel that you need to complete everything at once.
The easiest order is:
1. Hat
Learn the basic increases.
2. Mittens
Practice working in rounds.
3. Booties
Practice oval shaping and decreases.
4. Romper
Use the skills from the smaller projects to construct the larger garment.
This makes the complete set much less intimidating.
Final Thoughts
A coordinated crochet baby set doesn’t need complicated stitches to look beautiful. The combination of simple single crochet, carefully planned stripes, soft colors, ribbed edges, and small wooden-style buttons creates a timeless handmade appearance.
The most important part of this project is not following a stitch count blindly. Baby proportions vary, yarn behaves differently, and crochet tension is personal. Measure as you work, adjust the number of rows when necessary, and prioritize a comfortable fit.
Once you’ve made the basic set, you can use the same construction to create dozens of variations: longer rompers, sleeveless versions, solid-color sets, seasonal colors, striped hats, matching blankets, or personalized baby-shower gifts.
And because the romper, hat, mittens, and booties use relatively simple stitches, this is also a great project for using up coordinated leftover baby yarn while creating a complete handmade outfit.