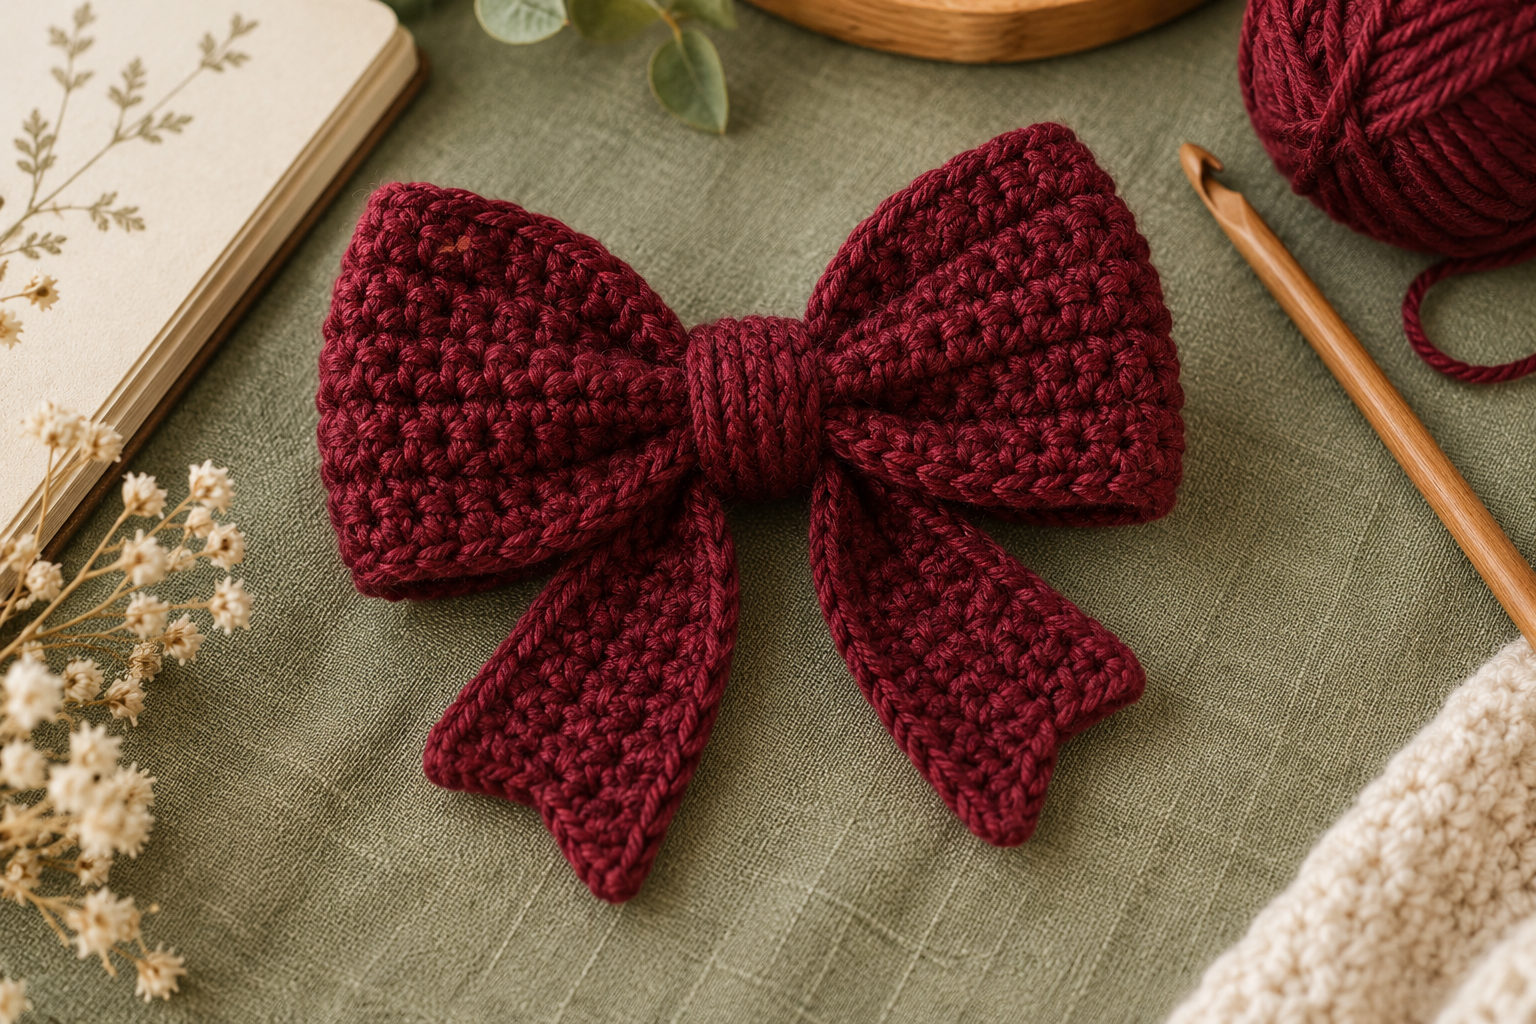
Crochet bows are one of those small projects that can make a surprisingly big impact. A simple rectangle of crochet fabric can be folded, cinched, and transformed into a cute handmade bow for hair accessories, bags, gifts, clothing, home décor, or seasonal projects.
This pattern is designed to be simple enough for beginners, while still giving you enough information to customize the bow for different sizes and uses.
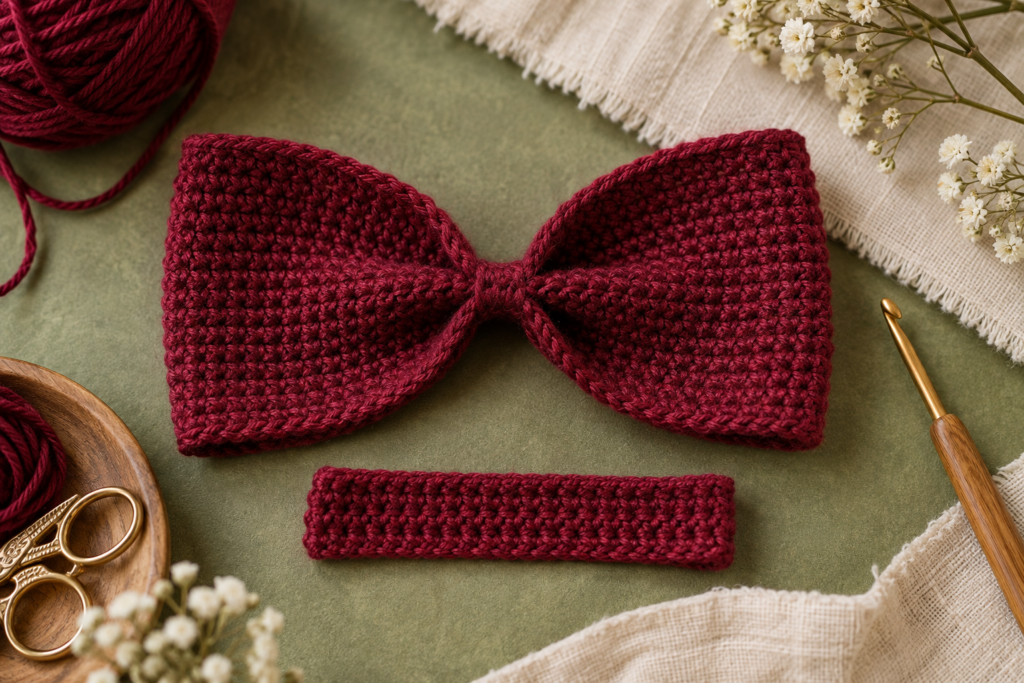
The design is based on a straightforward rectangular crochet construction, inspired by the simple bow shown in the reference image. The pattern below is an original tutorial, with its own sizing, measurements, construction instructions, and variations.
Why Make This Crochet Bow?
A crochet bow is a particularly useful small project because it doesn’t require much yarn or time.
You can make one with leftover yarn from another project, experiment with different colors, or create a whole collection of bows for different seasons.
This pattern is suitable for:
- Crochet beginners
- Scrap-yarn projects
- Hair accessories
- Gift wrapping
- Bag decoration
- Headbands
- Baby accessories
- Christmas decorations
- Valentine’s Day crafts
- Handmade gifts
- Small items to sell
The basic bow uses only simple stitches, making it a great project when you want something quick without committing to a large crochet project.
Finished Bow Sizes
The same basic construction can be adapted to several sizes.
| Size | Finished Width | Finished Height | Suggested Use |
|---|---|---|---|
| Mini | 6–7 cm | 4–5 cm | Clips, gifts, dolls |
| Small | 8–9 cm | 5–6 cm | Hair clips, bags |
| Medium | 10–11 cm | 6–7 cm | Headbands, hair bows |
| Large | 13–15 cm | 8–9 cm | Statement accessories, décor |
Measurements can vary depending on yarn, hook size and tension.
Materials
| Material | Recommendation |
|---|---|
| Yarn | Worsted/medium weight for the standard bow |
| Hook | 4.0 mm |
| Yarn needle | For finishing and assembly |
| Scissors | For cutting yarn |
| Stitch marker | Optional |
| Hair clip | Optional |
| Headband | Optional |
| Sewing needle and thread | Optional for attaching accessories |
For a smaller bow, use lighter yarn and a smaller hook.
For a larger statement bow, use thicker yarn and a larger hook.
Choosing the Right Yarn
The yarn you choose has a big effect on the finished bow.
Cotton
Cotton creates a structured bow with excellent stitch definition.
It is especially useful for:
- Hair accessories
- Bag decorations
- Gift bows
- Small appliqués
Acrylic
Acrylic is affordable and available in many colors.
It is a good option when you’re making multiple bows or experimenting with different color combinations.
Wool Blend
A wool blend can create a soft, slightly textured bow.
It works particularly well for:
- Fall accessories
- Winter décor
- Cozy headbands
Velvet Yarn
Velvet yarn creates a completely different look.
The finished bow becomes soft and luxurious, making it especially attractive for hair accessories and gift decorations.
However, velvet yarn can make stitches harder to see, so it may not be the easiest choice for a beginner.
How Much Yarn Do You Need?
This project uses very little yarn.
| Bow Size | Approximate Yarn |
|---|---|
| Mini | 5–8 g |
| Small | 8–12 g |
| Medium | 12–18 g |
| Large | 18–25 g |
This makes the pattern an excellent way to use leftover yarn.
Crochet Abbreviations
The pattern uses US crochet terminology.
| Abbreviation | Meaning |
|---|---|
| ch | Chain |
| sc | Single crochet |
| sl st | Slip stitch |
| st | Stitch |
| sts | Stitches |
| rep | Repeat |
| FO | Fasten off |
Crochet Stitches Used
You only need a few basic techniques.
Chain Stitch
Make a slip knot on your hook, yarn over, and pull the yarn through the loop.
Single Crochet
Insert your hook into the stitch, yarn over and pull up a loop.
You will have two loops on your hook.
Yarn over again and pull through both loops.
Slip Stitch
Insert the hook into the stitch, yarn over and pull directly through both the stitch and the loop already on the hook.
Gauge
Gauge isn’t critical for this project because the finished size can easily be adjusted.
For the standard medium bow, a useful starting point is approximately:
20 single crochet stitches × 20 rows = 10 × 10 cm
If your fabric is very loose, use a smaller hook.
If your fabric is extremely stiff, try a larger hook.
The most important thing is that the rectangle feels flexible enough to fold and shape.
The Basic Crochet Bow Pattern
The standard bow is made from three components:
- Main rectangle
- Center wrap
- Optional tails
The main rectangle creates the two loops of the bow.
Medium Crochet Bow
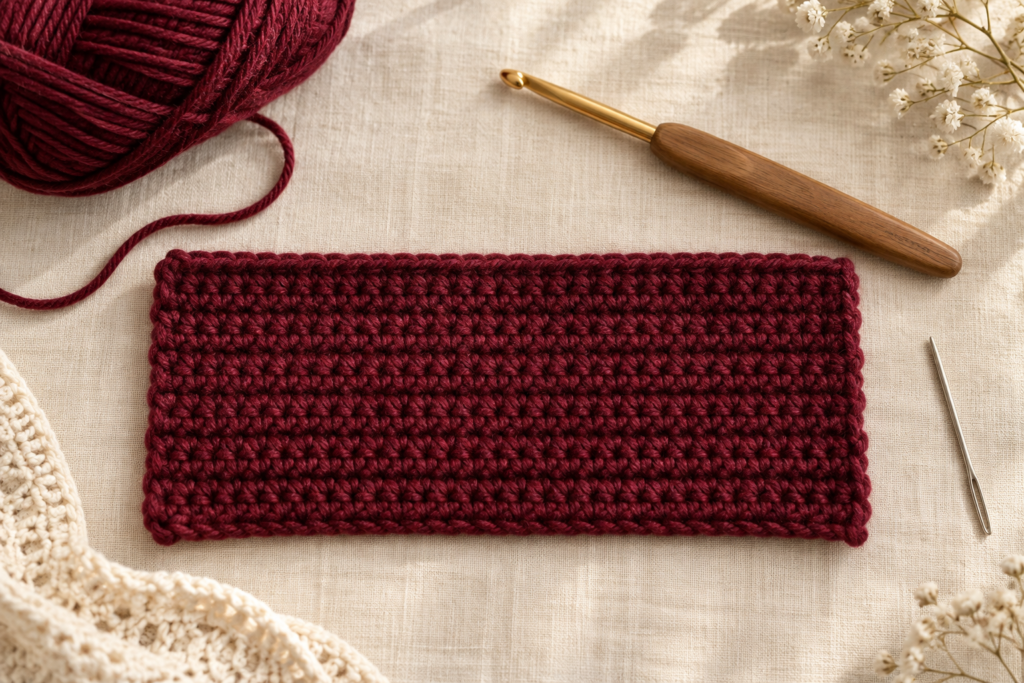
Step 1: Foundation Chain
Chain 21.
You should have 20 stitches available for the first row.
Step 2: First Row
Single crochet in the second chain from the hook.
Single crochet across.
You should have:
20 sc
Chain 1 and turn.
Step 3: Rows 2–6
Single crochet across.
At the end of each row:
Ch 1, turn.
Continue until you have completed 6 rows.
You now have a small rectangle approximately 10 cm wide.
Step 4: Fasten Off
Cut the yarn, leaving a tail of approximately 15 cm.
Pull the yarn through the final loop.
Set the rectangle aside.
Small Crochet Bow Pattern
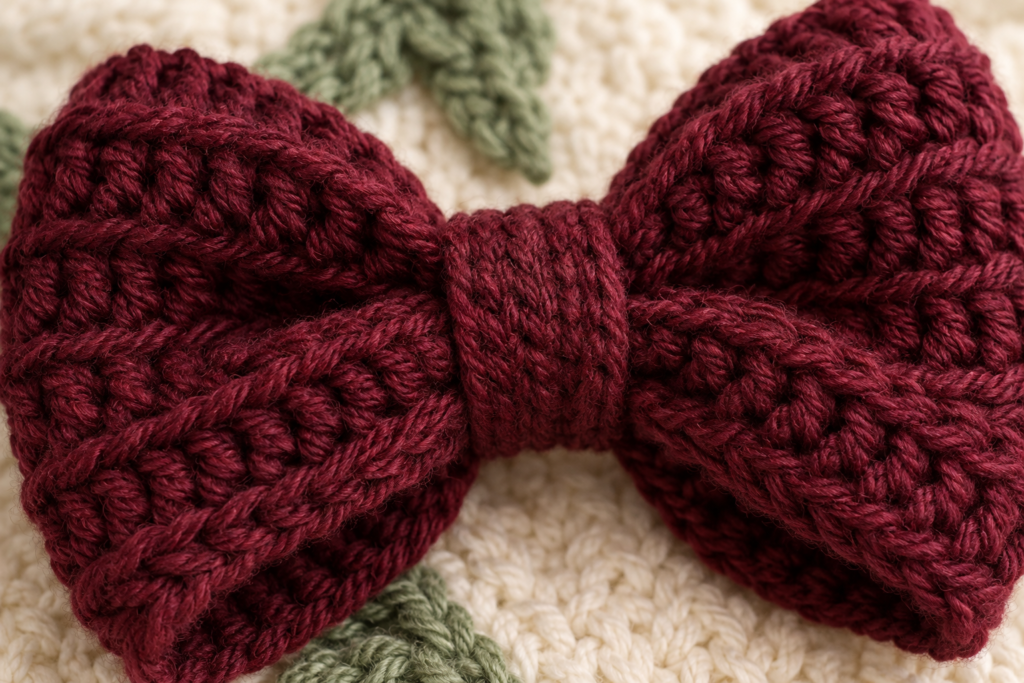
For a smaller bow:
Chain 17.
Row 1:
Sc in 2nd ch from hook and across — 16 sc.
Rows 2–5:
Sc across.
Fasten off.
This creates a compact bow suitable for:
- Small hair clips
- Baby accessories
- Gift packaging
- Crochet bags
- Doll accessories
Large Crochet Bow Pattern
For a larger bow:
Chain 27.
Row 1:
Sc in 2nd ch from hook and across — 26 sc.
Rows 2–8:
Sc across.
Fasten off.
This produces a larger bow that works well as:
- A statement hair accessory
- Headband decoration
- Bag embellishment
- Christmas decoration
- Wall décor
- Gift decoration
How to Make the Center Wrap
The center piece is what transforms the flat rectangle into a recognizable bow.
For the standard medium bow:
Foundation
Chain 9.
Row 1
Sc in the second chain from the hook and across.
You should have:
8 sc
Rows 2–4
Sc across.
Fasten off and leave a long tail.
Your center strip should be narrow enough to wrap around the middle of the bow.
How to Assemble the Crochet Bow
Now comes the most satisfying part.
Step 1: Fold the Main Rectangle
Place the rectangle flat.
Bring the short ends toward the center.
The rectangle should naturally begin forming two loops.
Don’t make the center folds too sharp yet.
Step 2: Create the Bow Shape
Pinch the center of the rectangle.
You should now have:
left loop → center → right loop
Adjust the loops until they are approximately the same size.
Step 3: Wrap the Center
Take your narrow center strip and place it around the pinched middle.
Wrap it firmly around the center.
The center strip should hold the two loops together without crushing them.
Step 4: Secure the Back
Use your yarn needle to sew the center strip securely at the back.
Make several small stitches through the center layers.
Secure the yarn carefully.
Step 5: Shape the Loops
Fluff each loop with your fingers.
Pull gently on the edges until the bow looks balanced.
The finished bow should have two distinct loops and a defined center.
Optional Crochet Bow With Tails
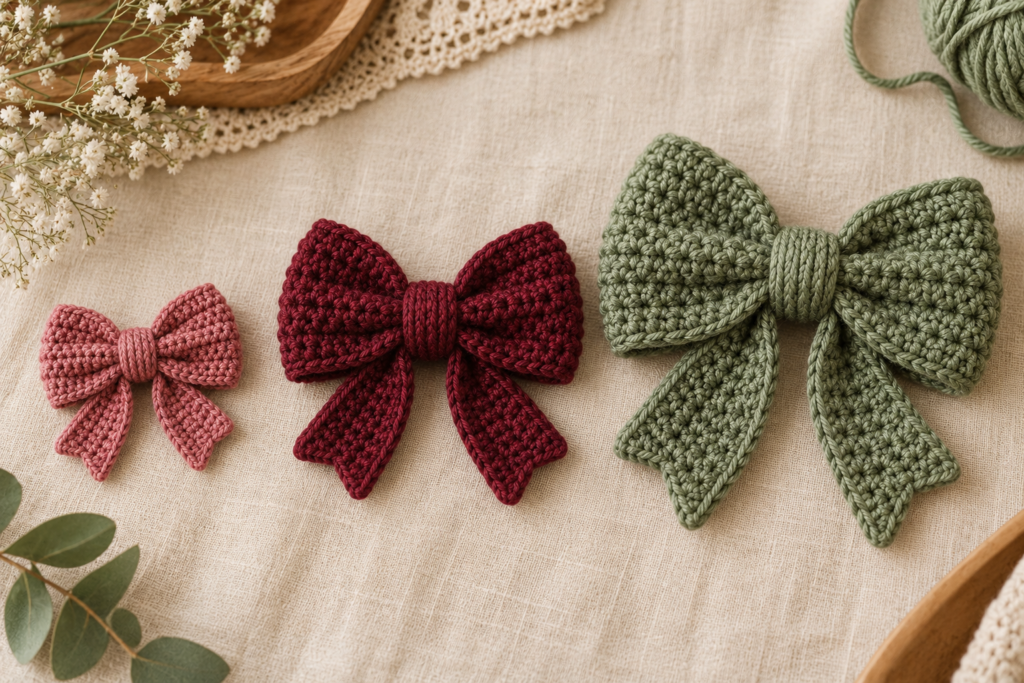
If you want a more traditional ribbon-bow appearance, add two decorative tails.
You can crochet them separately.
Simple Tail Pattern
Chain 16.
Sc in the second chain from the hook and across.
Work 4 rows of sc.
Fasten off.
Repeat for the second tail.
Sew the tails to the back of the bow underneath the center wrap.
Creating a V-Shaped Tail
To create a decorative V-shaped end:
Fold the tail vertically.
Starting from the outside edge, make a diagonal cut with scissors.
Because crochet fabric can unravel, secure the edge with a few stitches or a narrow crochet border.
For a more durable finish, crochet a small edging around the tail instead of cutting the fabric.
A More Decorative Bow
The basic single-crochet version is perfect for beginners, but you can make the same shape much more interesting by changing the stitch pattern.
Half Double Crochet Bow
Instead of single crochet, use half double crochet.
This creates a slightly taller and softer fabric.
Pattern
Chain 21.
Hdc in the second chain from the hook and across.
Work 5–6 rows.
Fasten off.
This creates a slightly fuller bow.
Double Crochet Bow
For a lighter and more open texture:
Chain 21.
Dc in the fourth chain from the hook.
Dc across.
Work 4–5 rows.
Fasten off.
This version works particularly well with cotton yarn and decorative gift bows.
Textured Crochet Bow
For a more interesting surface, alternate single crochet and back-loop-only single crochet.
Pattern
Chain 21.
Row 1:
Sc across.
Row 2:
Sc in the back loop only across.
Repeat Rows 1–2 for 6–8 rows.
The alternating texture creates subtle horizontal ridges.
Ribbed Crochet Bow
For a stretchy, ribbed appearance:
Chain 21.
Work sc in the back loop only across.
Continue for 8 rows.
This creates a flexible ribbed rectangle that makes a particularly cute bow.
Two-Color Crochet Bow
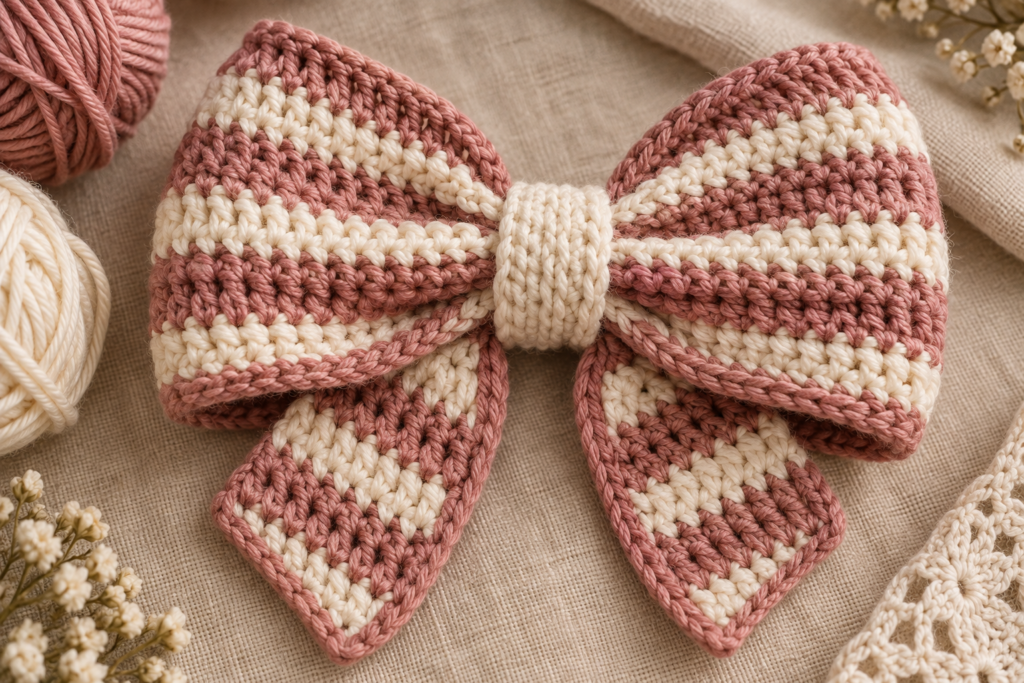
You don’t need complicated colorwork to create a beautiful two-color bow.
Try making:
- Main rectangle in cream
- Center wrap in burgundy
Or:
- Main rectangle in sage
- Center wrap in ivory
Or:
- Main rectangle in dusty pink
- Center wrap in plum
The contrast between the main piece and center wrap makes the finished bow look more polished.
Striped Crochet Bow
For stripes, change color every two rows.
For example:
Rows 1–2: Pink
Rows 3–4: Cream
Rows 5–6: Pink
You can create many different combinations.
| Main Color | Accent Color |
|---|---|
| Blush pink | Cream |
| Sage | Ivory |
| Burgundy | Dusty pink |
| Mustard | Cream |
| Navy | Ivory |
| Plum | Soft pink |
| Terracotta | Beige |
Crochet Hair Bow
One of the easiest ways to use this pattern is as a hair accessory.
Make the medium or small bow.
Once the bow is assembled, attach a small metal hair clip to the back.
Attachment Method
Position the clip horizontally behind the center.
Use a needle and strong matching thread to sew the clip securely to the back of the center wrap.
Make several passes through the clip and the crochet fabric.
Check that the clip does not move excessively before using it.
Crochet Bow Headband
You can also attach the bow to a headband.
Make a medium or large bow.
Position it slightly to one side of the headband for a classic look.
Secure it with matching yarn or strong thread.
For a removable accessory, you can attach a small clip to the back of the bow and clip it onto the headband instead.
Crochet Bow Hair Tie
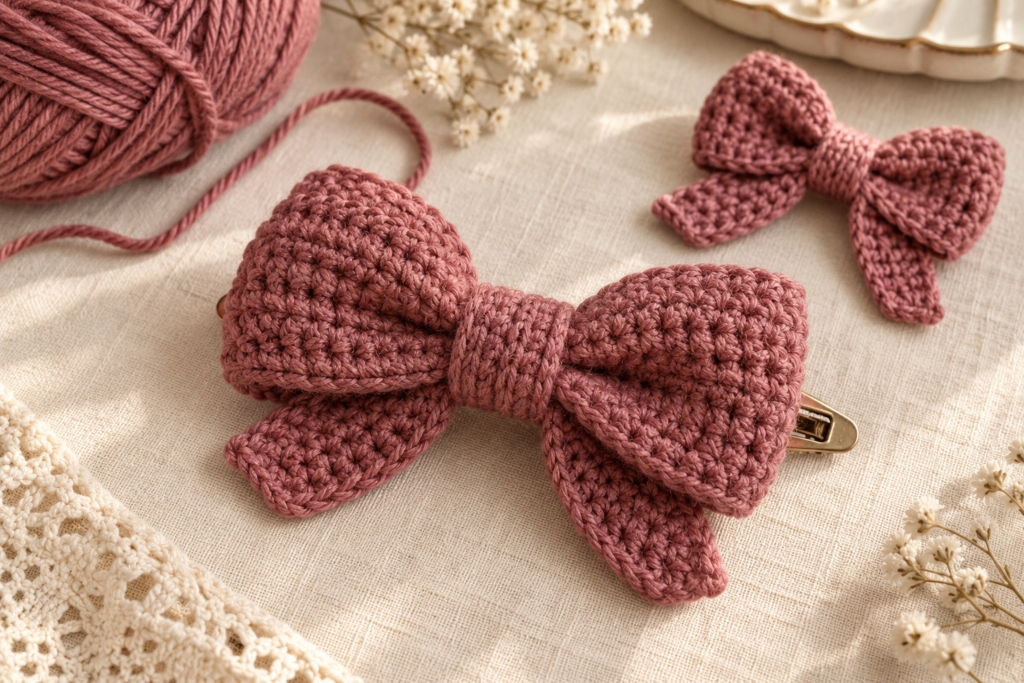
Another simple option is attaching the bow to an elastic hair tie.
Place the elastic behind the center of the bow.
Wrap the center strip around both the bow and elastic.
Secure everything tightly at the back.
This creates a cute handmade ponytail accessory.
Crochet Bow for a Bag
A medium or large bow can instantly personalize a plain crochet or fabric bag.
Sew the bow securely to the front of the bag.
You can also attach it to a bag handle.
For a removable decoration, attach a small lobster clasp or clip to the back.
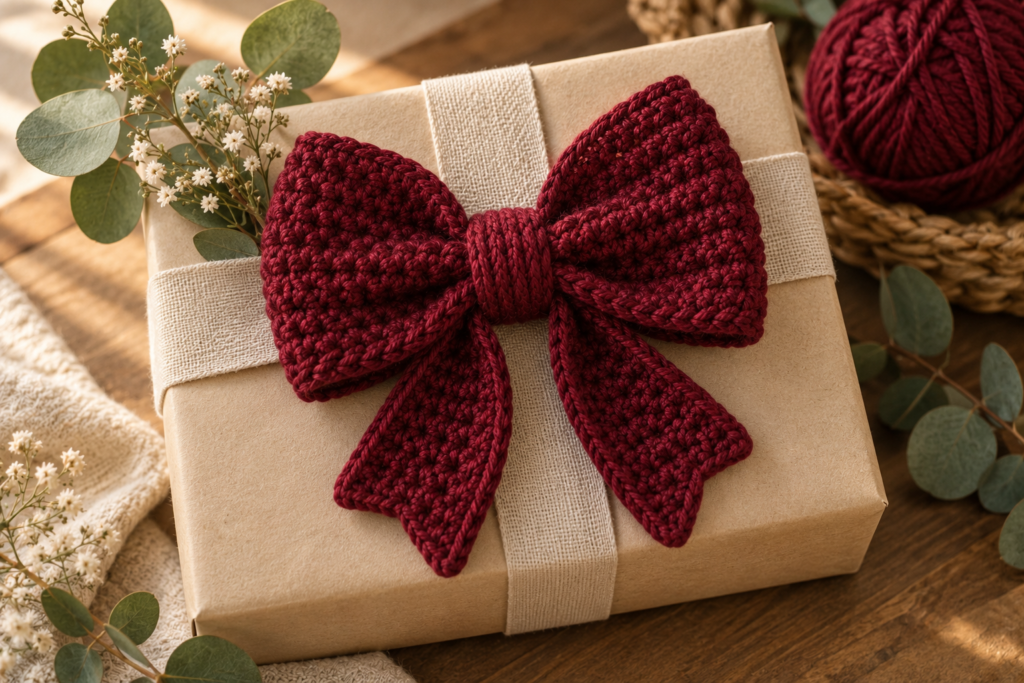
Crochet Gift Bow
Instead of buying a disposable ribbon bow, make a reusable crochet bow.
Choose a slightly larger size and use a structured yarn such as cotton.
Attach a small loop at the back.
The bow can then be tied onto:
- Gift baskets
- Gift boxes
- Crochet bags
- Baby shower presents
- Birthday gifts
- Christmas packages
The recipient can reuse the bow as a hair accessory or decoration.
Baby Crochet Bow
For baby accessories, a tiny crochet bow can be attached to a soft headband or clothing item.
Use lightweight, soft yarn.
Avoid adding small detachable embellishments such as loose beads or buttons.
For baby items, make sure every attachment is secure and inspect the finished piece regularly.
Christmas Crochet Bow
Change the colors and the same pattern becomes a Christmas decoration.
Try:
Burgundy + cream
Forest green + cream
Red + white
Green + gold
You can also add a crochet loop to the back and hang the bow on a Christmas tree.
Valentine’s Day Crochet Bow
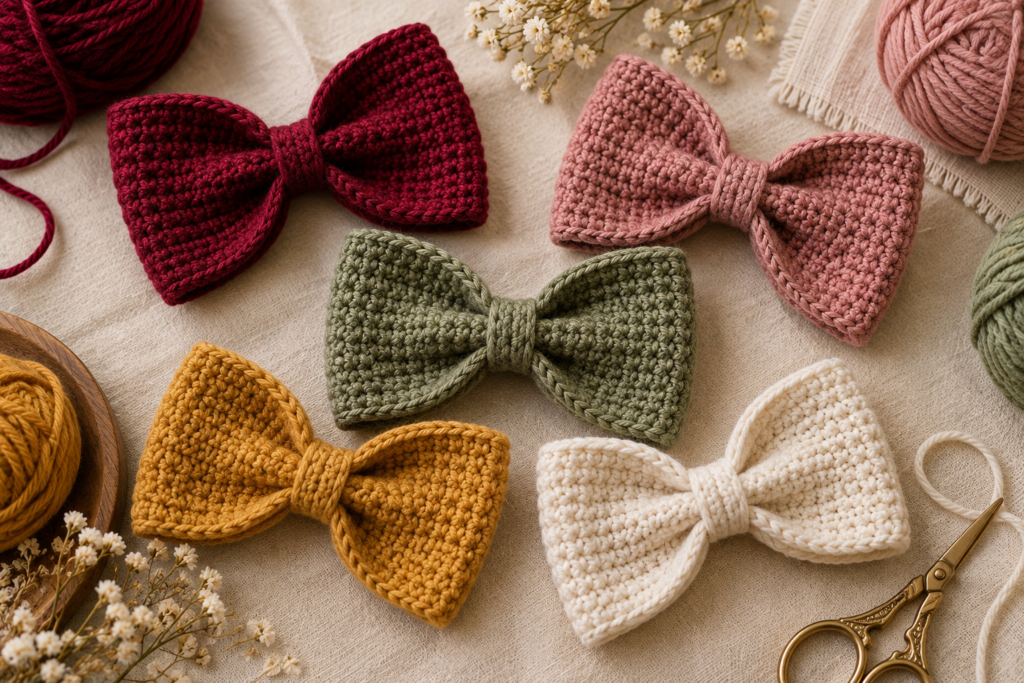
For Valentine’s projects, try:
- Dusty pink
- Burgundy
- Red
- Cream
- Mauve
A small heart appliqué can be attached to the center if desired, provided it is securely fastened for the intended use.
Halloween Crochet Bow
Create a spooky version using:
Black + orange
Purple + black
Orange + cream
You can attach the finished bow to a hair clip, Halloween bag or seasonal wreath.
Bow Size Comparison
| Size | Chain | Main Rows | Best For |
|---|---|---|---|
| Mini | 13 | 4 | Tiny clips, dolls |
| Small | 17 | 5 | Hair clips |
| Medium | 21 | 6 | Hair accessories |
| Large | 27 | 8 | Bags and décor |
| Oversized | 35 | 10 | Statement décor |
For the mini version, chain 13 and work 12 sc across for 4 rows.
The measurements will vary with your yarn and tension, so use the finished dimensions as your main guide.
How to Make the Bow More Structured
If your bow looks floppy, there are several ways to improve it.
Use a Smaller Hook
A smaller hook produces denser stitches.
Choose Cotton
Cotton generally creates a more structured fabric than very soft acrylic.
Add a Second Layer
For an extra-full bow, crochet two identical rectangles and place them together before creating the center.
Use a Firm Center Wrap
A tight center wrap gives the bow more definition.
How to Make a Fuller Bow
For a fuller bow, increase the number of rows.
For example, instead of 6 rows:
Work 8–10 rows.
You can also increase the width by starting with a longer foundation chain.
The important thing is to maintain proportions.
If the rectangle becomes much wider but remains very short, the finished bow may look unusually flat.
Troubleshooting
| Problem | Cause | Solution |
|---|---|---|
| Bow looks too flat | Rectangle is too small | Add rows or use thicker yarn |
| Bow won’t hold its shape | Fabric is too soft | Use cotton or smaller hook |
| Center looks bulky | Wrap is too wide | Reduce center-strip width |
| Loops are uneven | Center wasn’t positioned evenly | Adjust before securing |
| Bow keeps twisting | Rectangle was folded unevenly | Align both sides carefully |
| Stitches look loose | Hook is too large | Try a smaller hook |
| Bow is too stiff | Hook too small/yarn too thick | Try a larger hook |
| Second bow is different | Tension changed | Compare measurements |
| Center keeps slipping | Wrap isn’t tight enough | Secure it more firmly |
| Edges curl | Tension is uneven | Block lightly and check gauge |
Blocking the Crochet Bow
Blocking isn’t always necessary for such a small project, but it can improve the finished shape.
Lightly dampen the crochet rectangle.
Lay it flat on a clean towel.
Gently straighten the edges.
Allow it to dry completely.
Once dry, assemble the bow.
Avoid aggressively stretching the fabric because this can distort the stitches.
How to Make Multiple Matching Bows
If you’re making several bows for a shop, event or gift collection, create one sample first.
Measure:
- Width
- Height
- Center-wrap width
- Number of rows
- Approximate yarn usage
Then use that sample as your template.
This will make it much easier to produce consistent bows.
Crochet Bow Color Inspiration
A coordinated collection can make simple bows look much more sophisticated.
Soft Cottage Palette
- Cream
- Dusty rose
- Sage
- Beige
Elegant Autumn Palette
- Burgundy
- Mustard
- Terracotta
- Cream
Minimalist Palette
- Ivory
- Taupe
- Gray
- Black
Romantic Palette
- Blush
- Mauve
- Burgundy
- Cream
Children’s Palette
- Sky blue
- Pink
- Butter yellow
- Mint
How to Use Leftover Yarn
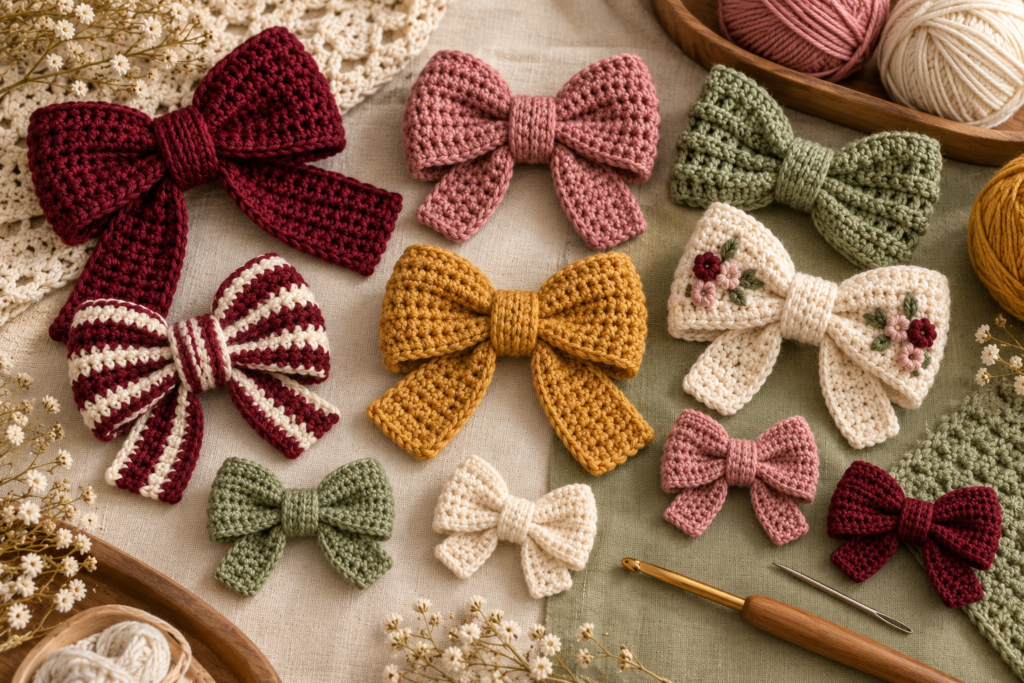
This is one of the best projects for scrap yarn.
Instead of throwing away small amounts of yarn, sort them by color and make miniature bows.
You can create:
- A matching set
- A rainbow collection
- Seasonal bows
- Gift decorations
- Hair accessories
- Bag charms
- Doll accessories
Small bows are especially useful when you have only a few grams of yarn left from another project.
Turning the Bow Into a Bag Charm
Make a small or medium bow.
Attach a secure loop to the back.
Connect the loop to a keyring or lobster clasp.
You can combine several small bows in different colors to make a playful bag charm.
Turning the Bow Into a Brooch
For an adult accessory, sew a brooch pin securely onto the back.
The bow can be worn on:
- Cardigans
- Coats
- Scarves
- Bags
- Hats
Choose a structured yarn for the best shape.
Handmade Crochet Bow Gift Set
A set of handmade bows can make an inexpensive but thoughtful gift.
For example:
Set of 3
Blush + cream + sage
Set of 5
Pink + blue + mustard + green + ivory
Seasonal Set
Burgundy + cream + forest green
Package the bows in a small paper box or reusable fabric pouch.
Tips for Selling Crochet Bows
Crochet bows are attractive as handmade products because they require relatively little yarn and can be produced in batches.
When calculating your selling price, consider:
Materials + Labor + Packaging + Platform Fees + Profit
Don’t price only according to the amount of yarn used.
Your time, finishing, packaging and design work also have value.
Possible product variations include:
- Single bow
- Set of 3
- Set of 5
- Matching mother-and-child accessories
- Seasonal collections
- Custom color sets
- Personalized gift sets
Photography Tips for Crochet Bows
The bow itself is small, so photography is important.
Use a simple background such as:
- Warm cream
- Sage green
- Beige
- Light wood
- Soft linen
For Pinterest, photograph several bows together in different colors.
A single burgundy bow can be beautiful, but a collection of five colors gives the viewer more visual information and creates stronger curiosity.
For the article, include:
- Finished bow
- Flat crochet rectangle
- Center wrap
- Folded rectangle
- Wrapped center
- Finished bow
- Color variations
- Hair accessory application
Frequently Asked Questions
Is this crochet bow pattern suitable for beginners?
Yes. The basic version uses primarily chain stitches and single crochet. The construction is also simple because the bow starts as a rectangle.
How long does it take to crochet a bow?
A small bow can often be completed quickly, while a larger or more detailed version takes longer. Your crochet speed, yarn weight and finishing method will affect the total time.
How much yarn does a crochet bow use?
Very little. A medium bow generally uses only a small amount of yarn, making it an excellent scrap-yarn project.
What crochet hook should I use?
A 4.0 mm hook works well with medium/worsted-weight yarn for the standard version. Adjust the hook according to your yarn and desired fabric density.
Can I make this bow bigger?
Yes. Increase the foundation chain to make the bow wider and add rows to make it taller.
Can I make a tiny crochet bow?
Absolutely. Use lightweight yarn and a smaller hook, and reduce both the foundation chain and number of rows.
Can I use this pattern for a hair clip?
Yes. A small or medium bow works particularly well. Secure the hair clip firmly to the back.
Can I use velvet yarn?
Yes, although velvet yarn can be more difficult for beginners because individual stitches can be harder to see.
Can I make a crochet bow without sewing?
The basic bow can be assembled primarily through wrapping and crocheting, but a few secure stitches at the back provide a more durable finish, particularly for hair accessories or items that will be handled frequently.
Can I sell bows made from this pattern?
Yes, you can use your own finished handmade bows as products. Your product photos and descriptions should be your own, and you should not reproduce another designer’s written pattern or photographs.
Final Thoughts
This easy crochet bow pattern is proof that a small amount of yarn can become something genuinely useful and beautiful.
The basic rectangle is simple enough for a beginner, but the finished bow can be transformed into dozens of different projects. Change the yarn, adjust the size, add stripes, use a textured stitch, or attach the finished bow to a hair clip, headband, bag, gift box or seasonal decoration.
Once you understand the basic construction, you can make an entire collection from just a few small scraps of yarn.
For your blog, this is also a particularly useful evergreen crochet project because the same pattern can be promoted for hair accessories, gifts, Christmas, Valentine’s Day, baby accessories, scrap-yarn projects and beginner crochet tutorials throughout the year.