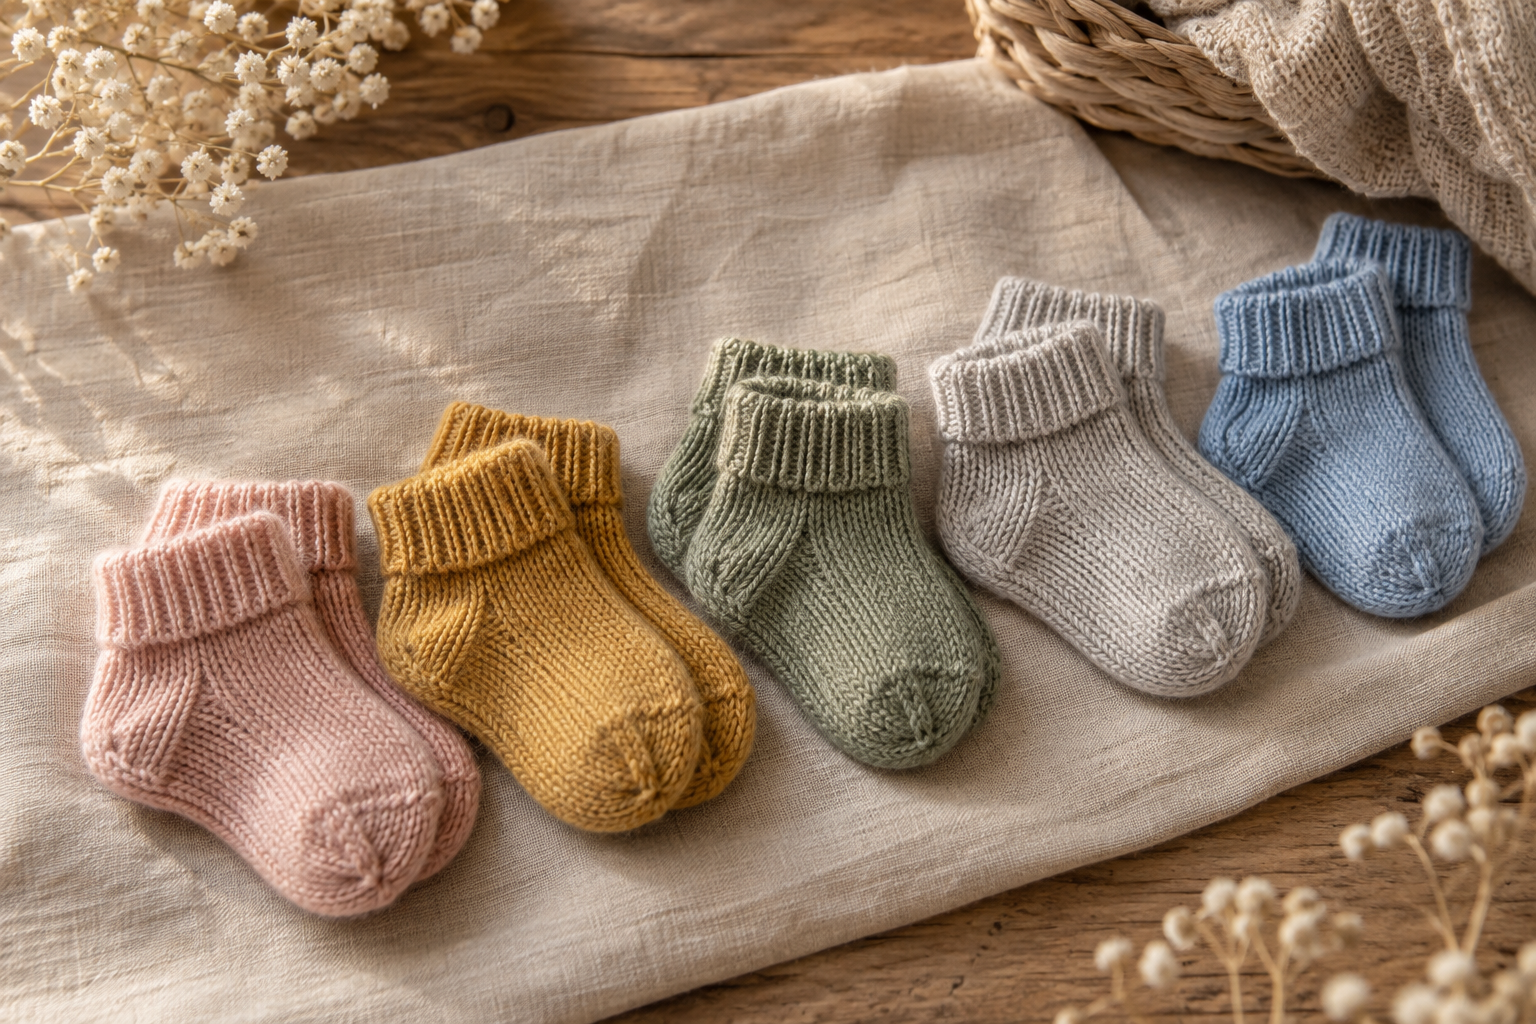
These tiny knitted baby socks are one of those projects that look more complicated than they really are. With a simple ribbed cuff, smooth stockinette stitch, a shaped heel and a rounded toe, you can create a soft pair of handmade socks without using complicated cables, lace or colorwork.
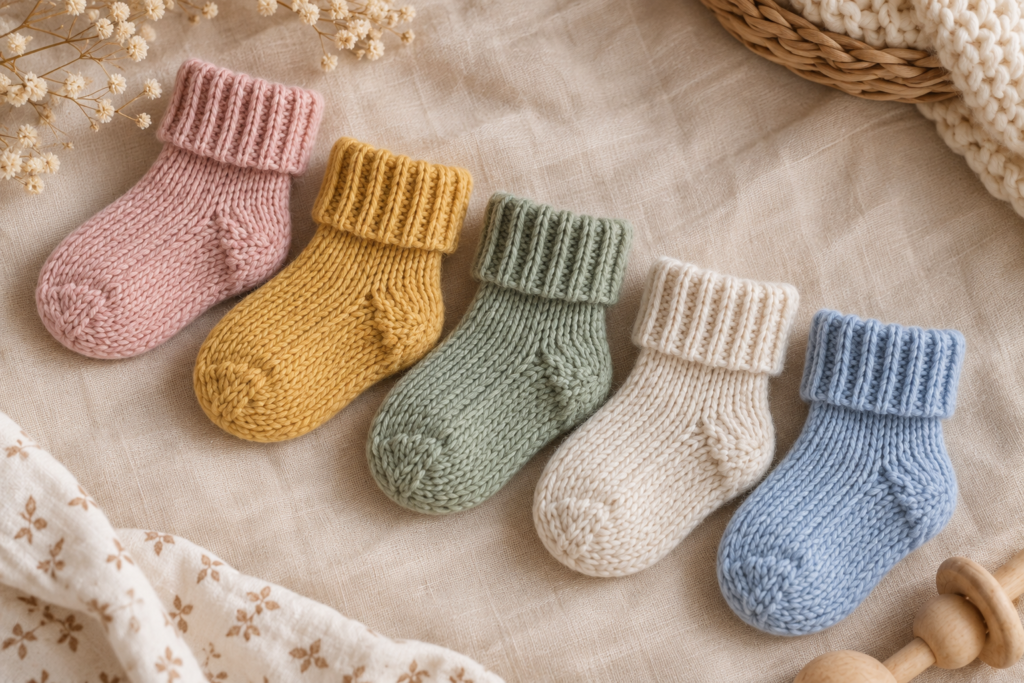
The design is especially nice for baby gifts because it works beautifully in several colors. You can make a classic cream pair, soft pink socks, mustard yellow, sage green, dusty blue, or even a rainbow collection like the inspiration photo.
This tutorial uses an original construction and pattern inspired by the simple appearance of the reference image, rather than reproducing another designer’s written pattern.
Why You’ll Love This Baby Socks Pattern
These socks are designed around a simple construction that is easy to understand once you know the basic knitting techniques.
You will learn how to:
- Cast on and work in the round
- Knit 1×1 ribbing
- Knit stockinette in the round
- Make a simple heel flap
- Shape the heel
- Pick up stitches
- Reduce stitches for the gusset
- Shape a rounded toe
- Finish and weave in your yarn ends
The result is a lightweight handmade sock that can be customized for different baby sizes.
Finished Baby Sock Sizes
Because babies grow quickly, exact foot measurements are more useful than relying only on age.
| Size | Approx. Baby Age | Foot Length | Foot Circumference | Finished Sock Length* |
|---|---|---|---|---|
| Newborn | 0–3 months | 8–9 cm | 9–10 cm | 9–10 cm |
| Small | 3–6 months | 9–10 cm | 10–11 cm | 10–11 cm |
| Medium | 6–12 months | 10–11.5 cm | 11–12 cm | 11–12 cm |
*The finished length can be adjusted before beginning the toe.
Tip: If you are making these as a gift, measure an existing baby sock when possible. Babies of the same age can have noticeably different foot sizes.
Materials
| Material | Newborn | 3–6 Months | 6–12 Months |
|---|---|---|---|
| Sport/DK yarn | 35–40 g | 40–45 g | 45–50 g |
| Needles | 3.25 mm | 3.25 mm | 3.25 mm |
| Tapestry needle | 1 | 1 | 1 |
| Stitch markers | 2–3 | 2–3 | 2–3 |
| Small scissors | 1 | 1 | 1 |
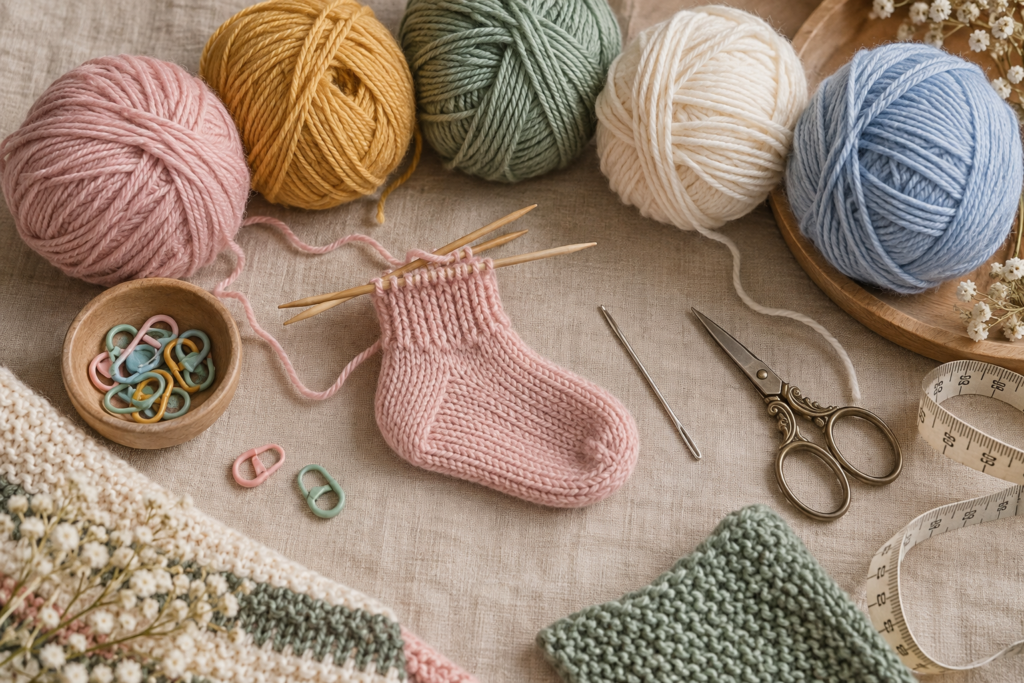
You can use double-pointed needles, two circular needles, or a circular needle if you prefer a suitable small-circumference knitting method.
Choosing the Yarn
A soft washable yarn is the most practical choice for baby socks.
Look for:
- Soft fibers
- Smooth yarn
- Good stitch definition
- Machine-washable or easy-care properties
- Lightweight construction
- Good recovery and elasticity
Avoid yarn that feels scratchy against the skin.
For a beginner-friendly version, sport or light DK yarn makes the stitches easy to see while keeping the finished socks soft rather than excessively bulky.
Recommended Gauge
Work a small swatch in stockinette before starting.
Gauge: approximately 24 stitches × 32 rounds = 10 × 10 cm using 3.25 mm needles.
Gauge can vary significantly depending on your yarn and knitting tension.
If your swatch is wider than 10 cm, use smaller needles.
If your swatch is narrower than 10 cm, use larger needles.
For baby socks, circumference matters particularly because a sock that is too tight can be uncomfortable.
Knitting Abbreviations
| Abbreviation | Meaning |
|---|---|
| CO | Cast on |
| BO | Bind off |
| K | Knit |
| P | Purl |
| K2tog | Knit 2 stitches together |
| SSK | Slip, slip, knit |
| St | Stitch |
| Sts | Stitches |
| RS | Right side |
| WS | Wrong side |
| PM | Place marker |
| SM | Slip marker |
| Rep | Repeat |
| Rnd | Round |
| DPNs | Double-pointed needles |
Basic Techniques You’ll Need
Knit Stitch
Insert the right needle into the front of the next stitch, wrap the yarn around the needle, pull the new loop through and slide the old stitch off.
Purl Stitch
Insert the right needle into the front of the stitch with the yarn positioned in front. Wrap the yarn and pull the new loop through.
K2tog
Knit two stitches together as if they were one stitch.
This creates a decrease that leans slightly to the right.
SSK
Slip one stitch knitwise, slip another stitch knitwise, then knit the two slipped stitches together through the back loops.
This creates a decrease that generally leans to the left.
These two decreases are especially useful when shaping the toe and gusset.
Part 1: Knitting the Baby Sock Cuff
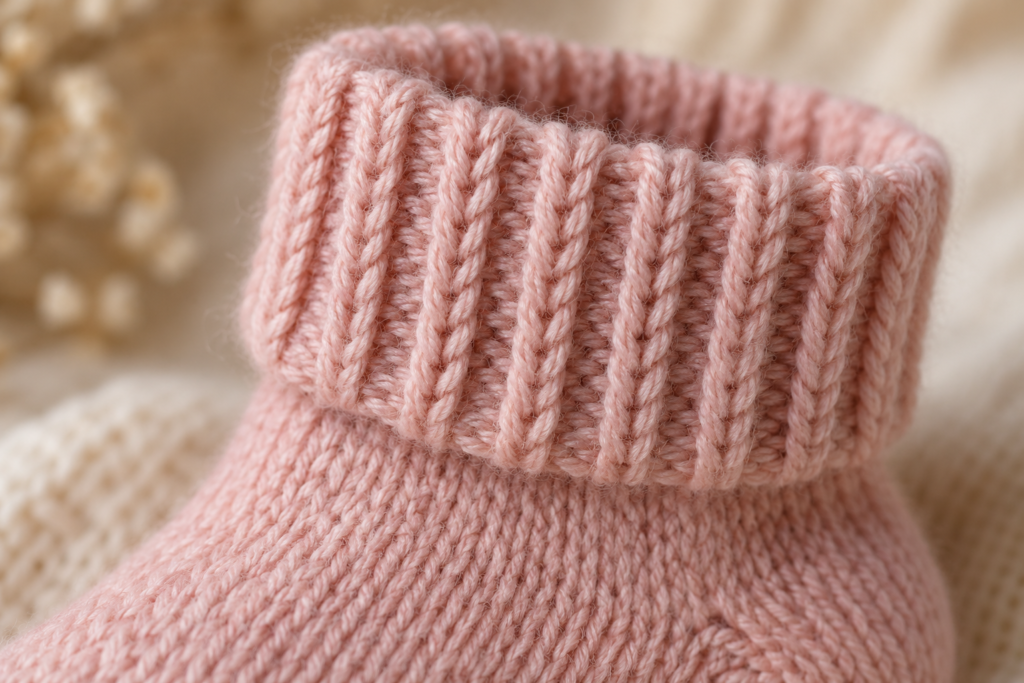
The sock is worked from the cuff downward.
Choose your size:
- Newborn: 24 stitches
- 3–6 months: 28 stitches
- 6–12 months: 32 stitches
Cast on your required number of stitches using a stretchy cast-on.
Join carefully in the round, making sure the stitches are not twisted.
Place a marker to indicate the beginning of the round.
Cuff
Work:
K1, P1 around
Continue the 1×1 ribbing for approximately:
| Size | Cuff Rounds |
|---|---|
| Newborn | 10–12 |
| 3–6 months | 12–14 |
| 6–12 months | 14–16 |
Do not make the cuff excessively tight.
The purpose of the ribbing is to gently hold the sock around the baby’s ankle.
Part 2: Knit the Sock Leg
After completing the ribbed cuff, switch to stockinette.
Because you are knitting in the round, stockinette is simply:
Knit every round.
Work approximately:
| Size | Leg Rounds |
|---|---|
| Newborn | 12–14 |
| 3–6 months | 14–16 |
| 6–12 months | 16–20 |
At this point you should have a small tube with a stretchy ribbed cuff.
Want a Taller Sock?
Simply add more knit rounds before beginning the heel.
For example, you can make:
- Ankle socks
- Classic baby crew socks
- Longer winter socks
Adding or removing a few rounds here is one of the easiest ways to customize the design.
Part 3: Prepare for the Heel
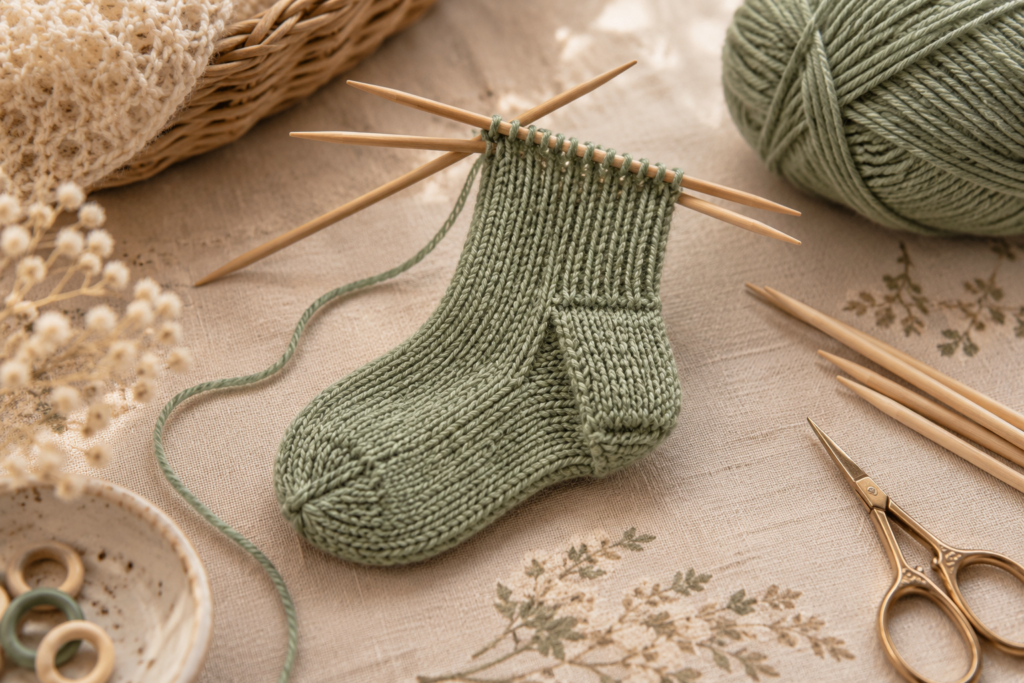
The heel is worked over half of the stitches.
Divide your stitches as follows:
| Size | Total Stitches | Heel Stitches |
|---|---|---|
| Newborn | 24 | 12 |
| 3–6 months | 28 | 14 |
| 6–12 months | 32 | 16 |
Place the remaining stitches on hold or leave them on the other needles while you work the heel.
The heel flap is worked back and forth rather than in the round.
Part 4: Simple Heel Flap
The heel flap uses stockinette stitch.
Work back and forth over your heel stitches.
Newborn — 12 Heel Stitches
Work approximately 12 rows:
RS: Knit across
WS: Purl across
Repeat until 12 rows are completed.
3–6 Months — 14 Heel Stitches
Work approximately 14 rows:
RS: Knit across
WS: Purl across
6–12 Months — 16 Heel Stitches
Work approximately 16 rows:
RS: Knit across
WS: Purl across
The heel flap should now look like a small rectangular section.
Why Make a Heel Flap?
The heel flap adds extra fabric underneath the heel, which helps create a stronger and more comfortable sock.
For baby socks, you don’t need a complicated decorative heel. Simple stockinette keeps the construction approachable for beginners.
Part 5: Shape the Heel
For this pattern, use a simple centered heel turn.
The exact number of stitches worked before each turn depends on the number of heel stitches.
Newborn Heel Turn
With 12 heel stitches:
Row 1: K7, SSK, K1, turn.
Row 2: P4, P2tog, P1, turn.
Continue alternating knit-side and purl-side decreases, working one additional stitch farther into the unworked section each time.
Finish when the heel cup is comfortably shaped and the remaining center stitches form the base of the heel.
3–6 Month Heel Turn
With 14 heel stitches:
Row 1: K8, SSK, K1, turn.
Row 2: P5, P2tog, P1, turn.
Continue the same principle, gradually working farther into the remaining stitches.
6–12 Month Heel Turn
With 16 heel stitches:
Row 1: K9, SSK, K1, turn.
Row 2: P6, P2tog, P1, turn.
Continue alternating sides until the heel cup is formed.
Beginner Tip
If heel shaping is completely new to you, don’t rush.
The important visual goal is to create a curved heel rather than a flat rectangle.
Your heel should begin looking like a little pocket that will eventually support the baby’s heel.
Part 6: Pick Up the Heel Stitches
Return to working in the round.
With the working yarn, knit across the heel stitches.
Now pick up stitches along the first side of the heel flap.
A useful starting point is approximately:
1 stitch for every 2 rows
For example, a 14-row heel flap may produce around 7 picked-up stitches.
Don’t worry if your exact number differs slightly because yarn thickness and tension affect this.
Continue knitting across the stitches that were held for the top of the foot.
Then pick up the same approximate number of stitches along the other side of the heel flap.
You are now back to working in the round.
Part 7: Shape the Gusset
The stitches around the heel create extra width.
This extra width needs to be reduced gradually.
Place one marker at each side of the top-of-foot section.
Work one round:
Knit around.
On the next decrease round:
Knit to 3 stitches before the first marker, K2tog, K1.
Knit across the top of the foot.
At the second side:
K1, SSK, knit to the end of the round.
Repeat the decrease round every other round until the original stitch count is restored.
Example
If you began with 24 stitches, the gusset increases your stitch count after picking up the heel stitches.
Continue decreasing until you are back to approximately:
24 stitches
For the larger sizes, return to:
28 stitches or 32 stitches respectively.
This creates the tapered shape from the heel toward the foot.
Part 8: Knit the Foot
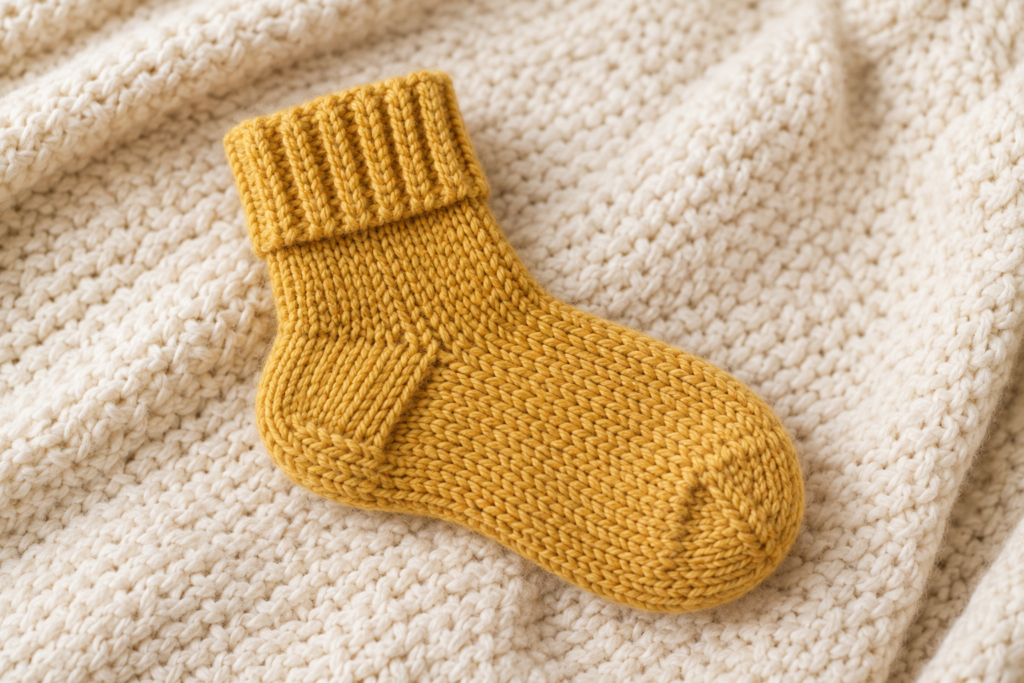
Once your original stitch count has been restored, stop decreasing.
Continue knitting every round.
Measure from the back of the heel toward the tip of the foot.
You want to leave enough space for the toe.
A useful guide is:
| Size | Approx. Foot Length Before Toe |
|---|---|
| Newborn | 6.5–7.5 cm |
| 3–6 months | 7.5–8.5 cm |
| 6–12 months | 8.5–10 cm |
The exact measurement is more important than the number of rounds.
How to Check the Length
Lay the sock flat.
Measure from the back of the heel to the end of the knitted foot.
The sock should be slightly shorter than the baby’s actual foot before the toe is completed because the fabric will stretch.
Part 9: Shape the Toe
The toe is shaped by decreasing at both sides.
Divide the stitches evenly between the top and bottom of the foot.
For a 24-stitch sock, you can work with approximately 12 stitches on each side.
Toe Decrease Round
At the first side:
K1, SSK, knit to 3 stitches before the next section, K2tog, K1.
Repeat the same shaping on the other side.
This produces four decreases around the round.
Work one plain round between decrease rounds at first.
Continue:
Decrease round → knit one round → decrease round
until the toe begins to taper.
Then work decrease rounds more frequently as the opening becomes smaller.
When approximately 8 stitches remain, cut the yarn leaving a 15–20 cm tail.
Thread the tail through a tapestry needle.
Pull the needle through the remaining stitches.
Remove the knitting needles and pull gently to close the toe.
Secure the yarn on the inside.
Part 10: Finish the Baby Sock
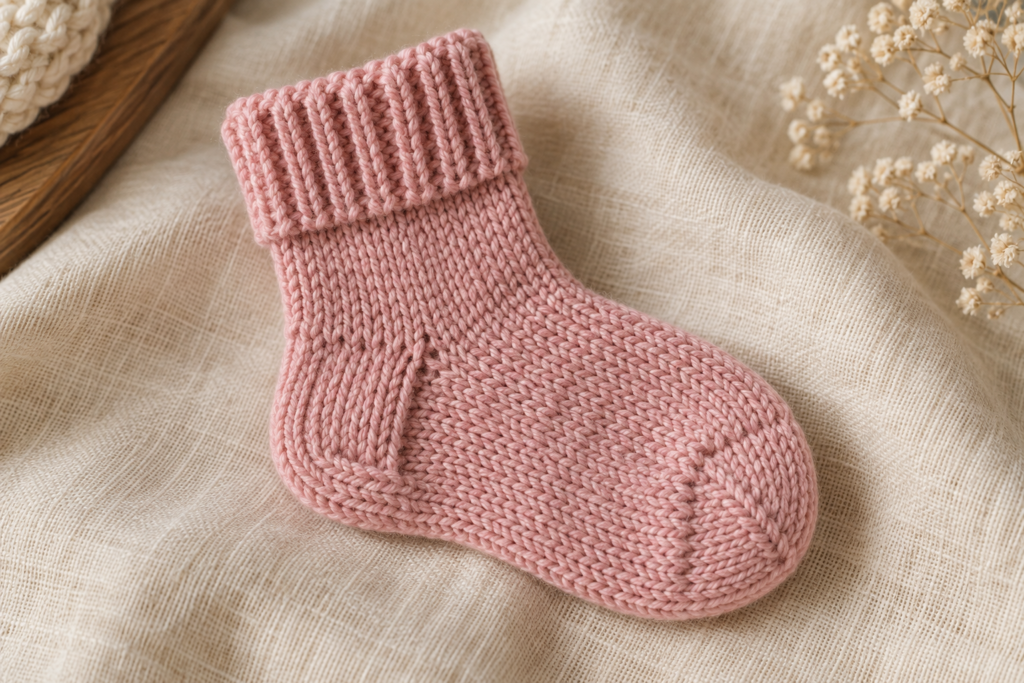
Turn the sock inside out.
Use a tapestry needle to weave the yarn tail securely through several stitches.
Avoid leaving long loose strands inside the sock.
Trim the excess yarn.
Turn the sock right side out.
Gently shape the heel, foot and toe with your fingers.
Do not aggressively stretch the finished sock.
Making the Second Sock
The second sock is made exactly the same way.
The most important thing is to compare the two socks before weaving in the final ends.
Place them side by side and check:
- Cuff height
- Leg length
- Heel position
- Foot length
- Toe shape
Small differences are normal, especially for handmade socks.
Easy Color Ideas
The simple design makes these socks perfect for experimenting with color.
Soft Pastel Collection
Try:
- Blush pink
- Baby blue
- Sage
- Butter yellow
- Cream
Neutral Baby Socks
Use:
- Ivory
- Oatmeal
- Beige
- Light gray
- Taupe
Rainbow Baby Socks
Make every pair a different color:
| Pair | Color |
|---|---|
| 1 | Pink |
| 2 | Mustard |
| 3 | Sage |
| 4 | Cream |
| 5 | Blue |
This creates a beautiful handmade collection similar to the colorful inspiration image.
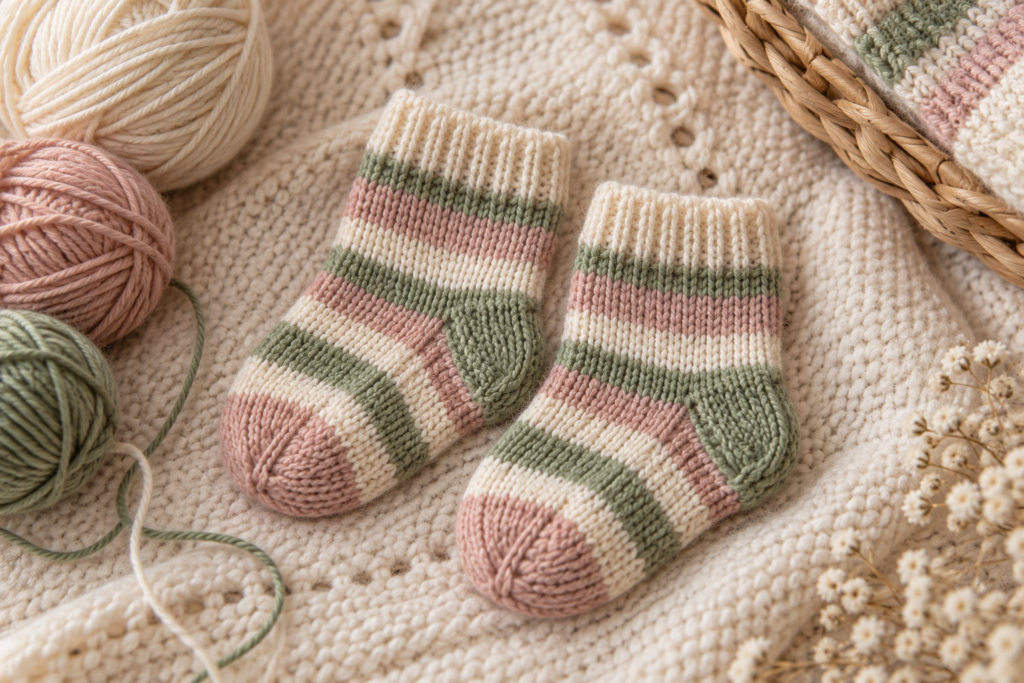
How to Make Striped Baby Socks
The basic pattern can easily become a striped design.
Instead of using one color for the entire sock, alternate yarn colors.
For example:
4 rounds Color A
4 rounds Color B
Repeat throughout the leg and foot.
For a subtler effect:
2 rounds pink + 2 rounds cream
For bold stripes:
6 rounds mustard + 6 rounds cream
Remember to keep the inside of the sock neat when changing colors.
How to Add a Decorative Cuff
Instead of basic 1×1 ribbing, try:
K2, P2
This creates a classic ribbed cuff.
For a softer baby-style appearance, use:
K1, P1
The 1×1 rib is especially useful because it gives the cuff plenty of stretch.
How to Adjust the Sock Size
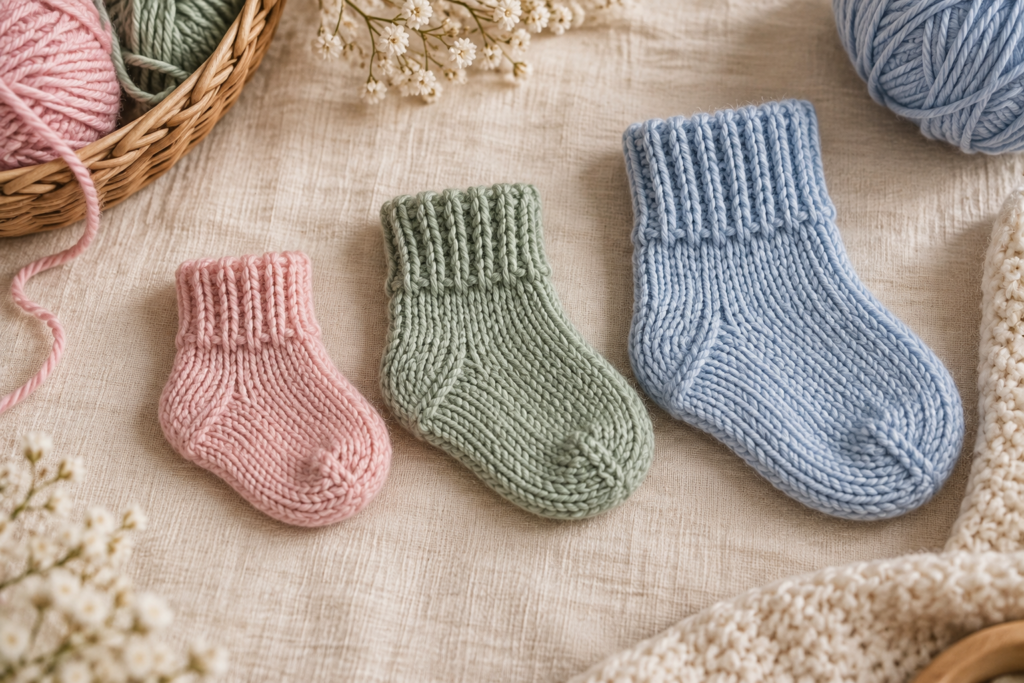
The easiest way to modify this pattern is to change the circumference and length separately.
To Make the Sock Wider
Increase the cast-on stitch count in multiples that work with your ribbing and gauge.
For example, if your gauge produces approximately 2.4 stitches per centimeter, adding 4 stitches increases the circumference by roughly 1.7 cm.
Always consider the baby’s actual foot measurement.
To Make the Sock Longer
Simply knit more rounds before beginning the toe.
This is much easier than changing the heel.
To Make a Smaller Sock
Use fewer stitches and a smaller needle if appropriate for your yarn.
Do not make a baby sock extremely tight just because you are trying to achieve a smaller finished size.
Measuring for a Custom Baby Sock
If you want a more precise fit, measure three things:
- Foot circumference around the widest part
- Foot length from heel to longest toe
- Ankle circumference
Then compare your measurements with your knitting gauge.
For example:
24 stitches ÷ 10 cm = 2.4 stitches per cm
If the baby’s desired sock circumference is 10 cm:
10 × 2.4 = 24 stitches
That gives you a useful starting point for the cast-on.
How to Get a Professional Finish
The difference between an amateur-looking sock and a polished handmade sock often comes down to finishing.
Keep Your Tension Consistent
Try not to knit the cuff much tighter than the leg.
Avoid a Tight Toe
A baby sock needs enough stretch to fit comfortably over the foot.
Match Both Socks
Use the first completed sock as your measuring reference for the second.
Weave Ends Securely
Loose yarn tails can become uncomfortable or catch on toes.
Block Gently
Lightly dampen the finished socks and shape them with your fingers.
Baby socks are small enough that aggressive blocking usually isn’t necessary.
Common Problems and Solutions
| Problem | Possible Cause | Solution |
|---|---|---|
| Sock is too tight | Too many stitches per cm | Use larger needles or more stitches |
| Sock is too loose | Too few stitches per cm | Use smaller needles or fewer stitches |
| Cuff doesn’t stretch | Tight cast-on | Use a stretchy cast-on |
| Heel looks flat | Heel turn tension | Check turning instructions and tension |
| Toe is too pointed | Too many decreases | Begin toe decreases later |
| Sock is too short | Too few foot rounds | Add more rounds before toe |
| Sock is too long | Too many foot rounds | Remove several rounds |
| Second sock is different | Inconsistent measurements | Compare both socks while knitting |
| Fabric feels stiff | Yarn too heavy | Choose lighter, softer yarn |
Beginner Tips for Knitting Baby Socks
If you’ve never knitted socks before, the heel is usually the part that feels unfamiliar.
Don’t worry if the sock looks strange halfway through.
When the heel is being shaped, the fabric temporarily looks quite different from the finished sock.
Once you pick up the stitches and return to working in the round, the familiar sock shape begins to appear.
A good approach is to make the smallest size first as a practice sock before attempting a larger pair.
Baby-Safe Considerations
Baby clothing needs special attention to finishing.
Avoid decorative elements that can detach and become choking hazards.
For these socks, simple knitted texture and color changes are preferable to small attached buttons, beads or other loose embellishments.
Make sure:
- All yarn ends are securely woven in
- There are no loose strands inside the sock
- Decorative pieces cannot easily detach
- The cuff is comfortable rather than restrictive
- The finished yarn is suitable for baby’s sensitive skin
Always follow the care instructions recommended for your chosen yarn.
Washing and Caring for Handmade Baby Socks
Baby socks are likely to need frequent washing, so choose washable yarn whenever possible.
Before washing, check the yarn label.
A gentle approach is usually best:
- Wash according to the yarn manufacturer’s instructions.
- Use a mild detergent suitable for delicate garments.
- Avoid excessive agitation if the yarn is delicate.
- Rinse thoroughly when hand washing.
- Press gently in a towel to remove excess water.
- Reshape the socks.
- Allow them to dry completely.
Do not use high heat unless the yarn specifically permits it.
Crochet vs. Knitting for Baby Socks
If you’re deciding whether to make baby socks with knitting needles or a crochet hook, there is an important difference.
| Feature | Knitted Socks | Crochet Socks |
|---|---|---|
| Fabric | Thin and flexible | Usually thicker |
| Stretch | Excellent | Depends on stitch |
| Traditional sock construction | Very common | Less traditional |
| Fine yarn | Excellent | Can be more challenging |
| Seamless appearance | Excellent | Excellent with suitable construction |
| Beginner difficulty | Moderate | Moderate |
| Best for fitted socks | Excellent | Good |
Knitting is particularly useful when you want a lightweight sock with a close-fitting shape.
Handmade Baby Shower Gift Idea
A pair of handmade baby socks becomes even more special when combined with other handmade pieces.
Create a small gift collection with:
- Two pairs of knitted baby socks
- A matching knitted bonnet
- A soft baby blanket
- A handmade baby sweater
- A simple gift card
For a colorful presentation, make each pair in a different pastel shade.
A set of five pairs—pink, mustard, sage, cream and blue—can create a beautiful handmade rainbow collection.
How to Photograph Your Finished Baby Socks
The inspiration image demonstrates an effective photography concept: multiple socks in different colors arranged diagonally on a simple neutral background.
You can recreate that editorial feeling without copying the original photograph.
Try this setup:
Background: warm beige, cream or light wood
Arrangement: overlap 4–5 socks diagonally
Colors: use contrasting but coordinated pastel shades
Lighting: soft natural window light
Camera angle: directly overhead
Composition: leave some negative space around the socks
This works especially well for Pinterest because the colorful socks immediately communicate the project visually.
Ideas for Selling Handmade Baby Socks
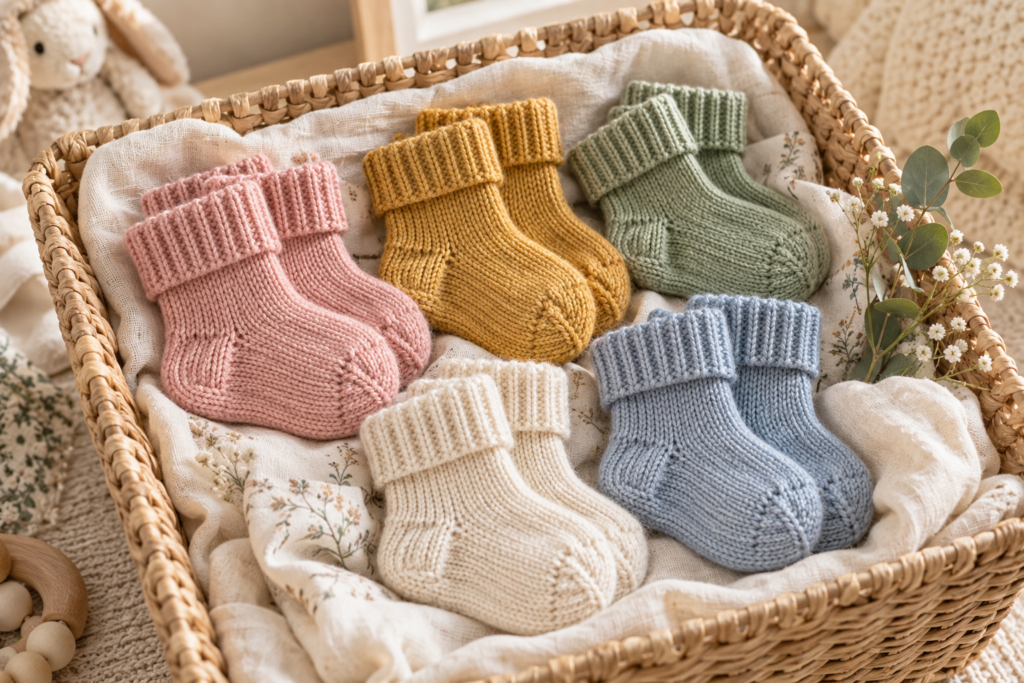
If you make these socks for a handmade shop, consider selling them individually or as coordinated sets.
Possible product combinations include:
Single Pair
One pair in a selected color.
Two-Pair Gift Set
Two complementary colors packaged together.
Rainbow Collection
Five pairs in five different colors.
Baby Shower Set
Socks combined with a bonnet or blanket.
When selling handmade baby clothing, clearly state the fiber content, approximate size, care instructions and any limitations of the handmade item.
Frequently Asked Questions
Are baby socks difficult to knit?
They can be challenging if you’ve never made a heel before, but the small size makes them a manageable first sock project. The rest of the construction uses basic knitting techniques.
What yarn is best for knitted baby socks?
A soft, washable sport or light DK yarn is a convenient choice for beginners. For a thinner sock, a suitable fingering-weight yarn can also be used with an appropriately sized needle.
What size knitting needles should I use?
A 3.25 mm needle is a useful starting point for the gauge used in this tutorial, but your ideal needle size depends on your yarn and personal tension.
Can I make these socks for a newborn?
Yes. Use the smallest size and check the baby’s actual foot measurements whenever possible.
Can I make the socks larger?
Yes. Adjust the stitch count for circumference and add or remove rounds for length.
Can I knit these socks with straight needles?
The pattern is designed for knitting in the round. If you prefer straight needles, you can adapt the construction and add a seam, but the finished appearance will be different.
Can I use cotton yarn?
You can, provided it produces a comfortable fabric with enough flexibility. Cotton generally has less elasticity than wool or some acrylic blends, so check your gauge and stretch carefully.
How much yarn do I need?
A small pair generally requires less than one skein, but the exact amount depends on yarn weight, size, gauge and how long you make the socks.
Can I use different colors?
Absolutely. The simple construction is ideal for pastel colors, stripes, color blocking and rainbow sets.
Are these socks suitable as a baby shower gift?
Yes. Handmade socks are small, practical and easy to combine with other baby items. A coordinated multi-color set makes an especially attractive gift.
Final Thoughts
These super simple baby socks are a wonderful small knitting project when you want something useful, adorable and customizable.
The basic construction gives you a reliable foundation: a stretchy ribbed cuff, simple knitted leg, shaped heel, comfortable foot and rounded toe. Once you’ve made one pair, you can experiment with different colors, stripes, cuff styles and sizes.
The best part is that the same basic technique can become an entire collection of handmade baby socks—from soft pink and mustard to sage, cream and blue.
And because baby socks are such a small project, they are also a practical way to use leftover yarn from larger baby knitting projects.