
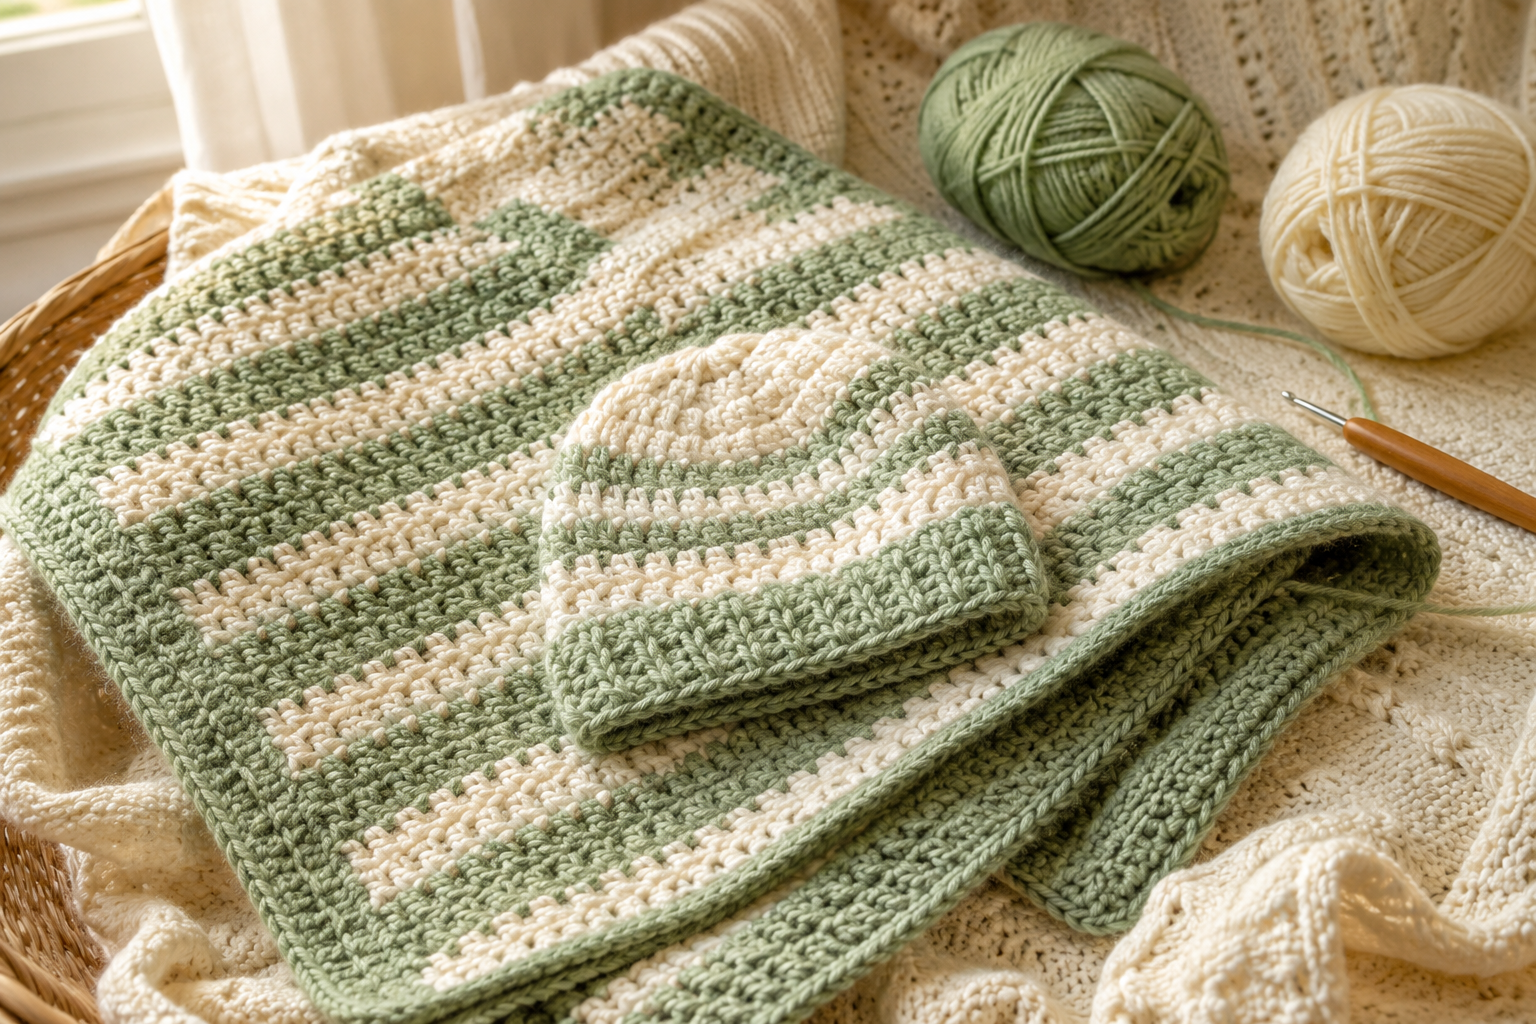
If you’re looking for a handmade baby gift that feels thoughtful, practical, and genuinely special, a crochet baby blanket with matching beanies is a wonderful project to make. A coordinated set can be customized in almost any color palette, and you can make the blanket and hats separately or turn them into a complete baby-shower gift.
This beginner-friendly crochet set uses simple stitches, straightforward stripe changes, and an easy border. The matching beanie pattern is provided in multiple baby sizes, so you can make one for a newborn or create several sizes as the baby grows.
The blanket pattern below is an original beginner-friendly design, rather than a reproduction of the pattern shown in the reference image.
Table of Contents
- Why Make a Crochet Baby Blanket and Beanie Set?
- Project Overview
- Materials You’ll Need
- Choosing the Right Yarn
- Yarn Color Ideas
- Crochet Hook and Gauge
- Baby Blanket Size Chart
- Crochet Abbreviations
- How the Blanket Is Constructed
- Free Crochet Baby Blanket Pattern
- Step-by-Step Blanket Tutorial
- How to Change Colors
- How to Crochet the Border
- Matching Crochet Baby Beanie Pattern
- Baby Beanie Size Chart
- Step-by-Step Beanie Tutorial
- How to Customize the Set
- Common Crochet Problems and Solutions
- Baby Safety and Practical Considerations
- Washing and Care
- Turning the Set Into a Baby Shower Gift
- Affiliate Disclosure
- Frequently Asked Questions
- Related Crochet Posts
- Final Thoughts
Why Make a Crochet Baby Blanket and Beanie Set?
A handmade baby blanket is already a lovely gift, but adding a matching crochet beanie makes the project feel like a coordinated collection.
The two pieces can use exactly the same colors, or you can make the hat slightly different by reversing the stripe order or adding a contrasting border.
This project is also useful for practicing several foundational crochet techniques:
- Making a foundation chain
- Working rows of double crochet
- Maintaining an even stitch count
- Changing yarn colors
- Carrying and weaving in yarn ends
- Creating a simple border
- Working crochet stitches in the round
- Increasing evenly
- Measuring finished crochet pieces
If you’re relatively new to crochet, you can make the blanket first and then use the beanie as a smaller project to practice working in rounds.
Project Overview
| Feature | Crochet Baby Blanket | Matching Beanie |
|---|---|---|
| Skill level | Beginner | Beginner |
| Main stitch | Double crochet | Half double crochet |
| Construction | Flat rows | Worked in rounds |
| Recommended yarn | Soft worsted/DK | Same yarn |
| Customizable | Yes | Yes |
| Color changes | Optional | Optional |
| Best use | Baby blanket | Baby accessory |
| Gift potential | Excellent | Excellent |
The blanket is designed as a simple striped piece with a clean border. The beanie uses gradual increases at the crown before continuing evenly around the head.
Materials You’ll Need
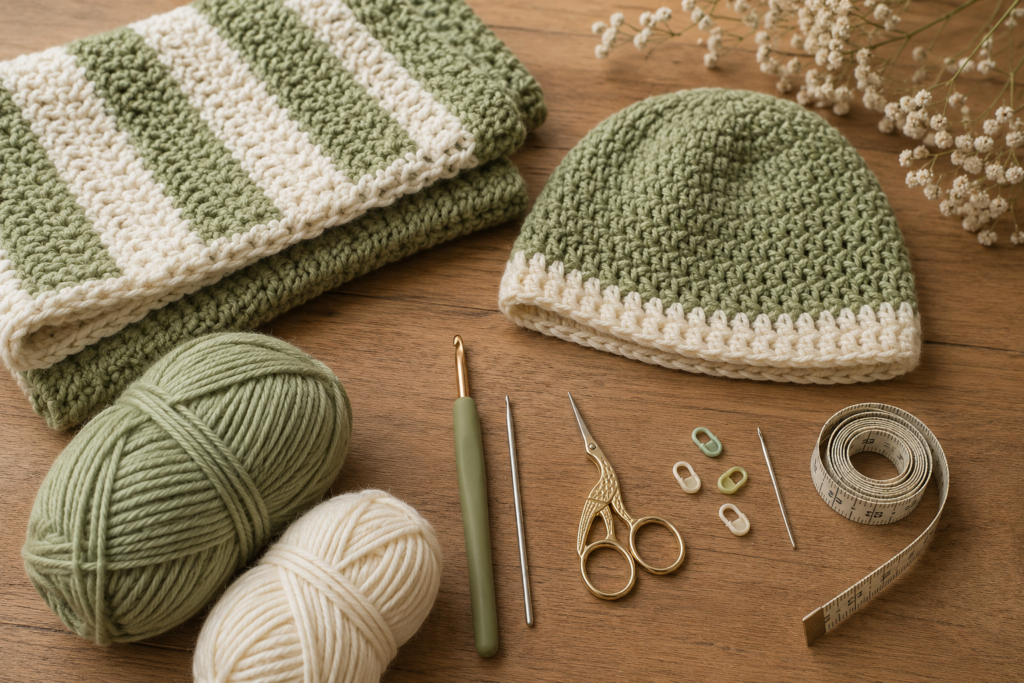
For the Baby Blanket
- Soft washable yarn
- Crochet hook appropriate for your yarn
- Scissors
- Yarn needle
- Measuring tape
- Stitch markers if desired
For the Matching Beanie
- Same yarn used for the blanket
- Crochet hook
- Yarn needle
- Scissors
- Stitch marker
A simple two-color set works beautifully, but you can use three or more colors if you prefer.
Choosing the Right Yarn
Baby projects benefit from yarn that is soft, washable, and comfortable against delicate skin.
Good choices include:
| Yarn Type | Advantages | Things to Consider |
|---|---|---|
| Baby acrylic | Soft, affordable, washable | Choose a quality soft version |
| Cotton blend | Breathable and comfortable | Can have less stretch |
| Acrylic blend | Easy-care and versatile | Check softness |
| Superwash wool | Warm and naturally breathable | More expensive |
| Bamboo blend | Soft and lightweight | Can require gentler care |
For a blanket, avoid yarn that feels rough against your skin. If it feels scratchy in your hand, it probably isn’t the best choice for a baby blanket.
For a beanie, softness and flexibility become even more important because the fabric sits directly against the baby’s head.
How Much Yarn Will You Need?
The amount depends on the finished size, yarn weight, hook size, stitch tension, and number of colors.
A practical starting estimate is:
| Project | Approximate Yarn Amount |
|---|---|
| Small receiving blanket | 500–700 g |
| Standard baby blanket | 700–1,000 g |
| Larger toddler blanket | 900–1,300 g |
| One baby beanie | 50–100 g |
These are planning estimates rather than exact requirements.
If you’re using stripes, buy enough yarn to ensure the same dye lot is available for the entire project whenever possible.
Yarn Color Ideas
The classic green-and-white combination shown in the inspiration photo works beautifully, but there are many other possibilities.
| Style | Main Color | Contrast |
|---|---|---|
| Soft neutral | Oatmeal | Cream |
| Blush | Dusty pink | Ivory |
| Sage | Sage green | Cream |
| Woodland | Olive | Beige |
| Coastal | Soft blue | White |
| Lavender | Lavender | Cream |
| Sunny | Pale yellow | White |
| Modern neutral | Taupe | Charcoal |
| Vintage | Dusty rose | Sage |
| Rainbow | Cream | Pastel stripes |
For a more sophisticated look, choose one neutral shade and one muted color rather than using too many highly saturated colors.
Free Crochet Baby Blanket Pattern
This pattern creates a simple striped blanket using double crochet.
The finished size can be adjusted easily by changing the foundation chain and number of rows.
Suggested Finished Size
Approximately:
30 × 36 inches
This is a useful baby-blanket size, but you can easily make the blanket smaller or larger.
Recommended Yarn
Medium/worsted-weight or similar soft washable yarn.
Recommended Hook
Approximately 5 mm, adjusted according to your yarn and tension.
Blanket Stitch Pattern
The main fabric uses:
Double crochet (dc)
This creates a relatively quick-growing fabric while keeping the blanket soft and flexible.
Foundation Chain
Chain 101.
This creates approximately 100 working stitches.
If you want to change the width, add or remove stitches while keeping the stitch count appropriate for your desired construction.
Row 1
Work 1 double crochet into the fourth chain from the hook.
Continue working 1 dc into each chain across.
You should have approximately:
98 dc
plus the turning-chain structure.
Turn.
Row 2
Chain 3.
Work 1 dc into each stitch across.
Turn.
Rows 3–6
Repeat Row 2.
At the end of Row 6, change color if you’re making the striped version.
Stripe Section
Continue working groups of approximately 4–6 rows per color.
For example:
| Rows | Color |
|---|---|
| 1–6 | Cream |
| 7–12 | Sage |
| 13–18 | Cream |
| 19–24 | Sage |
| 25–30 | Cream |
| 31–36 | Sage |
Continue alternating until the blanket reaches your desired length.
You don’t have to follow six-row stripes. Four-row, five-row, eight-row, or even randomly sized stripes can create a completely different appearance.
Finishing the Blanket
Once the blanket reaches approximately 36 inches in length, fasten off.
Leave a yarn tail of several inches.
Use a yarn needle to weave the end securely through the back of the stitches.
Repeat for every color change.
Do not simply cut the ends short and leave them unsecured. Blankets receive plenty of handling and washing, so the ends should be woven in securely.
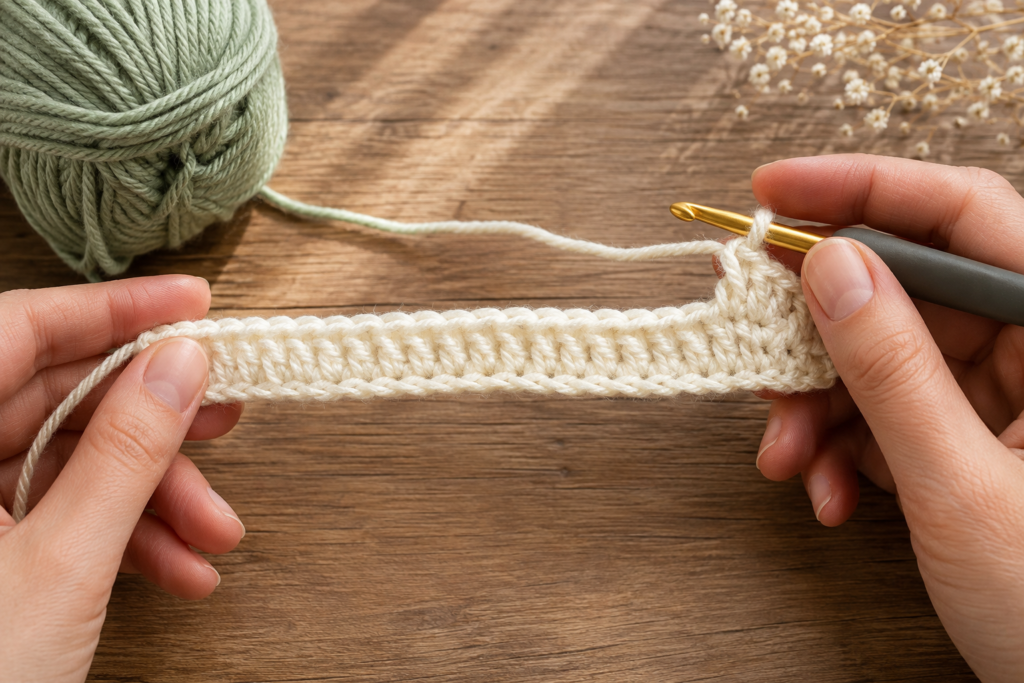
Step-by-Step Crochet Baby Blanket Tutorial
Step 1: Choose Your Colors
Pick two or three colors before starting.
For the cleanest appearance, select one dominant color and one accent color.
Step 2: Make the Foundation Chain
Chain the number required for your desired width.
Keep your chain relaxed.
A very tight foundation chain can make the bottom edge narrower than the rest of the blanket.
Step 3: Work the First Row
Work double crochet stitches evenly across the foundation chain.
Count your stitches before turning.
This is the most important row to check because mistakes here can affect every row afterward.
Step 4: Continue the Main Rows
Chain 3 at the beginning of each new row and work one double crochet into each stitch.
Try not to accidentally skip the final stitch.
Step 5: Change Colors
After completing your chosen number of rows, switch to your contrast color.
Keep your color changes consistent if you want evenly spaced stripes.
Step 6: Continue Until the Blanket Is Long Enough
Measure the blanket periodically.
Don’t rely exclusively on row count because yarn tension varies from crocheter to crocheter.
Step 7: Add the Border
After reaching the desired length, add a simple border around the entire blanket.
Step 8: Weave in All Ends
Use a yarn needle and weave each tail securely through several stitches.
Step 9: Block if Necessary
If the edges aren’t perfectly straight, lightly dampen the blanket and reshape it flat.
Always follow the care instructions for your particular yarn.
How to Change Colors Neatly
Color changes are one of the easiest ways to make a basic crochet blanket look much more polished.
For a clean color change:
- Work the final stitch of the old color.
- Stop before completing the final yarn-over.
- Use the new color for the final pull-through.
- Continue the next row with the new color.
- Secure the previous yarn tail later.
This produces a much cleaner transition than tying a knot directly at the edge.
Pro Tip
Don’t make a knot at every color change unless your specific construction requires it.
Instead, weave the tails securely into the back of the fabric when you’re finished.
How to Crochet the Blanket Border
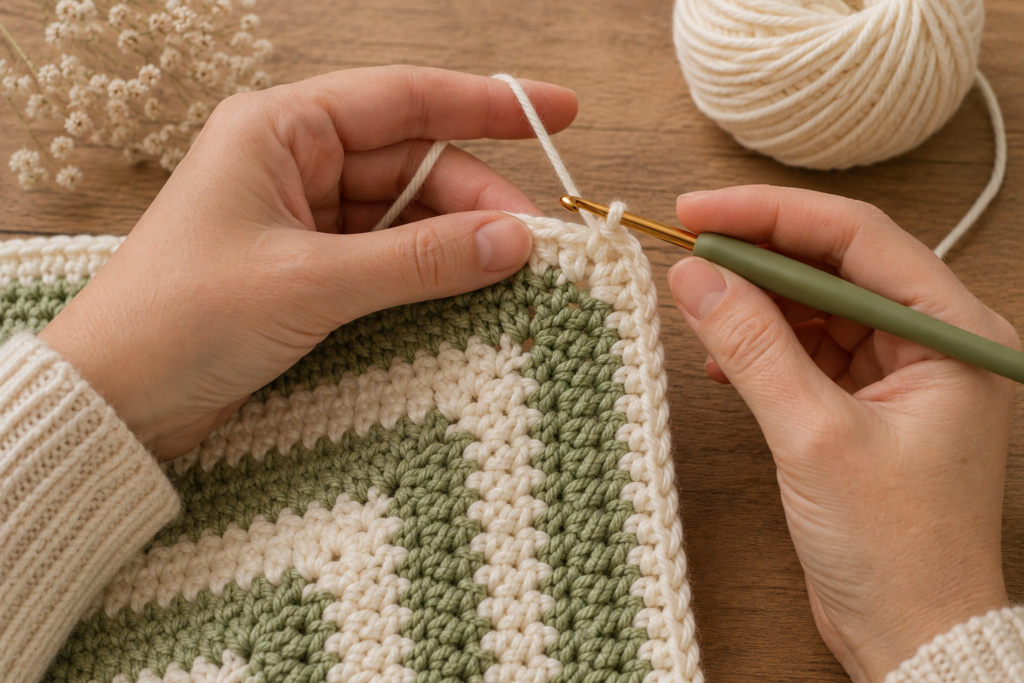
A border helps stabilize the edges and gives the blanket a finished appearance.
Round 1
Join your border color at one corner.
Chain 1.
Work single crochet evenly along the first edge.
When you reach a corner, work approximately:
3 sc into the corner space
Continue around all four sides.
At each corner, repeat the corner increase.
Join with a slip stitch.
Round 2
Chain 1.
Work sc around the entire blanket.
At each corner, work:
3 sc
Join with a slip stitch.
Fasten off.
Optional Decorative Border
For a slightly more decorative finish, add a third round using:
- Half double crochet
- Shell stitches
- Picot edging
- Simple scallops
For a beginner blanket, however, a clean single-crochet border often looks better than an overly complicated edge.
Matching Crochet Baby Beanie Pattern
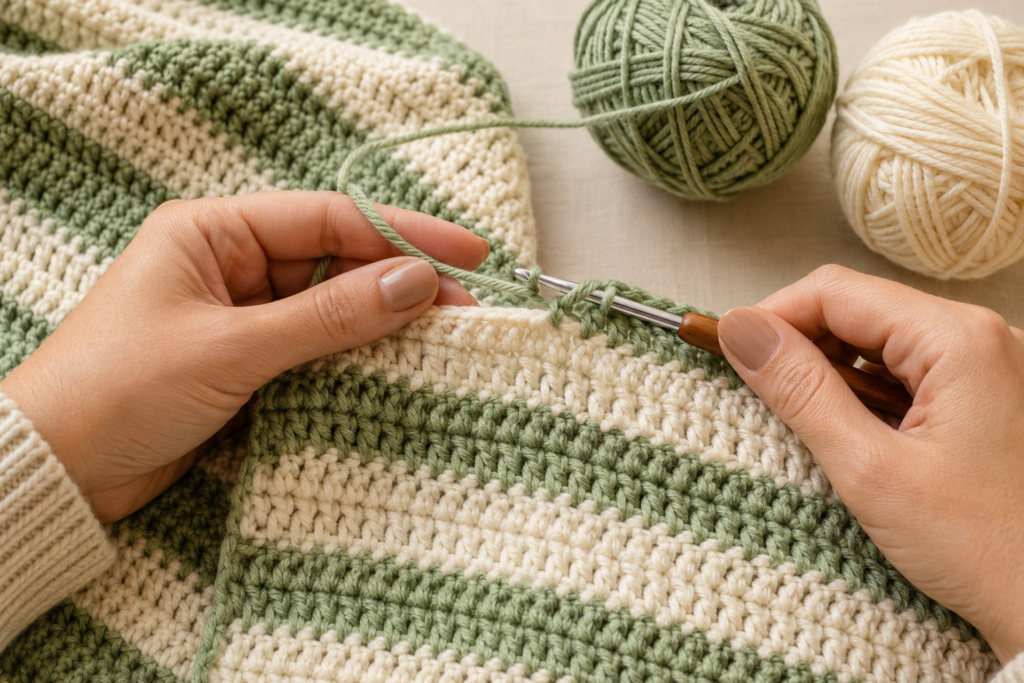
Now let’s make the matching hat.
This beanie uses half double crochet and simple crown increases.
The pattern can be adapted for several baby sizes.
Baby Beanie Size Chart
| Size | Approx. Head Circumference | Approx. Hat Height |
|---|---|---|
| Newborn | 13–14 in | 5–5.5 in |
| 0–3 months | 14–15 in | 5.5–6 in |
| 3–6 months | 15–17 in | 6–6.5 in |
| 6–12 months | 16–18 in | 6.5–7 in |
| 12–24 months | 17–19 in | 7–7.5 in |
These are approximate planning measurements. Whenever possible, measure the baby’s head rather than relying solely on age.
Baby Beanie Pattern
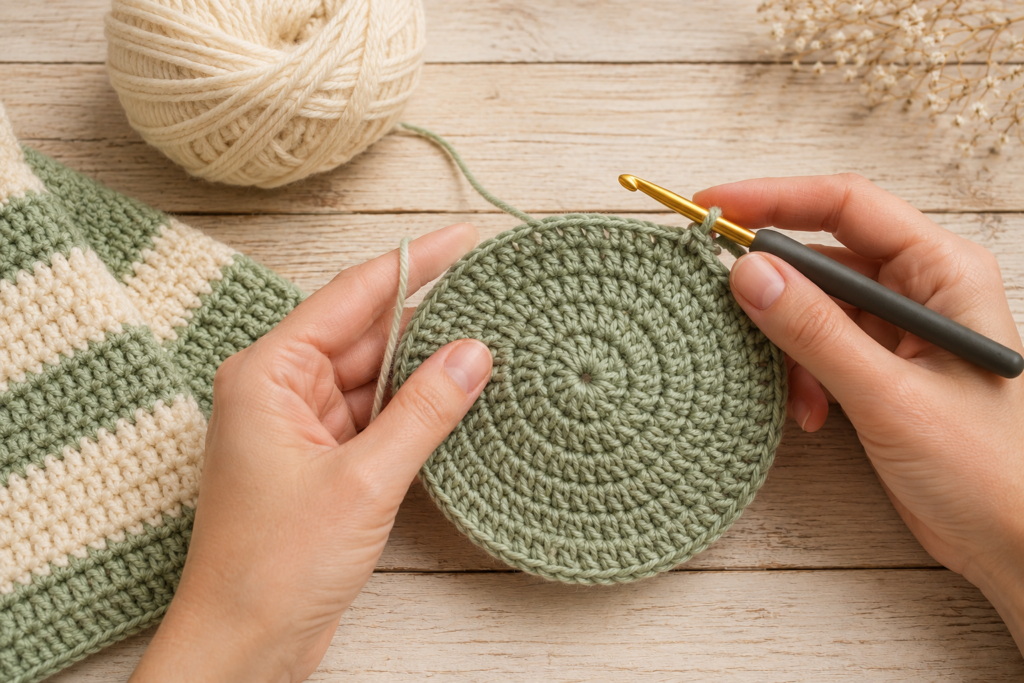
Crown
Round 1
Make a magic ring.
Work 10 hdc into the ring.
Join with a slip stitch.
Round 2
Chain 1.
Work 2 hdc in each stitch around.
You should have:
20 stitches
Round 3
Chain 1.
Repeat:
1 hdc, 2 hdc in next stitch
around.
You should have:
30 stitches
Round 4
Chain 1.
Repeat:
1 hdc in the next 2 stitches, 2 hdc in the next stitch
around.
You should have:
40 stitches
Continue increasing evenly until the crown reaches the diameter appropriate for your chosen size.
Continuing the Beanie
Once the crown is wide enough, stop increasing.
Work one hdc into every stitch around.
Continue until the hat reaches the desired height.
For a small newborn beanie, this may take approximately 8–10 rounds after the crown.
For larger sizes, add additional rounds.
Simple Beanie Stripe Pattern
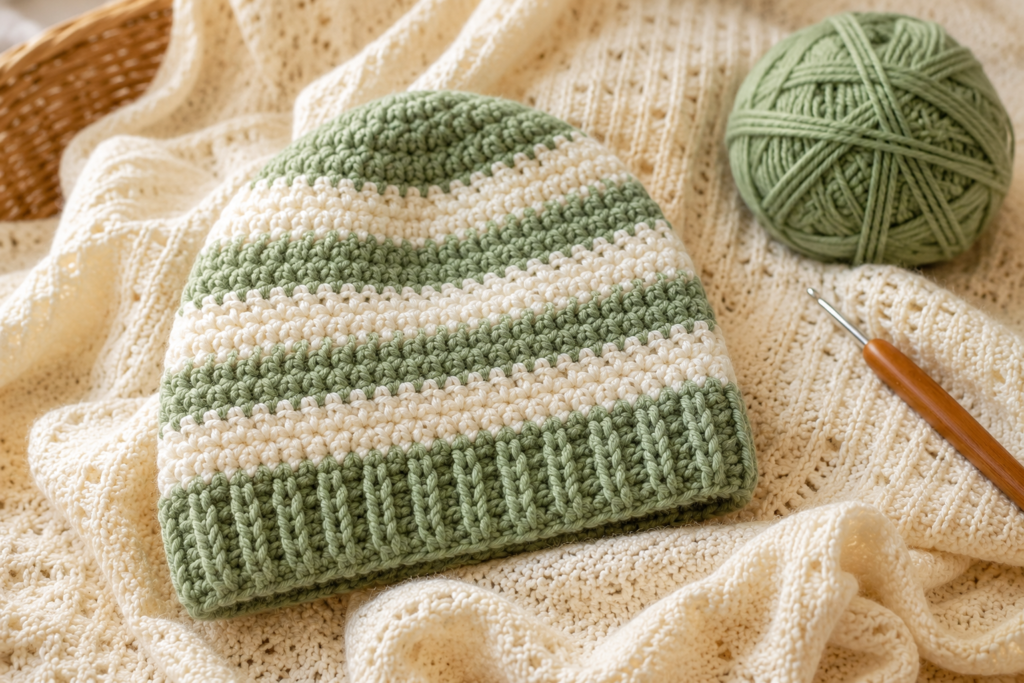
To match the blanket:
| Rounds | Color |
|---|---|
| 1–3 | Cream |
| 4–6 | Sage |
| 7–9 | Cream |
| 10–12 | Sage |
| Final rounds | Cream |
Adjust the number of rounds depending on the size you’re making.
Creating a Simple Beanie Ribbed Edge
For a more structured bottom edge, use single crochet through the back loop only.
Work several rounds of:
sc BLO
This produces subtle horizontal ridges.
Keep the edge comfortable and flexible.
It shouldn’t feel tight around the baby’s head.
Step-by-Step Beanie Tutorial
Step 1: Make the Magic Ring
Create a magic ring and work your initial hdc stitches inside it.
If you struggle with the magic ring, you can alternatively chain 2 and work your first round into the second chain from the hook.
Step 2: Increase the Crown
Increase evenly during the first few rounds.
The crown should remain relatively flat.
Step 3: Check the Shape
If the crown begins forming a bowl too early, you may need additional increases.
If it becomes wavy or ruffled, you may be increasing too frequently.
Step 4: Stop Increasing
Once the crown has reached the required diameter, work even rounds.
Step 5: Measure the Height
Measure from the center of the crown toward the bottom edge.
Continue until the beanie reaches the desired height.
Step 6: Add the Border
Finish with several rounds of sc BLO if you want a ribbed edge.
Step 7: Fasten Off
Cut the yarn, pull the tail through the final loop and weave the end securely.
How to Customize the Blanket and Beanie Set
One of the best things about making a coordinated set is that you don’t have to use identical designs.
Here are some easy combinations.
Matching Stripes
Use exactly the same stripe sequence on the blanket and hat.
This creates the strongest coordinated appearance.
Reversed Stripes
If the blanket starts with cream, begin the hat with green.
This gives the pieces a matching but slightly less uniform look.
Neutral Blanket + Colorful Hat
Make the blanket primarily cream and add a colorful striped beanie.
This keeps the larger piece understated while making the hat the accent.
Solid Blanket + Striped Beanie
A solid cream blanket paired with a striped hat is another simple combination.
How to Make the Blanket Larger
The easiest way to increase blanket size is to change the number of foundation chains and rows.
For Width
Increase the number of foundation stitches.
For Length
Continue adding rows.
For a Square Blanket
Keep the width and length approximately equal.
For a Larger Toddler Blanket
Increase both dimensions while keeping the same stitch pattern.
| Desired Result | What to Change |
|---|---|
| Wider | More foundation chains |
| Longer | More rows |
| Square | Similar width and length |
| Toddler size | Increase both |
| Smaller receiving blanket | Fewer chains and rows |
Common Crochet Problems and Solutions
My blanket is getting wider
You’re probably adding stitches accidentally at the beginning or end of rows.
Count your stitches regularly.
My blanket is getting narrower
You may be missing the final stitch.
Pay particular attention to the stitch near the turning chain.
My stripes aren’t even
Make sure you’re working the same number of rows in each color.
My border looks wavy
You may have added too many stitches along the sides.
Try spacing your border stitches more evenly.
My corners are curling
Make sure you’re placing enough stitches in each corner.
Three single crochets in a corner is a useful starting point for a simple border.
My beanie is too small
Add another increase round before beginning the straight sides.
My beanie is too loose
Your crown may be too wide, or your tension may be too loose.
Try a smaller hook or reduce the number of increase rounds.
My beanie looks like a bowl
You may not have enough increases.
Add increases gradually until the crown lies flatter.
The hat is too short
Continue working additional even rounds before adding the final border.
Baby Safety and Practical Considerations
When making crochet items for babies, simple construction is usually best.
Avoid adding small detachable decorations such as:
- Buttons
- Beads
- Loose charms
- Small plastic pieces
- Long cords
- Loose appliqués
Anything that can detach should be treated carefully around babies.
For a baby beanie, make sure the finished fabric isn’t excessively tight.
For the blanket, inspect the finished piece for loose yarn ends and unsecured embellishments before use.
Also remember that handmade blankets and hats should be used appropriately for the baby’s age and environment. Follow safe infant-sleep guidance rather than assuming a crochet blanket is appropriate inside a baby’s sleep space.
Washing and Care
The best care method depends on the yarn.
Always check the yarn label first.
For washable yarn, a typical care routine may include:
- Wash using the recommended temperature.
- Use a gentle detergent.
- Avoid harsh chemicals unless the yarn label permits them.
- Reshape the blanket while damp if necessary.
- Dry according to the manufacturer’s instructions.
- Make sure everything is completely dry before storing.
For handmade baby gifts, it’s helpful to include a small care card explaining the yarn’s washing instructions.
Turning the Set Into a Baby Shower Gift
This crochet baby blanket and matching beanie can easily become the centerpiece of a handmade gift basket.
Consider adding:
- Crochet baby socks
- Crochet baby booties
- A handmade bib
- A small crochet toy
- A baby hat
- A soft neutral onesie
- A personalized card
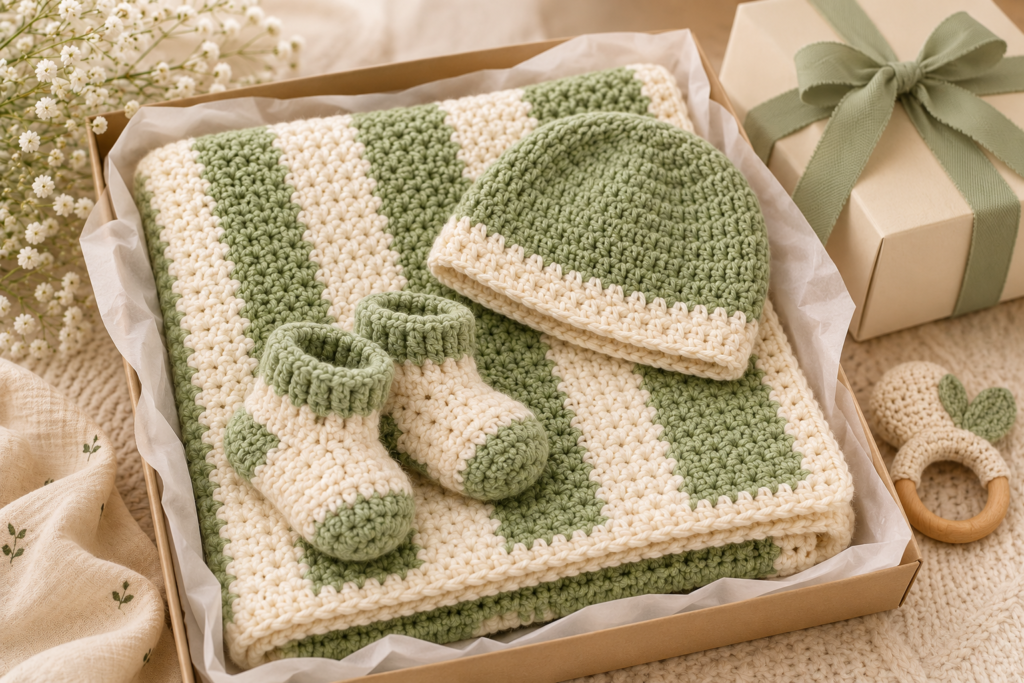
For presentation, fold the blanket neatly and place the beanie on top.
A simple cream or kraft gift box with tissue paper can make the handmade colors stand out.
You can also roll the blanket and tie it with a wide ribbon, placing the matching beanie on top.
Affiliate Disclosure
Affiliate Disclosure: This post may contain affiliate links. If you purchase something through one of these links, we may earn a small commission at no additional cost to you. We only recommend products that we believe can be useful for your crochet projects. Thank you for supporting our content.
Frequently Asked Questions
What is the best yarn for a crochet baby blanket?
A soft, washable yarn designed for baby garments is a practical choice. Soft acrylic, cotton blends and other machine-washable fibers can all work well depending on the desired warmth and texture.
How big should a crochet baby blanket be?
There isn’t one universal baby blanket size. A receiving blanket may be around 30 × 36 inches, while a larger baby or toddler blanket can be considerably bigger.
How many colors should I use?
Two colors are enough to create a beautiful striped blanket. Three or four colors can create a more colorful design, while a single neutral color gives a minimalist appearance.
Is this crochet baby blanket pattern beginner-friendly?
Yes. The blanket mainly uses double crochet, making it suitable for someone who knows the basic crochet stitches and wants to practice maintaining rows and changing colors.
Can I make the blanket without stripes?
Absolutely. You can make the entire blanket in one color or create your own stripe sequence.
How do I make a matching crochet baby hat?
Use the same yarn and color palette and make the beanie separately using the included half-double-crochet pattern.
How do I know which beanie size to make?
Measure the baby’s head if possible. Age-based sizing is only an estimate because babies have different head circumferences.
Can I use cotton yarn for the blanket?
Yes. Cotton can create a breathable blanket, although it may behave differently from acrylic and can produce a heavier fabric depending on the yarn.
How do I keep my crochet blanket edges straight?
Count your stitches at the end of every row and make sure your turning chain isn’t accidentally being treated as a regular stitch unless your chosen pattern specifically requires it.
Can I sell blankets made from this pattern?
If you’re using an original pattern like the one provided here, you can generally make finished items for personal use or sale, but your own site’s pattern-use policy should clearly state what you’re permitting. Do not claim someone else’s pattern or photography as your own.
Related Crochet Posts
If you’re building a strong baby crochet content cluster, this article should link naturally to other relevant projects on your website.
Easy Crochet Baby Socks Pattern: Free Beginner-Friendly Tutorial
A perfect companion project for this blanket and beanie set, especially when creating a complete handmade baby gift.
10 Free Granny Square Crochet Patterns for Beginners
Another small wearable project that pairs naturally with a handmade baby blanket.
31 Crochet Shawl Patterns That Are Beautiful, Easy & Stylish
A cute beginner-friendly crochet project for readers who enjoy small handmade designs.
Free Granny Square Crochet Patterns
A useful next step for readers who want to explore colorful crochet motifs and eventually use them in blankets or baby garments.
Crochet Baby Sweater Patterns
A natural internal link for readers interested in expanding their handmade baby wardrobe.
Baby Crochet Patterns for Beginners
A broader collection page can connect this project with your other baby-focused crochet tutorials.
Quick Project Checklist
Before starting the blanket:
- Choose your yarn
- Select two or more colors
- Check the yarn label
- Choose an appropriate hook
- Make a gauge swatch
- Decide on blanket dimensions
- Plan your stripe sequence
- Make the foundation chain
- Begin the blanket
- Count stitches regularly
- Change colors consistently
- Add the border
- Weave in all ends
For the matching beanie:
- Measure the baby’s head if possible
- Choose the appropriate size
- Make the crown
- Check the diameter
- Work the sides
- Check the height
- Add the cuff
- Secure the final end
- Inspect the finished hat
Final Thoughts
A crochet baby blanket with matching beanies is one of those projects that feels much more special than a simple single crochet item. The blanket gives you plenty of room to play with stripes and color combinations, while the smaller beanie provides a quick way to complete the matching set.
The construction is intentionally simple, making this a good project for crocheters who want to move beyond basic practice squares and start creating useful handmade baby items.
Start with the blanket if you want a relaxing, repetitive project, or make the beanie first if you’d rather complete something quickly. Once you’ve established your colors and stitch pattern, you can coordinate the two pieces into a beautiful handmade set for a baby shower, newborn gift, or growing baby’s wardrobe.
The best part is that the pattern is easy to personalize. Change the colors, adjust the dimensions, add a different border, or reverse the stripe sequence on the hat. With the same basic techniques, you can create a completely different set every time.







