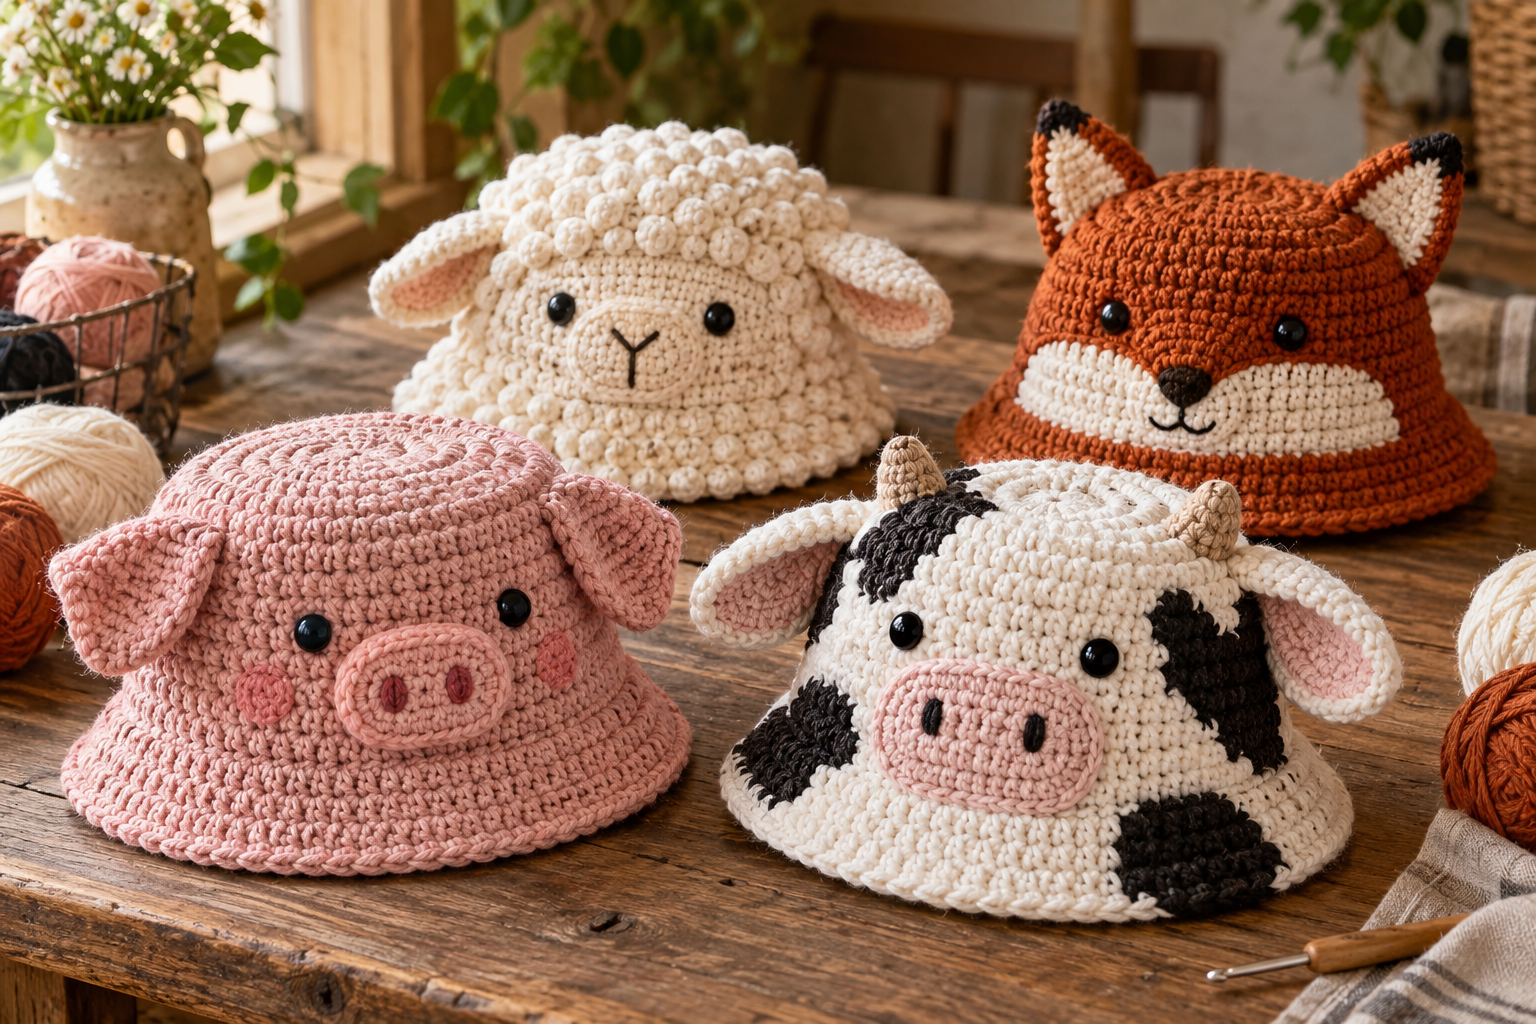
If you love crochet projects that are both practical and adorable, these farm animal crochet bucket hats are a perfect weekend make.
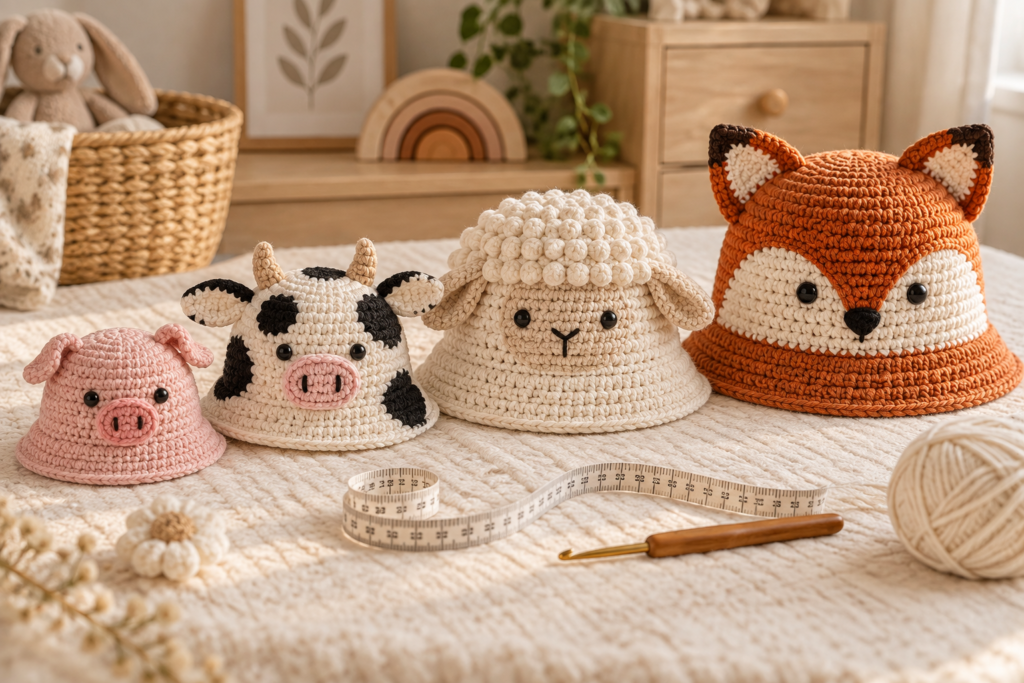
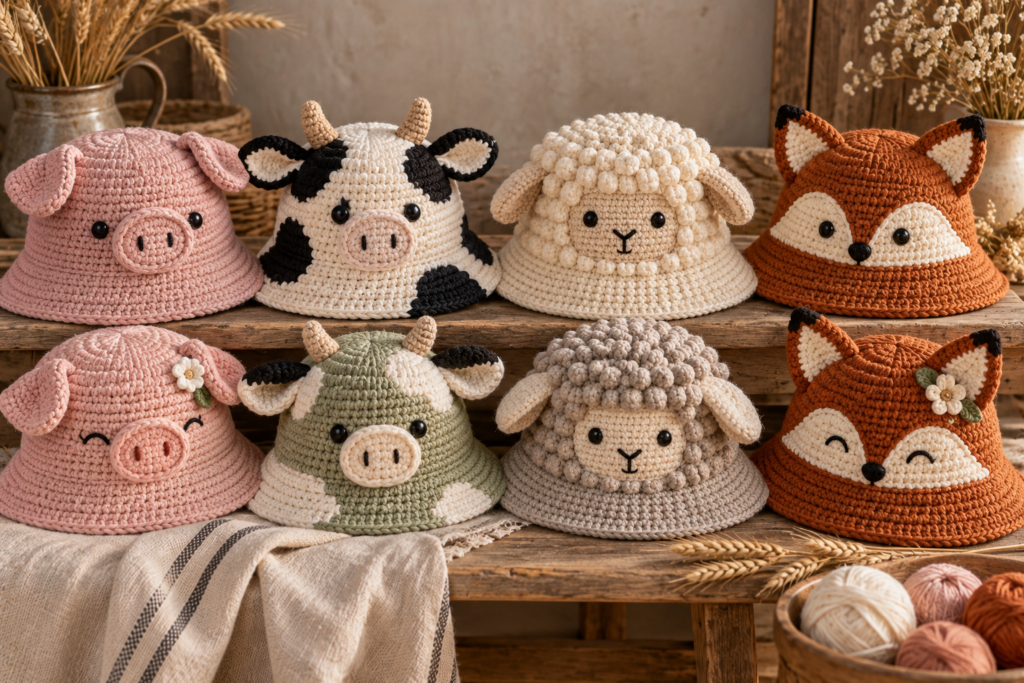
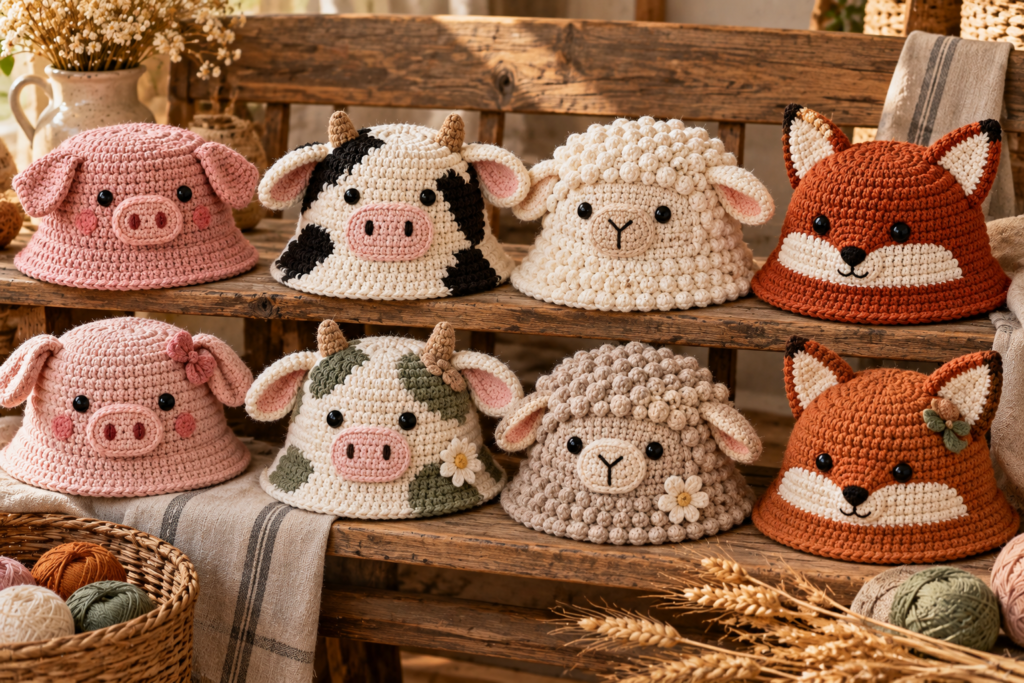
Inspired by the playful designs shown in the reference, this collection turns one simple crochet bucket-hat base into four different animal designs:
- Pink Pig
- Black-and-White Cow
- Fluffy Sheep
- Rusty Fox
The great thing about this project is that you don’t need four completely different hat constructions. The basic bucket hat stays almost the same, while the ears, muzzle, face details, colors and texture transform it into a completely different animal.
This makes the pattern especially useful if you’re making handmade gifts, sibling sets, birthday accessories, Halloween outfits, farm-themed photography props or crochet items to sell.
The patterns below are written as an original construction inspired by the visual reference, rather than copied from the pattern shown in the image.
What You’ll Learn
This tutorial covers:
- How to crochet the bucket-hat base
- How to adjust the circumference
- How to create a structured brim
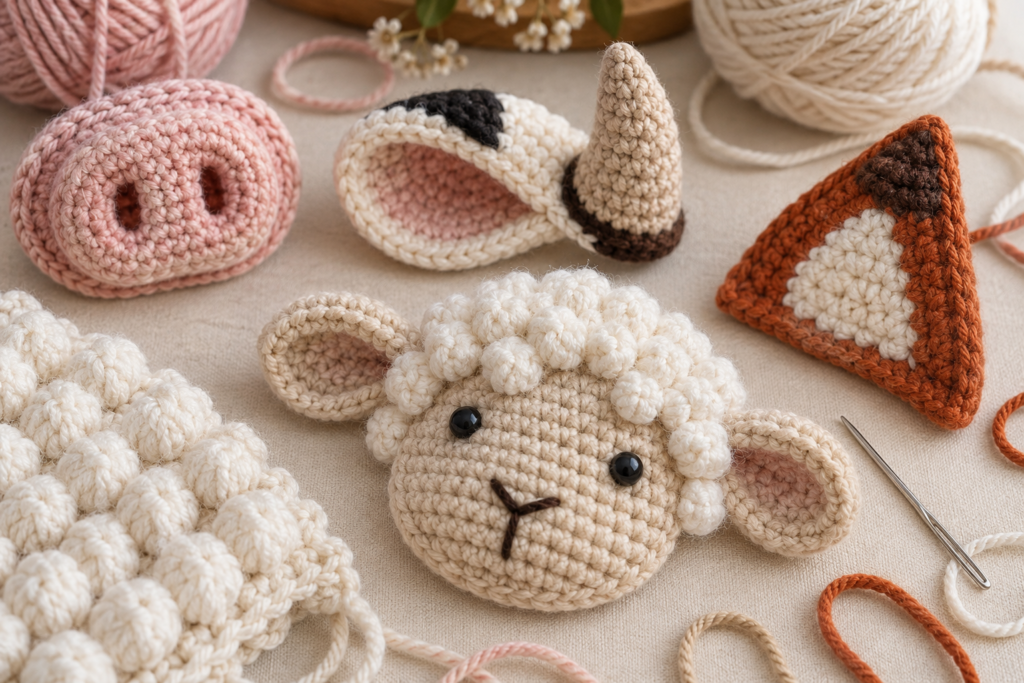
- How to make pig ears and snout
- How to create cow ears, horns and muzzle
- How to make a textured sheep face
- How to create fox ears and facial markings
- How to attach the animal details
- How to make different sizes
- How to change colors cleanly
- How to make the hats more structured
- How to personalize the designs
- How to troubleshoot common problems
- How to wash and care for the finished hats
- How to turn the collection into matching family or sibling sets
The Basic Construction
All four designs use the same basic bucket-hat structure:
Crown → sides → brim → animal details
This means you can make one basic hat first and then experiment with different animal faces.
| Section | Purpose |
|---|---|
| Crown | Covers the top of the head |
| Side wall | Creates the bucket shape |
| Brim | Provides the characteristic hat silhouette |
| Ears | Identifies the animal |
| Muzzle | Creates the animal’s face |
| Facial details | Adds personality |
| Decorative edging | Finishes the hat |
Materials
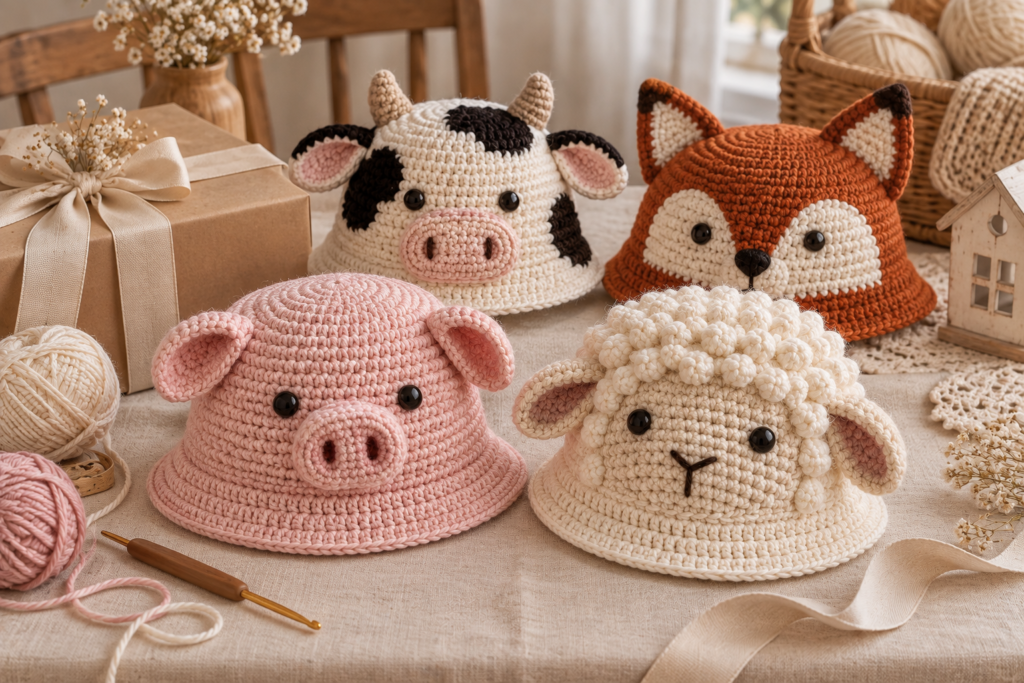
Basic Materials
| Material | Recommendation |
|---|---|
| Yarn | Worsted/medium-weight yarn |
| Main hook | 4.0–4.5 mm |
| Detail hook | 3.5–4.0 mm |
| Tapestry needle | 1 |
| Stitch markers | 2–4 |
| Scissors | 1 |
| Measuring tape | 1 |
| Fiberfill | Small amount for raised muzzles |
| Embroidery needle | 1 |
| Optional interfacing | For extra brim structure |
For children’s hats, choose soft yarn that feels comfortable against the skin.
Yarn Color Guide
| Animal | Main Color | Accent Colors |
|---|---|---|
| Pig | Dusty pink | Dark pink, black |
| Cow | White | Black, pink |
| Sheep | Cream | Beige, black |
| Fox | Rust orange | White, black, cream |
You can also reverse the colors to create your own variations.
Choosing Yarn
A smooth yarn is easiest for beginners because the stitches remain visible.
Good characteristics include:
- Soft texture
- Consistent thickness
- Good stitch definition
- Easy washing
- Comfortable against skin
- Good color selection
For the sheep version, you can deliberately choose a textured or boucle-style yarn for the wool effect, but use a smooth yarn for the actual hat base if you’re still learning.
Hook Size
Start with:
4.0 mm hook + worsted-weight yarn
If your fabric is very loose, move down to:
3.5 mm
If the fabric is too stiff or small, try:
4.5 mm
Gauge
A useful starting gauge is approximately:
16–18 single crochet stitches = 10 cm
and approximately:
18–20 rounds = 10 cm
Gauge can vary considerably depending on yarn and tension, so head circumference is more important than blindly following a stitch count.
Measuring the Head
Before crocheting, measure around the widest part of the head.
Place the measuring tape:
- Above the eyebrows
- Around the back of the head
- Around the largest circumference
Do not pull the tape tightly.
Size Guide
Here is a practical starting point.
| Size | Approx. Age | Head Circumference | Finished Hat Circumference |
|---|---|---|---|
| Baby | 0–6 months | 36–43 cm | 35–42 cm |
| Toddler | 1–3 years | 46–50 cm | 45–49 cm |
| Child | 4–8 years | 50–54 cm | 49–53 cm |
| Older Child | 9–12 years | 53–56 cm | 52–55 cm |
| Teen/Adult | 13+ | 55–59 cm | 54–58 cm |
These are starting ranges rather than guaranteed measurements. Always measure the intended wearer when possible.
Understanding Negative Ease
A crochet hat shouldn’t usually be exactly the same circumference as the head.
A small amount of negative ease helps the hat stay in place.
A useful starting point is:
Head circumference − 1 to 2 cm = finished hat circumference
For a snug children’s hat, you can use slightly more negative ease.
For a relaxed bucket hat, use less.
Crochet Abbreviations
The patterns use US crochet terminology.
| Abbreviation | Meaning |
|---|---|
| MR | Magic ring |
| ch | Chain |
| sc | Single crochet |
| hdc | Half double crochet |
| dc | Double crochet |
| sl st | Slip stitch |
| st | Stitch |
| sts | Stitches |
| inc | Increase |
| dec | Decrease |
| BLO | Back loop only |
| FLO | Front loop only |
| rep | Repeat |
| FO | Fasten off |
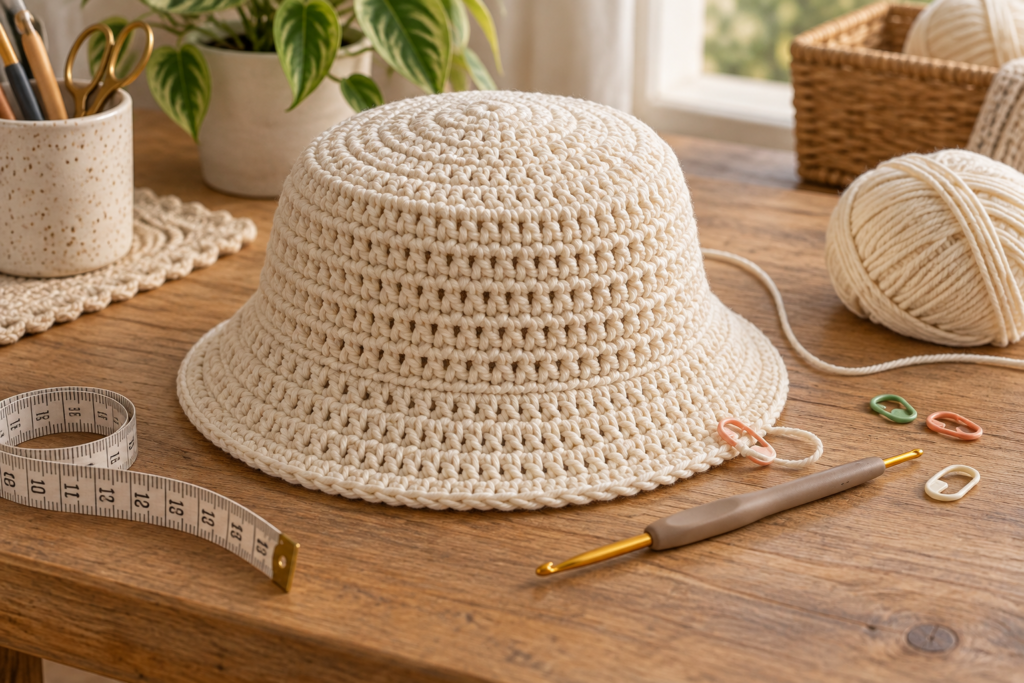
BASIC BUCKET HAT PATTERN
Make this base first.
You can then turn it into a pig, cow, sheep or fox.
Crown
Begin with your main color.
Round 1
Make a magic ring.
Work:
6 sc into MR
Join with a slip stitch.
6 sts
Round 2
2 sc in each stitch around.
12 sts
Round 3
(sc, inc) × 6
18 sts
Round 4
(2 sc, inc) × 6
24 sts
Round 5
(3 sc, inc) × 6
30 sts
Round 6
(4 sc, inc) × 6
36 sts
Continue increasing in the same pattern until the crown reaches the desired diameter.
Crown Diameter Guide
| Size | Approx. Crown Diameter |
|---|---|
| Baby | 12–13 cm |
| Toddler | 14–15 cm |
| Child | 16–17 cm |
| Adult | 18–19 cm |
Stop increasing once the crown is approximately the correct width.
Creating the Hat Sides
Once the crown is wide enough, stop increasing.
Work:
sc around
for approximately 7–12 rounds depending on size.
The fabric should begin to curve downward.
Side Height Guide
| Size | Approx. Side Height |
|---|---|
| Baby | 7–8 cm |
| Toddler | 8–9 cm |
| Child | 9–10 cm |
| Adult | 10–11 cm |
Try the hat on periodically if possible.
The bottom edge should sit around the forehead without covering the eyes.
Creating the Brim
The brim is where the bucket-hat silhouette develops.
Brim Round 1
Work:
(4 sc, inc) around.
If your hat needs a more gradual flare, use:
(5 sc, inc)
instead.
Brim Round 2
Sc around.
Brim Round 3
Repeat the increase pattern from Round 1.
Brim Round 4
Sc around.
Continue alternating increase and plain rounds until the brim reaches your preferred width.
Brim Width Guide
| Style | Approx. Brim Extension |
|---|---|
| Small | 2–3 cm |
| Classic | 3–4 cm |
| Wide | 4–5 cm |
| Sun Hat | 5–7 cm |
For the playful animal hats in the reference, a 3–4 cm brim creates a good balance.
Keeping the Brim Flat
If your brim curls upward:
You need more increases.
If your brim becomes wavy:
You have too many increases.
If it feels floppy:
Try:
- Smaller hook
- Firmer yarn
- Additional round
- Light blocking
- A hidden stabilizer
Optional Structured Brim
For a more structured bucket hat, place a lightweight flexible stabilizer inside the brim.
Don’t use sharp or uncomfortable materials.
The stabilizer should be:
- Flexible
- Smooth
- Fully enclosed
- Impossible to contact the skin
PIG BUCKET HAT
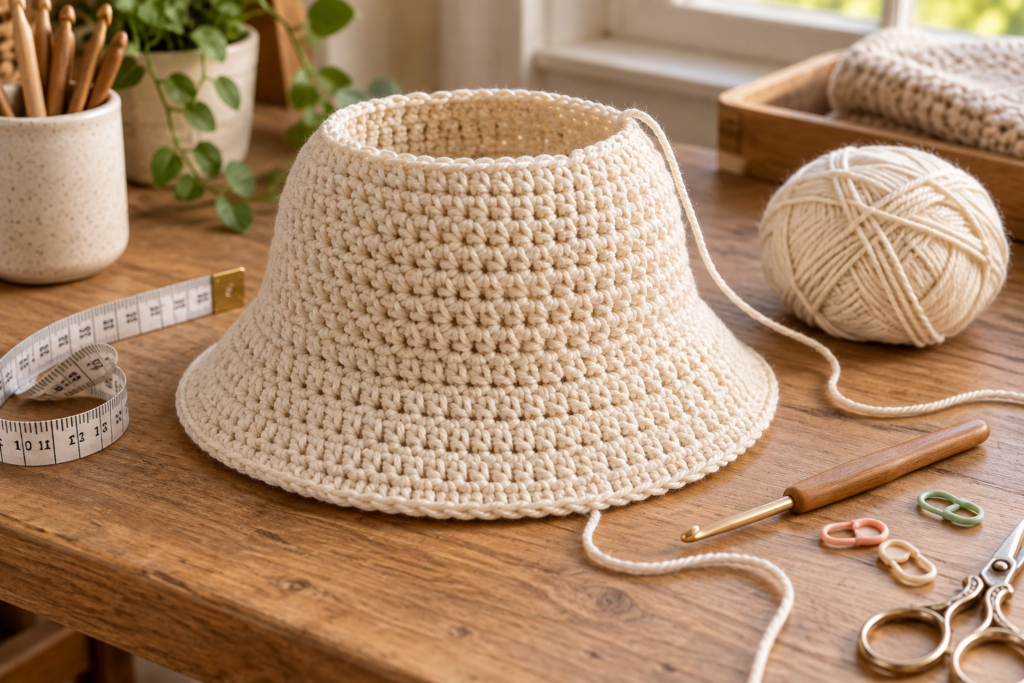
Now transform the basic hat into a cute pink pig.
Pig Color Palette
| Component | Color |
|---|---|
| Hat | Dusty pink |
| Ears | Pink |
| Inner ears | Light pink |
| Snout | Medium pink |
| Nostrils | Dark pink |
| Eyes | Black |
Pig Ears
Make two.
Round 1
MR, 6 sc.
Round 2
Inc around.
12 sts
Round 3
(sc, inc) × 6
18 sts
Round 4
Sc around.
Fasten off, leaving a sewing tail.
Flatten the piece slightly.
Fold the bottom edge inward to create a soft curved ear.
Sew to the top sides of the hat.
Pig Snout
Use a darker pink.
Round 1
MR, 6 sc.
Round 2
2 sc in each stitch.
12 sts
Round 3
(sc, inc) × 6
18 sts
Round 4
Sc around.
Fasten off.
Add two small embroidered nostrils.
Do not make them excessively raised.
Pig Face Placement
Position the snout slightly below the center of the hat.
Place the eyes approximately:
2–3 cm above the snout
depending on hat size.
For smaller hats, reduce the distance.
Pig Face
Embroidery creates a cleaner finish than plastic pieces.
Add:
- Two small black eyes
- Two nostrils
- Optional tiny smile
Pig Bow Variation
For an extra cute version, add a small crochet bow.
Simple Bow
Chain 15.
Sc across.
Work approximately 5–6 rows.
Fasten off.
Wrap yarn tightly around the middle.
Sew to one ear.
COW BUCKET HAT
The cow design is built from the same base but uses black patches, ears, horns and a pink muzzle.
Cow Color Palette
| Component | Color |
|---|---|
| Hat | White |
| Spots | Black |
| Ears | White + pink |
| Horns | Beige |
| Muzzle | Pink |
| Eyes | Black |
Cow Spots
Instead of making complicated color changes in the main hat, create small crochet patches and sew them onto the finished hat.
This makes the pattern easier.
Small Spot
MR.
Work approximately:
6 sc
Increase irregularly to create a rounded organic shape.
Finish when the patch measures approximately:
2–4 cm
Make several different shapes.
Avoid making every spot identical.
Large Cow Spot
Create a slightly irregular oval.
Use:
- 6 sc in MR
- Increase around
- Add a few additional stitches on opposite sides
- Fasten off
The exact shape can be adjusted visually.
Cow Ears
Make two.
Round 1
MR, 6 sc.
Round 2
Inc around.
Round 3
Sc around.
Flatten.
Add a smaller pink inner-ear piece.
Sew to the sides of the crown.
Cow Horns
Use beige or light brown yarn.
Round 1
MR, 6 sc.
Round 2
Sc around.
Round 3
Sc around.
Fasten off.
Stuff very lightly.
Sew near the base of the ears.
For a baby or toddler version, embroidered horn shapes are an alternative if you want everything completely soft and flat.
Cow Muzzle
Use pink yarn.
Create an oval approximately:
5–7 cm wide
for a child-size hat.
Make:
- Chain 6.
- Sc around the chain.
- Work increases at both ends.
- Continue until the desired oval is reached.
- Add two embroidered nostrils.
Sew the muzzle to the front.
SHEEP BUCKET HAT
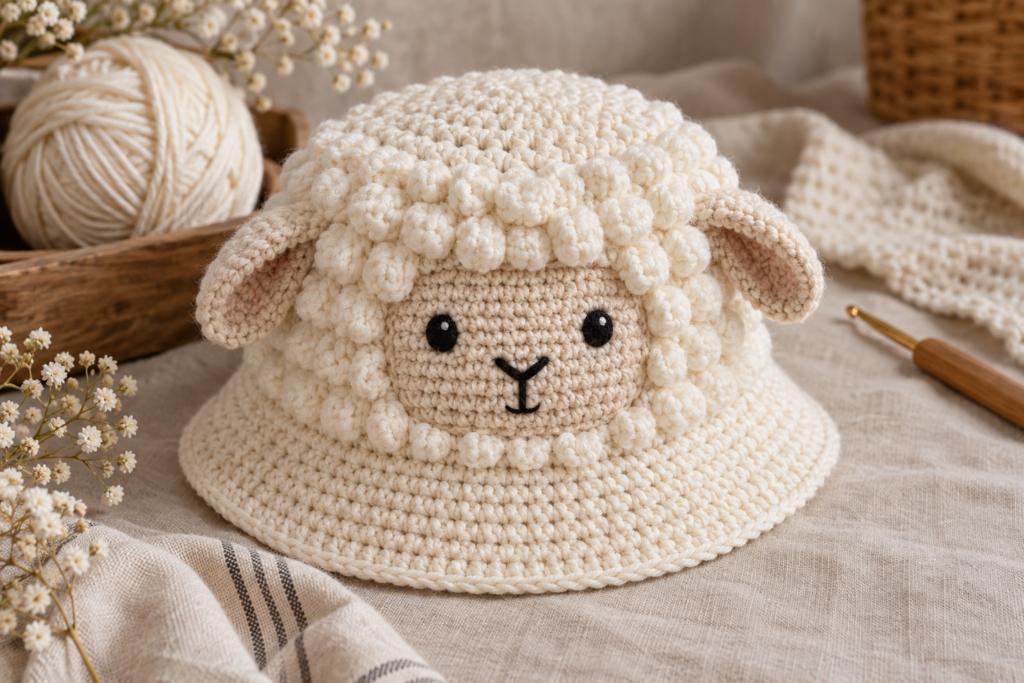
The sheep version gets its character from texture.
The easiest approach is:
Smooth crochet base + textured wool-like details.
Sheep Colors
| Component | Color |
|---|---|
| Hat | Cream |
| Wool texture | Cream/off-white |
| Face | Beige |
| Ears | Black or beige |
| Eyes | Black |
| Nose | Black |
Creating the Sheep Texture
There are several ways to imitate fluffy wool.
Option 1 — Bobbles
Work bobble stitches across selected areas.
Option 2 — Loop Stitch
Loop stitch creates a fluffy surface.
Option 3 — Appliqué
Make small fluffy circles and sew them to the hat.
For beginners, appliqué circles are easiest to control.
Sheep Wool Appliqués
Make several small textured circles.
Each piece can be approximately:
2–3 cm
in diameter.
Sew them around the upper sides of the hat.
Leave the face area relatively smooth.
Sheep Face
Use beige yarn.
Create an oval face approximately:
5–7 cm
long.
Sew it to the front.
Sheep Ears
Make two small oval pieces.
Use:
- Beige
- Black
- Dark gray
Attach them slightly behind the face.
Sheep Eyes
Embroider two small black eyes.
Add a tiny black nose.
For a softer expression, place the eyes slightly closer together.
FOX BUCKET HAT
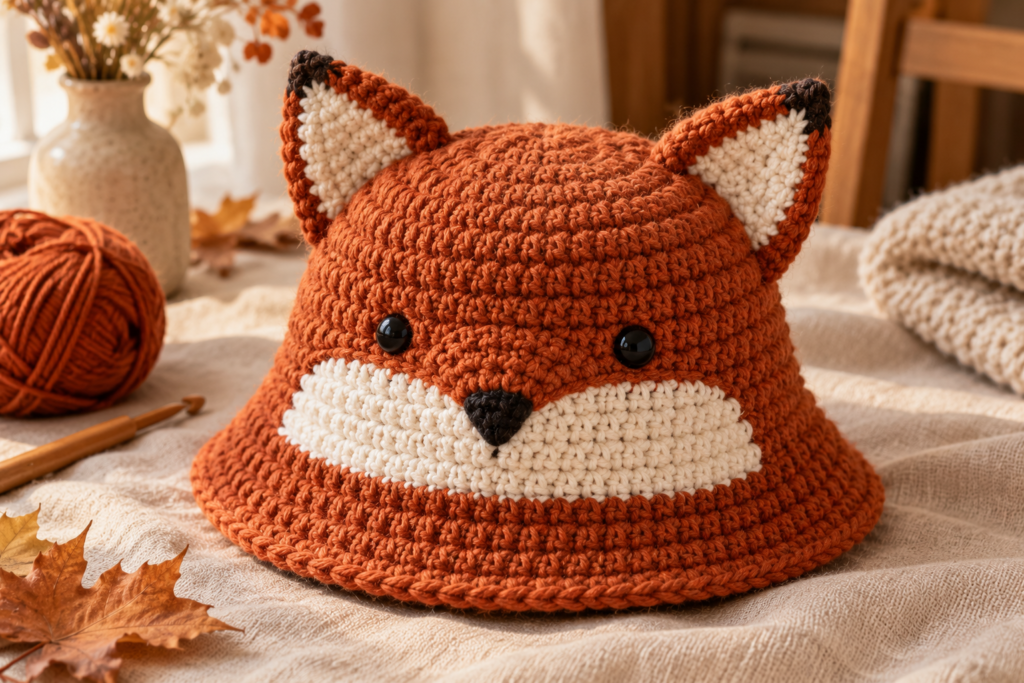
The fox version is one of the easiest to recognize because of its pointed ears and contrasting white face.
Fox Color Palette
| Component | Color |
|---|---|
| Hat | Rust orange |
| Ears | Rust + cream/black |
| Face | White/cream |
| Nose | Black |
| Eyes | Black |
| Optional border | White |
Fox Ears
Make two.
Round 1
MR, 6 sc.
Round 2
Inc around.
Round 3
(sc, inc) × 6
Round 4
Sc around.
Continue without increasing until the piece becomes slightly elongated.
Fold the bottom slightly.
Sew the ears to the crown.
Fox Inner Ear
Create a smaller triangular piece in:
- Cream
- Black
- Dark brown
Sew it to the center of each ear.
Fox Face
Create a cream or white muzzle/face patch.
A simple version can be created using an oval.
For a more fox-like appearance, shape the top slightly narrower.
Sew the patch to the front.
Fox Nose
Embroider a small black triangular nose.
Add two short embroidered lines downward.
Optionally add a subtle smile.
Fox Eye Placement
The eyes should sit just above the white facial patch.
For a playful expression:
Place the eyes slightly wider apart.
For a more traditional fox look:
Place them slightly closer together.
Making All Four Hats as a Collection
This is one of the biggest advantages of this project.
Once you’ve perfected the base hat, you can make an entire collection.
| Hat | Base | Main Details |
|---|---|---|
| Pig | Pink | Ears + snout |
| Cow | White | Spots + horns + muzzle |
| Sheep | Cream | Wool texture + face |
| Fox | Orange | Pointed ears + white face |
The basic construction remains the same.
Matching Sibling Set
A farm-animal collection is perfect for siblings.
For example:
Baby: Pig
Toddler: Sheep
Older child: Cow
Parent: Fox
You can keep the same brim and proportions while changing the animal details.
How to Make the Hats More Professional
The difference between a basic crochet hat and a polished handmade product often comes down to finishing.
1. Keep the Crown Flat
Check your increases regularly.
2. Count Your Rounds
Write down every round.
3. Make Both Ears Identical
Place them side by side before sewing.
4. Secure All Embroidery
Hide the yarn tails inside the hat.
5. Block the Brim
Light blocking can dramatically improve the silhouette.
6. Keep the Face Centered
Measure from the center of the hat.
Face Placement Guide
| Feature | Position |
|---|---|
| Eyes | Upper face |
| Muzzle | Center |
| Nose | Center of muzzle |
| Ears | Upper sides |
| Horns | Behind ears |
| Spots | Around face |
| Wool | Around face |
Common Problems
| Problem | Cause | Solution |
|---|---|---|
| Crown becomes bowl-shaped | Too many increases | Reduce increases |
| Crown becomes cone-shaped | Too few increases | Add increases |
| Brim waves | Too many increases | Reduce increases |
| Brim curls | Too few increases | Add increases |
| Hat too tight | Small gauge | Larger hook |
| Hat too loose | Loose gauge | Smaller hook |
| Ears look uneven | Different tension | Count rounds |
| Face looks crooked | Poor placement | Mark center first |
| Spots look messy | Random placement | Arrange before sewing |
| Sheep looks flat | Not enough texture | Add bobbles/appliqués |
| Fox ears collapse | Too soft | Add a firmer inner layer |
| Hat loses shape | Loose tension | Use firmer yarn |
How to Find the Center of the Hat
Before attaching the face:
- Fold the hat in half.
- Mark the center front.
- Fold it in the opposite direction.
- Mark the second center.
- The intersection is your center point.
This makes facial placement much easier.
How to Make a Smaller Hat
Don’t simply remove random rounds.
Instead:
Reduce the crown diameter
Stop increasing earlier.
Reduce the side height
Work fewer straight rounds.
Reduce the brim
Use fewer increase rounds.
This preserves the proportions.
How to Make a Larger Hat
Increase the crown until it reaches the required diameter.
Then add side rounds.
Finally, add additional brim rounds.
The animal details can also be scaled up slightly.
Adult Farm Animal Bucket Hats
The same concept works beautifully for adults.
For an adult version:
- Use a deeper crown.
- Increase the circumference.
- Make the brim approximately 4–6 cm.
- Scale the ears and muzzle proportionally.
- Keep the animal details slightly more minimalist.
A black-and-white cow hat can look particularly fun for festivals or farm-themed events.
Halloween Versions
These designs can also become Halloween accessories.
Try:
Ghost Cow
White hat + black spots + exaggerated eyes.
Witch Pig
Pink pig + tiny purple witch hat.
Werefox
Rust-orange fox + darker ears + black details.
Spooky Sheep
Cream sheep + black eyes + dark gray details.
Farm-Themed Party Ideas
These hats can work as:
- Birthday accessories
- Farm birthday party props
- Children’s photo props
- School costume accessories
- Farm-animal themed outfits
- Halloween costumes
- Handmade gifts
- Baby photography accessories
Custom Color Ideas
Don’t feel limited to realistic animal colors.
Try:
| Animal | Alternative Colors |
|---|---|
| Pig | Pink + lavender |
| Cow | Cream + chocolate |
| Sheep | Beige + sage |
| Fox | Rust + dusty pink |
For a more modern aesthetic, use muted colors rather than bright primary shades.
How to Add a Crochet Flower
For a more decorative version, sew a small crochet flower onto one side of the brim.
A simple flower can be made using:
MR → 5 petals → fasten off
Use contrasting colors such as:
- Cream
- Pink
- Yellow
- Lavender
Adding a Bow
A bow is especially cute on:
- Pig
- Sheep
- Cow
Make a small rectangle.
Fold it.
Wrap the center tightly with yarn.
Sew it to the side of the hat.
Baby and Toddler Safety
If these hats are intended for babies or young children, inspect them carefully.
Pay particular attention to:
- Buttons
- Beads
- Safety eyes
- Decorative pieces
- Long yarn tails
- Loose embroidery
- Small horns
- Appliqués
For very young children, embroidered facial features are a safer design choice than detachable plastic components.
All decorative pieces should be securely attached and the finished hat should be inspected regularly.
Care Instructions
Always follow the care instructions for your specific yarn.
For washable yarn:
- Wash gently.
- Avoid harsh bleach.
- Don’t wring aggressively.
- Reshape while damp.
- Dry flat when appropriate.
- Allow the hat to dry completely.
Don’t store a damp crochet hat.
How to Photograph the Hats
These hats are extremely visual, so photography matters.
For your main article image, photograph all four together:
Pig + Cow + Sheep + Fox
Place them on:
- Brown craft paper
- Cream linen
- Wooden table
- Neutral nursery surface
This creates a strong handmade editorial look.
Individual Photography Ideas
Pig
Pink hat against cream fabric.
Cow
White hat against rustic wood.
Sheep
Cream hat against beige linen.
Fox
Orange hat against autumn foliage.
Product Photography for Selling
If you sell the finished hats, photograph:
- Front
- Side
- Back
- Close-up
- Brim
- Ear details
- Interior
- Size comparison
- Full animal collection
This gives potential buyers a much clearer understanding of the product.
Pricing Handmade Hats
If you plan to sell these, don’t calculate the price based only on yarn.
Use:
Material Cost + Labor + Packaging + Platform Fees + Overhead + Profit = Selling Price
Track your time while making the first hat.
Then you’ll know exactly how much labor is involved.
Pattern Difficulty
| Section | Difficulty |
|---|---|
| Basic crown | Beginner |
| Side wall | Beginner |
| Brim | Beginner |
| Pig ears | Beginner |
| Pig snout | Beginner |
| Cow spots | Beginner |
| Cow horns | Beginner |
| Sheep texture | Intermediate |
| Fox face | Beginner |
| Color changes | Beginner–Intermediate |
| Complete collection | Intermediate |
Beginner-Friendly Version
If this is your first animal crochet project, start with the pig.
It requires only:
- Basic bucket hat
- Two ears
- One snout
- Embroidered face
Once you’ve completed it, the cow, sheep and fox become much easier.
Intermediate Challenge
After making one basic hat, try the sheep.
The texture adds more visual interest and gives you practice with:
- Bobbles
- Texture
- Appliqués
- Layering
Quick Pattern Reference
Basic Hat
R1: MR, 6 sc
R2: inc around
R3: (sc, inc) × 6
R4: (2 sc, inc) × 6
R5: (3 sc, inc) × 6
R6: (4 sc, inc) × 6
Continue increasing until the crown reaches the desired diameter.
Then:
Sc around without increases until the side height is correct.
For the brim:
Alternate increase and plain rounds until the desired width is reached.
Pig
Add:
- 2 rounded ears
- 1 pink oval snout
- 2 embroidered nostrils
- 2 eyes
Cow
Add:
- 2 ears
- 2 small horns
- Pink muzzle
- Black crochet spots
Sheep
Add:
- Beige face
- Small ears
- Textured wool
- Black embroidered features
Fox
Add:
- 2 pointed ears
- Inner-ear triangles
- Cream facial patch
- Black nose
- Embroidered eyes
Project Checklist
Before finishing your hat:
- Correct head circumference measured
- Crown diameter checked
- Side height checked
- Brim lies flat
- Both ears match
- Face is centered
- Muzzle securely sewn
- Embroidery secured
- All yarn tails woven in
- No loose decorative pieces
- Hat gently blocked
- Final size checked
Frequently Asked Questions
Can beginners make these animal crochet bucket hats?
Yes. The basic bucket-hat construction uses simple stitches. The animal features are mostly small appliqués and embroidered details.
Which animal is easiest?
The pig is probably the simplest because it requires a basic hat, two ears and a simple snout.
Can I use another yarn weight?
Yes, but your hook size and finished dimensions will change. Always measure the hat rather than relying only on the stitch count.
Can I make these hats for adults?
Yes. Simply increase the crown until it matches the intended head circumference and adjust the side height and brim accordingly.
Can I make the cow spots with color changes?
Yes, but sewing separate patches onto the finished hat is generally easier for beginners and avoids complicated color changes.
How can I make the sheep look fluffier?
Use textured yarn, bobbles, loop stitches or small crocheted wool appliqués.
Can I make the fox in different colors?
Absolutely. A cream fox, gray fox or even pastel fox can create a completely different aesthetic.
Can I sell finished hats made from this pattern?
You can create and sell your own finished handmade items, subject to your local business rules and any terms applicable to the materials or pattern you use. If you do sell them, photograph your own finished products rather than using someone else’s photography.
Can I use buttons for the eyes?
For baby and toddler hats, embroidered facial features are preferable to detachable small components. If you use any decorative component, make sure it is securely attached and inspect it regularly.
Final Thoughts
These Farm Animal Crochet Bucket Hats are a great example of how one simple crochet construction can become an entire collection.
Start with the basic bucket-hat shape, then change the personality through a few carefully designed details:
Pink ears + snout = Pig
Black patches + horns + muzzle = Cow
Texture + woolly face = Sheep
Pointed ears + white face = Fox
That makes this project especially useful for crocheters who want to build a coordinated collection rather than making four completely unrelated patterns.
The designs can be adapted for babies, toddlers, children, teenagers and adults, and the same concept can be expanded into other animals such as a chicken, bunny, bear, duck, frog, dog or cat.
For the best result, focus on three things: accurate sizing, a flat structured brim and carefully centered facial details. Those small finishing choices are what turn a basic crochet hat into a polished animal design.