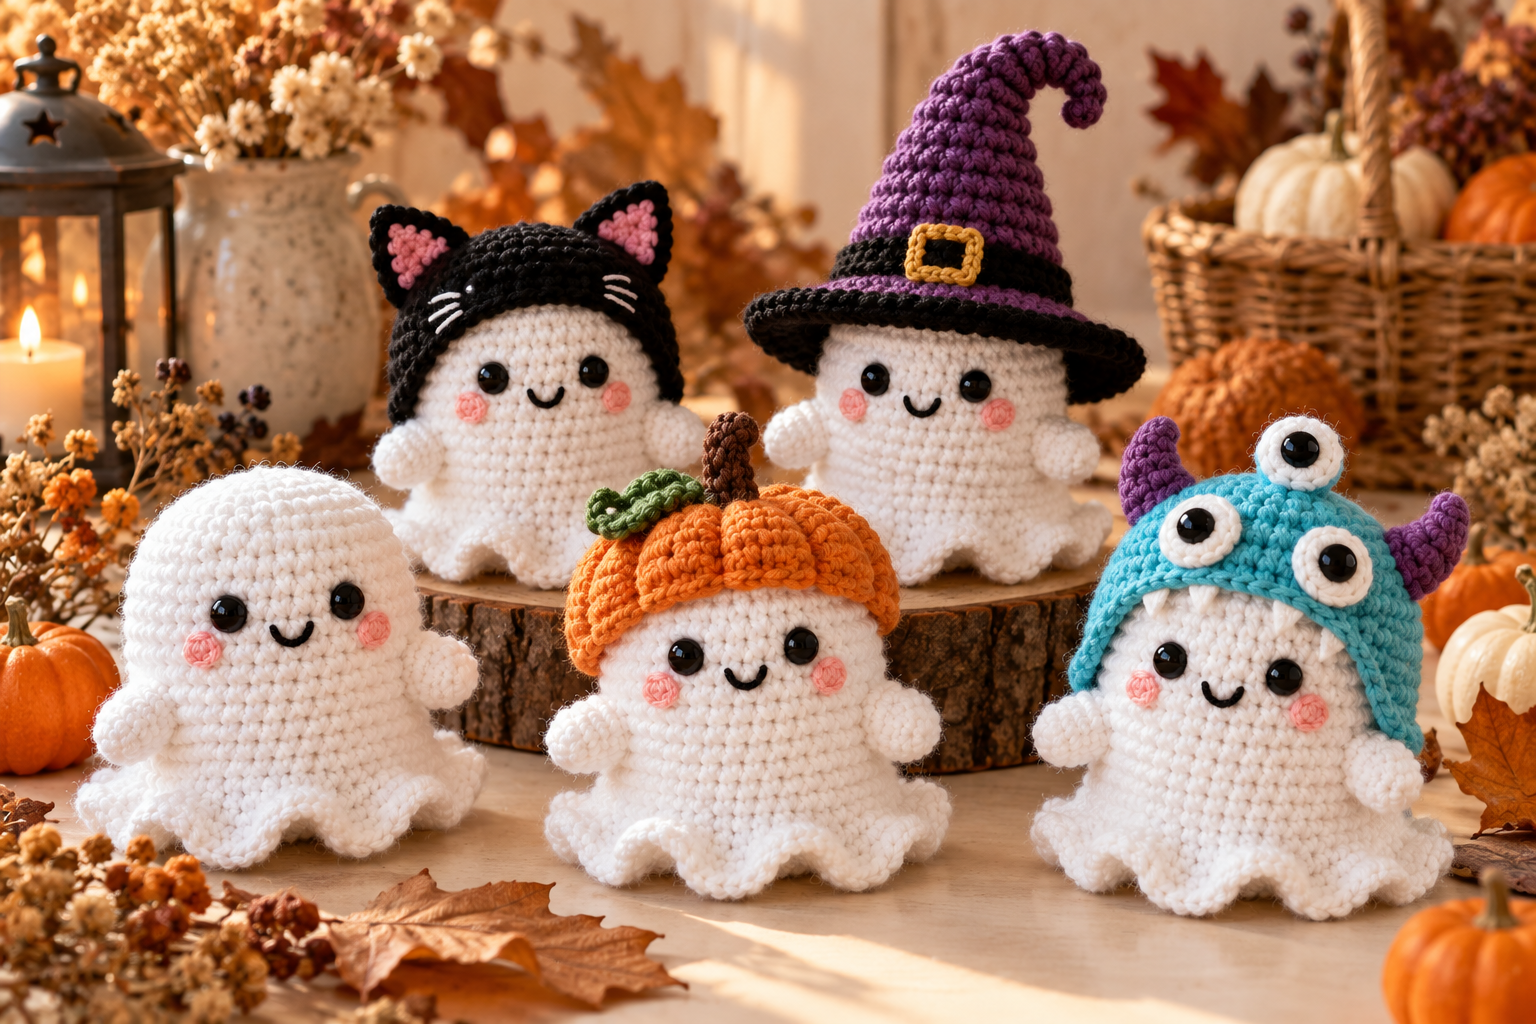
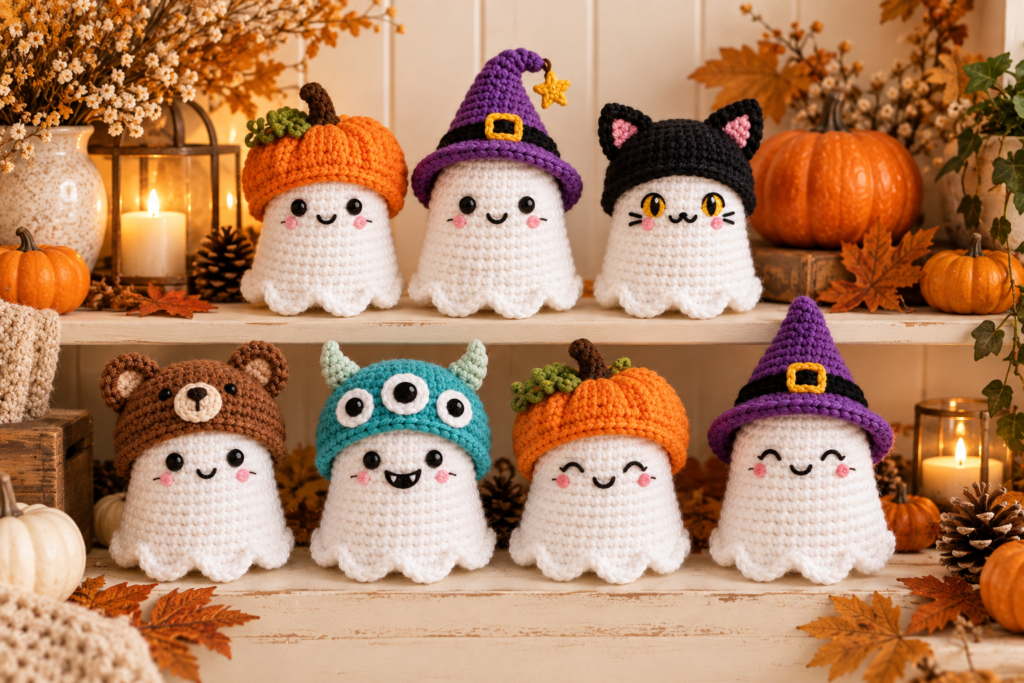
These tiny crochet ghosts are the perfect Halloween project for beginners who want something cute, quick, and highly customizable. The idea is simple: crochet one basic ghost body, then change the little hat or accessory to create an entire collection.
Inspired by the adorable miniature ghost set in your reference image, this tutorial gives you original crochet patterns for a small ghost collection, including a pumpkin ghost, black cat ghost, witch ghost, bear ghost, and a cute blue monster ghost.
The biggest advantage is that you only need to learn one basic ghost pattern. Once the body is finished, the different personalities come from the hats, ears, faces, and colors.
Pattern note: The instructions below are an original pattern developed from the visual concept of the uploaded image. They are not a reproduction of the original creator’s written pattern.
What You’ll Make
| Design | Main Colors | Difficulty | Approx. Size |
|---|---|---|---|
| Classic Ghost | White | Beginner | 7–9 cm |
| Pumpkin Ghost | White + orange | Beginner | 8–10 cm |
| Black Cat Ghost | White + black | Beginner | 8–10 cm |
| Witch Ghost | White + purple/black | Beginner | 9–11 cm |
| Bear Ghost | White + brown | Beginner | 8–10 cm |
| Blue Monster Ghost | White + turquoise/blue | Beginner | 9–10 cm |
You can also turn the finished ghosts into:
- Halloween ornaments
- Christmas-tree decorations
- Bag charms
- Keychains
- Shelf decorations
- Party favors
- Halloween garlands
- Small handmade gifts
- Crochet market items
- Desk decorations
- Seasonal collectibles
Materials You’ll Need
Yarn
A small amount of worsted-weight or DK yarn is enough for each ghost.
Basic Ghost
- White yarn
- Small amount of pink yarn
- Small amount of black yarn
Pumpkin Hat
- Orange yarn
- Green yarn
- Small amount of black yarn
Cat Hat
- Black yarn
- Pink yarn
- Yellow or orange yarn
Witch Hat
- Purple yarn
- Black yarn
- Yellow yarn
Bear Hat
- Brown yarn
- Dark brown yarn
- Small amount of black yarn
Blue Monster Hat
- Turquoise or blue yarn
- White yarn
- Black yarn
- Optional pink yarn
Other Supplies
- Crochet hook appropriate for your yarn
- Fiberfill stuffing
- Tapestry needle
- Stitch marker
- Scissors
- Embroidery needle
- Optional safety eyes
- Optional keychain or ornament loop
For a small amigurumi, a 3–3.5 mm hook works well with DK or worsted yarn, but choose your hook according to the yarn and the firmness you want.
For amigurumi, your stitches should be tight enough that stuffing cannot easily show through.
Crochet Abbreviations
| Abbreviation | Meaning |
|---|---|
| MR | Magic ring |
| ch | Chain |
| sc | Single crochet |
| inc | Increase |
| dec | Decrease |
| sl st | Slip stitch |
| hdc | Half double crochet |
| dc | Double crochet |
| BLO | Back loop only |
| FLO | Front loop only |
| st | Stitch |
| rep | Repeat |
US crochet terminology is used throughout this tutorial.
Before You Start
There are three important techniques you’ll use repeatedly.
Single crochet increase
Work 2 sc into the same stitch.
Single crochet decrease
Insert your hook into the next stitch, pull up a loop, insert into the following stitch, pull up a loop, then yarn over and pull through all three loops.
Invisible decrease
For a cleaner amigurumi finish, insert your hook through the front loops only of the next two stitches, yarn over, pull through both loops, yarn over and pull through the remaining two loops.
PART 1: THE BASIC CROCHET GHOST
This is the foundation for every ghost in the collection.
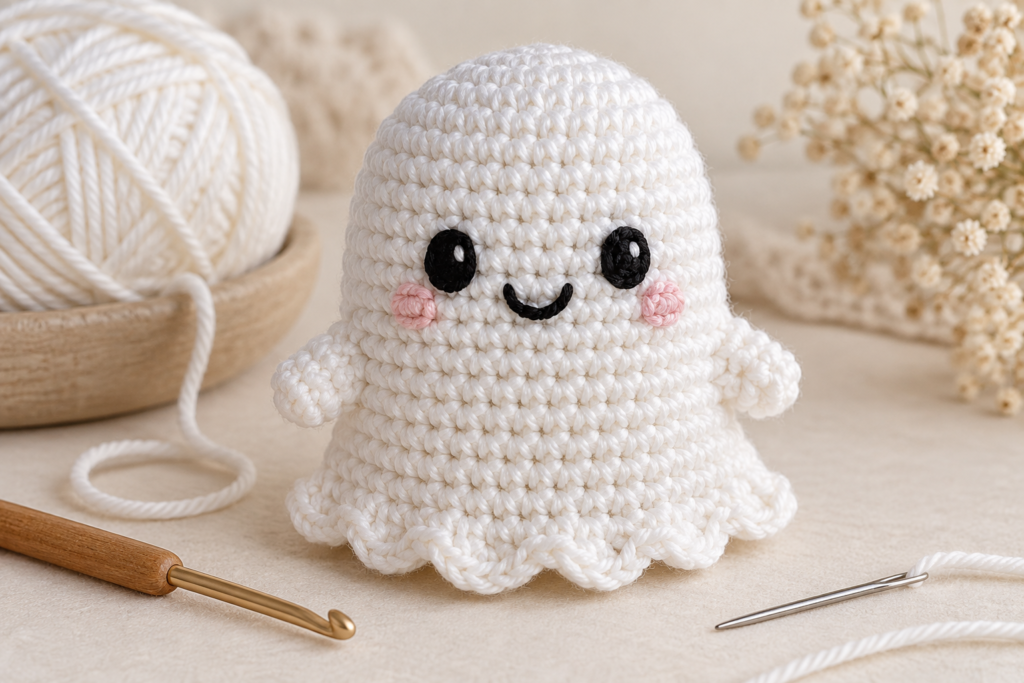
The finished body should look like a small rounded ghost with a slightly flared bottom.
Ghost Body Pattern
Work continuously in the round unless otherwise stated.
Round 1
Make a magic ring.
Work:
6 sc into the ring
Total: 6 stitches
Round 2
inc around
Total: 12 stitches
Round 3
(sc, inc) × 6
Total: 18 stitches
Round 4
(2 sc, inc) × 6
Total: 24 stitches
Round 5
(3 sc, inc) × 6
Total: 30 stitches
You now have the widest part of the upper body.
Rounds 6–9
sc around
Total: 30 stitches per round
Start adding a small amount of stuffing after Round 7.
Do not overstuff the ghost. You want it soft and slightly rounded rather than extremely firm.
Round 10
sc around
Total: 30 stitches
At this stage, shape the stuffing so the top remains rounded and the lower portion is slightly wider.
Round 11 – Bottom Ruffle
This is what gives the ghost its cute skirt-like appearance.
Work:
(sl st in next stitch, 3 dc in next stitch, sl st in next stitch) around
You will create a series of small scallops around the bottom.
Fasten off.
Leave a long yarn tail.
Using your tapestry needle, weave the tail through the remaining opening and pull tight.
Secure the yarn inside the body.
Important Tip
If you want a more dramatic ruffle, replace the 3 dc with:
5 dc in the same stitch
For a subtle ruffle, use:
2 dc in the same stitch
This lets you change the appearance without changing the main ghost pattern.
PART 2: ADDING THE FACE
The face is what gives these ghosts their personality.
For the reference style, keep the face small and concentrated near the upper-middle portion of the body.
Eyes
You have two options.
Option 1: Embroidered Eyes
Use black yarn and make two small vertical or round stitches.
This is the safest option for babies and very young children.
Option 2: Safety Eyes
Use small safety eyes according to the manufacturer’s instructions.
Place them approximately:
2–3 stitches apart
depending on your ghost’s size.
Make sure they are securely attached.
Tiny Pink Cheeks
Using pink yarn, make two tiny embroidered dots or small horizontal stitches underneath the eyes.
These create the sweet expression visible in the inspiration image.
Cute Mouth
Use black embroidery thread.
You can create:
Happy Mouth
Make a small curved line.
Tiny Smile
Make a short horizontal stitch with a tiny downward or upward curve.
Open Mouth
Create a small vertical oval.
Blushing Ghost
Add two tiny pink circles to the cheeks.
PART 3: ADDING THE HANGING LOOP
The ghosts in the reference image have little loops on top, which makes them perfect ornaments.
You can add the loop after finishing the body.
Using the same yarn:
- Insert your hook into the top center.
- Pull through the yarn.
- Chain 18–25 stitches.
- Slip stitch back into the same attachment point.
- Fasten off.
- Weave the ends securely into the body.
For a keychain, make the loop slightly shorter and attach a metal keychain ring.
PATTERN 1: PUMPKIN GHOST
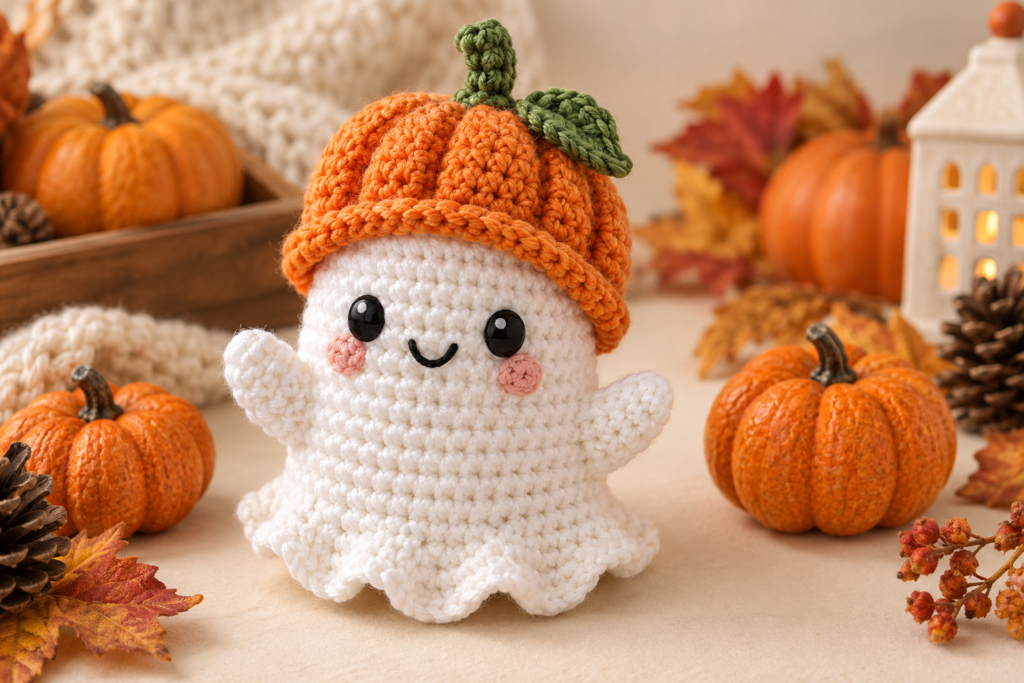
The pumpkin version is one of the easiest designs because the ghost body stays exactly the same.
You only need to make a tiny pumpkin hat.
Pumpkin Hat
Use orange yarn.
Round 1
MR, 6 sc
6 sts
Round 2
inc around
12 sts
Round 3
(sc, inc) × 6
18 sts
Round 4
(2 sc, inc) × 6
24 sts
Round 5
sc around
24 sts
Round 6
(3 sc, inc) × 6
30 sts
Round 7
sc around
30 sts
Round 8
(3 sc, dec) × 6
24 sts
Fasten off.
This produces a small rounded pumpkin cap.
Pumpkin Face
Using black yarn, embroider:
- Two triangular eyes
- A small jagged mouth
- Optional tiny nose
Don’t worry about making the face perfectly symmetrical. Slightly irregular embroidery gives handmade crochet projects more personality.
Pumpkin Stem
Use green or brown yarn.
Chain 4.
Slip stitch back along the chain.
Attach it to the center top of the pumpkin.
Pumpkin Leaves
With green yarn:
- Chain 4.
- Slip stitch back along the chain.
- Chain 3.
- Slip stitch into the base.
Sew the small leaf next to the stem.
Place the pumpkin hat on the ghost.
You now have a tiny crochet pumpkin ghost.
PATTERN 2: BLACK CAT GHOST
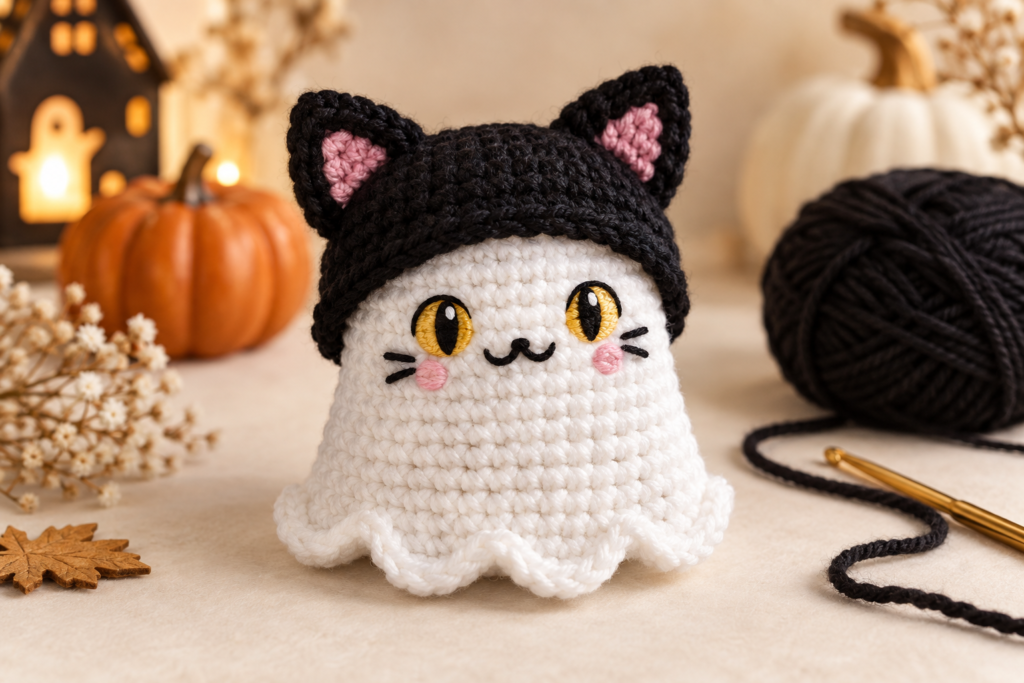
The cat version is especially cute because the black hat creates strong contrast against the white ghost.
Cat Hat
Use black yarn.
Follow the pumpkin hat instructions through Round 7.
Instead of making the rounded pumpkin shape, finish with a slightly tighter opening.
The goal is to create a simple black cap.
Cat Ears
Make two triangular ears.
Ear – Make 2
Chain 5.
Row 1:
Sc across.
Row 2:
Dec, sc, sc
Row 3:
Dec, sc
Row 4:
Dec
Fasten off.
Repeat for the second ear.
Fold the bottom edge slightly and sew each ear onto the hat.
Pink Inner Ears
Using pink yarn, embroider a tiny triangle inside each ear.
This small detail makes the cat immediately recognizable.
Cat Eyes
Use yellow, gold, or green embroidery thread.
Make two small vertical ovals.
Add a black vertical line through the center.
Cat Whiskers
Using black embroidery thread, add:
- 2 short whiskers on each side
Keep them small so they don’t overwhelm the tiny ghost.
PATTERN 3: WITCH GHOST
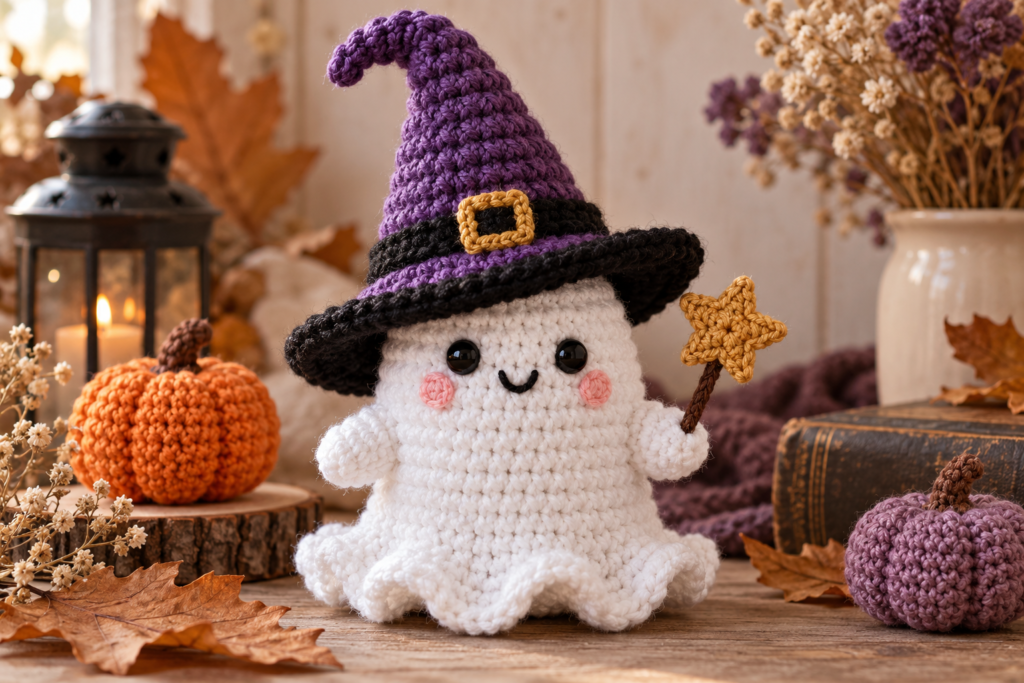
The witch ghost is perfect for Halloween decorations.
The design consists of:
- White ghost
- Purple witch hat
- Black brim
- Yellow buckle
Witch Hat
Use purple yarn.
Round 1
MR, 6 sc
Round 2
sc around
Round 3
(sc, inc) × 3
9 sts
Round 4
sc around
Round 5
(2 sc, inc) × 3
12 sts
Round 6
sc around
Round 7
(3 sc, inc) × 3
15 sts
Round 8
sc around
Continue increasing gradually until the hat is approximately the height you want.
For a very small ghost, a 7–8 cm cone is enough.
Witch Hat Brim
Switch to black yarn.
Work around the bottom edge of the cone:
(sc, inc) around
Continue until the brim is approximately 1–1.5 cm wider than the cone.
For a floppy witch-hat appearance, work one additional round without increases.
Yellow Buckle
You can embroider a tiny yellow square.
Alternatively:
- Chain 8.
- Slip stitch to form a tiny ring.
- Sew it onto the front of the hat.
Optional Hat Band
Use black yarn around the purple hat.
This creates a stronger witch silhouette.
PATTERN 4: BEAR GHOST
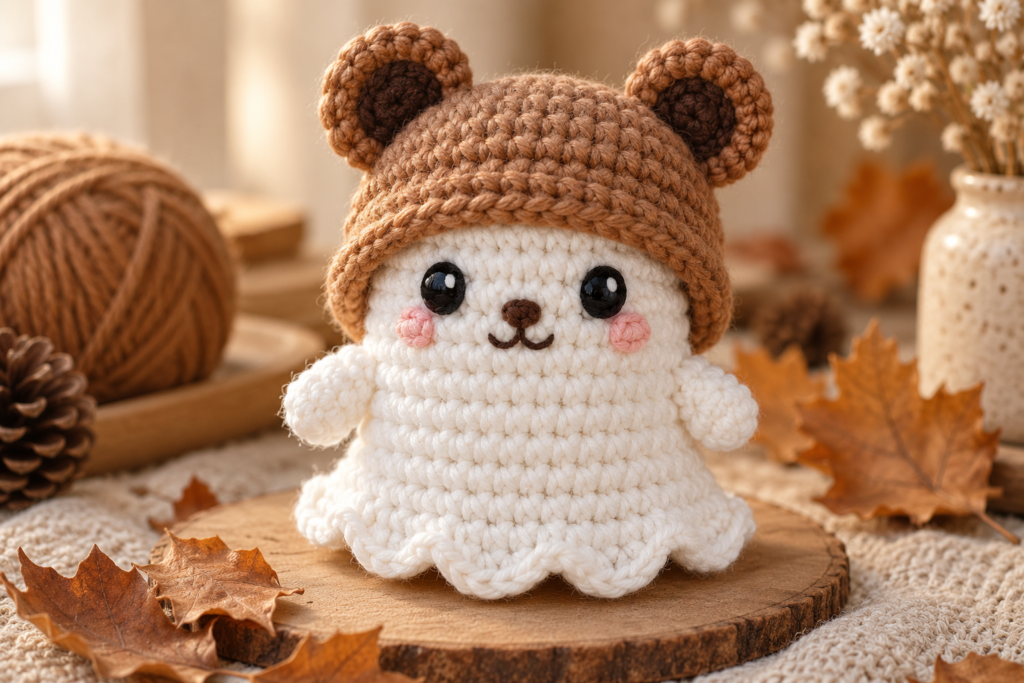
The bear version uses a simple brown hat with rounded ears.
It is especially cute for a woodland or autumn Halloween collection.
Bear Hat
Follow the basic hat pattern through the point where the hat reaches the size of the ghost’s head.
Use:
- Light brown for the main hat
- Dark brown for details
Bear Ears
Make 2 small circles.
Ear
MR, 6 sc.
Round 2:
inc around
12 sts.
Round 3:
sc around.
Fasten off.
Fold the circle slightly in half.
Sew the bottom edge onto the hat.
Inner Ear
Using darker brown yarn, embroider a small semicircle inside each ear.
Bear Muzzle
You can embroider a small dark brown oval.
Add:
- Small nose
- Tiny mouth
This creates a simple teddy-bear appearance without requiring a complicated muzzle.
PATTERN 5: BLUE MONSTER GHOST
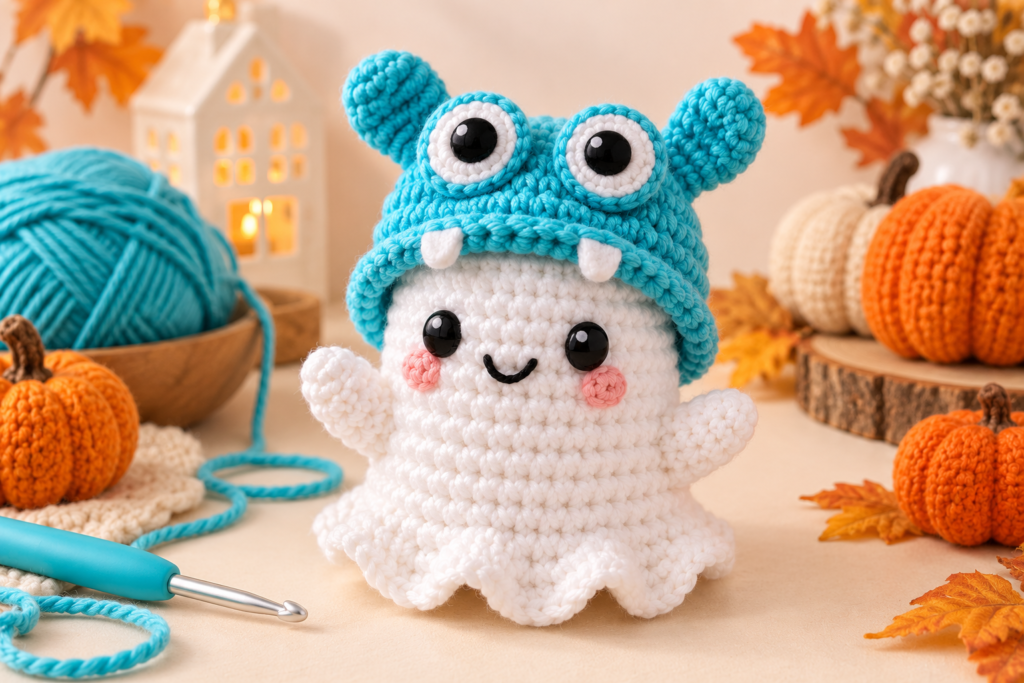
This version is inspired by the colorful blue character in the reference collection.
Use turquoise or bright blue yarn for the hat.
The fun part is the oversized eyes and small ears.
Monster Hat
Create a simple rounded cap using the same basic hat construction.
Use turquoise yarn.
Monster Ears
Make two small round ears.
Ear
MR, 6 sc.
Round 2:
inc around
12 sts.
Round 3:
sc around.
Fasten off.
Sew one ear to each side of the hat.
Large Eyes
Use white yarn to embroider two small white circles.
Add black centers.
If you prefer safety eyes, use small black eyes positioned in the center of the white circles.
Optional Monster Teeth
Using white yarn, embroider two tiny triangular teeth.
This gives the ghost a playful Halloween-monster look.
BONUS: CLASSIC GHOST WITHOUT A HAT
Not every ghost needs an accessory.
For a minimalist version:
- Crochet the white ghost body.
- Add black eyes.
- Add pink cheeks.
- Add a tiny smile.
- Add the hanging loop.
Use cream, ivory, pale pink, or light gray yarn for different versions.
A collection of neutral ghosts can look beautiful on a Halloween mantel.
HOW TO MAKE ALL FIVE GHOSTS MATCH
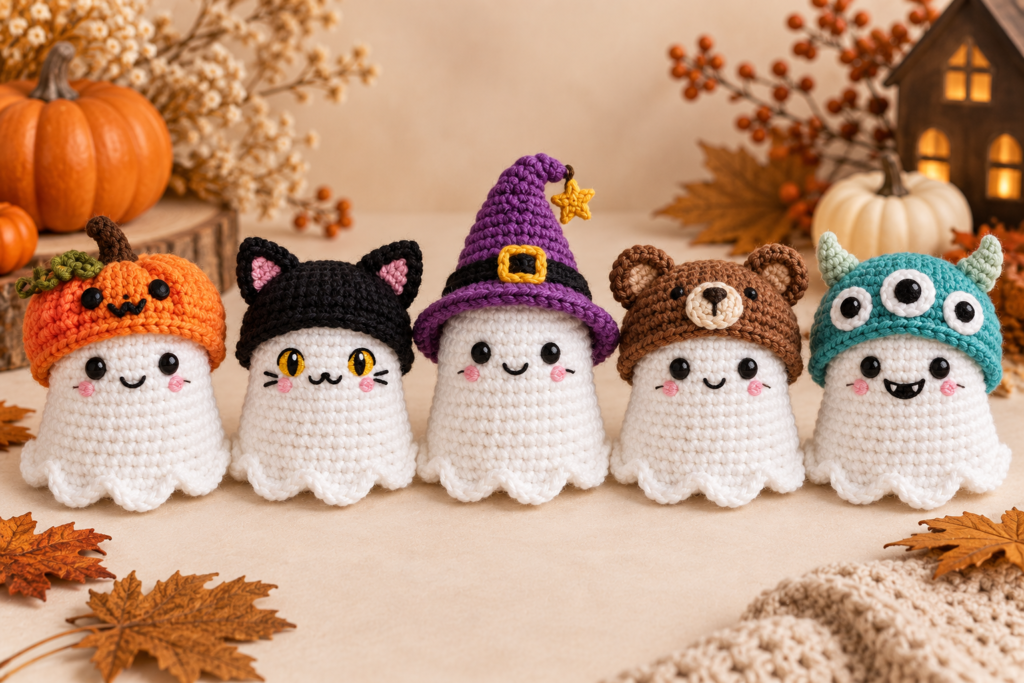
One of the easiest ways to make a collection look professionally designed is to keep the base identical.
Use:
Same ghost body + different hat
For example:
| Ghost | Body | Hat | Extra Detail |
|---|---|---|---|
| Classic | White | None | Pink cheeks |
| Pumpkin | White | Orange | Green stem |
| Cat | White | Black | Pink ears |
| Witch | White | Purple | Black brim |
| Bear | White | Brown | Round ears |
| Monster | White | Turquoise | Big eyes |
This makes the collection feel cohesive.
HOW TO MAKE THE GHOSTS SMALLER
If you want miniature ghosts for a garland or dollhouse-style display, don’t completely redesign the pattern.
Instead:
- Use thinner yarn.
- Use a smaller hook.
- Reduce the number of body rounds.
- Make smaller hats.
For example, use DK yarn with a 2.5–3 mm hook.
The finished ghost may become approximately 5–7 cm tall.
HOW TO MAKE THEM LARGER
For a larger decorative ghost:
- Use bulky yarn.
- Use a larger hook.
- Increase the body further before working the straight rounds.
For example, after reaching 30 stitches:
Larger Version
Round 6:
(4 sc, inc) × 6
36 sts
Round 7:
(5 sc, inc) × 6
42 sts
Rounds 8–11:
sc around.
Then add the ruffled bottom.
This creates a larger, fuller ghost.
HOW TO MAKE A WHOLE HALLOWEEN GHOST FAMILY
Once you’ve mastered the base pattern, you don’t have to stop at five.
Try creating:
Pumpkin Ghost
Orange pumpkin hat.
Witch Ghost
Purple witch hat.
Vampire Ghost
Black cape and tiny red bow tie.
Frankenstein Ghost
Green hat or green hair.
Bat Ghost
Black hat with bat wings.
Spider Ghost
Black spider hat with eight tiny legs.
Candy Corn Ghost
White, orange and yellow color-blocked body.
Skeleton Ghost
Black embroidered bones.
Candy Ghost
Pastel pink or purple hat with candy decorations.
Mushroom Ghost
Red or beige mushroom cap.
EASY CROCHET BAT HAT
For another Halloween variation, create a simple bat-wing accessory.
Make two small wings using black yarn.
Wing
Chain 6.
Row 1:
sc across.
Row 2:
dec, sc, sc
Row 3:
dec, sc
Row 4:
dec
Fasten off.
Repeat for the other side.
Sew the wings onto the back of the ghost.
Add two small triangular ears to the top.
You now have a bat ghost without needing another complicated body pattern.
CROCHET GHOST GARLAND
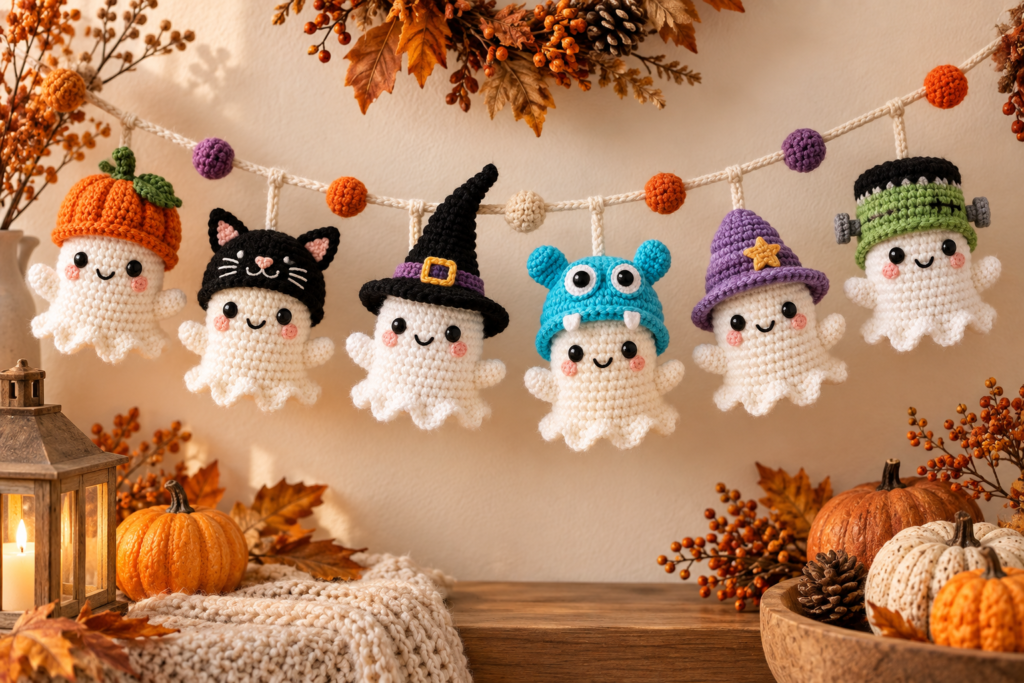
These miniature ghosts work particularly well as a garland.
Make:
- 3 ghosts for a short garland
- 5 ghosts for a medium garland
- 7–10 ghosts for a larger decoration
Mix:
- Pumpkin
- Cat
- Witch
- Bear
- Monster
Use a long chain or decorative cord as the garland base.
Attach each ghost approximately 10–15 cm apart.
Alternate colors so the garland doesn’t look repetitive.
HOW TO ATTACH THE GHOSTS
There are two easy methods.
Method 1: Sew Them Onto the Cord
Use a tapestry needle and matching yarn.
Pass the yarn through the top of each ghost and around the cord.
Secure firmly.
Method 2: Use Their Hanging Loops
If you’ve already added hanging loops, simply thread the ghosts onto a decorative cord.
This is easier if you want to change the arrangement later.
CROCHET GHOST KEYCHAIN
The miniature version makes a great handmade accessory.
For a keychain:
- Make the ghost body.
- Make a short hanging loop.
- Reinforce the loop with several stitches.
- Attach a metal keychain ring.
- Pull all yarn ends inside.
- Secure the ends carefully.
Avoid making extremely long loops because they can catch on objects.
CROCHET GHOST ORNAMENT
For Christmas or Halloween decorating, use:
- White
- Cream
- Gray
- Lavender
- Pale pink
Add a longer loop at the top.
You can also embroider:
- Stars
- Tiny hearts
- Snowflakes
- Moon shapes
- Small pumpkins
This lets you reuse the ghost design beyond Halloween.
HOW TO MAKE THE GHOST FACE LOOK PROFESSIONAL
The face is one of the most important parts.
Before sewing anything permanently, place your eyes with pins.
Step back and look at the ghost.
Check:
- Are the eyes level?
- Are they centered?
- Is the mouth positioned correctly?
- Are the cheeks symmetrical?
- Is the expression too large?
For tiny amigurumi, less is usually better.
A few tiny stitches can create a much more polished face than a large embroidered design.
STUFFING GUIDE
Stuffing can completely change the appearance of your ghost.
Too little stuffing
The ghost may:
- Collapse
- Look flat
- Lose its shape
Too much stuffing
The ghost may:
- Become very firm
- Stretch the stitches
- Reveal stuffing between stitches
- Lose its cute rounded shape
The best approach is to add small amounts gradually.
Push stuffing toward the sides with the back of your crochet hook.
Don’t force a large amount inside at once.
HOW TO KEEP THE GHOST STANDING
If you want your ghosts to sit on a shelf rather than hang, add a little weight to the bottom.
One option is to place a small amount of weighted craft material inside a securely enclosed inner pouch before adding fiberfill.
Make sure any weighted material is completely inaccessible, particularly if the finished item may be handled by children.
COLOR PALETTE IDEAS
Traditional Halloween
- White
- Orange
- Black
- Purple
- Green
Cute Pastel Halloween
- Cream
- Dusty pink
- Lavender
- Mint
- Soft orange
Gothic Halloween
- Black
- Charcoal
- Burgundy
- Plum
- Ivory
Woodland Halloween
- Cream
- Rust
- Brown
- Sage
- Mustard
Candy Halloween
- Pink
- Blue
- Purple
- Yellow
- White
BEGINNER TROUBLESHOOTING
My ghost is becoming triangular
You’re probably missing stitches or increasing unevenly.
Count your stitches at the end of every increase round.
The expected progression is:
6 → 12 → 18 → 24 → 30
My ghost is too flat
Add more stuffing and check that your stitch tension isn’t extremely tight.
My ghost is too large
Use a smaller hook or thinner yarn.
My stitches have holes
Use a smaller hook.
Amigurumi normally benefits from tight tension.
My hat falls off
Make the opening slightly smaller.
You can also secure the hat with a few hidden stitches.
My ruffle isn’t even
Make sure you are working the same number of stitches in each repeat.
Mark the beginning of your round.
FINISHING CHECKLIST
Before calling your ghost finished, check:
- All yarn tails are woven in.
- Stuffing is evenly distributed.
- Eyes are secure.
- Face is centered.
- Hat is securely attached.
- Ears are symmetrical.
- Hanging loop is reinforced.
- No loose decorative pieces remain.
- The bottom ruffle is evenly spread.
- The ghost keeps its shape.
CARE INSTRUCTIONS
Because these ghosts are handmade, gentle care will help them maintain their shape.
For most acrylic-yarn versions:
- Spot clean when possible.
- Use mild soap if necessary.
- Avoid aggressive scrubbing.
- Do not wring.
- Reshape while damp.
- Allow to air dry completely.
Always check the care instructions for the specific yarn you’ve used.
SAFETY NOTES
If these ghosts are intended for babies or toddlers, avoid detachable safety eyes, buttons, beads, bells, or other small parts.
For very young children, embroidered facial features are a safer design choice, although the finished item should still be assessed for the intended age and use.
For decorative ornaments and adult collectibles, you have more freedom with embellishments.
HOW TO TURN THIS INTO A CROCHET BUSINESS PRODUCT
These ghosts are particularly suitable for creating collections rather than individual products.
Instead of selling one ghost, consider themed sets.
Halloween Ghost Set
- Pumpkin
- Witch
- Cat
- Bear
- Monster
Pastel Ghost Set
- Pink
- Lavender
- Mint
- Baby blue
- Cream
Woodland Ghost Set
- Bear
- Fox
- Mushroom
- Pumpkin
- Owl
Mini Ghost Ornament Set
Make 5–10 tiny ghosts in coordinating colors and sell them as a seasonal decoration set.
You can also offer:
- Individual ghosts
- Ghost garlands
- Ornament bundles
- Halloween gift sets
- Crochet kits
- Custom colors
QUICK PATTERN REFERENCE
Basic Ghost
R1: 6 sc in MR — 6
R2: inc around — 12
R3: (sc, inc) ×6 — 18
R4: (2 sc, inc) ×6 — 24
R5: (3 sc, inc) ×6 — 30
R6–10: sc around — 30
R11: ruffle around
Fasten off and finish.
Pumpkin Hat
R1: 6 sc
R2: inc — 12
R3: (sc, inc) — 18
R4: (2 sc, inc) — 24
R5: sc around — 24
R6: (3 sc, inc) — 30
R7: sc around — 30
R8: (3 sc, dec) — 24
Cat
Basic hat + triangular ears + pink inner ears + embroidered eyes.
Witch
Purple cone + black brim + yellow buckle.
Bear
Brown cap + two round ears + embroidered muzzle.
Monster
Turquoise cap + round ears + oversized eyes.
5-MINUTE CUSTOMIZATION IDEAS
Once you have the basic ghost finished, you can completely change its personality with tiny details.
Try adding:
- Tiny bows
- Mini flowers
- Pumpkins
- Stars
- Hearts
- Bats
- Spider webs
- Scarves
- Tiny collars
- Witch hat
- Cat ears
- Bear ears
- Monster eyes
- Embroidered eyelashes
You can even make a matching ghost family where every ghost has the same white body but a completely different personality.
FAQ
How long does one crochet ghost take?
A beginner may need around 30–90 minutes for a simple ghost, depending on yarn, hook size, experience, and how detailed the hat is.
Once you’ve practiced the basic body, you can make them considerably faster.
Are these crochet ghosts beginner-friendly?
Yes. The basic body uses primarily single crochet, increases, decreases, stuffing, and simple finishing.
The decorative hats can be learned separately.
Can I use cotton yarn?
Yes. Cotton creates a firm, defined amigurumi texture.
Acrylic yarn is also a convenient option and often produces a softer result.
Can I sell ghosts made from this pattern?
Generally, you can sell finished handmade items you make yourself, but you should not redistribute the written pattern as your own. If you are selling finished items, check the terms of any specific pattern or designer whose work you use.
Can I make these ghosts without safety eyes?
Absolutely.
Embroidered eyes are especially useful for very small ghosts or projects intended for young children.
Can I make the ghost larger?
Yes. Use thicker yarn and a larger hook, or add additional increase rounds before working the straight rounds.
Can I make a whole Halloween collection?
Definitely. The easiest approach is to keep the same ghost body and change only the accessories.
That gives you a consistent collection without having to learn an entirely new pattern for every character.
Final Project Idea: The Five Ghost Halloween Set
If you want to recreate the collection concept from your inspiration image, make these five:
- Pumpkin Ghost — orange pumpkin hat with green stem
- Black Cat Ghost — black cat-ear hat with yellow eyes
- Witch Ghost — purple pointed hat with black brim
- Bear Ghost — brown bear-ear hat
- Blue Monster Ghost — turquoise hat with oversized eyes
Keep all five bodies identical in size.
Then photograph them together as a collection.
This creates a much stronger visual story than photographing each ghost separately, and it gives you multiple possibilities for Halloween decorations, ornaments, gifts, garlands, and handmade product collections.
The real advantage of this project is that once you learn the basic ghost body, you can keep creating new characters without learning a completely new amigurumi pattern every time.