
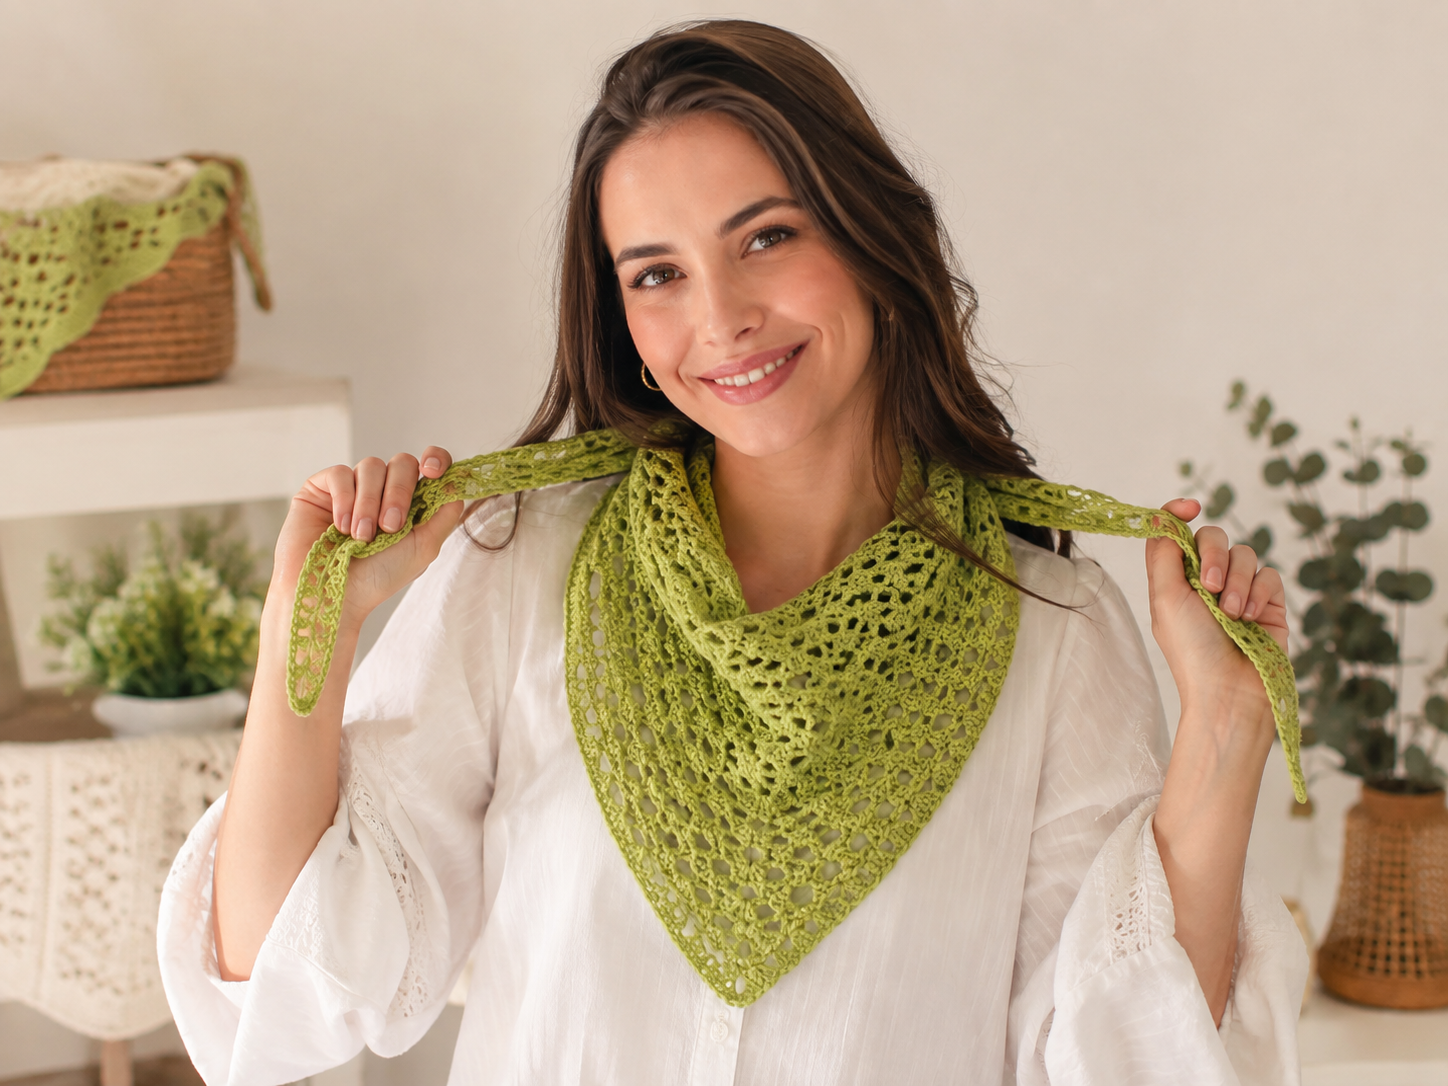
If you love handmade accessories, this easy crochet bandana pattern is a project worth adding to your list. It is lightweight, comfortable, customizable and much easier to make than it may look.
A crochet bandana can be worn as a traditional head scarf, tied at the back, styled over your hair or even worn as a cute neck accessory. It also makes a thoughtful handmade gift and is a great way to experiment with different yarn colors and simple crochet stitches.
In this tutorial, you’ll learn how to make a lightweight triangular crochet bandana from start to finish, including the materials, stitch guide, sizing, step-by-step instructions, color ideas, finishing techniques and four different ways to wear it.
The pattern is written using US crochet terminology.
Table of Contents
- Why You’ll Love This Crochet Bandana
- What Is a Crochet Bandana?
- Crochet Bandana at a Glance
- Materials You’ll Need
- Choosing the Best Yarn
- Choosing the Right Crochet Hook
- Crochet Abbreviations
- Gauge and Sizing
- How the Bandana Is Constructed
- Free Crochet Bandana Pattern
- Step-by-Step Crochet Bandana Tutorial
- How to Make the Bandana More Open and Lightweight
- How to Adjust the Size
- Crochet Bandana Size Guide
- Color Combination Ideas
- How to Add a Decorative Border
- How to Wear a Crochet Bandana
- Four Easy Ways to Style It
- Beginner Tips
- Common Mistakes and How to Fix Them
- How to Wash and Care for Your Bandana
- Gift Ideas
- Frequently Asked Questions
- Related Crochet Patterns
- Final Thoughts
Why You’ll Love This Crochet Bandana
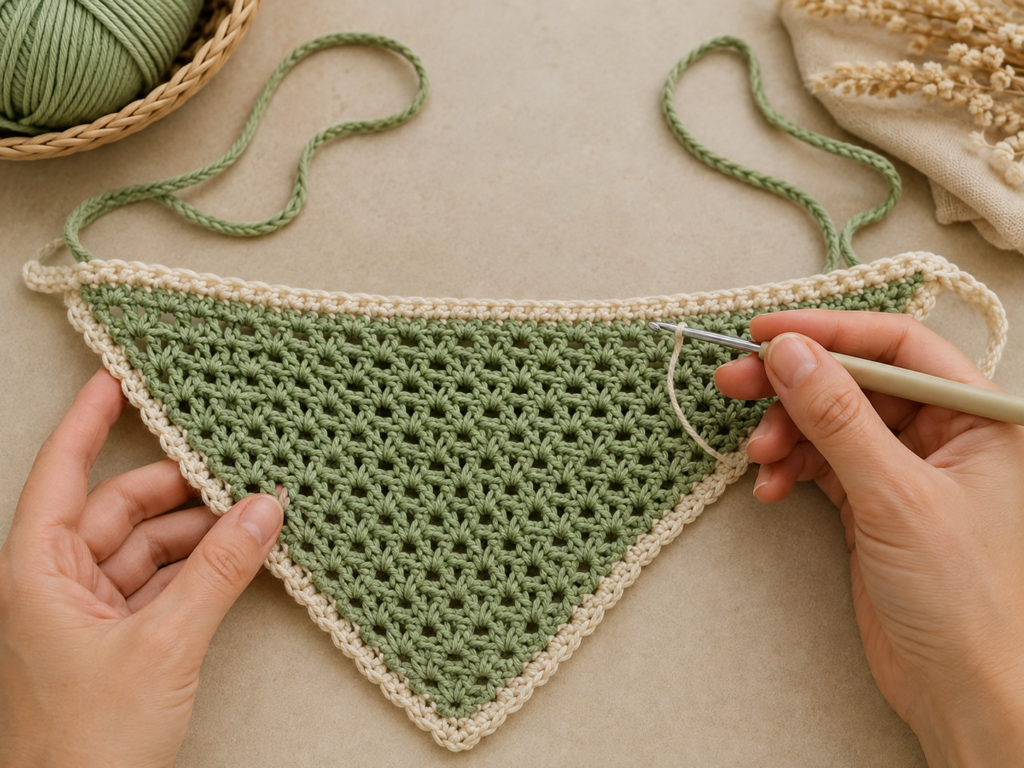
There are plenty of reasons to add a crochet bandana to your handmade wardrobe.
🌸 It’s beginner-friendly
The basic version uses simple stitches and a repetitive triangular construction, making it easier to follow than many larger crochet garments.
🧶 It doesn’t use much yarn
A bandana is an excellent project for using up leftover yarn.
☀️ It’s lightweight
Using cotton or another lightweight yarn creates a breathable accessory that works especially well in spring and summer.
🎨 It’s completely customizable
You can change:
- The yarn color
- The size
- The border
- The stitch pattern
- The ties
- The overall length
🎁 It’s a great handmade gift
A crochet bandana is small enough to make as a gift without spending weeks on a large project.
What Is a Crochet Bandana?
A crochet bandana is a triangular or approximately triangular handmade accessory that can be worn around the head, hair or neck.
Unlike a traditional solid crochet hat, a bandana is generally lightweight and open enough to allow airflow.
The basic construction is simple:
Small starting point → gradually increasing triangle → decorative border → ties
This construction is what makes the project so beginner-friendly.
Crochet Bandana at a Glance
| Detail | Recommendation |
|---|---|
| Skill level | Beginner |
| Construction | Increasing triangle |
| Main stitch | Double crochet |
| Yarn | Lightweight cotton |
| Hook | 3.5–4.0 mm |
| Shape | Triangle |
| Approx. time | 2–4 hours |
| Best season | Spring & summer |
| Adjustable | Yes |
| Great for gifts | Yes |
| Customizable | Very easy |
Your actual finished size and yarn usage will depend on your tension, yarn weight and how many rows you crochet.
Materials You’ll Need
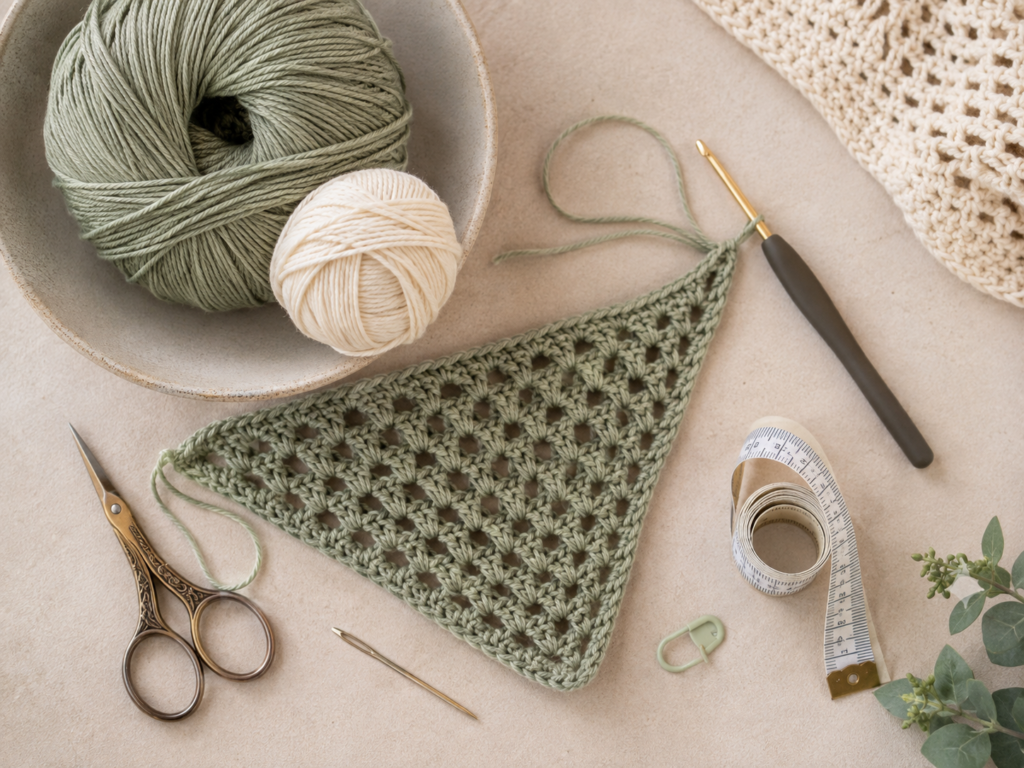
For a standard adult bandana, you’ll need:
- Lightweight cotton yarn
- 3.5–4.0 mm crochet hook
- Scissors
- Tapestry needle
- Stitch marker, optional
- Measuring tape
- Blocking pins, optional
Optional
You can also use:
- A yarn needle for weaving ends
- Decorative beads, if securely attached
- Contrasting yarn for the border
- A small amount of fabric stiffener for certain decorative applications
For a wearable bandana, however, keeping the design simple usually gives the best result.
Choosing the Best Yarn
The yarn makes a big difference in the final bandana.
Cotton Yarn
My top choice.
Cotton is:
- Breathable
- Lightweight
- Durable
- Easy to wash
- Good for warm weather
It also gives the stitches enough structure to show the triangular shape clearly.
Bamboo Blend
Bamboo blends can create a softer and more drapey bandana.
They’re particularly nice if you want a more delicate accessory.
Lightweight Acrylic
A lightweight acrylic can also work, especially if you want easy-care yarn and a large choice of colors.
However, it may feel warmer than cotton.
Yarn Weight Guide
| Yarn Type | Result | Recommendation |
|---|---|---|
| Lace | Very delicate | Advanced/lightweight design |
| Sport | Light and breathable | Excellent |
| DK | Slightly thicker | Excellent |
| Worsted | Heavy | Better for cooler weather |
| Chenille | Very soft | Not ideal for this design |
For the lightweight look shown in the inspiration, sport or DK cotton is a particularly good choice.
Choosing the Right Crochet Hook
For lightweight cotton yarn, start with approximately:
3.5–4.0 mm
A slightly larger hook creates more open stitches and a softer drape.
A smaller hook creates a denser, firmer fabric.
Quick guide
| Hook | Result |
|---|---|
| 3.0 mm | Dense |
| 3.5 mm | Balanced |
| 4.0 mm | Lightweight/open |
| 4.5 mm | Very open |
Always check the yarn label and make a small sample first.
Crochet Abbreviations
This tutorial uses US terminology.
| Abbreviation | Meaning |
|---|---|
| ch | Chain |
| sc | Single crochet |
| dc | Double crochet |
| hdc | Half double crochet |
| sl st | Slip stitch |
| st | Stitch |
| sts | Stitches |
| rep | Repeat |
| sk | Skip |
| FO | Fasten off |
Gauge and Sizing
Because a bandana is an accessory rather than a fitted garment, gauge does not need to be exact.
However, your tension affects:
- Finished width
- Finished length
- Draping
- Amount of yarn required
For a lightweight bandana, your stitches should feel flexible rather than stiff.
If your fabric feels too dense, try a larger hook.
If it feels too loose and floppy, try a slightly smaller hook.
How the Bandana Is Constructed
The pattern below creates a simple triangular shape.
You’ll begin with a small number of stitches and gradually increase the width.
Think of the construction like this:
Row 1: tiny starting point
↓
Row 2: slightly wider
↓
Row 3: wider again
↓
Continue increasing
↓
Decorative border
↓
Add ties
The beauty of this construction is that you can stop at almost any point when you’re happy with the size.
Free Crochet Bandana Pattern
Finished Size
The standard version is designed to create an approximately:
21–23 inch wide adult bandana
before adding the ties.
Because crochet tension varies, use the measurements below as a guide rather than an absolute requirement.
Pattern Notes
- Use US crochet terminology.
- Turn after every row.
- The beginning chain-3 counts as a double crochet unless otherwise stated.
- Keep your stitches relaxed.
- Measure the bandana as you work rather than relying only on row numbers.
Step-by-Step Crochet Bandana Tutorial
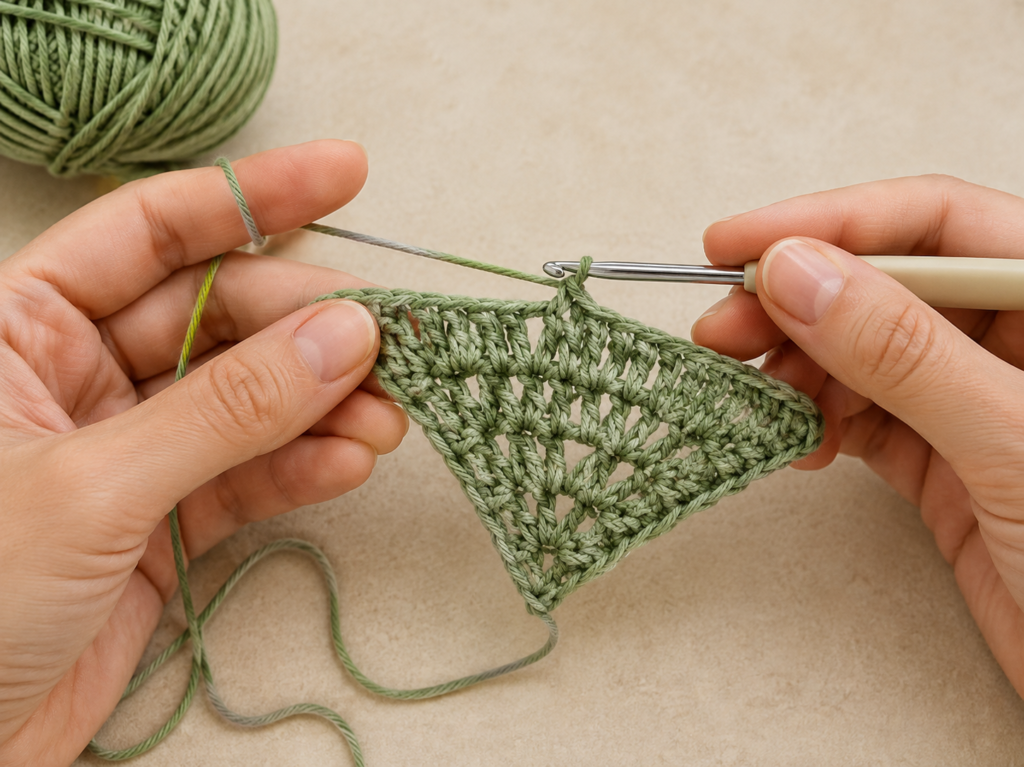
Step 1: Create the Foundation
Chain:
4
Double crochet into the fourth chain from the hook.
You now have:
2 dc
Turn.
Step 2: Begin Increasing
Row 2
Chain 3.
Work 2 dc into the same first stitch.
Then work 1 dc into each stitch across.
At the final stitch, work:
3 dc
Turn.
This creates the first increase at each side of the triangle.
Step 3: Continue the Triangle
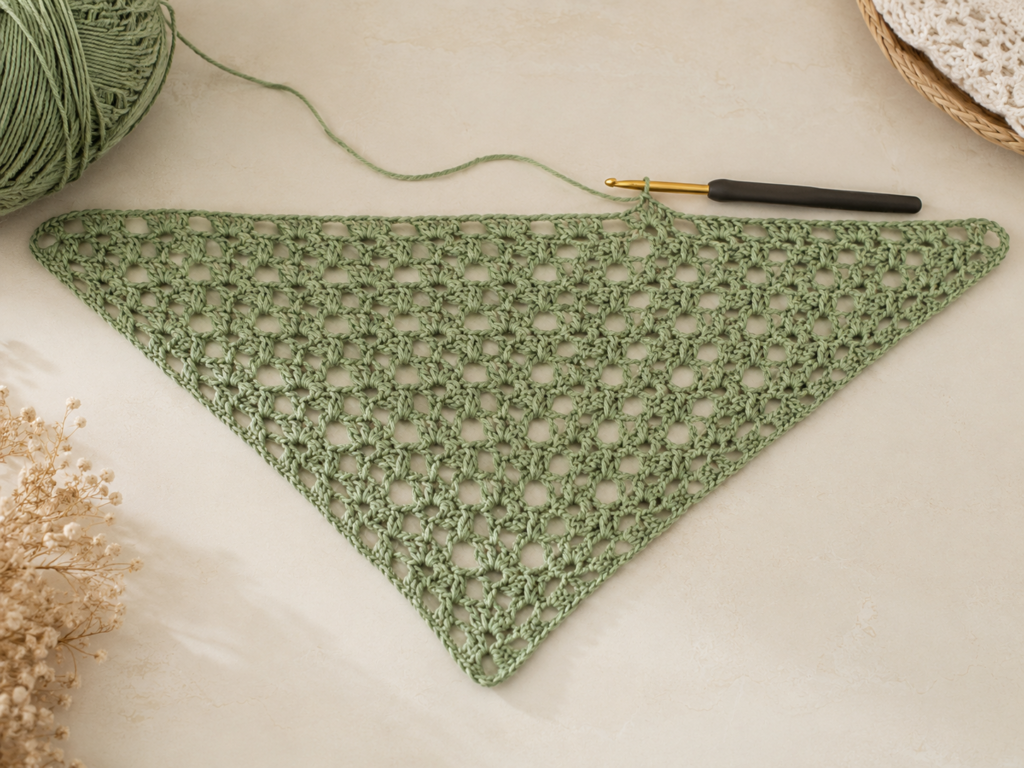
Row 3
Chain 3.
Work:
2 dc into the first stitch
Then work:
1 dc in each stitch across
At the final stitch:
3 dc
Turn.
Step 4: Repeat the Increase
Continue repeating the same basic row:
Every row:
ch 3, 2 dc in first stitch, dc across, 3 dc in final stitch
Turn.
Each row becomes wider.
Continue until the bandana reaches your preferred width.
Important Sizing Tip
Don’t worry if your row count doesn’t exactly match someone else’s.
The best way to size a crochet bandana is to measure the actual project.
For an adult bandana, stop when the top edge is approximately:
21–23 inches
For a larger fit, continue increasing.
For a smaller fit, stop earlier.
Step 5: Check the Shape
Lay your project flat.
You should see a triangular shape with:
- A narrow center point
- Two gradually widening sides
- A longer upper edge
If one side looks significantly different from the other, check that you’re making the same increase at both ends of every row.
Step 6: Add a Simple Border
Once you’re happy with the size, don’t fasten off immediately.
Instead, you can add a simple border around the triangle.
Option 1: Single Crochet Border
Work single crochet evenly around the edges.
At the point of the triangle, work:
3 sc
This helps the corner remain sharp.
Continue around the remaining edges.
Join with a slip stitch.
Fasten off.
Step 7: Add a Decorative Border
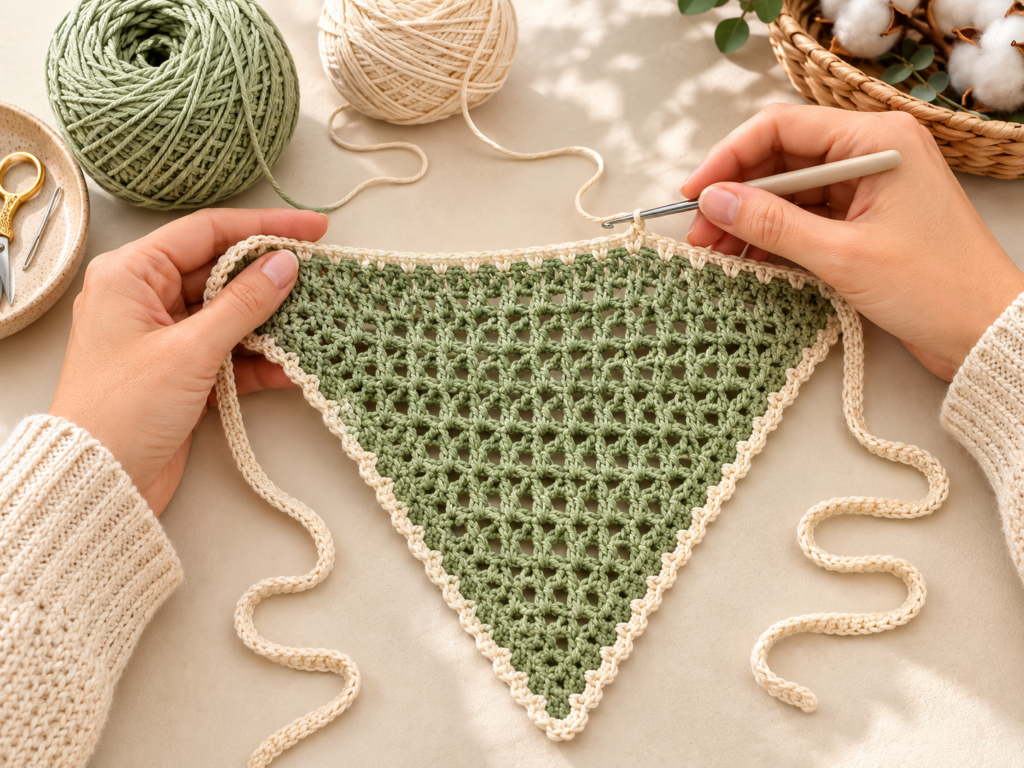
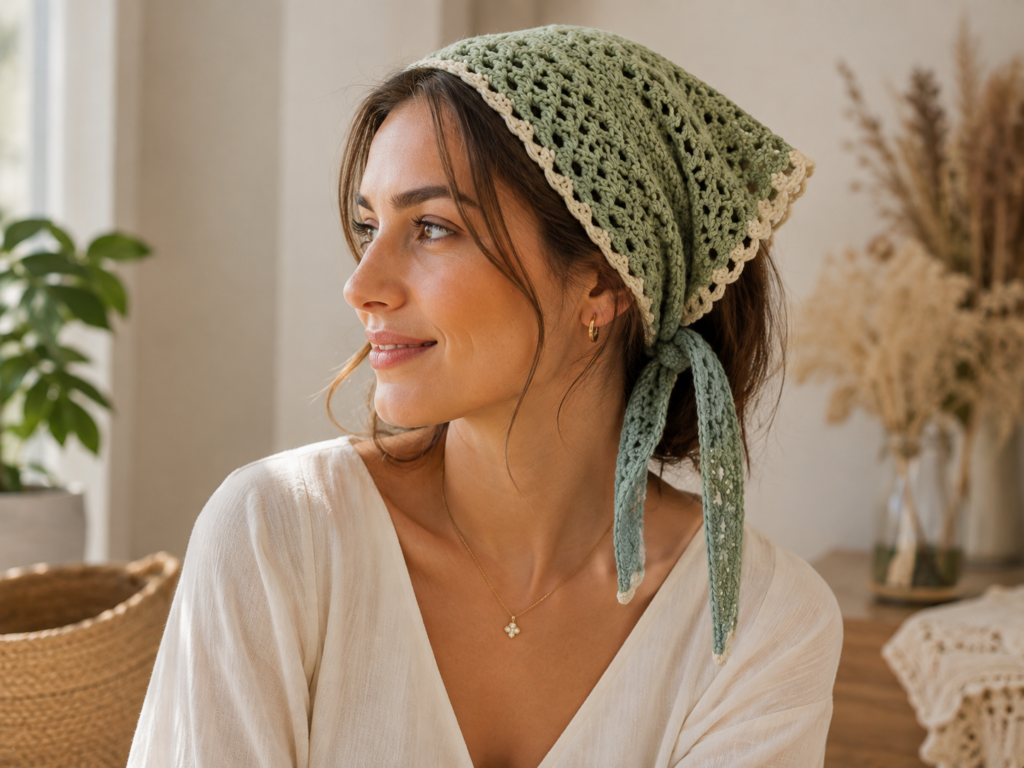
If you want a more feminine or decorative finish, use a contrasting color.
For example:
Green bandana + cream border
or
Pink bandana + white border
You can use:
- Scallops
- Picots
- Shell stitches
- Simple chains
Simple Scalloped Border
After completing the basic single crochet border:
skip 2 stitches, 5 dc into the next stitch, skip 2 stitches, sl st into the next stitch
Repeat around the edge.
This creates small crochet shells along the border.
Tip
If the scallops make the edge wave too much, use fewer double crochets in each shell or increase the number of skipped stitches.
Step 8: Make the Ties
You need two ties so that the bandana can be secured comfortably.
A simple method is to crochet chains directly from each upper corner.
At one corner:
Chain 35–45
Fasten off.
Repeat on the opposite corner.
The exact chain length depends on how you plan to wear the bandana.
Alternative: Stronger Crochet Ties
For a stronger tie, make:
Chain 40
Then work slip stitches back across the chain.
Fasten off.
This produces a thicker cord that is less likely to stretch excessively.
Step 9: Weave in the Ends
Use a tapestry needle to weave all loose yarn ends securely into the back of the stitches.
For a wearable accessory, don’t simply cut the ends after one or two stitches.
Weave them through several stitches and change direction before trimming.
Step 10: Block the Bandana
Blocking isn’t absolutely necessary, but it can dramatically improve the finished shape.
Lightly dampen the bandana.
Gently reshape it into a symmetrical triangle.
Pin the corners.
Allow it to dry completely.
Once dry, remove the pins.
The stitches should look more even and the edges should appear cleaner.
How to Make the Bandana More Open and Lightweight
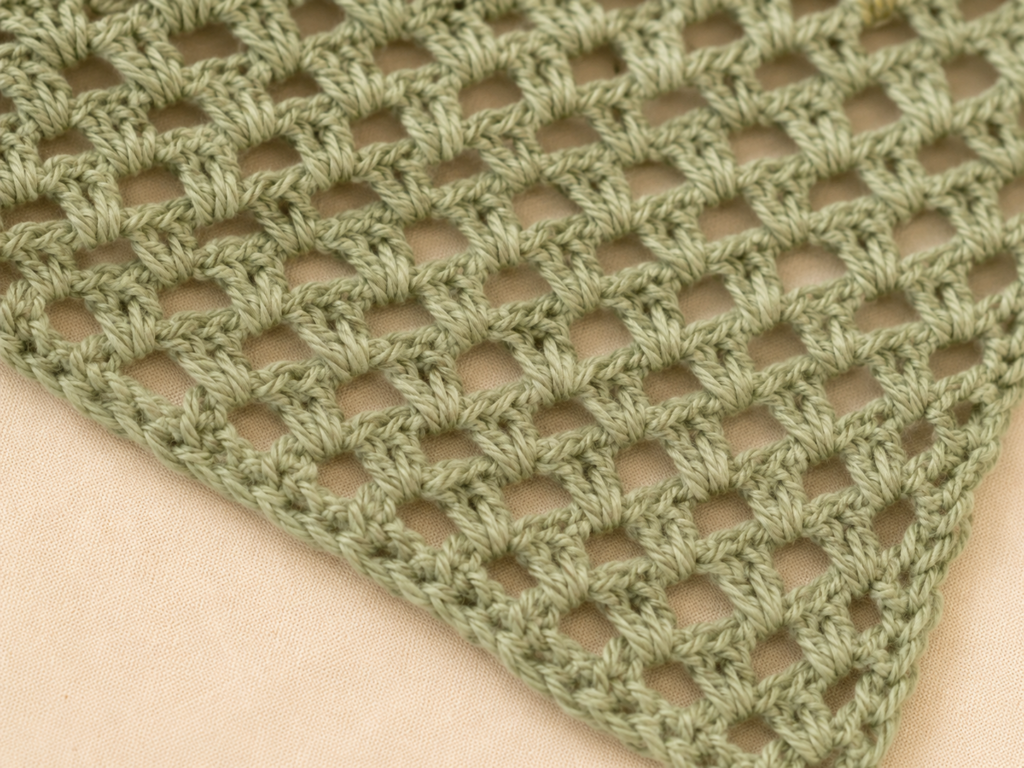
If you want a look closer to the airy bandana in the inspiration image, you can make a more open version.
Instead of working every stitch as a solid double crochet, introduce chain spaces.
For example, on selected rows work:
dc, ch 1, skip 1
and repeat across.
This creates a lightweight mesh effect.
Important
If you are making this version for the first time, test the stitch pattern on a small swatch first.
An overly open mesh may stretch considerably when worn.
Prefer to learn by watching?
If you’re more comfortable following a visual tutorial, this crochet triangle head scarf video is a great companion to the written pattern above. It demonstrates how the triangular shape is built and shows how the finished accessory can be customized for different sizes.
Watch the tutorial below, then use our written instructions above for the complete pattern, sizing tips and styling ideas.
Video: Crochet Triangle Head Scarf Tutorial for Beginners by Crochet Daniela.
Video tutorial: Crochet Triangle Head Scarf Tutorial for Beginners by Crochet Daniela. The video is used as a visual reference; follow the written pattern above for the specific instructions in this article.
Easy Mesh Variation
A simple openwork section can be made by repeating:
dc, ch 1, skip 1
across the row.
On the next row, work the double crochet into the previous row’s chain spaces.
This creates small square openings throughout the fabric.
Best yarn for this version
- Cotton
- Cotton/bamboo blend
- Lightweight cotton/acrylic blend
These fibers generally provide a nice balance of structure and drape.
How to Adjust the Size
This is one of the best things about a triangular bandana.
You don’t have to follow a fixed number of rows.
Simply continue increasing until you reach the size you want.
Smaller Bandana
Stop earlier.
Good for:
- Children
- Smaller heads
- Shorter hairstyles
- Petite accessories
Standard Adult
Continue until the top edge measures approximately:
21–23 inches
Larger Adult
Continue to approximately:
24–26 inches
Crochet Bandana Size Guide
| Size | Approx. Top Width | Suggested Use |
|---|---|---|
| Mini | 16–18 in | Small accessory |
| Small | 18–20 in | Children / petite fit |
| Medium | 21–23 in | Most adults |
| Large | 24–26 in | Larger fit / fuller hair |
| Extra Large | 27+ in | Oversized style |
These measurements are approximate because the amount of overlap and tying style changes the final fit.
How to Make It Longer or Shorter
Width and length are affected by your number of increase rows.
For a longer triangle:
Continue increasing for more rows.
For a shorter triangle:
Stop earlier.
For a deeper triangle:
Use more rows.
For a shallow triangle:
Use fewer rows.
Always measure the actual bandana against your head or intended recipient before finishing.
Color Combination Ideas
This is where you can have fun.
🌿 Sage + Cream
Soft and minimalist.
🌸 Blush + White
Feminine and delicate.
🍋 Butter Yellow + Cream
Perfect for spring and summer.
🫒 Olive + Beige
A more natural, earthy look.
🩵 Sky Blue + White
Fresh and casual.
🍓 Coral + Cream
Bright and summery.
🖤 Black + Cream
Classic and easy to style.
🌈 Rainbow
Perfect for using leftover yarn.
Color Combination Table
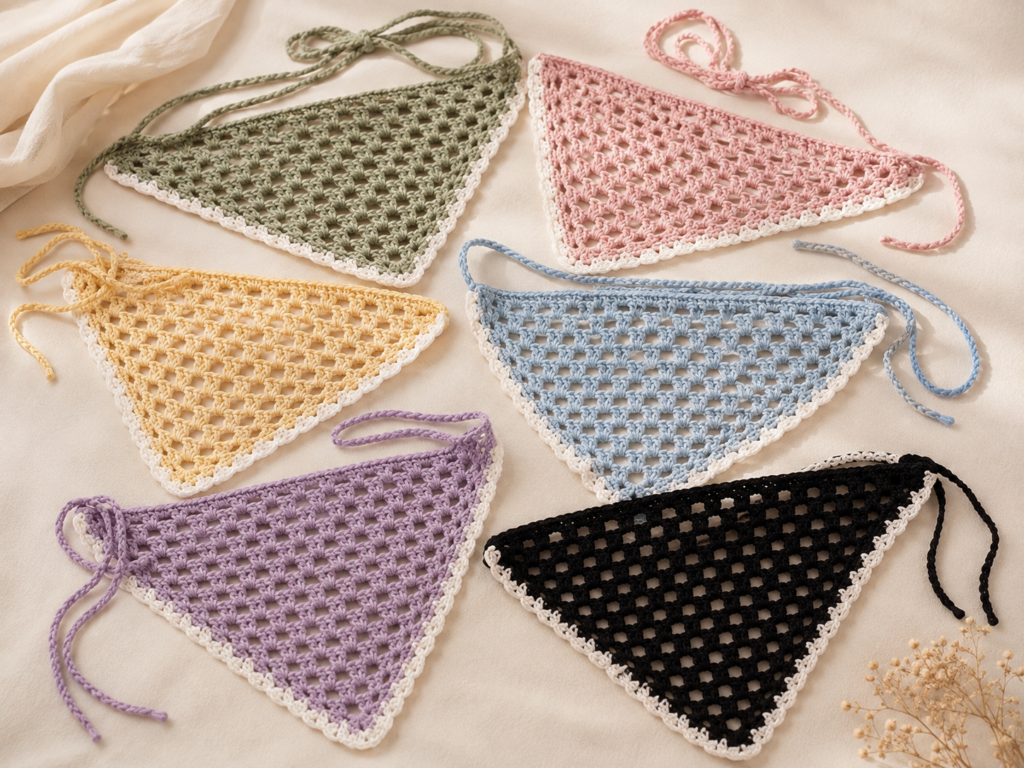
| Main Color | Border | Style |
|---|---|---|
| Sage | Cream | Minimalist |
| Pink | White | Feminine |
| Green | Beige | Boho |
| Black | White | Classic |
| Lavender | Cream | Soft |
| Blue | White | Summer |
| Rust | Cream | Autumn |
| Yellow | White | Cheerful |
How to Add Stripes
Instead of making the whole bandana one color, change colors every few rows.
For example:
Rows 1–4: Cream
Rows 5–8: Sage
Rows 9–12: Cream
Rows 13–16: Sage
Continue alternating until you reach the desired size.
Tip
Change colors at the end of a row whenever possible.
This keeps the color transitions cleaner.
How to Make a Two-Color Bandana
Another beautiful option is to keep the triangle one color and use the second color only for the border.
For example:
Main: Olive green
Border: Cream
This is particularly easy for beginners because you don’t have to manage frequent color changes.
How to Wear a Crochet Bandana
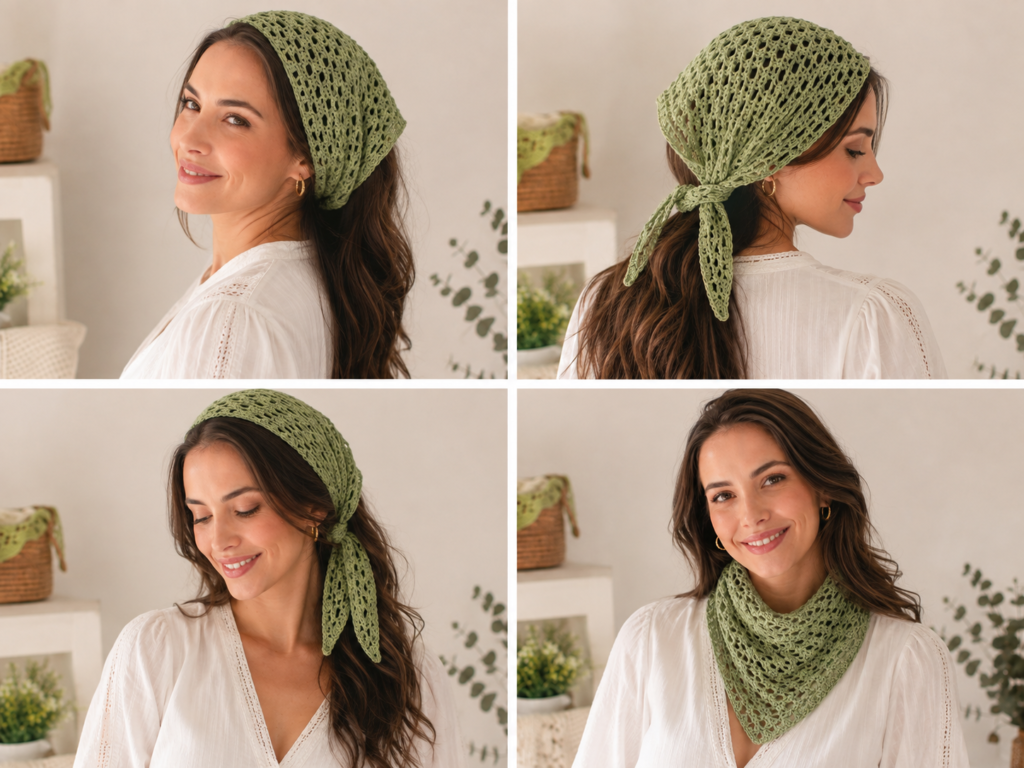
One of the best things about this project is its versatility.
You don’t have to wear it the same way every time.
Style 1: Classic Headband Look
Fold or position the triangular bandana so the point falls toward the back.
Tie the two long ends underneath or behind your hair.
This creates a classic head-scarf appearance.
Best for:
- Casual outfits
- Jeans
- Summer dresses
- Beach days
Style 2: Back-Tied Style
Place the long edge near your forehead.
Bring the ties toward the back of your head.
Tie them beneath your hair.
Let the triangular point fall down the back.
This is one of the easiest everyday styles.
Style 3: Side-Tie Style
Move the triangle slightly toward one side of your head.
Tie the ends near your ear.
This creates a more playful and asymmetrical look.
Styling tip
A small bow can make this version especially cute.
Style 4: Tied Back
Place the bandana over your hair and tie the ends at the back.
This creates more coverage and works particularly well for:
- Messy buns
- Ponytails
- Natural hairstyles
- Beach outfits
Bonus: Wear It as a Neck Scarf
Your crochet bandana doesn’t have to stay on your head.
Fold it into a smaller triangle and tie it loosely around your neck.
Pair it with:
- A simple white T-shirt
- Denim jacket
- Neutral sweater
- Casual dress
This makes the same handmade accessory feel completely different.
Beginner Tips
1. Count your stitches
The increase pattern needs to stay consistent.
If you accidentally skip an increase, one side may become uneven.
2. Mark the first stitch
A stitch marker can make it much easier to identify the beginning of your row.
3. Don’t crochet too tightly
A bandana should drape.
Very tight stitches can make it stiff.
4. Measure as you go
Don’t wait until the final row to discover that the bandana is too small.
5. Use a swatch
Especially if you’re using unfamiliar yarn.
A small swatch tells you how the yarn behaves before you commit to the whole project.
Common Mistakes and How to Fix Them
The triangle is crooked
Check that you are increasing equally at both ends.
The fabric is too stiff
Try:
- A larger hook
- Lighter yarn
- More open stitches
The bandana stretches too much
Try:
- A smaller hook
- Firmer cotton
- Denser stitches
- A less open stitch pattern
The border is wavy
You may have added too many stitches.
Try spacing the border stitches more evenly.
The corner is curling
Make sure you have enough stitches at the point.
For a single crochet border, 3 sc at the corner usually helps the point lie flat.
How to Wash and Care for Your Crochet Bandana
Always check the yarn label first.
For cotton crochet accessories:
- Wash gently.
- Use cool or lukewarm water.
- Avoid aggressive wringing.
- Reshape while damp.
- Lay flat to dry.
Avoid hanging a wet crochet bandana for long periods because the weight of the water can stretch the stitches.
How to Make It a Gift
A handmade crochet bandana makes a lovely small gift.
You can package it with:
- A handwritten note
- Matching scrunchie
- Small crochet flower
- Hair clips
- Handmade card
- Gift box
Gift idea
Make the bandana in the recipient’s favorite color and pair it with a matching crochet scrunchie.
This creates a simple handmade accessory set.
Crochet Bandana Project Planner
| Step | What to Do |
|---|---|
| 1 | Choose yarn |
| 2 | Choose hook |
| 3 | Make a small swatch |
| 4 | Start the triangle |
| 5 | Increase each row |
| 6 | Measure the width |
| 7 | Add border |
| 8 | Add ties |
| 9 | Weave in ends |
| 10 | Block |
| 11 | Try different styling options |
Frequently Asked Questions
Is this crochet bandana beginner-friendly?
Yes. The basic construction uses simple crochet stitches and a repetitive increase pattern. It’s a good project for someone who already knows how to make chains and basic double crochet stitches.
How long does it take to crochet a bandana?
A lightweight bandana can usually be completed in approximately 2–4 hours, depending on your experience, yarn and desired size.
What yarn is best for a crochet bandana?
Lightweight cotton is one of the best choices because it is breathable, washable and comfortable against the skin.
How much yarn do I need?
A standard adult bandana may require approximately 100–150 g of lightweight yarn, but actual usage varies considerably with yarn weight, hook size, stitch pattern and finished dimensions.
If you’re using an especially lightweight openwork pattern, you may need considerably less.
Can beginners crochet this bandana?
Yes. If you know chain, single crochet and double crochet, you can work through the basic version.
Can I make the bandana smaller?
Absolutely. Simply stop increasing sooner.
Can I make it bigger?
Yes. Continue the increase rows until the top edge reaches your desired width.
Can I use acrylic yarn?
Yes. Lightweight acrylic can work well, particularly if you want easy-care yarn and a wide range of colors.
Can I use cotton yarn?
Yes. Cotton is actually one of the best choices for a lightweight summer bandana.
Can I sell finished crochet bandanas?
You can generally sell your own handmade finished items, subject to the rules of the marketplace you’re using and applicable laws. Make sure your listing and branding don’t imply that you’re selling an official product from another designer or brand.
Related Crochet Patterns
If you enjoyed this crochet bandana, you may also like these projects:
18 Unique Ghost Crochet Patterns for Halloween
Perfect if you’re looking for cute and spooky crochet projects for Halloween.
31 Crochet Baby Sweater & Cardigan Ideas That Are Too Cute to Resist
A collection of beginner-friendly crochet projects that are fun to make and give as gifts.
21 Crochet Skirt Shapes for Beginners to Try
Try these seasonal pumpkin designs for fall décor, gifts and Halloween projects.
21 Crochet Spider Web Bandana Ideas THAT Will Transform Your Halloween Look
More simple Halloween projects to add to your seasonal crochet list.
23 Crochet Halloween Cardigan Ideas, Patterns & Tutorials
Beautiful handmade projects for bringing cozy autumn style into your home.
23 Crochet Butterfly Cardigan Ideas, Patterns & Tutorials
More handmade gift ideas for friends, family and Halloween parties.
More Ways to Customize Your Crochet Bandana
Once you’ve made the basic version, don’t be afraid to experiment.
Add Flowers
Make tiny crochet flowers and sew them along one corner.
Add Leaves
Small green crochet leaves can create a beautiful botanical look.
Add Embroidery
Try:
- Hearts
- Stars
- Initials
- Flowers
- Small dots
Add Fringe
A small amount of fringe along the two short edges can create a boho-inspired look.
Add Beads
For an adult accessory, small beads can add a delicate decorative touch. Make sure they’re attached securely and consider the intended wearer’s age and use.
Final Thoughts
A crochet bandana is one of those projects that looks much more complicated than it actually is.
Once you understand the simple increasing triangle, you can create an entire collection of handmade accessories in different colors, sizes and stitch patterns.
Start with a lightweight cotton yarn and a 3.5–4.0 mm hook for a breathable everyday version. If you want something more delicate, experiment with open mesh stitches. If you prefer a warmer accessory, try a slightly heavier yarn.
And don’t stop with one styling option.
Wear your bandana traditionally, tie it at the back, move it to the side or use it as a neck scarf. One simple crochet project can become several different accessories.
Most importantly, remember that crochet doesn’t have to be complicated to be beautiful.
Choose a color you love, grab your hook and make a bandana that’s completely your own. 🧶🌸
Happy crocheting!







