
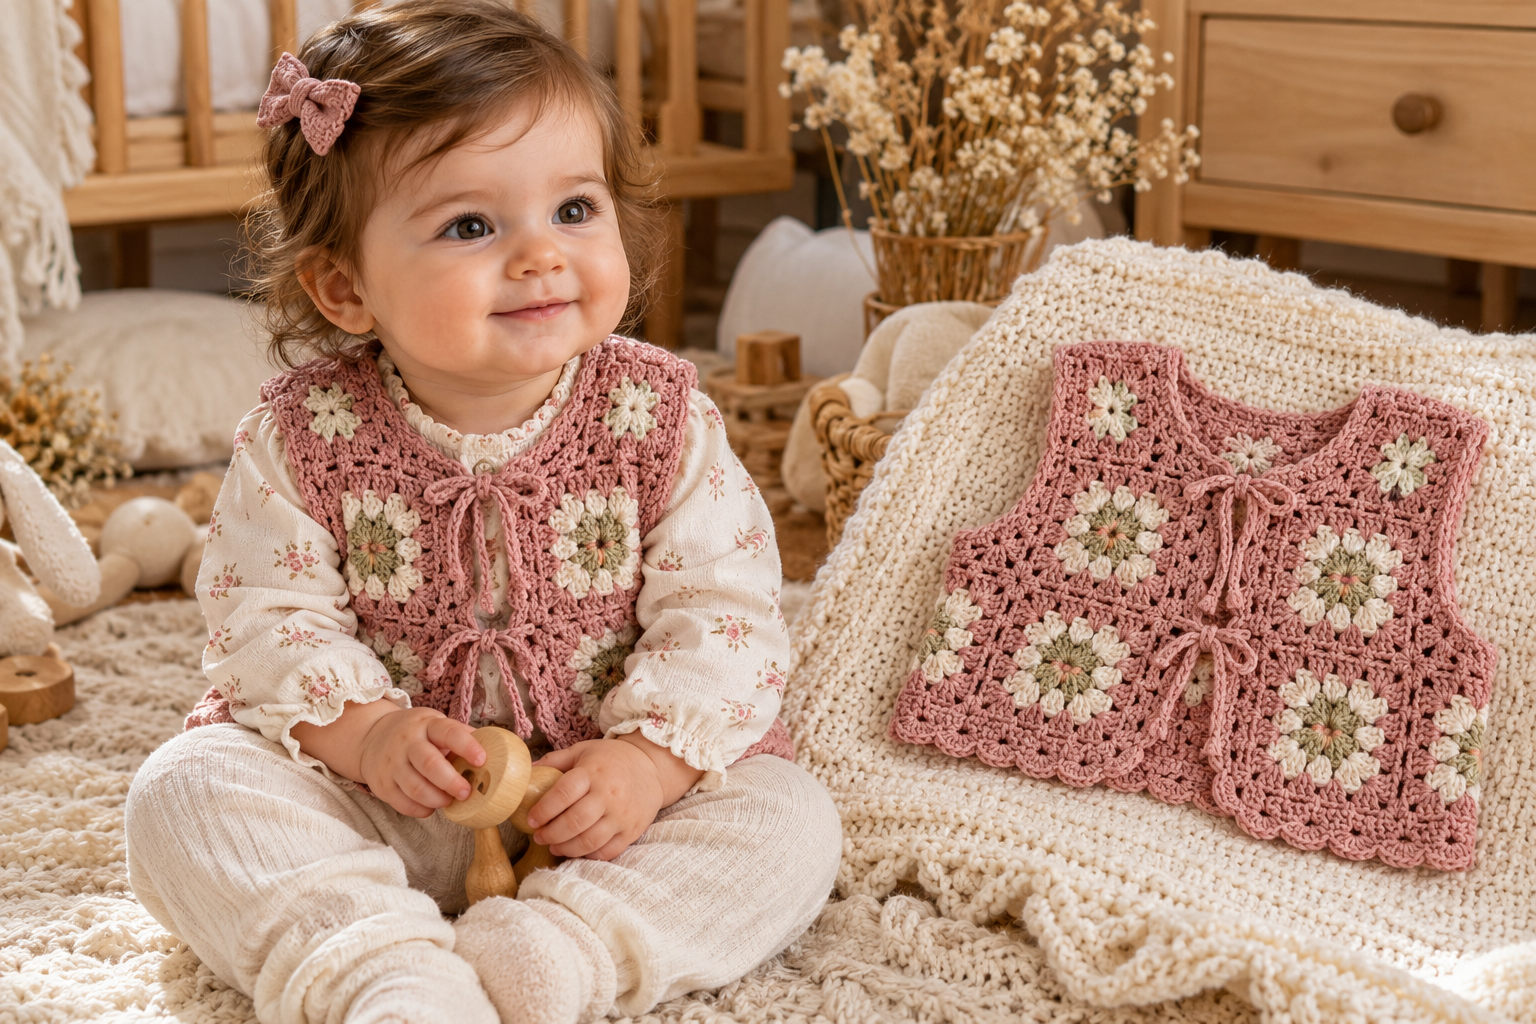
If you love delicate handmade baby clothes, this crochet baby vest pattern is a beautiful project to add to your crochet collection. Inspired by the soft granny-square design shown in the reference, this little vest combines classic crochet motifs with a simple open-front construction, making it practical, comfortable, and adorable for everyday layering.
The design is built from granny square-inspired motifs that are joined to create the back and front panels. A simple edging is then added around the neckline, armholes, and bottom. You can make it in a single soft color for a timeless look or combine several shades for a more traditional granny-square appearance.
The pattern below is written as an original, adaptable tutorial rather than a transcription of the photographed garment. That means you can adjust the number and size of squares, yarn weight, and finishing details to create a vest that fits your baby perfectly.
What You’ll Learn
This tutorial covers:
- How to choose yarn for a baby vest
- How to make the granny-square motifs
- How to make a solid granny-square variation
- How to join the squares
- How to construct the back
- How to construct the front panels
- How to create the armholes
- How to shape the neckline
- How to add a decorative border
- How to add crochet ties
- How to adjust the vest for different baby sizes
- How to check gauge and fit
- How to block granny squares
- How to make matching baby accessories
- How to troubleshoot common problems
Crochet Baby Vest Overview
The finished garment is designed as a lightweight open-front baby vest/cardigan.
The construction is intentionally simple:
- Crochet the granny squares.
- Block the squares if necessary.
- Join the squares into panels.
- Assemble the back and front pieces.
- Leave openings for the armholes.
- Shape the neckline.
- Add edging around the vest.
- Add front ties or buttons.
- Weave in the ends.
- Block the finished garment.
This construction is particularly useful for beginners because most of the garment is made from small, manageable motifs rather than one enormous piece.
Suggested Sizes
Because babies grow at different rates, use the baby’s actual chest measurement whenever possible instead of relying only on age.
| Size | Approx. Age | Finished Chest | Suggested Length |
|---|---|---|---|
| Newborn | 0–3 months | 16–17 in | 7–8 in |
| Small | 3–6 months | 17–18 in | 8–9 in |
| Medium | 6–12 months | 18–19 in | 9–10 in |
| Large | 12–18 months | 19–20 in | 10–11 in |
| Toddler | 18–24 months | 20–21 in | 11–12 in |
These are approximate target measurements rather than strict sizing standards.
For a looser cardigan-style fit, add approximately 1–2 inches of ease to the baby’s chest measurement.
Materials You’ll Need
Yarn
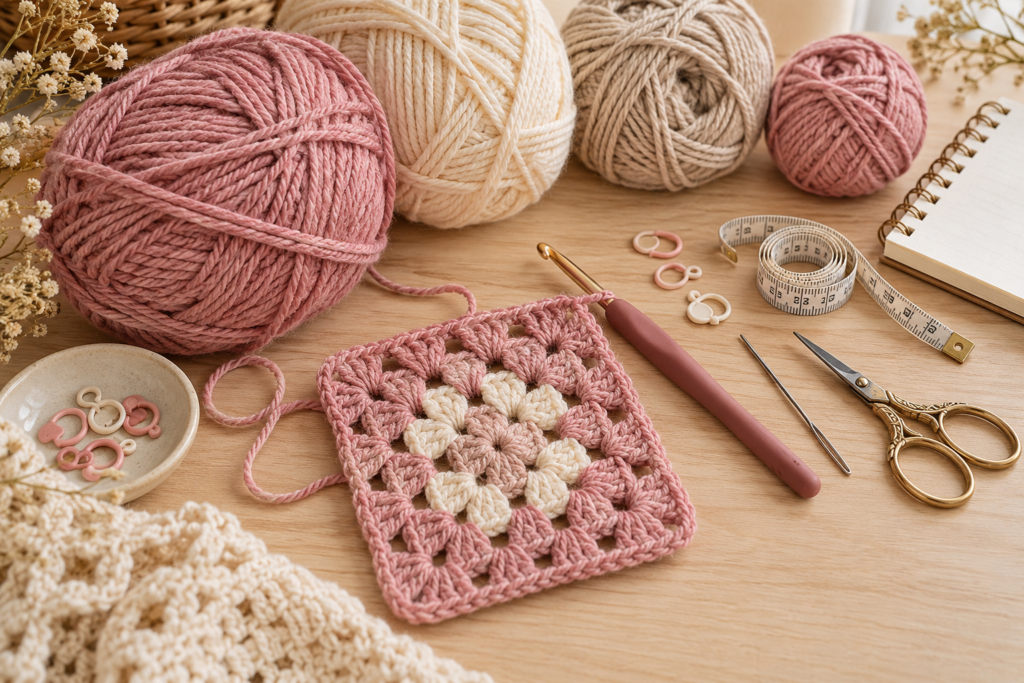
For a lightweight baby vest, choose a soft DK or light worsted yarn.
A washable acrylic, cotton-acrylic blend, bamboo blend, or soft superwash wool can work well.
For babies, avoid yarns that feel scratchy or stiff against delicate skin.
For the sample style, a soft dusty pink is beautiful, but you can also use:
- Cream
- Oatmeal
- Sage green
- Dusty blue
- Lavender
- Soft peach
- Butter yellow
- Terracotta
- Blush pink
Approximate Yarn Requirements
| Size | Approx. Yarn |
|---|---|
| Newborn | 150–200 g |
| 3–6 months | 180–220 g |
| 6–12 months | 200–250 g |
| 12–18 months | 230–280 g |
| 18–24 months | 260–320 g |
Yarn requirements vary according to yarn weight, hook size, motif size, border width, and tension.
Crochet Hook
Start with approximately:
4.0 mm crochet hook for DK yarn
You may need to move up or down depending on your tension.
Other Supplies
You will also need:
- Tapestry needle
- Small scissors
- Stitch markers
- Measuring tape
- Blocking mats or towels
- Rust-resistant pins
- Optional buttons
- Optional wooden beads for ties
Crochet Abbreviations
This tutorial uses US crochet terminology.
| Abbreviation | Meaning |
|---|---|
| ch | Chain |
| sl st | Slip stitch |
| sc | Single crochet |
| hdc | Half double crochet |
| dc | Double crochet |
| st | Stitch |
| sts | Stitches |
| sp | Space |
| rep | Repeat |
| sk | Skip |
| rnd | Round |
Granny Square Pattern
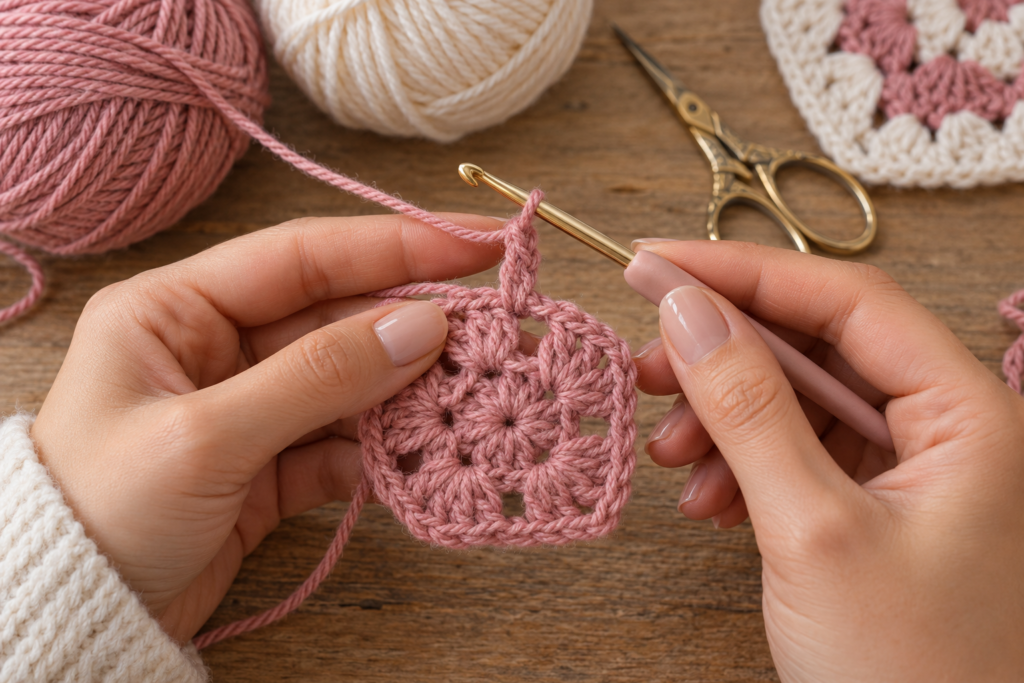
The granny square is the main decorative element of this vest.
For the sample design, use a floral-inspired center followed by traditional granny clusters.
Round 1 — Center
Make a magic ring.
Chain 3. This counts as the first double crochet.
Work 11 dc into the ring.
Pull the magic ring closed.
Join with a slip stitch to the top of the beginning chain-3.
You should have 12 double crochet stitches.
Fasten off if you want a multicolor square.
Round 2 — Building the Flower Center
Join your next color into any stitch.
Chain 3.
Work 2 dc into the same stitch.
Chain 1.
In the next stitch, work 3 dc.
Chain 1.
Continue around:
3 dc, ch 1 in each stitch.
Join with a slip stitch.
This creates a soft clustered center.
Round 3 — Creating the Square
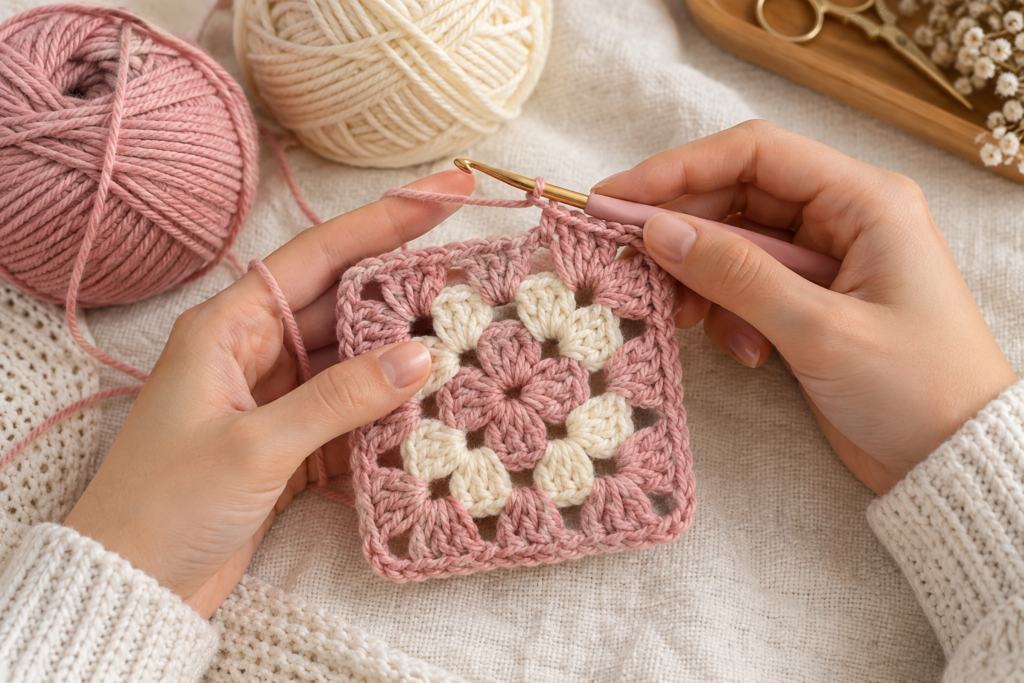
Join your next color into any chain-1 space.
Chain 3.
Work 2 dc into the same space.
Chain 2.
Work 3 dc into the same space.
This creates the first corner.
In the next space, work:
3 dc, ch 1
Repeat around until you reach the next corner.
For each corner, use:
3 dc, ch 2, 3 dc
Finish by joining with a slip stitch.
Your circular flower should now begin taking on a square shape.
Round 4 — Expanding the Square
Join the next color into a corner space.
Chain 3.
Work:
2 dc, ch 2, 3 dc
in the same corner.
Chain 1.
In the next side space, work:
3 dc, ch 1
Continue around the square.
Every corner receives:
3 dc, ch 2, 3 dc
Every side space receives:
3 dc, ch 1
Join with a slip stitch.
Round 5 — Final Granny Border
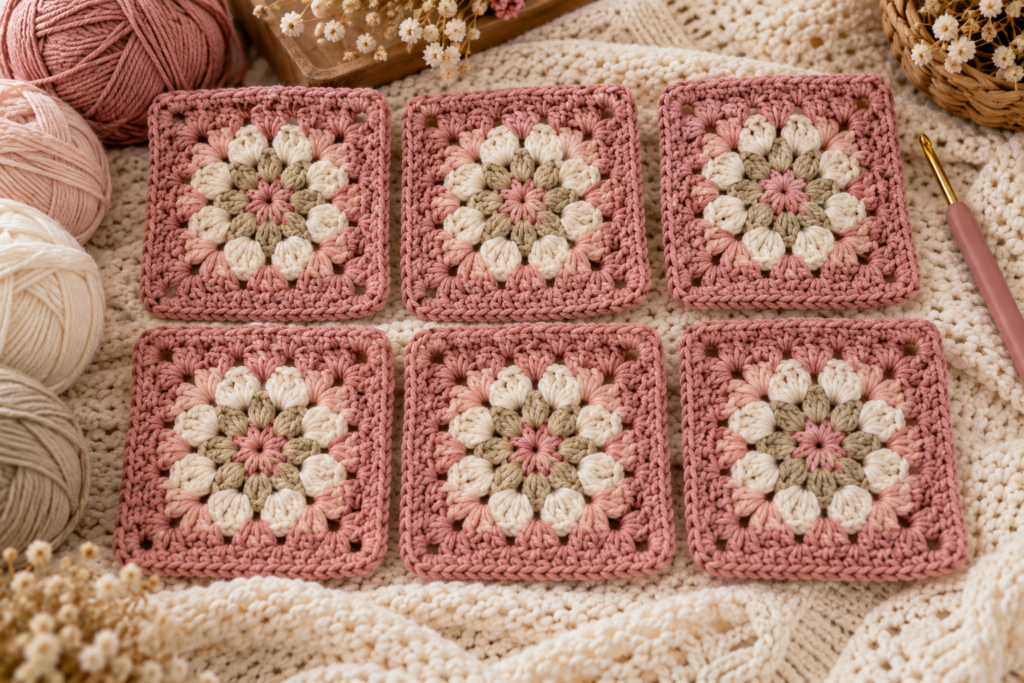
For a slightly larger baby vest motif, add another round.
Join your final color in a corner.
Work:
3 dc, ch 2, 3 dc
in the corner.
Chain 1.
Work 3 dc in each side space, chaining 1 between clusters.
Continue around.
Join with a slip stitch.
Fasten off and weave in the ends.
Your completed square should have a defined center, four corners, and relatively straight sides.
Alternative One-Color Granny Square
If you want the soft monochromatic appearance shown in the inspiration image, you don’t need to change colors.
Simply continue each round using the same yarn.
This creates a much more subtle texture and makes the floral center the main visual feature.
For a boutique baby look, try:
Dusty pink + cream edging
or
Cream + blush edging
or
Sage green + ivory edging
How Many Squares Do You Need?
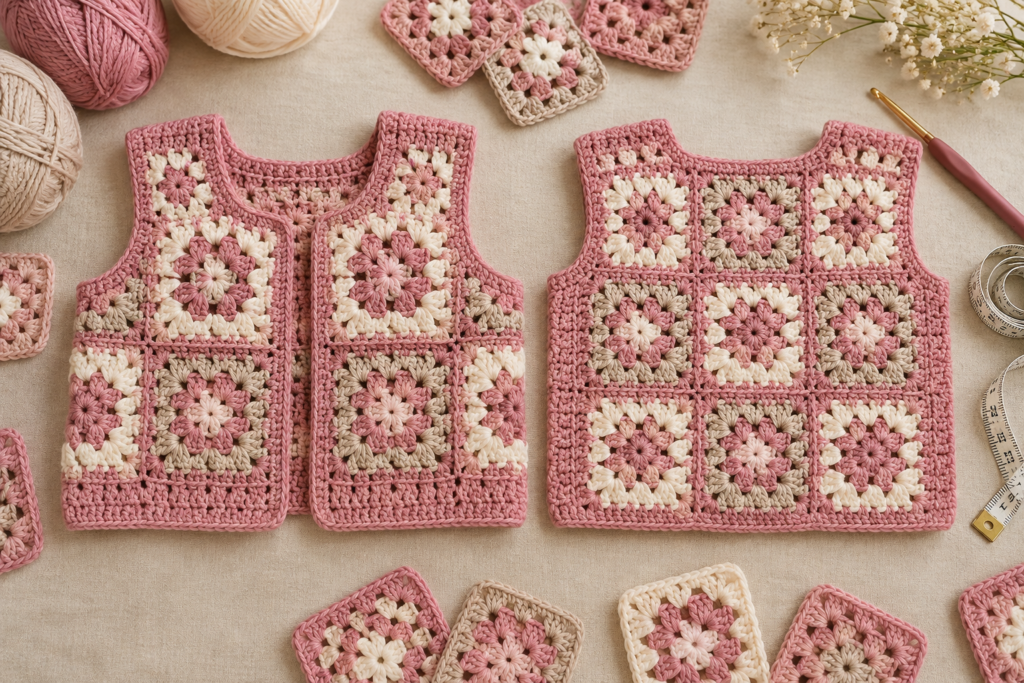
The number depends on the size of the squares and the size of the baby vest.
A simple layout is:
Newborn
Approximately:
- 4 squares for the back
- 2 squares for each front panel
Total: 8 squares
3–6 Months
Approximately:
- 6 squares for the back
- 2–3 squares per front panel
Total: 10–12 squares
6–12 Months
Approximately:
- 6–8 squares for the back
- 3 squares per front panel
Total: 12–14 squares
12–18 Months
Approximately:
- 8 squares for the back
- 3–4 squares per front panel
Total: 14–16 squares
These numbers are starting points. The easiest way to get the right fit is to arrange your finished squares and measure the resulting panel before joining permanently.
The Most Important Step: Check Your Measurements
Before assembling the vest, measure the baby or compare your work with a well-fitting baby garment.
Measure:
Chest circumference
Back width
Total length
Armhole depth
Shoulder width
For example, if your finished squares measure approximately 4 inches each, a 2 × 3 arrangement gives a panel approximately:
8 × 12 inches
before accounting for joining and edging.
If your squares are 5 inches each, the same arrangement becomes:
10 × 15 inches
This is why counting squares alone isn’t enough.
Blocking the Granny Squares
Blocking is especially useful for granny-square garments.
Lay each square flat on a blocking mat.
Gently shape the corners.
Make sure the sides are straight.
Pin each corner.
Lightly mist the squares with water if your yarn allows wet blocking.
Allow them to dry completely.
Don’t stretch the squares aggressively.
The goal is to make them uniform rather than dramatically change their size.
Uniform squares make the finished vest look much more professional.
Joining the Granny Squares
There are several ways to join the motifs.
Method 1 — Slip-Stitch Join
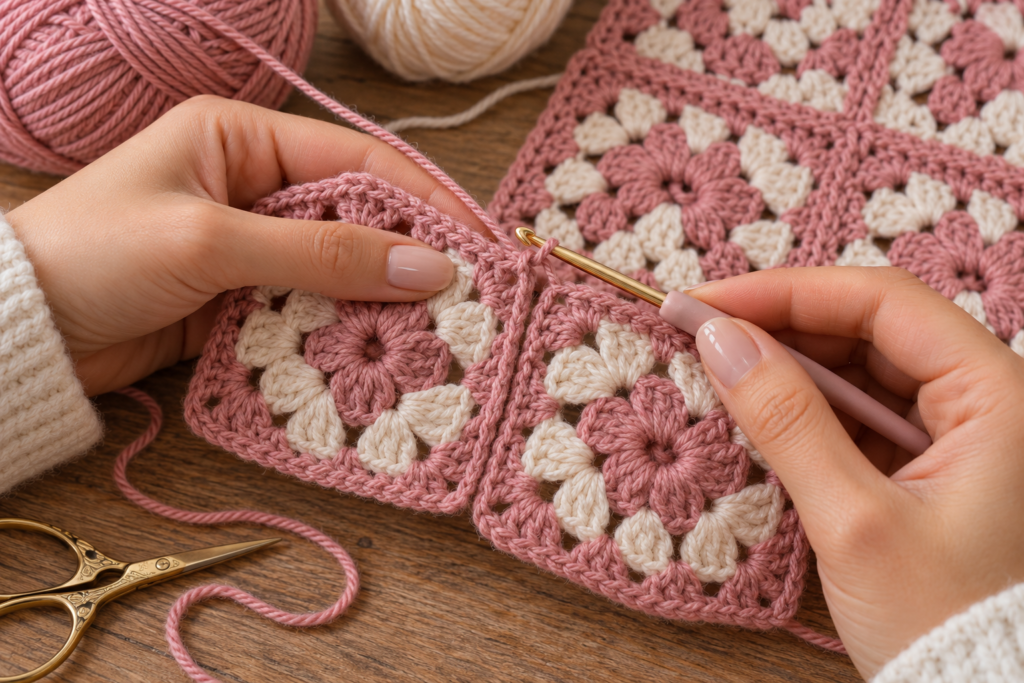
Place two squares together with the right sides facing outward.
Insert the hook through the corresponding stitches of both squares.
Yarn over.
Pull through both layers.
Continue with slip stitches along the edge.
This creates a slightly raised seam.
It works particularly well when you want the joining lines to become part of the design.
Method 2 — Single Crochet Join
Place two squares together.
Insert your hook through both corresponding stitches.
Yarn over and pull through.
Yarn over again and complete a single crochet.
Continue across.
This creates a more visible ridge.
Method 3 — Whip Stitch
Place the squares together.
Using a tapestry needle and yarn, sew through the corresponding stitches.
Pull gently after every few stitches.
Avoid pulling too tightly because the seam can become puckered.
For a soft baby vest, a flexible seam is preferable.
Back Panel Construction
Lay your squares on a flat surface.
Arrange them so the motifs are balanced.
For example, a 6-square back could be arranged:
Square 1 | Square 2 | Square 3
Square 4 | Square 5 | Square 6
Join the squares horizontally first.
Then join the completed rows vertically.
Check that all the corners meet neatly.
The back panel should now look like one rectangular piece.
Front Panel Construction
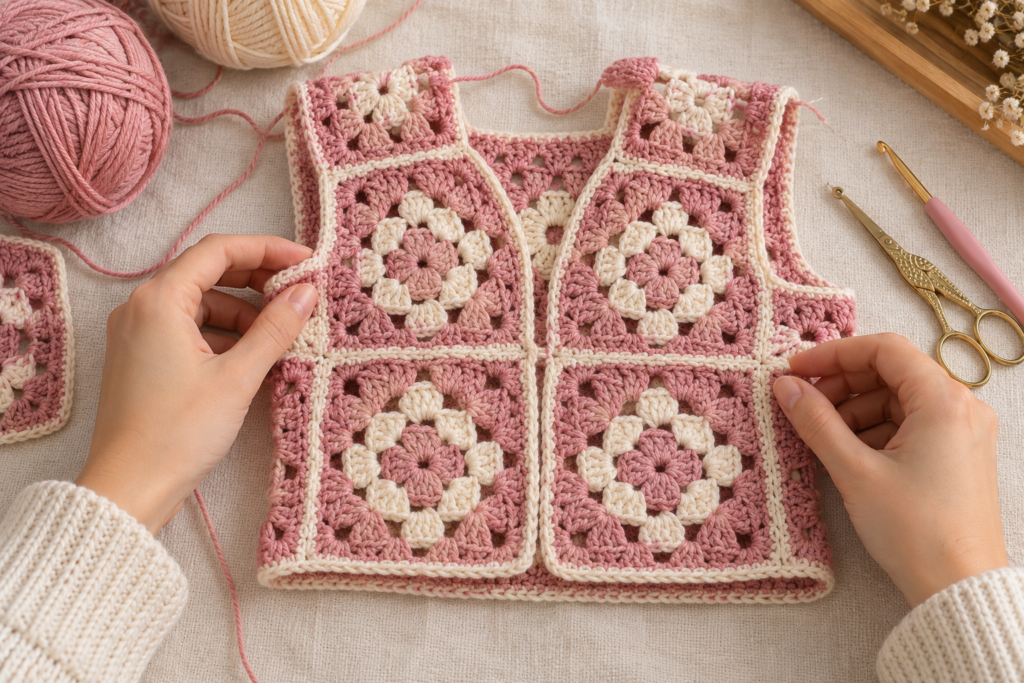
The front consists of two narrower sections.
For example:
Left Front: 2–3 squares
Right Front: 2–3 squares
The front panels should be approximately half the width of the back combined, allowing the vest to overlap slightly or remain open.
This is where you can customize the design.
For a classic cardigan appearance, allow a small overlap at the front.
For a true open vest, keep the two sides separate.
Creating the Armholes
Once the front and back panels are joined, place them together with the wrong sides facing outward.
Use stitch markers to indicate where the shoulder seams should stop.
Do not sew the entire side.
Leave an opening for the arm.
For a baby garment, the armhole should be comfortable rather than tight.
A useful approach is to measure a well-fitting baby cardigan and copy its armhole depth.
For a growing baby vest, err slightly toward a comfortable opening rather than a very fitted one.
Joining the Shoulders
Place the front and back panels together.
Align the shoulder edges.
Join using either:
- Slip stitch
- Single crochet
- Mattress stitch
- Whip stitch
Leave the armholes completely open.
After joining both shoulders, turn the vest right side out.
You should now clearly see the cardigan shape.
Side Seams
Starting below the armhole, join the side of the vest.
Work downward toward the bottom edge.
Stop at the same point on both sides.
Try the vest on a suitable garment form or compare it with a baby cardigan.
Check that the armhole is large enough.
Neckline Edging
A simple crochet edging can dramatically improve the finished appearance.
Join yarn at the back neckline.
Work single crochet evenly around:
- Back neck
- Left front
- Front edge
- Right front
At corners, work 2–3 stitches into the same space if necessary.
This prevents the edging from pulling inward.
For a softer decorative finish, work a second round of:
sc, ch 1, skip 1
This creates a delicate open edging.
Armhole Edging
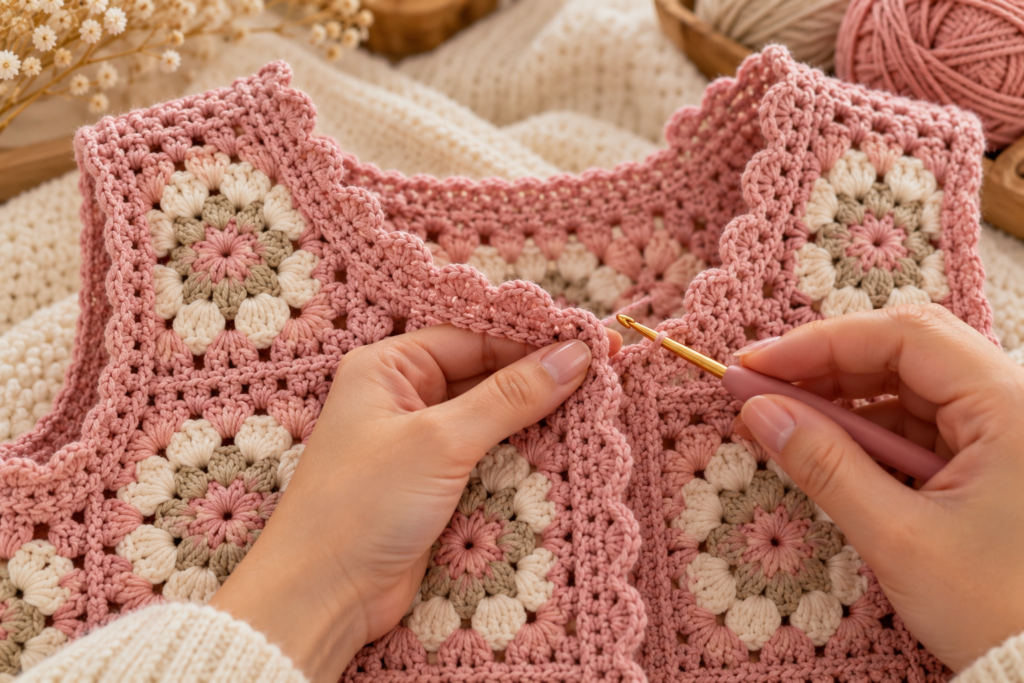
Work one round of single crochet around each armhole.
Try to distribute your stitches evenly.
If the armhole becomes wavy, you have probably added too many stitches.
If it pulls inward, add a few more stitches.
The finished edge should lie flat.
For a decorative baby finish, add a second round of small scallops.
Simple Scallop Border
Work:
skip 1 stitch, 5 dc in next stitch, skip 1 stitch, sl st in next stitch
Repeat around.
This creates small rounded scallops.
Bottom Border
The bottom edge can remain simple or become decorative.
For a clean finish:
Round 1: sc around.
Round 2: sc around.
For a feminine decorative finish:
Round 1: sc around.
Round 2: skip 1, 5 dc in next stitch, skip 1, sl st in next.
Repeat around.
The scallop border works especially well with a floral granny square.
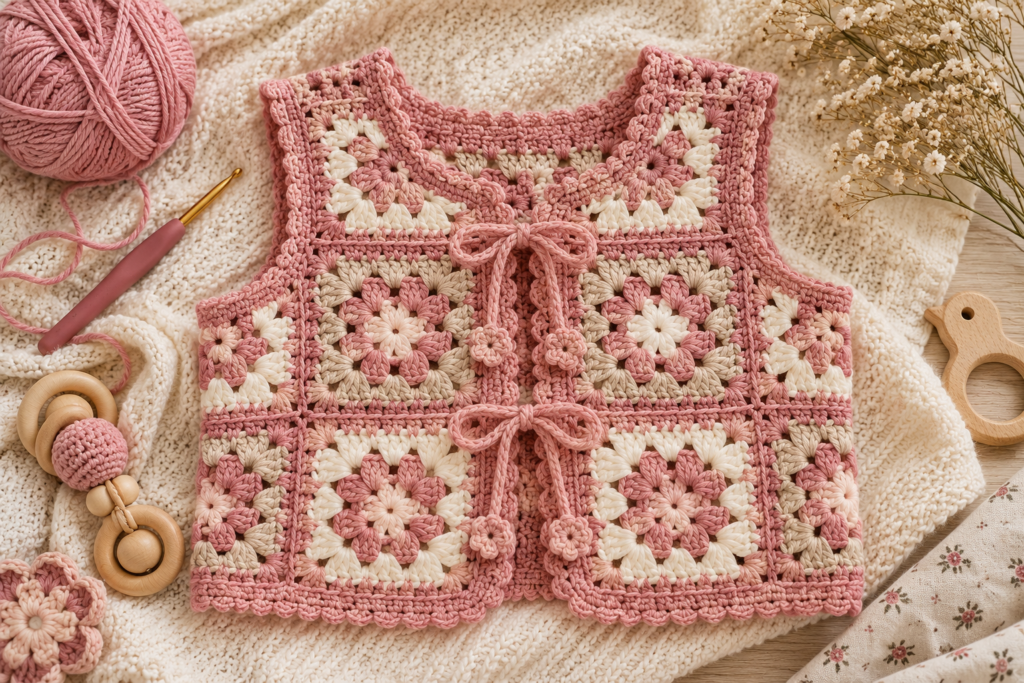
Crochet Front Ties
The inspiration design has a delicate tie-style closure, which is perfect for a baby vest.
Attach yarn near the upper front edge.
Chain approximately:
25–35 chains
depending on the size.
Slip stitch back across the chain.
Fasten off.
Repeat on the opposite side.
You can then tie the two strings into a small bow.
More Secure Tie
For a thicker tie:
Chain 35.
Single crochet into the second chain from the hook.
Single crochet across.
Fasten off.
This creates a stronger ribbon-like tie.
Optional Button Closure
Instead of ties, you can add one or two buttons.
Position the button near the upper chest.
Create a small chain loop on the opposite side.
Make sure the button is securely sewn on.
For baby clothing, avoid loose decorative pieces and check the attachment regularly.
Decorative Flower Granny Square
If you want the floral appearance to be more obvious, create a raised flower center.
Use a contrasting color for the flower.
Work several puff stitches or clusters around the center.
A simple flower effect can be created using:
[3 dc together, ch 2]
repeated around the center.
The petals will create a raised three-dimensional texture.
This looks particularly beautiful in:
- Cream
- Dusty pink
- Lavender
- Soft yellow
Adding a Small Crochet Flower
You can also make tiny flowers separately.
Mini Flower
Make a magic ring.
Work:
sl st, ch 2, 2 dc, ch 2, sl st
Repeat five times around.
Pull the center closed.
Fasten off.
Sew the flower carefully to the vest.
You can add one tiny flower to each front corner for a coordinated look.
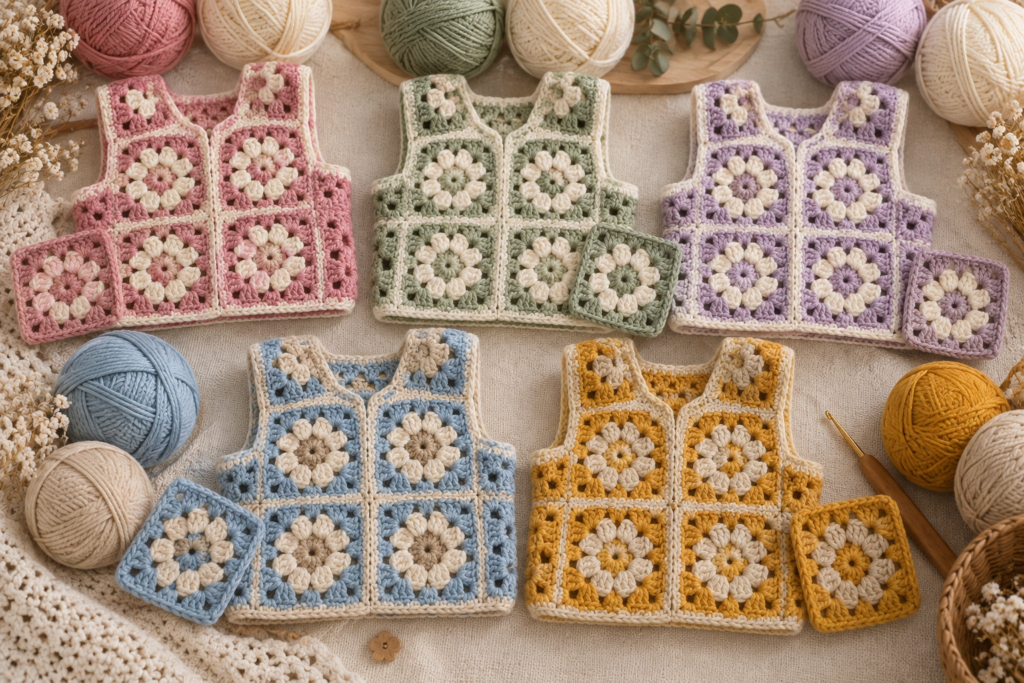
Color Combinations
Soft Blush
- Dusty pink
- Cream
- Light beige
Perfect for a delicate nursery-inspired aesthetic.
Sage Garden
- Sage
- Ivory
- Soft yellow
- Cream
This gives the vest a natural botanical appearance.
Vintage Rose
- Rose pink
- Mauve
- Cream
- Dusty peach
Beautiful for a vintage-inspired baby wardrobe.
Neutral Baby
- Oatmeal
- Cream
- Taupe
Ideal for a minimalist handmade look.
Spring Pastels
- Lavender
- Blush
- Butter yellow
- Mint
Perfect for a cheerful spring vest.
How to Make the Vest Larger
There are two easy ways to increase the size.
Method 1 — Make Larger Squares
Continue the granny-square pattern for additional rounds.
This is the simplest option if you want to preserve the proportions.
Method 2 — Add More Squares
Instead of making each square larger, add additional motifs.
This is useful when you want to increase the width without dramatically changing the square’s appearance.
How to Make It Smaller
If your finished vest is too large:
- Use smaller granny squares
- Remove one motif
- Use a smaller crochet hook
- Reduce the border
- Use lighter yarn
Don’t simply tighten your stitches dramatically, because this can make the fabric stiff.
How to Adjust the Length
The easiest way to make the vest longer is to add another round around the granny squares before assembly.
Alternatively, add a few rows of crochet beneath the completed vest.
A simple bottom extension can be worked in single crochet, half double crochet, or granny clusters.
How to Adjust the Width
For extra chest room, add another granny-square motif to the back or widen the front panels.
Always make the front and back symmetrical.
If you add one square to the back, check that the shoulder placement and armhole position remain comfortable.
Beginner Tip: Count Your Stitches
Don’t rely only on how the square looks.
Count your corner spaces.
A correctly formed granny square should have four clearly identifiable corners.
If you suddenly have five corners, you’ve probably inserted an extra corner cluster somewhere.
If you only have three corners, one corner cluster is missing.
Common Problems
My Granny Square Is Wavy
This usually means you have too many stitches.
Try reducing the number of clusters or checking whether you’re accidentally working into spaces that shouldn’t receive stitches.
My Square Is Curling
A little curling during the first rounds can be normal.
Blocking usually helps.
If the square remains severely curled, check your tension and stitch placement.
My Square Looks Like a Circle
You may not be defining the corners strongly enough.
Make sure your corners contain:
3 dc, ch 2, 3 dc
The chain-2 space helps establish the corner.
My Squares Don’t Match
Measure them.
Even a half-inch difference can become obvious when several squares are joined.
Block them to the same dimensions before assembly.
My Vest Is Too Stiff
Try:
- A larger crochet hook
- Softer yarn
- Looser tension
- A lighter yarn weight
Baby garments generally benefit from flexible fabric.
The Armhole Is Too Tight
Increase the armhole opening.
Don’t rely exclusively on the number of stitches or squares.
Compare the opening with an existing baby garment that fits comfortably.
Finishing the Vest
Once the vest is assembled:
- Check all seams.
- Weave in every yarn end.
- Trim excess yarn.
- Check the neckline.
- Check both armholes.
- Check the front closure.
- Gently block the finished garment.
- Allow it to dry completely.
- Check the garment again before use.
Pay particular attention to loose ends and decorative elements.
Final Blocking
Lay the completed vest flat.
Gently shape the shoulders.
Straighten the front edges.
Smooth the bottom border.
Make sure both armholes are similar.
Lightly mist if appropriate for your yarn.
Allow the vest to dry completely.
Blocking can make a handmade garment look considerably more polished.
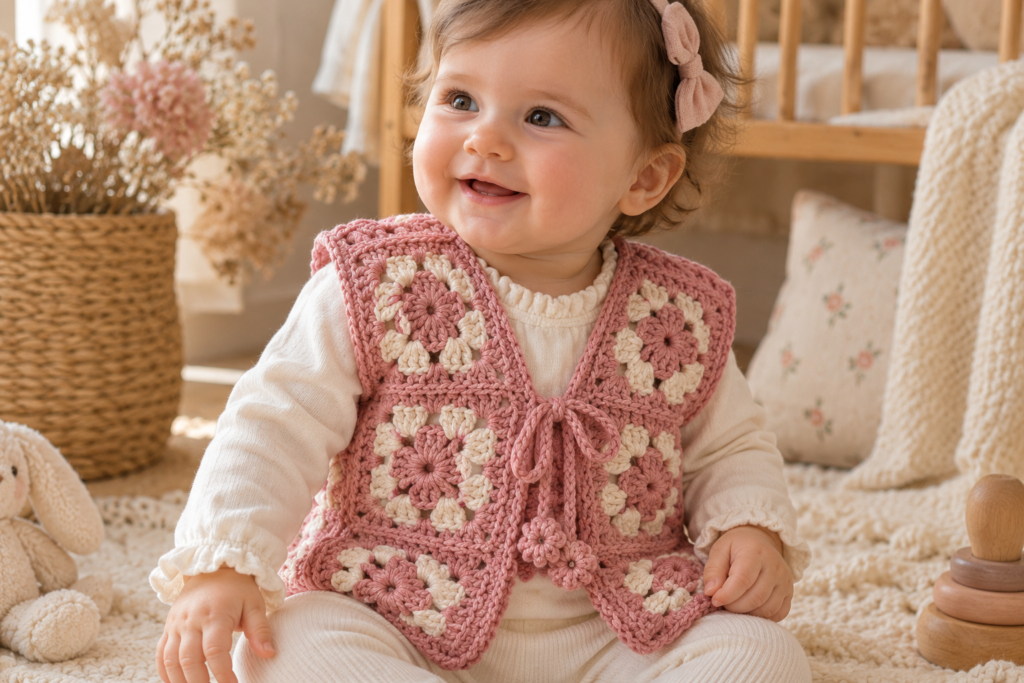
Styling the Crochet Baby Vest
This little vest works beautifully over:
- A white cotton bodysuit
- A long-sleeve cream top
- A simple baby dress
- A ribbed romper
- A neutral blouse
- Soft cotton trousers
- Bloomers
- Denim-style baby pants
For a coordinated handmade outfit, pair it with matching:
- Crochet booties
- Baby headband
- Bonnet
- Hair bow
- Small crochet flower
- Baby blanket
The dusty-pink version is especially beautiful with cream or oatmeal clothing underneath.
Matching Granny Square Baby Booties
To create a complete handmade set, use the same yarn colors for a pair of tiny crochet booties.
You can make the booties primarily in cream and add a small pink flower or granny-square-inspired detail.
This creates the same coordinated aesthetic as the inspiration image.
Matching Crochet Baby Headband
A simple crochet headband can be made from a narrow strip of single crochet or half double crochet.
Work enough rows to create a soft elastic band.
Add a small granny-square flower to the side.
Use the same colors as the vest.
This turns the vest into a complete handmade baby outfit.
Gift Ideas
This crochet baby vest makes a thoughtful handmade gift for:
- Baby showers
- Newborn gifts
- First birthdays
- Christmas
- Baby photography sessions
- Family photos
- Handmade clothing collections
You can also make several versions in different colors and sizes.
Care Instructions
Baby crochet garments should be treated gently.
Whenever possible:
- Follow the yarn manufacturer’s washing instructions.
- Use a gentle detergent.
- Avoid excessive heat.
- Don’t twist the garment aggressively.
- Reshape while damp.
- Dry flat when recommended.
Avoid high heat unless the yarn specifically allows it.
Safety Notes for Baby Crochet
Because this is a baby garment, inspect it carefully before giving it to a child.
Check:
- Buttons
- Beads
- Decorative flowers
- Ties
- Loose yarn ends
- Seams
- Small embellishments
Anything attached to the garment should be secure.
Avoid detachable small decorations that could become a choking hazard.
For this reason, a simple crochet tie or securely sewn decorative element can be preferable to loose embellishments.
Quick Pattern Summary
Project: Granny Square Baby Vest
Construction: Granny-square panels
Skill level: Advanced beginner
Yarn: DK/light worsted baby-friendly yarn
Hook: Approximately 4.0 mm
Main stitch: Double crochet
Construction: Motifs → panels → assembly → edging
Closure: Crochet ties or optional buttons
Customization: Highly adaptable
Simple Construction Checklist
Before starting:
☐ Choose your yarn
☐ Measure the baby or a suitable garment
☐ Make one test square
☐ Measure the square
☐ Decide your panel layout
☐ Make all squares
☐ Block the squares
☐ Join the back
☐ Join the front panels
☐ Sew the shoulders
☐ Join the sides
☐ Add armhole edging
☐ Add neckline edging
☐ Add bottom border
☐ Add ties or buttons
☐ Weave in ends
☐ Block the finished vest
☐ Inspect all attachments
Final Thoughts
A granny square crochet baby vest is one of those projects that looks intricate while being surprisingly approachable once you divide it into small steps. Instead of tackling an entire garment at once, you work on individual motifs, join them into panels, and then finish the vest with simple crochet edging.
The real beauty of this pattern is its flexibility. You can keep the entire vest in one soft color for a minimalist look, use several pastel shades for a traditional granny-square effect, or create a floral center in every square and surround it with a neutral border.
Once you’ve made the basic construction, you can also use the same technique to create matching baby booties, headbands, bonnets, blankets, and other handmade accessories.
The result is a sweet handmade layer that can become part of a baby’s wardrobe while also giving you plenty of opportunities to experiment with color, texture, motif size, and decorative edging.







