A handmade crochet dog bandana is one of the most satisfying small crochet projects you can make. It uses relatively little yarn, works up much faster than a sweater or blanket, and can be customized to fit almost any dog.
This pattern creates a classic triangular dog bandana with a comfortable top band, optional button closure, decorative border and optional fringe. The basic body uses simple single crochet increases, so it is suitable for beginners who are comfortable with chain stitches, single crochet and turning rows.
You can make it in sage green, mustard, dusty pink, burgundy, cream, blue or virtually any color combination. You can also turn the same basic pattern into seasonal accessories for Christmas, Halloween, birthdays, Valentine’s Day or everyday wear.
Important: The pattern in this tutorial is an original construction inspired by the visual style of the uploaded reference image. It is not a reproduction of another designer’s written pattern.
Why You’ll Love This Crochet Dog Bandana
This pattern is designed to be practical as well as cute.
You don’t need advanced crochet techniques, and you can adjust the dimensions as you work instead of relying entirely on a fixed stitch count.
The project is ideal for:
- Crochet beginners
- Scrap-yarn projects
- Handmade pet accessories
- Small crochet projects
- Dog birthday gifts
- Pet photography
- Seasonal dog outfits
- Handmade markets
- Personalized pet gifts
The triangular body is particularly useful because you can stop increasing whenever the bandana reaches the width you need.
What Makes This Pattern Beginner-Friendly?
There are several reasons this is a good first pet-accessory project.
First, the main body uses mostly single crochet.
Second, the triangle is created with a simple increase formula rather than complicated shaping.
Third, you can measure the bandana as you work, so you don’t have to rely entirely on stitch counts.
Finally, the top band and border are simple enough to customize once you understand the basic construction.
Finished Size Guide
Dog breeds don’t have standardized neck measurements, so always measure your individual dog.
The measurements below are useful starting points.
| Size | Approx. Neck | Bandana Width | Triangle Drop | Suggested Dogs |
|---|---|---|---|---|
| XS | 20–25 cm | 16–18 cm | 11–13 cm | Very small dogs |
| S | 25–32 cm | 20–23 cm | 14–16 cm | Small dogs |
| M | 32–40 cm | 25–28 cm | 17–20 cm | Small/medium dogs |
| L | 40–50 cm | 30–34 cm | 21–24 cm | Medium/large dogs |
| XL | 50–65 cm | 36–42 cm | 25–30 cm | Large dogs |
These measurements are approximate.
Your dog’s actual neck measurement should always determine the final fit.
How to Measure Your Dog
Want to make a cute crochet bandana for your dog?
These easy projects use very little yarn and are perfect for beginners. You can customize the size for small, medium, or large dogs.Shop the supplies on Amazon:
👉 Cotton Yarn for Dog Bandanas
👉 Beginner Crochet Kits
👉 Finished Crochet Dog BandanasAs an Amazon Associate, I earn from qualifying purchases.
Use a flexible measuring tape.
Place it around the dog’s neck where the bandana will sit.
Don’t pull the tape tightly.
Record the measurement.
For a tie-style bandana, you’ll need additional length beyond the neck measurement so the ends can be comfortably tied.
For a button-style bandana, you’ll need enough overlap to create the closure.
Example
If your dog’s neck measures:
35 cm
You could make a medium bandana with a top band that provides enough additional length for adjustment.
The goal isn’t to make the finished neck band exactly 35 cm. The goal is to create a comfortable adjustable closure around a 35 cm neck.
Materials
| Material | Recommendation |
|---|---|
| Yarn | Cotton or cotton blend |
| Yarn weight | Worsted/medium |
| Crochet hook | 4.0 mm |
| Tapestry needle | For weaving ends |
| Scissors | For trimming yarn |
| Measuring tape | For fitting |
| Stitch marker | Optional |
| Button | Optional |
| Sewing needle | If adding a button |
| Comb | Useful for fringe |
How Much Yarn Do You Need?
The amount depends on the size and stitch pattern.
| Size | Approximate Yarn |
|---|---|
| XS | 20–30 g |
| S | 25–35 g |
| M | 35–50 g |
| L | 50–65 g |
| XL | 65–85 g |
These are estimates rather than exact quantities.
A textured stitch or fringe will use more yarn than a simple single-crochet design.
Choosing the Best Yarn
Cotton
Cotton is one of the best choices for a dog bandana because it gives you good stitch definition and a relatively structured fabric.
It also works beautifully for:
- Summer bandanas
- Colorful designs
- Everyday accessories
- Washable pet projects
Cotton Blend
A cotton blend can provide a little more flexibility while maintaining good structure.
Acrylic
Soft acrylic can also work, especially if you’re making a decorative bandana or using yarn you already have.
Choose a soft yarn rather than a coarse one.
Wool
Wool can be attractive for winter accessories, but it may not be the easiest choice for a dog bandana that needs frequent washing.
If you use wool, pay particular attention to the manufacturer’s washing instructions.
Choosing the Crochet Hook
A 4.0 mm hook is a useful starting point with worsted-weight yarn.
However, your personal tension matters.
If your fabric feels:
Too stiff: use a larger hook.
Too loose: use a smaller hook.
For a dog bandana, you want a fabric that is flexible but still holds its triangular shape.
Gauge
Gauge is not extremely strict because the pattern is based on measurements.
A useful target is approximately:
18–20 sc = 10 cm
and approximately:
20–22 rows = 10 cm
Your gauge doesn’t need to match this perfectly.
What matters most is that you create a comfortable fabric and reach the required finished dimensions.
Crochet Abbreviations
This tutorial uses US crochet terminology.
| Abbreviation | Meaning |
|---|---|
| ch | Chain |
| sc | Single crochet |
| hdc | Half double crochet |
| dc | Double crochet |
| sl st | Slip stitch |
| st | Stitch |
| sts | Stitches |
| inc | Increase |
| rep | Repeat |
| BLO | Back loop only |
| FO | Fasten off |
Crochet Stitches You’ll Need
Chain Stitch
Make a slip knot.
Yarn over.
Pull the yarn through the loop on your hook.
Repeat to create a chain.
Single Crochet
Insert your hook into the stitch.
Yarn over.
Pull up a loop.
Yarn over again.
Pull through both loops.
Slip Stitch
Insert your hook into the stitch.
Yarn over.
Pull through the stitch and the loop on your hook.
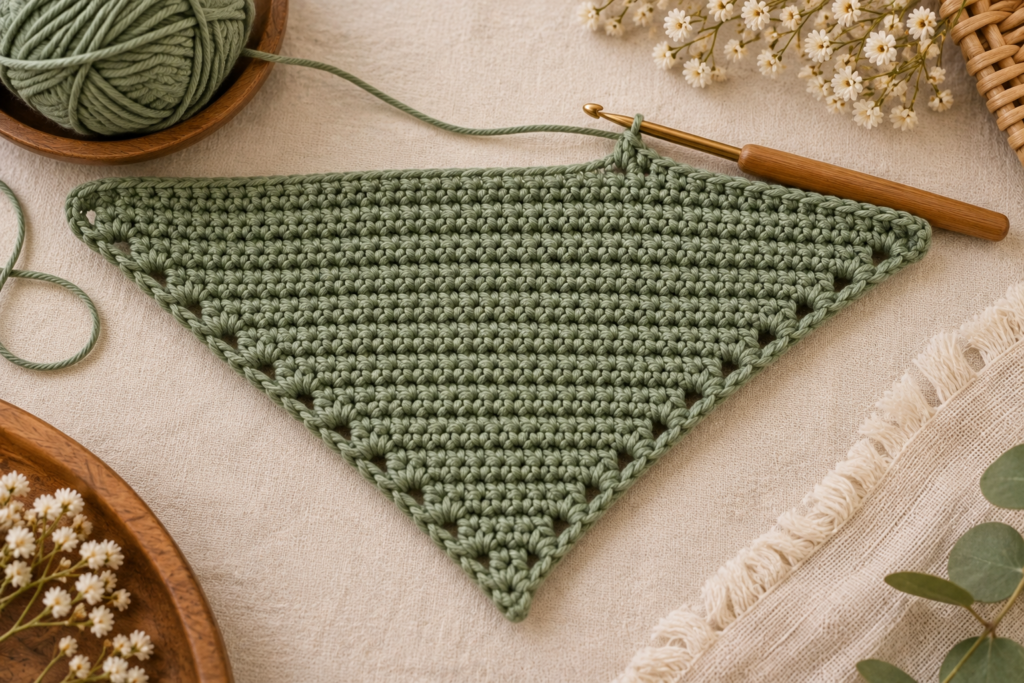
The Basic Crochet Dog Bandana Pattern
The main body is worked from the bottom point upward.
Instead of using a complicated decreasing pattern, we start with a tiny point and increase at both edges of every row.
This produces a symmetrical triangle.
The Increase Formula
Every row follows this basic idea:
Increase at the beginning + single crochet across + increase at the end.
This means each completed row adds 2 stitches.
That makes sizing very easy.
Step 1: Begin the Triangle
Chain 2.
Work:
2 sc in the second chain from the hook.
You now have:
2 stitches
Chain 1 and turn.
Step 2: Row 2
Work:
2 sc in the first stitch.
Sc across until the final stitch.
2 sc in the final stitch.
You now have:
4 stitches
Chain 1 and turn.
Step 3: Continue Increasing
Repeat this row:
2 sc in first stitch, sc across, 2 sc in final stitch.
At the end of each row:
Ch 1 and turn.
Each row adds two stitches.
Your stitch count will progress like this:
| Row | Stitch Count |
|---|---|
| 1 | 2 |
| 2 | 4 |
| 3 | 6 |
| 4 | 8 |
| 5 | 10 |
| 6 | 12 |
| 7 | 14 |
| 8 | 16 |
| 9 | 18 |
| 10 | 20 |
| 15 | 30 |
| 20 | 40 |
| 25 | 50 |
| 30 | 60 |
| 35 | 70 |
| 40 | 80 |
| 45 | 90 |
| 50 | 100 |
| 55 | 110 |
| 60 | 120 |
This is the key to customizing the pattern.
XS Dog Bandana
Continue the increase rows until the top edge measures approximately:
16–18 cm
With the example gauge, this may be around 32–36 rows.
Don’t worry if your exact row count is different.
Measure the actual fabric.
Once the top edge reaches the desired width, stop increasing.
Small Dog Bandana
Continue increasing until the top edge measures approximately:
20–23 cm
This may require around:
40–46 rows
depending on your gauge.
Medium Dog Bandana
Continue until the top edge measures approximately:
25–28 cm
At the sample gauge, this may require around:
50–56 rows
Large Dog Bandana
Continue until the top edge measures approximately:
30–34 cm
This may require approximately:
60–68 rows
depending on your tension.
XL Dog Bandana
Continue until the top edge reaches approximately:
36–42 cm
At the sample gauge, this may require approximately:
72–84 rows
Again, use the actual measurement rather than blindly following the row count.
Why Measurement Is Better Than a Fixed Stitch Count
Crochet tension varies enormously between people.
Imagine two crocheters using the same 4.0 mm hook.
One may produce:
18 stitches per 10 cm
while another produces:
21 stitches per 10 cm.
Their stitch counts will therefore produce different physical sizes.
For a dog bandana, measuring as you work is much more reliable.
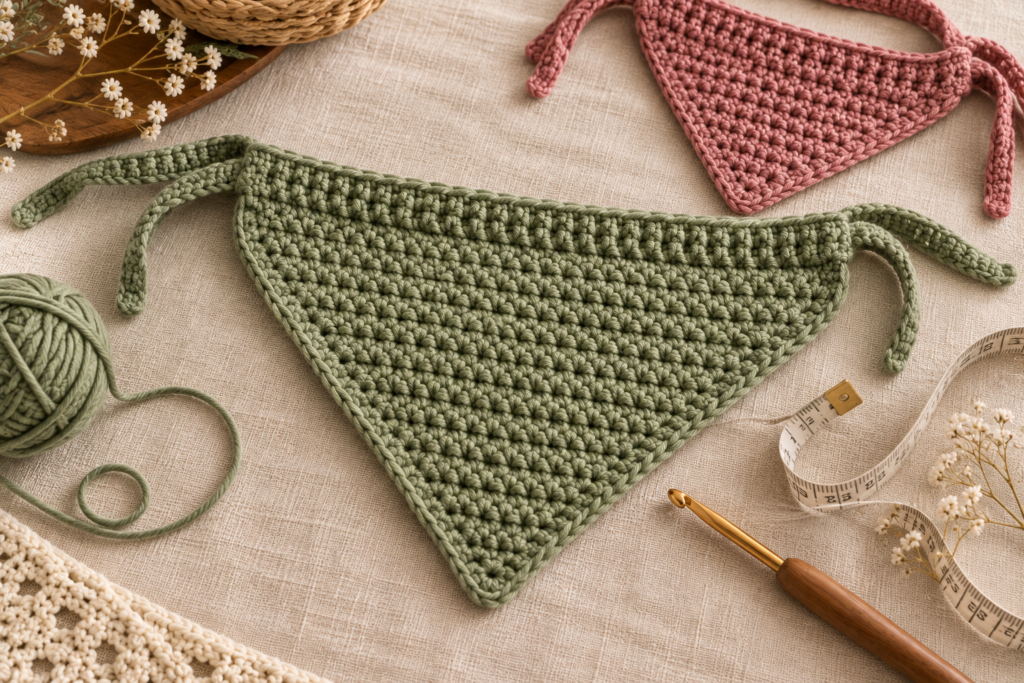
How to Check the Triangle Shape
Place your work flat.
The bottom should form a point.
The two diagonal edges should be approximately symmetrical.
The top edge should be relatively straight.
If one side is longer than the other, check that you’ve increased at both edges on every row.
Creating the Top Neck Band
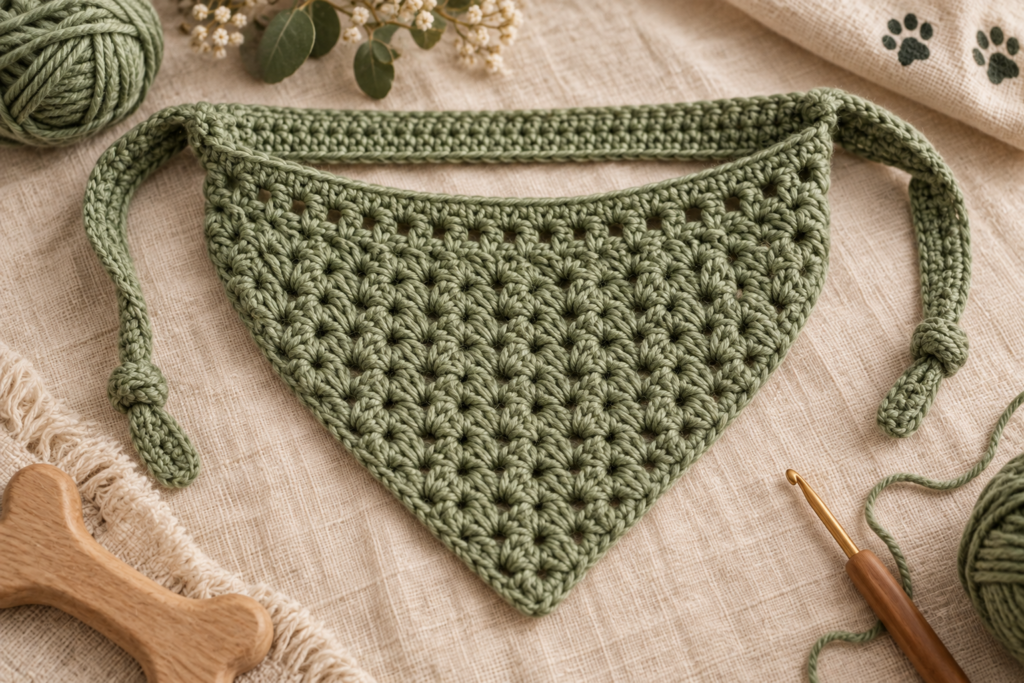
Once your triangle reaches the desired width, you need to create a comfortable way to attach it around the dog’s neck.
There are several options.
The easiest for beginners is a tie-style band.
Option 1: Adjustable Crochet Tie
Attach your yarn to one top corner.
Chain approximately:
20–30 cm
depending on the size of the dog.
Turn.
Sc back across the chain.
Continue working single crochet across the top edge of the triangle.
At the opposite corner, chain another:
20–30 cm
Turn and sc back across the chain.
Fasten off.
This creates two long ties.
The exact tie length can be adjusted to your dog’s neck size.
Option 2: Wider Neck Band
For a more substantial band, work several rows across the top.
After completing the triangle:
Row 1
Sc across the entire top edge.
Rows 2–4
Ch 1.
Sc across.
Fasten off.
You now have a wider top band.
Add ties to both ends.
This style can look especially polished when using a contrasting color.
Option 3: Button Closure
A button closure creates a more finished appearance.
Work a short extension from one side of the band.
On the opposite side, create a buttonhole.
For example:
Sc 2, ch 2, skip 2 sts, sc across.
The chain space becomes the buttonhole.
Sew the button securely to the opposite side.
Button Safety
Use a button only if it can be attached securely and your dog is unlikely to chew it.
For dogs that chew accessories, a simple tie closure is generally the safer design choice.
Always inspect the button before every use.
Adding a Crochet Border
A border gives the bandana a finished appearance.
Attach your yarn at one corner.
Work single crochet evenly around the outer edges.
At the bottom point, work:
3 sc in the point.
This helps the point remain defined.
Join with a slip stitch when you reach the beginning.
Fasten off.
Simple Scalloped Border
For a decorative edge, try a simple scallop.
A basic version can be created with:
Skip 2 stitches, 5 dc in next stitch, skip 2 stitches, sl st in next stitch.
Repeat around the edge.
This creates a decorative shell-like border.
If the edge becomes wavy, reduce the number of skipped stitches or use fewer double crochets per shell.
Textured Border
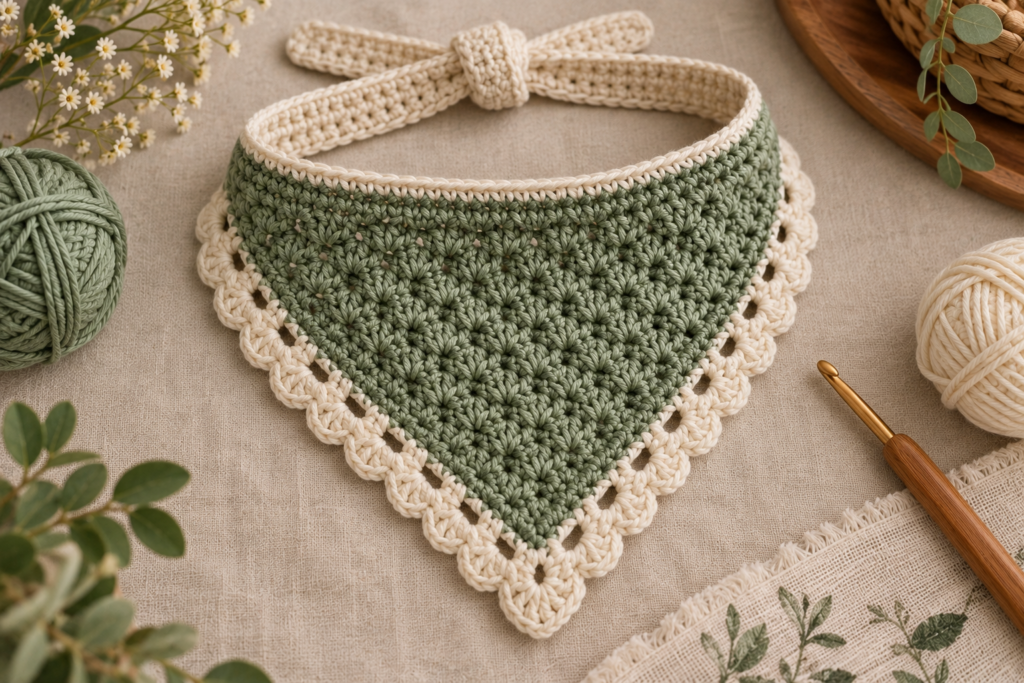
For a subtle textured look, use single crochet in the back loop only.
Work:
Sc BLO around the edge.
This creates a raised ridge around the bandana.
It’s an excellent option if you want decoration without adding fringe.
Adding Fringe
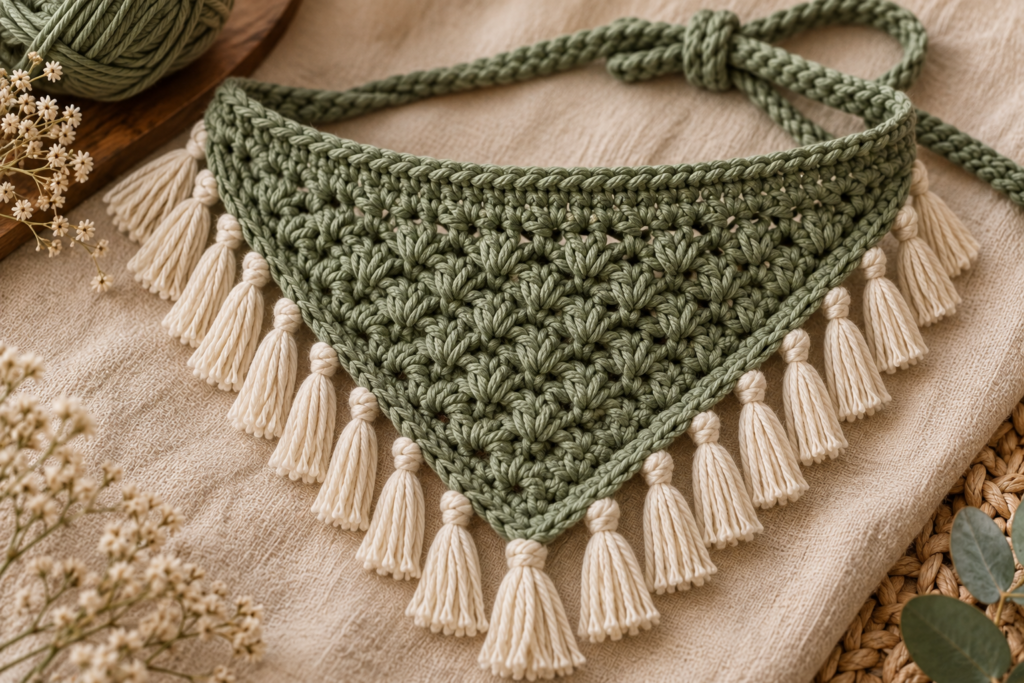
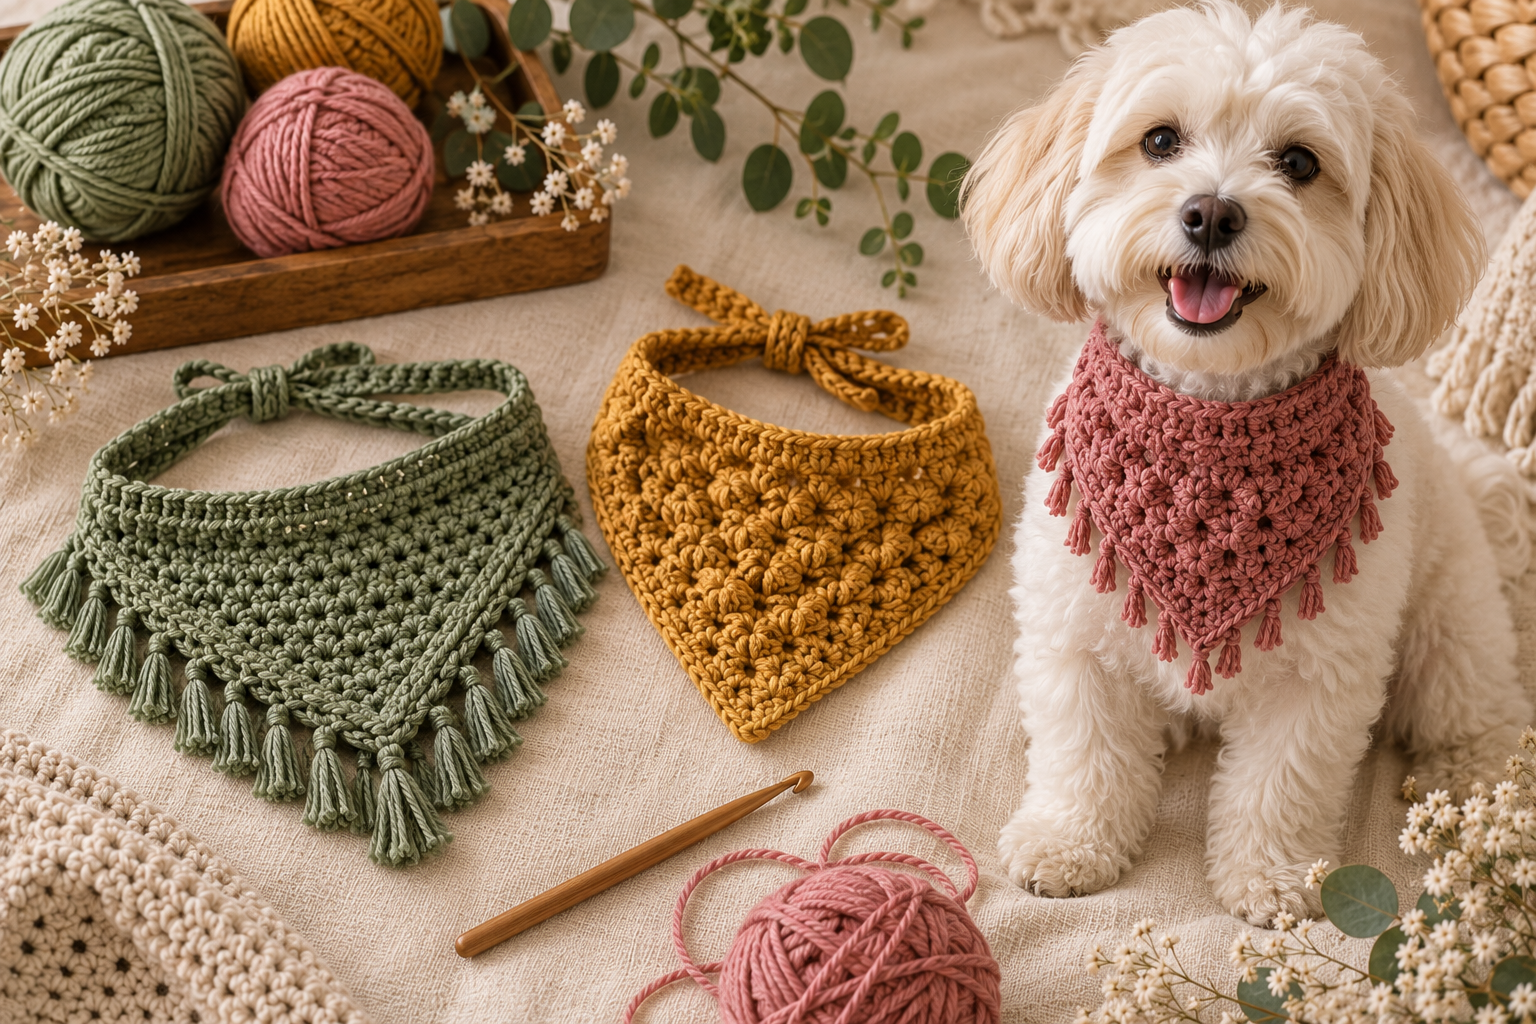
The inspiration image features decorative fringe.
Fringe can create a beautiful boho appearance.
Cut several pieces of yarn approximately:
10–12 cm long.
Fold one group in half.
Insert your hook through the edge of the bandana.
Pull the folded loop through.
Pull the loose ends through the loop.
Tighten gently.
Repeat.
How Much Fringe Should You Add?
You don’t need fringe on every stitch.
A good starting point is to place fringe every:
2–3 stitches
along the two diagonal edges.
You can also add fringe only along the bottom edge.
For a minimalist design, place three small fringe groups at the bottom.
Making Even Fringe
Cut a small piece of cardboard approximately 10–12 cm wide.
Wrap your yarn around the cardboard several times.
Cut along one side.
You’ll get multiple strands of approximately equal length.
This is much faster than measuring every strand individually.
Fringe-Free Version
If you want a cleaner everyday bandana, skip the fringe.
A simple single-crochet border can look more modern and is also easier to maintain.
Two-Color Crochet Dog Bandana
Color changes are one of the easiest ways to create a completely different design.
Try:
Sage + cream
Mustard + ivory
Dusty pink + burgundy
Blue + cream
Black + orange
Burgundy + forest green
You can keep the triangle one color and use the second color only for the border.
Striped Crochet Dog Bandana
For stripes, change color every few rows.
For example:
| Rows | Color |
|---|---|
| 1–4 | Cream |
| 5–8 | Sage |
| 9–12 | Cream |
| 13–16 | Sage |
| 17–20 | Cream |
Continue the pattern until the triangle is complete.
Because the triangle becomes wider as you work upward, the stripes will naturally become wider.
Color-Block Bandana
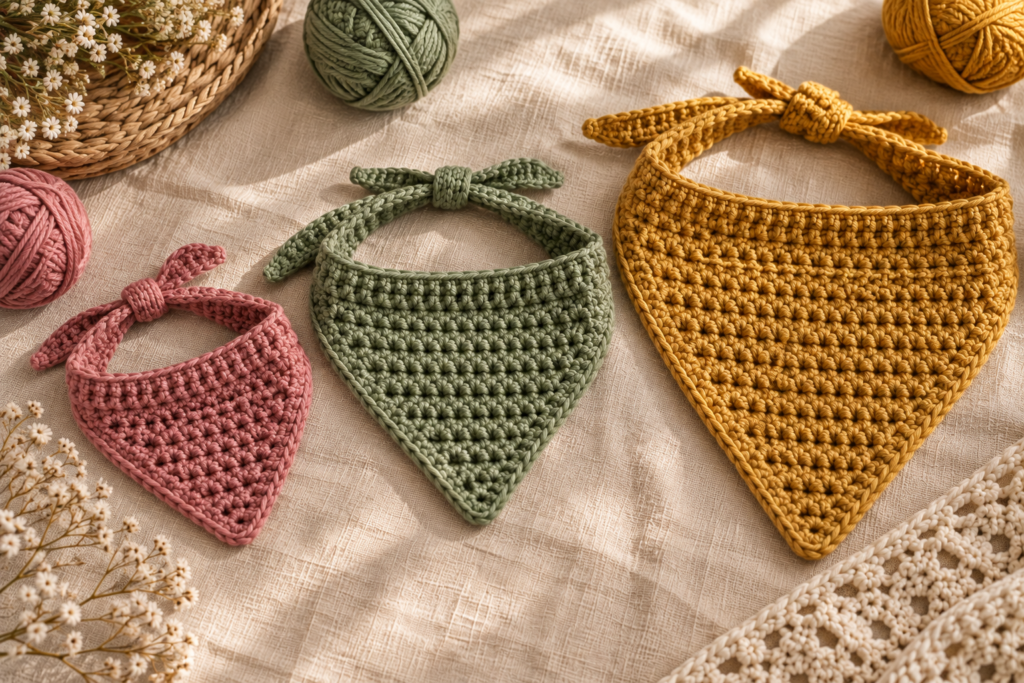
Instead of regular stripes, divide the bandana into sections.
For example:
Bottom point: Burgundy
Middle: Dusty pink
Top: Cream
You can achieve this by changing colors after a predetermined number of rows.
Granny-Inspired Version
If you want a more decorative bandana, use granny-style clusters instead of solid single crochet.
A simple cluster can use:
3 dc in the same space.
Add chain spaces between clusters.
This produces a more open and decorative fabric.
For everyday pet wear, however, a denser stitch pattern is generally easier to maintain.
How to Make a Reversible Dog Bandana
For an advanced version, crochet two matching triangles.
Make:
Triangle A: Sage
Triangle B: Cream
Place the two triangles together.
Work single crochet around the perimeter, joining the layers.
This creates a reversible bandana.
One side is sage.
The other is cream.
Keep in mind that the double layer will be heavier and warmer than the standard version.
Personalized Crochet Dog Bandana
You can personalize the design without adding small detachable decorations.
Ideas include:
- Color combinations
- Stripes
- Color blocking
- Securely embroidered initials
- Crochet borders
- Seasonal colors
- Different stitch textures
For a personalized bandana, embroidery is generally preferable to loose beads or small decorations.
Seasonal Dog Bandana Ideas
Christmas
Use:
Burgundy + cream
Forest green + ivory
Red + green
Add a simple contrasting border.
Halloween
Try:
Black + orange
Purple + black
Orange + cream
Valentine’s Day
Try:
Dusty pink + burgundy
Red + ivory
Mauve + cream
Easter
Use:
Sage + cream
Lavender + ivory
Butter yellow + mint
Summer
Try:
Sky blue + white
Coral + cream
Sage + ivory
Crochet Dog Bandana Color Chart
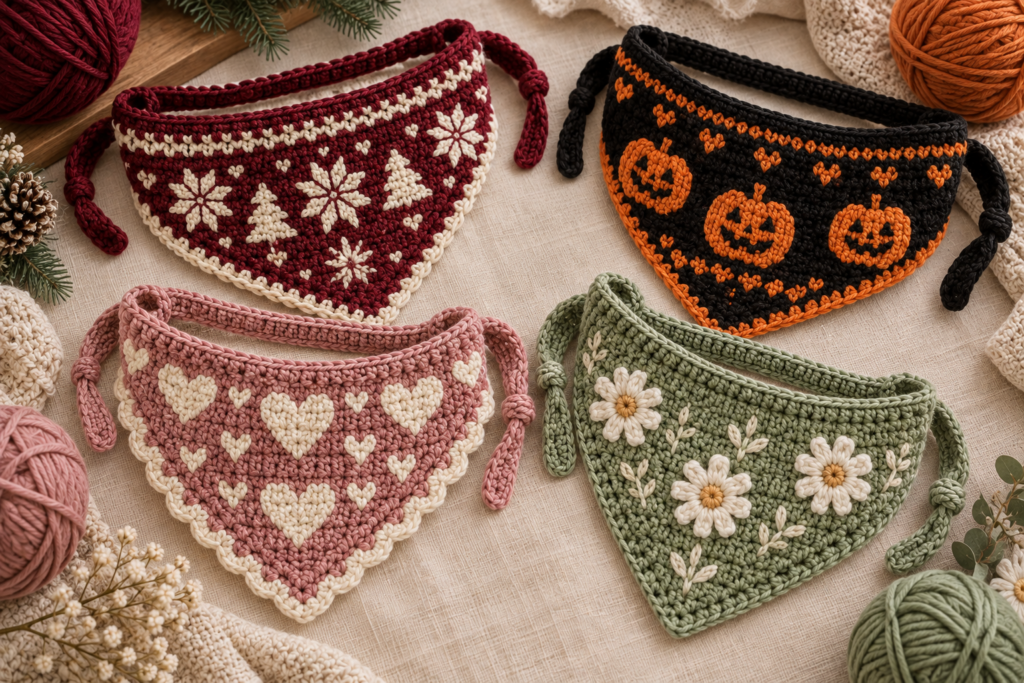
| Style | Main Color | Border |
|---|---|---|
| Boho | Sage | Cream |
| Romantic | Dusty rose | Burgundy |
| Autumn | Mustard | Burgundy |
| Coastal | Sky blue | Ivory |
| Minimalist | Beige | Black |
| Christmas | Burgundy | Forest green |
| Halloween | Orange | Black |
| Spring | Butter yellow | Sage |
How to Make the Bandana More Structured
If your bandana feels too floppy, try one of these solutions.
Use a Smaller Hook
A smaller hook creates tighter stitches.
Use Cotton
Cotton tends to create a defined fabric.
Add a Border
A firm single-crochet border can help stabilize the edges.
Block the Triangle
Light blocking can improve the final shape.
How to Make It Softer
If the fabric feels too stiff:
- Use a larger hook
- Choose softer yarn
- Use a lighter yarn weight
- Avoid overly tight tension
The finished bandana should drape naturally rather than behaving like a rigid piece of cardboard.
Blocking the Finished Bandana
Blocking is optional but can improve the appearance.
Lightly dampen the bandana.
Lay it flat on a clean towel or blocking mat.
Gently shape the triangle.
Pay particular attention to:
- The bottom point
- The diagonal edges
- The top edge
Allow it to dry completely.
Don’t aggressively stretch the neck ties.
Dog Bandana Fit Test
Before allowing your dog to wear the finished bandana, perform a simple fit check.
Place it around the neck.
Check that:
- It isn’t tight.
- Your dog can move normally.
- The bandana doesn’t interfere with breathing.
- The bandana doesn’t obstruct the eyes.
- The closure doesn’t dig into the neck.
- The dog can’t easily chew the bandana.
A decorative bandana should never replace a properly fitted collar or harness.
Dog Safety Considerations
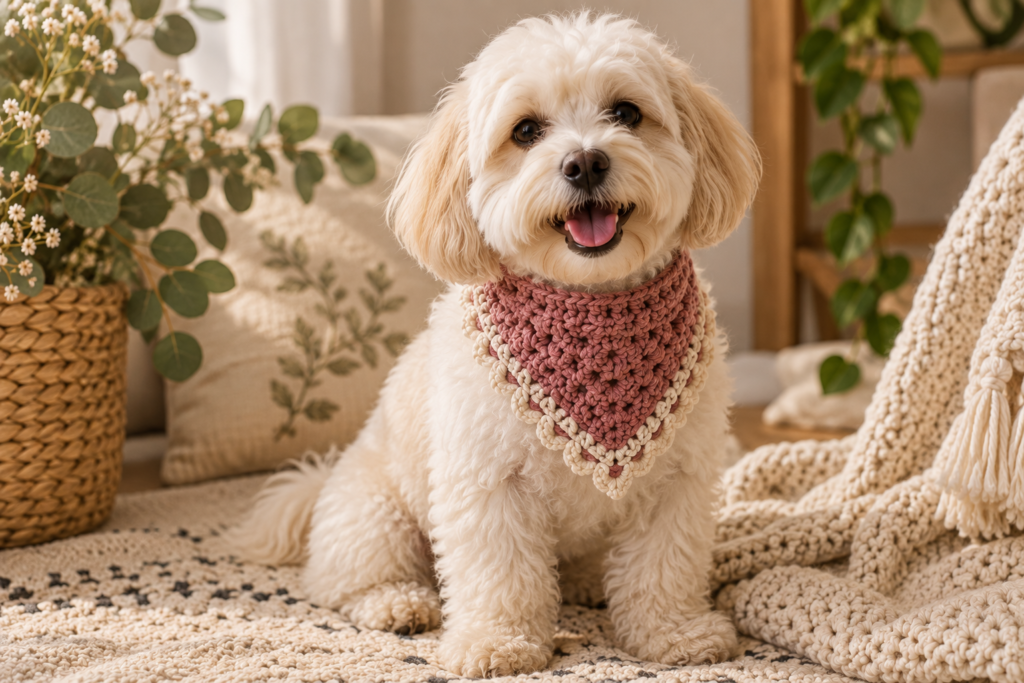
A crochet dog bandana is an accessory, so supervision is important.
Inspect it before every use.
Look for:
- Loose yarn
- Frayed sections
- Broken stitches
- Loose buttons
- Damaged closures
- Chewed areas
- Detached decorations
If your dog repeatedly tries to chew the bandana, remove it.
Avoid small detachable decorations such as:
- Loose beads
- Bells
- Small plastic pieces
- Poorly attached buttons
These can become hazards if the dog removes and swallows them.
Don’t leave a dog unattended while wearing an accessory if there is a realistic risk of chewing, entanglement or swallowing parts of the item.
How to Wash a Crochet Dog Bandana
Because dog accessories can become dirty quickly, washable yarn is highly practical.
Always follow the yarn manufacturer’s care instructions.
For washable yarn:
- Remove the bandana from the dog.
- Shake away loose dirt.
- Wash according to the yarn label.
- Use an appropriate gentle detergent.
- Rinse thoroughly.
- Reshape the triangle.
- Allow it to dry completely.
Don’t put a damp bandana back on your dog.
How to Keep the Bandana Looking New
After washing:
- Reshape the triangle while damp.
- Straighten the top band.
- Check the ties.
- Smooth the border.
- Trim only loose ends that are clearly part of the finishing process.
- Allow it to dry completely.
If you use fringe, gently comb it with your fingers after drying.
Troubleshooting
| Problem | Likely Cause | Solution |
|---|---|---|
| Triangle isn’t symmetrical | Uneven increases | Check both edge increases |
| One side is longer | Missed increase | Compare each row |
| Triangle curls | Tension is too tight | Try a larger hook |
| Fabric is floppy | Hook too large | Try a smaller hook |
| Bandana is too small | Stopped increasing too early | Add more rows |
| Bandana is too large | Too many rows | Stop earlier |
| Point looks uneven | Tension changes | Maintain consistent tension |
| Edge looks wavy | Too many stitches | Check increase placement |
| Fringe is uneven | Strands vary in length | Use a cardboard template |
| Button pulls the fabric | Button too heavy | Use a lighter button |
| Bandana slips | Closure too loose | Adjust the ties or button |
| Bandana feels restrictive | Neck band too short | Increase adjustment length |
How to Make the Triangle Deeper
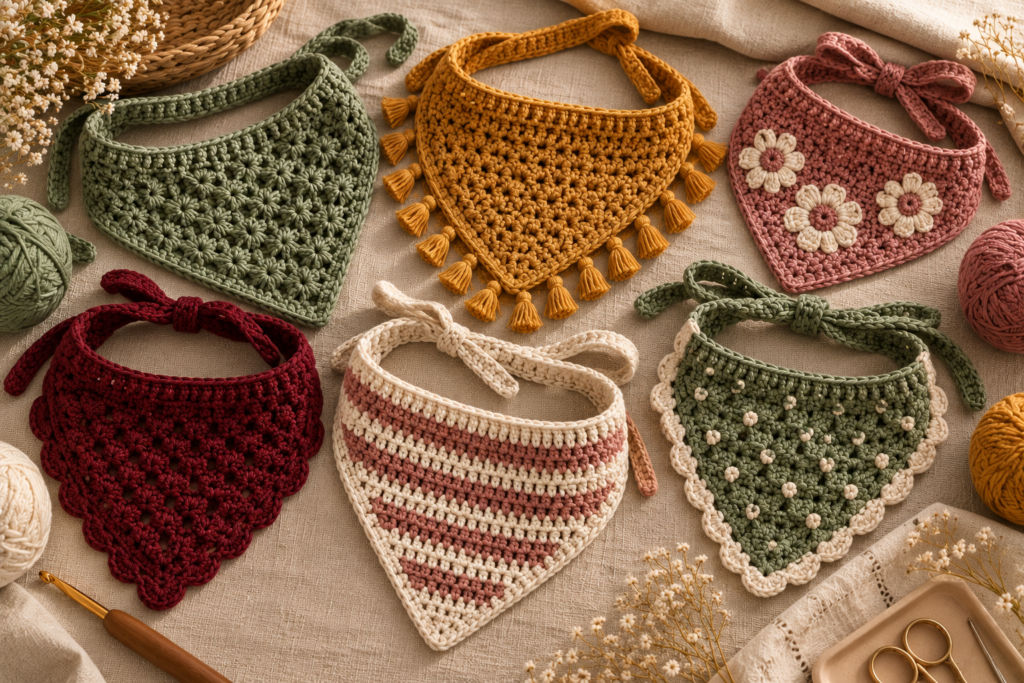
If you want a dramatic bandana that hangs farther down the chest, continue increasing for more rows.
For example, instead of stopping around 40 rows, continue toward:
50–60 rows
depending on your gauge and desired width.
Remember that increasing the width also increases the depth.
How to Make a Shallow Bandana
For a smaller, more subtle neckerchief:
Stop increasing sooner.
You can also make the top edge wider while keeping the triangle relatively shallow by adjusting the proportions of your design.
This is particularly useful for small dogs.
How to Make a Wider Neck Band
For large dogs, a very narrow top band can look disproportionate.
After completing the triangle, work several rows across the top edge.
A 3–5-row band gives the upper section more structure.
How to Make a Lightweight Summer Version
For summer:
- Use cotton
- Choose a lighter yarn
- Use a slightly larger hook
- Skip heavy fringe
- Use a single-layer construction
- Choose breathable stitch patterns
A lightweight triangular bandana is often more comfortable than a thick multi-layer version.
How to Make a Winter Version
For cooler weather:
- Use a soft medium-weight yarn
- Choose a slightly denser stitch
- Use a larger triangle
- Consider a wider neck band
Don’t make the accessory unnecessarily thick or heavy.
Matching Dog and Owner Bandanas
One fun variation is to create matching accessories.
For the dog:
Small triangular bandana
For the owner:
Larger matching triangular scarf
Use the same:
- Yarn
- Colors
- Border
- Stripe pattern
This can create a beautiful coordinated look for photographs.
Matching Dog Accessories
Once you have the bandana pattern figured out, you can create a complete handmade pet collection.
Consider making:
- Matching crochet bow
- Crochet dog toy
- Crochet collar accessory
- Matching leash decoration
- Seasonal pet accessories
Keep each accessory appropriate for its intended use and inspect them regularly.
Crochet Dog Bandana Gift Set
A handmade pet gift basket can include:
1 crochet dog bandana
1 matching crochet bow
1 handmade toy
1 small treat pouch
Use coordinated colors for a professional presentation.
For example:
Sage + cream + mustard
creates a warm natural collection.
Selling Handmade Crochet Dog Bandanas
Dog bandanas can work well as small handmade-market products because they don’t require as much material as larger garments.
Consider offering several sizes.
| Product | Possible Variation |
|---|---|
| XS Bandana | Solid color |
| Small Bandana | Two-color |
| Medium Bandana | Fringe |
| Large Bandana | Striped |
| XL Bandana | Custom colors |
You can also offer custom color combinations.
When creating product listings, clearly state:
- Finished dimensions
- Recommended neck range
- Yarn composition
- Closure type
- Care instructions
- Supervised-use information
- How customers should measure their dog
Avoid claiming that one size fits every dog.
How to Photograph Your Crochet Dog Bandana
Good photography can make a simple crochet project look significantly more professional.
Flat-Lay Photograph
Place two or three bandanas on a neutral surface.
Use:
- Cream
- Beige
- Sage
- Light wood
Add a crochet hook and matching yarn subtly around the edges.
Dog-Wearing Photograph
If you photograph the bandana on a dog, make sure it is comfortably fitted and the dog is supervised.
The dog should be relaxed and able to move naturally.
Detail Photograph
Take close-ups of:
- Crochet stitches
- Border
- Fringe
- Button closure
- Top band
- Triangle point
These photographs are particularly useful inside a tutorial because readers can compare their finished work with yours.
Beginner Workflow
If you’re completely new to crochet, follow this progression:
Step 1
Practice chain stitches.
Step 2
Practice single crochet.
Step 3
Make a small rectangle.
Step 4
Practice increasing at both edges.
Step 5
Create the triangular body.
Step 6
Measure it against your dog’s neck.
Step 7
Add the top band.
Step 8
Add the border.
Step 9
Add optional fringe.
Step 10
Check the final fit.
This approach is much less intimidating than trying to learn every technique simultaneously.
Quick Reference Pattern
For the basic triangular body:
Chain 2.
Row 1: 2 sc in second chain from hook.
Row 2 onward: 2 sc in first stitch, sc across, 2 sc in final stitch.
Ch 1 and turn after every row.
Continue until the top edge reaches your desired width.
Then:
Add top neck band → add border → add optional fringe → add closure → weave ends.
That’s the entire foundation of the project.
Easy Size Formula
Because every increase row adds two stitches, you can calculate the approximate stitch count easily.
If you complete:
40 rows → 80 stitches
50 rows → 100 stitches
60 rows → 120 stitches
The actual width depends on your gauge.
This makes it very easy to create your own custom size.
Three Easy Finished Designs
Design 1: Minimalist
Sage green body
Cream border
No fringe
Tie closure
This is a clean everyday style.
Design 2: Boho
Mustard body
Cream border
Fringe
Button closure
This gives you a look similar to the decorative inspiration style.
Design 3: Romantic
Dusty pink body
Burgundy border
Small fringe
This works beautifully for Valentine’s Day or pet photos.
Frequently Asked Questions
Is this crochet dog bandana pattern suitable for beginners?
Yes. The main triangle uses single crochet and simple increases. Once you understand the increase formula, the pattern becomes repetitive and easy to follow.
What crochet stitch is easiest for a dog bandana?
Single crochet is one of the easiest choices. It creates a relatively dense fabric and gives the triangular bandana good structure.
What yarn is best for a crochet dog bandana?
Cotton or a cotton blend is a practical option because it provides good stitch definition and is often easy to wash.
How do I know which size to make?
Measure your dog’s neck rather than choosing a size based only on breed.
Can I make this bandana for a puppy?
Yes, but puppies grow quickly. Check the fit regularly and resize the accessory as necessary.
Can I make the bandana without a button?
Yes. A simple tie closure is easy to make and allows more flexibility in fitting.
Can I make a reversible bandana?
Yes. Crochet two triangles and join them around the edges. Remember that the double layer will be heavier.
Can I use leftover yarn?
Absolutely. Smaller dog bandanas are excellent scrap-yarn projects.
Can I add fringe?
Yes. Fringe gives the bandana a boho appearance. It is optional.
Can I make the bandana larger?
Yes. Continue the increase rows until the top edge reaches the desired measurement.
Can I make a smaller bandana?
Yes. Stop increasing earlier and use the actual measurements as your guide.
Can I use acrylic yarn?
Yes, especially for decorative designs, as long as the yarn is soft and the finished fabric is comfortable.
How do I keep the bandana from slipping?
Use a properly fitted tie or secure closure. The bandana should sit comfortably without being restrictive.
Can my dog sleep while wearing it?
It’s better to remove accessories when there is a risk of chewing, entanglement or discomfort.
Can I sell dog bandanas made from this pattern?
You can make and sell your own finished handmade items. Use your own photographs and product descriptions rather than reproducing another designer’s written pattern or photography.
Final Thoughts
This easy crochet dog bandana pattern is a great example of how a simple crochet construction can become a highly customizable handmade accessory.
The triangular body is built almost entirely with single crochet and two simple increases per row. Once you understand that structure, you can create an XS bandana for a tiny dog, a larger version for a big dog, or anything in between.
You can keep the design minimalist with a clean border, or make it more decorative with fringe, stripes, contrasting colors and textured edging.
The biggest advantage of this construction is that you don’t have to memorize dozens of stitch counts. Simply crochet, measure the top edge, and stop when the bandana reaches the size you need.
For an everyday version, cotton yarn, a simple border and a tie closure make a practical combination. For photographs or special occasions, experiment with mustard, burgundy, dusty pink, sage, cream or seasonal color combinations.
Most importantly, treat the finished bandana as an accessory that requires appropriate fit and supervision. A beautiful crochet project should be comfortable, securely finished and appropriate for the individual dog wearing it.
Once you’ve made the first one, you’ll have the basic formula you need to create an entire collection of custom crochet dog bandanas in different sizes, colors and styles.