
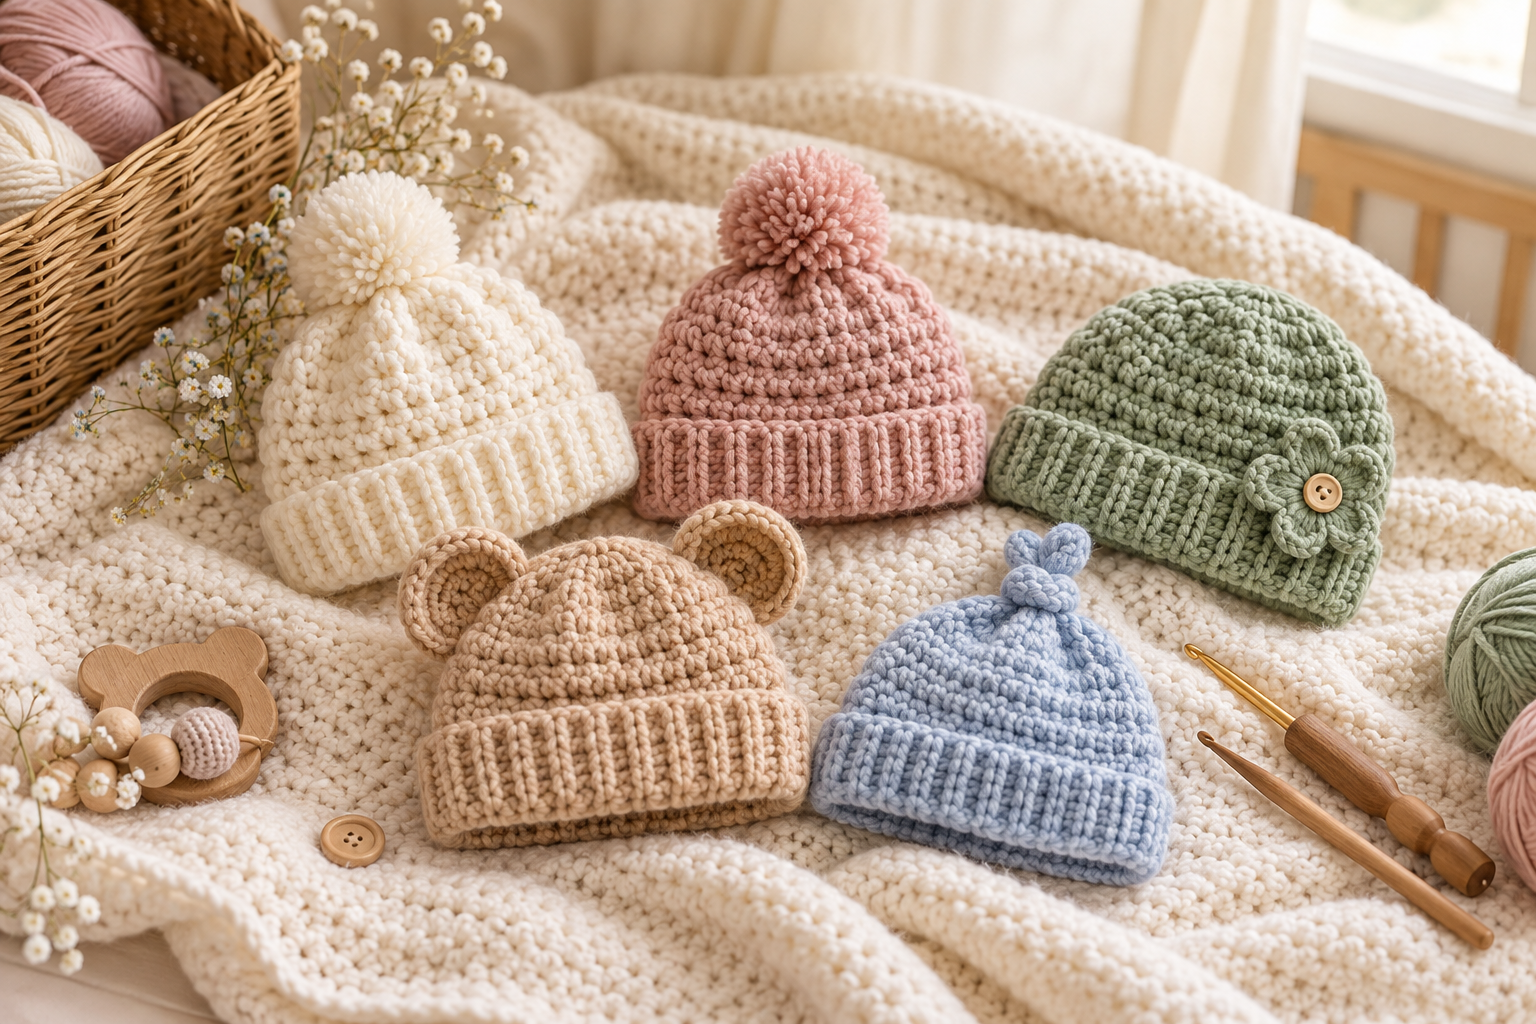
Crochet baby hats are some of the most satisfying small projects to make. They work up quickly, require relatively little yarn, and can be customized in countless colors and styles. From a simple newborn beanie to textured hats, animal-inspired designs, earflap hats and little bonnets, there is a crochet baby hat for practically every season and occasion.
This guide brings together 15 crochet baby hat ideas, plus a detailed beginner-friendly beanie pattern, sizing information, yarn recommendations, stitch explanations, gauge tips, finishing techniques and customization ideas.
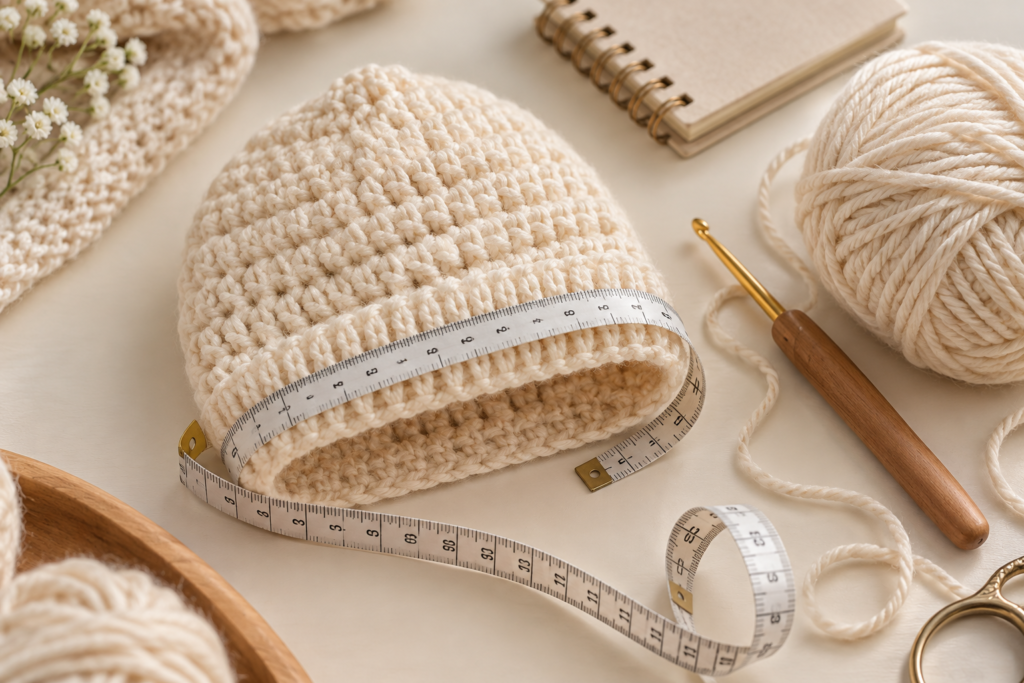
Pattern note: The patterns below are original tutorial-style instructions designed for this article. The photographed hat in the reference image is used as visual inspiration for the classic baby-beanie style; these instructions should not be treated as a transcription of another designer’s pattern.
Why Crochet Baby Hats Make Great Projects
Baby hats are excellent projects when you want something useful without committing to a large crochet piece.
They can be made with a single skein or even leftover yarn, depending on the size and yarn weight. They are also easy to personalize with colors, appliqués, pom-poms, textured stitches and different brim treatments.
They make lovely handmade gifts for:
- Baby showers
- Newborn photo sessions
- First birthdays
- Hospital or coming-home outfits
- Holiday gifts
- Matching sibling sets
- Handmade gift baskets
- Seasonal baby wardrobes
Because babies grow quickly, accurate sizing and comfortable materials are especially important.
Crochet Baby Hat Size Chart
The most reliable approach is to measure the baby’s head whenever possible rather than relying exclusively on age.
| Size | Approx. Age | Approx. Head Circumference | Approx. Hat Circumference | Approx. Height |
|---|---|---|---|---|
| Preemie | Preemie | 12–13 in | 11–12 in | 4.5–5 in |
| Newborn | 0–3 months | 13–14 in | 12–13 in | 5–5.5 in |
| 3–6 months | 3–6 months | 14–16 in | 13–15 in | 5.5–6 in |
| 6–12 months | 6–12 months | 16–17 in | 15–16 in | 6–6.5 in |
| 12–24 months | 1–2 years | 17–18 in | 16–17 in | 6.5–7 in |
| Toddler | 2–3 years | 18–19 in | 17–18 in | 7–7.5 in |
These are approximate crafting measurements, not medical or developmental measurements. Babies’ head sizes vary considerably, so measuring the intended recipient is preferable.
How to Measure a Baby’s Head for a Crochet Hat
Use a soft measuring tape and place it around the widest part of the head.
The tape should pass:
- Across the forehead
- Above the ears
- Around the fullest part of the back of the head
Keep the tape comfortably snug without pulling it tightly.
For a stretchy crochet hat, the finished circumference is usually made somewhat smaller than the actual head circumference so the fabric can stretch comfortably.
A useful basic formula is:
Finished hat circumference ≈ head circumference × 0.90
For example, if the head measures 16 inches:
16 × 0.90 = 14.4 inches
The exact amount of negative ease depends on yarn, stitch pattern and how stretchy the fabric is.
Materials for a Classic Crochet Baby Beanie
For the basic pattern, gather:
- DK or light worsted yarn
- Crochet hook appropriate for your yarn
- Yarn needle
- Stitch marker
- Scissors
- Measuring tape
For a soft baby hat, look for yarn that is:
- Soft against the skin
- Machine washable when possible
- Durable
- Not overly fuzzy
- Comfortable in the intended season
A smooth yarn makes stitch counting considerably easier for beginners.
Yarn Weight Guide
| Yarn Weight | Typical Use | General Result |
|---|---|---|
| Fingering | Lightweight summer hats | Thin and delicate |
| Sport | Lightweight baby hats | Soft and flexible |
| DK | Everyday baby hats | Excellent balance |
| Worsted | Warm winter hats | Thicker and warmer |
| Bulky | Cold-weather hats | Very warm and quick |
For the classic beanie shown in the inspiration image, DK or light worsted yarn is a practical starting point.
Crochet Abbreviations
| Abbreviation | Meaning |
|---|---|
| ch | Chain |
| sl st | Slip stitch |
| sc | Single crochet |
| hdc | Half double crochet |
| dc | Double crochet |
| st | Stitch |
| sts | Stitches |
| inc | Increase |
| BLO | Back loop only |
| FLO | Front loop only |
| MR | Magic ring |
US crochet terminology is used throughout this tutorial.
15 Crochet Baby Hat Ideas
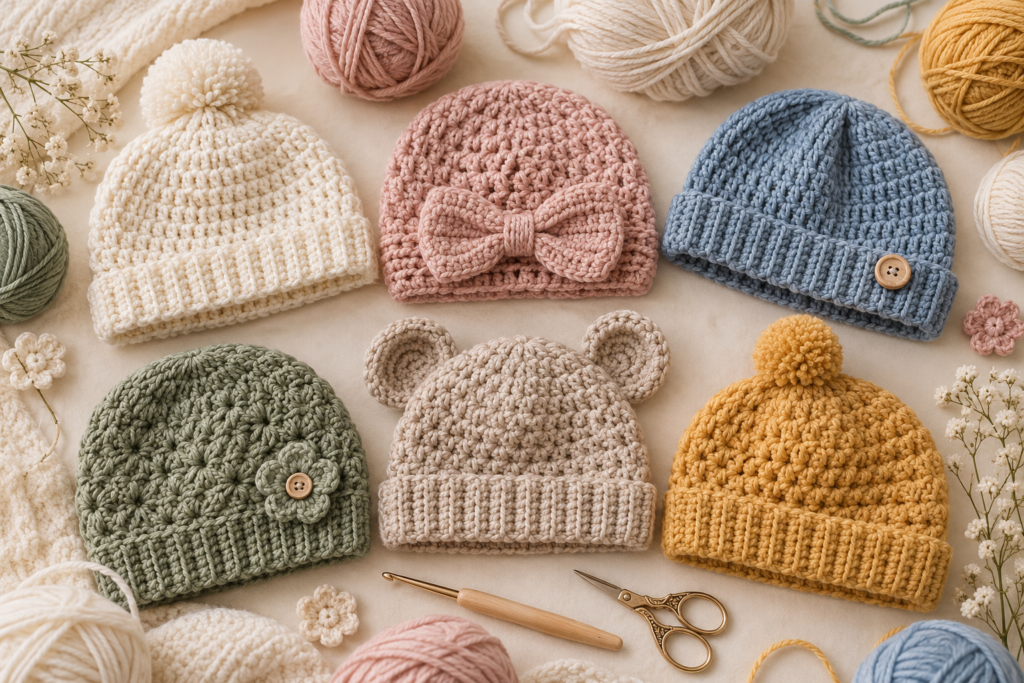
1. Classic Crochet Baby Beanie
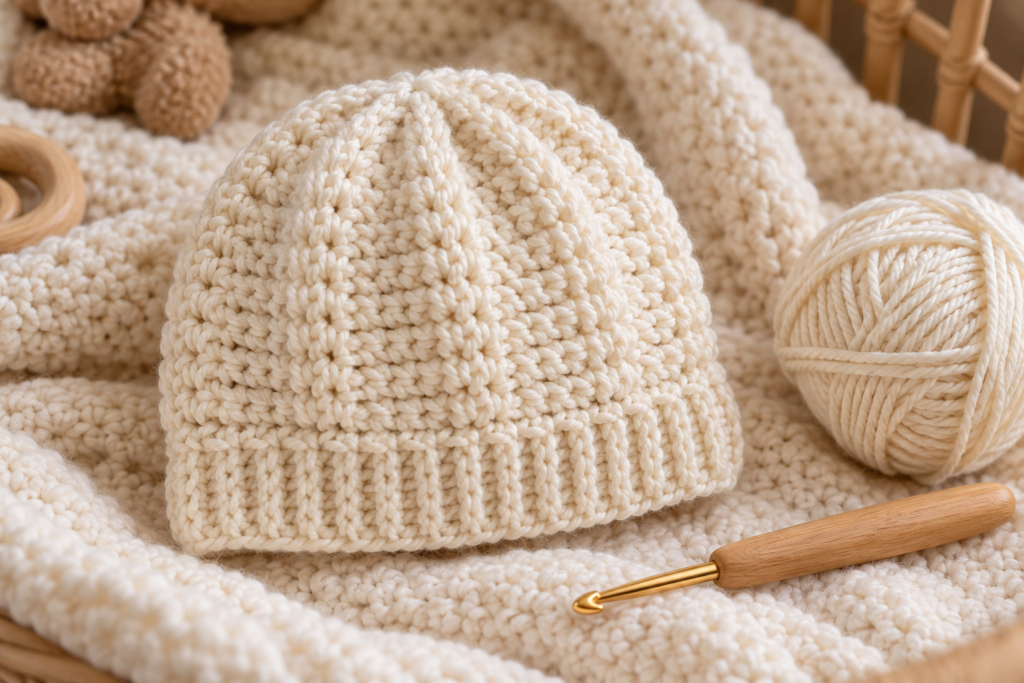
This is the easiest place to start.
The hat begins at the crown and is worked in rounds. Increase rounds gradually expand the circle, after which you work even rounds until the hat reaches the desired height.
The result is a simple, smooth beanie that works for newborns through toddlers.
Best for: beginners, baby showers and everyday wear.
Recommended stitches: single crochet or half double crochet.
2. Ribbed Crochet Baby Hat
A ribbed hat has a more elastic texture and a fitted appearance.
Instead of creating the entire hat from the crown downward, you can crochet rows of half double crochet through the back loop and join the resulting rectangle.
Basic construction
- Crochet a foundation chain corresponding to the desired hat height.
- Work HDC BLO across the row.
- Turn.
- Repeat until the strip wraps comfortably around the head.
- Seam the short edges.
- Cinch the top closed.
- Weave in the ends.
This method creates prominent vertical ribs.
3. Textured Bobble Baby Hat
Add small bobbles around the body of the hat for a playful texture.
A simple arrangement is:
4 plain stitches → 1 bobble → repeat
Keep the bobbles relatively small so they do not create uncomfortable bulk against the baby’s head.
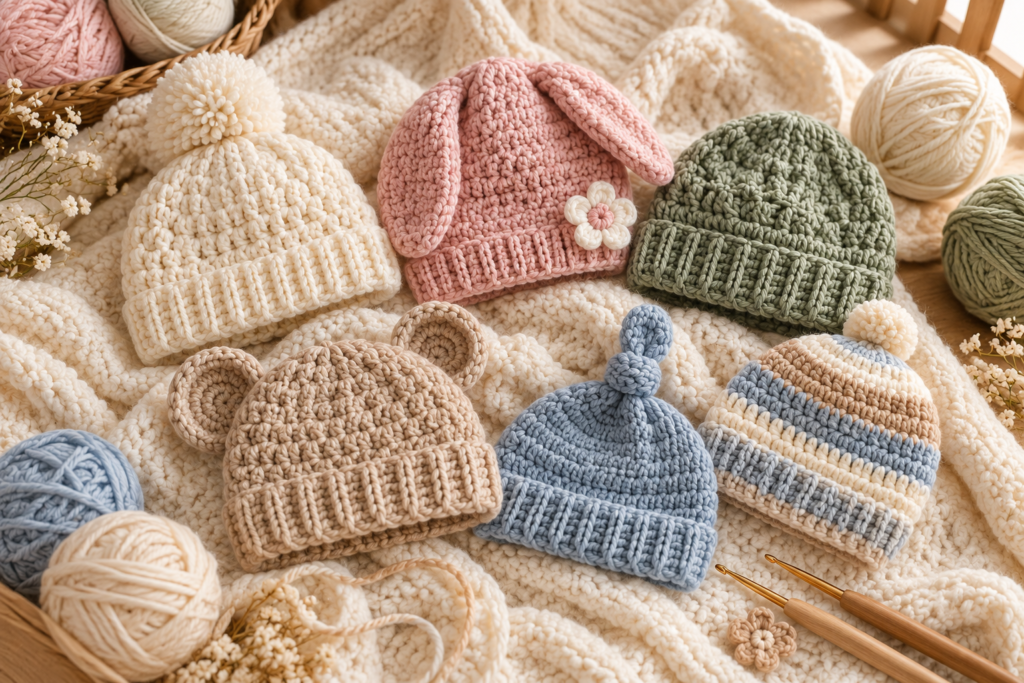
4. Crochet Baby Hat With Pom-Pom
Start with the classic beanie and add a soft pom-pom at the crown.
For baby projects, make sure the pom-pom is securely attached. Avoid loose decorative components that could detach.
A yarn pom-pom can be made using:
- Wrap yarn around a pom-pom maker or cardboard.
- Tie the center securely.
- Cut the loops.
- Shape the pom-pom.
- Attach it firmly to the hat.
5. Bear Ear Baby Hat
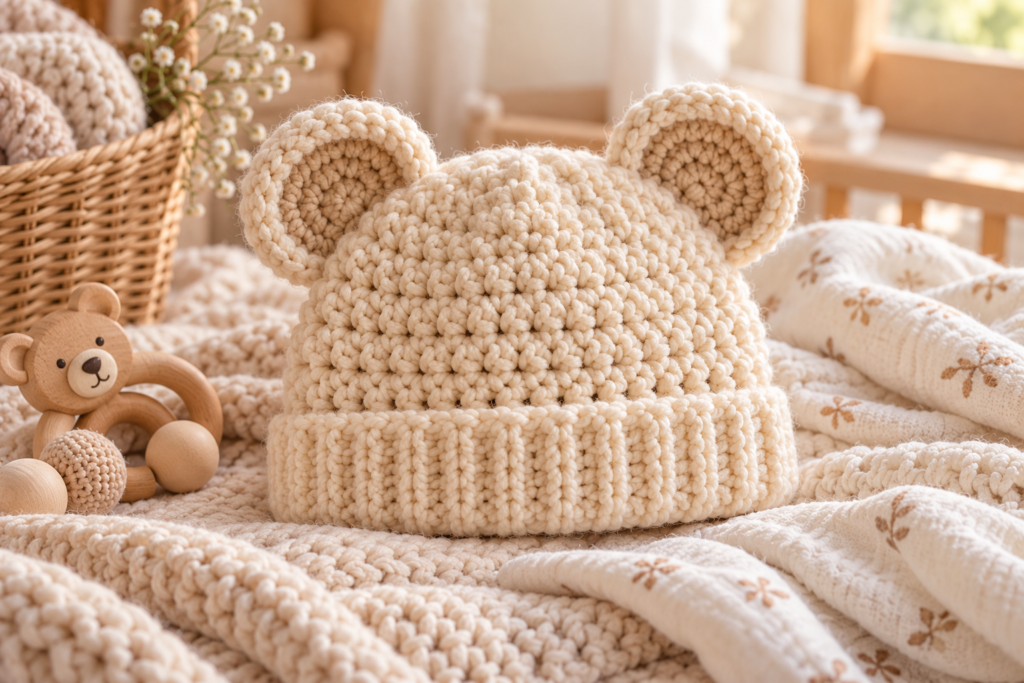
Transform a plain beanie into an adorable bear hat.
Ear construction
Make two small circles or rounded pieces.
For example:
Round 1: 6 sc into a magic ring.
Round 2: 2 sc in each stitch around — 12 sts.
Round 3: (sc, inc) around — 18 sts.
Fold each piece slightly and stitch it to the top sides of the hat.
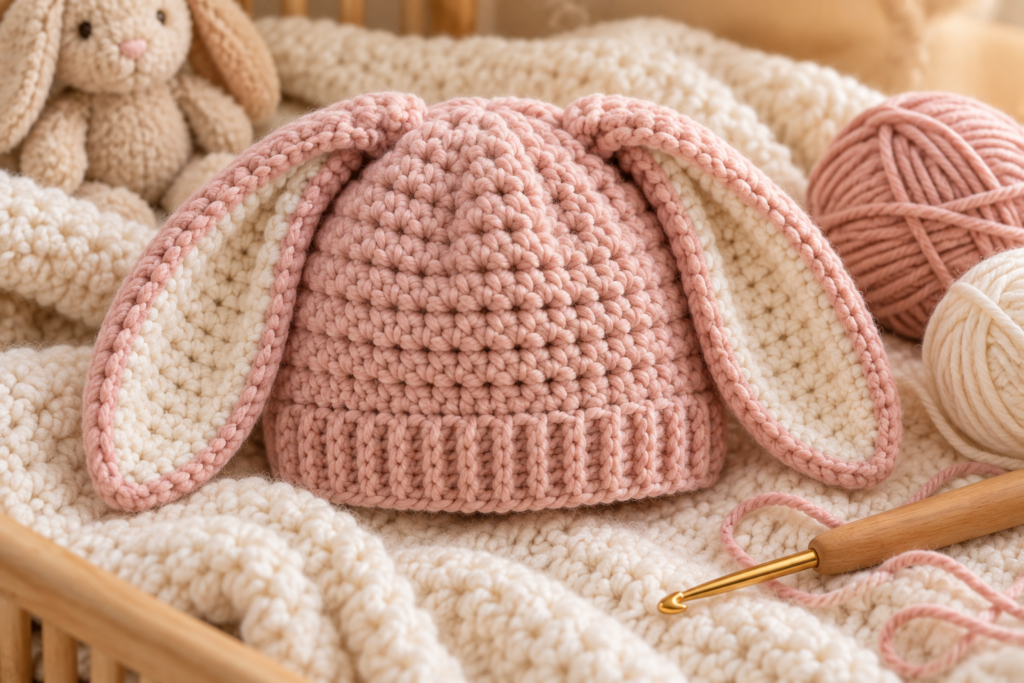
6. Bunny Ear Crochet Hat
For a bunny version, create elongated ears instead of round bear ears.
The ears can be made as flat crocheted pieces and folded slightly before sewing.
Use:
- Cream + pink
- White + blush
- Gray + pink
- Beige + dusty rose
for a soft nursery aesthetic.
7. Crochet Baby Bonnet
A bonnet gives a more vintage look.
Unlike a standard beanie, the bonnet typically covers the back and sides of the head while leaving the face open.
Add two crochet ties at the front.
Important: ties should always be designed and used with appropriate supervision around babies.
8. Crochet Baby Bucket Hat
A bucket hat is ideal for spring and summer.
Begin with a flat circular crown.
Once the crown reaches the desired diameter, stop increasing and crochet several rounds evenly.
Then begin increasing gradually again to create the brim.
For a structured brim:
Round A: sc around.
Round B: (sc, inc) around.
Round C: sc around.
Round D: (2 sc, inc) around.
The exact increase frequency depends on how dramatically you want the brim to flare.
9. Crochet Flower Baby Hat
Start with a plain hat and add a small crochet flower.
A simple flower can be created with:
ch 5, join into a ring.
Then work small groups of stitches around the center to form petals.
Sew the flower securely to the hat rather than using detachable embellishments.
10. Crochet Pumpkin Baby Hat
Perfect for autumn.
Use:
- Burnt orange yarn
- Green yarn
- Brown yarn
Create the main beanie in orange and add a small green stem.
Vertical surface stitches can also be added to suggest pumpkin sections.
11. Crochet Christmas Baby Hat
For a festive version, use:
- Red
- White
- Cream
- Green
A simple red beanie with a white folded brim creates a classic holiday look.
You can also add a small crocheted pom-pom.
12. Crochet Striped Baby Hat
Stripes are one of the easiest ways to customize a basic pattern.
Try:
3 rounds cream + 2 rounds sage
or
2 rounds pink + 2 rounds cream
For cleaner color changes, change yarn during the final yarn-over of the last stitch of the previous color.
13. Crochet Flower Stitch Baby Hat
For a more decorative design, alternate clusters of stitches to create a flower-like texture.
This style works particularly well with:
- Cream
- Dusty pink
- Lavender
- Sage
- Soft yellow
The stitch pattern becomes the decoration, so additional appliqués aren’t necessary.
14. Crochet Earflap Baby Hat
Earflaps can provide extra warmth in colder weather.
After completing the main hat, attach yarn to the side and crochet a triangular flap.
A simple decrease structure is:
Row 1: 8 sc
Row 2: sc across
Row 3: decrease, sc across
Row 4: sc across
Row 5: decrease, sc across
Continue until only a few stitches remain.
Repeat on the opposite side.
15. Crochet Baby Hat Gift Set
Instead of making one hat, create a coordinated set.
For example:
Hat + booties + mittens
Use the same:
- Yarn
- Color palette
- Stitch texture
- Decorative detail
This creates a cohesive handmade baby gift.
Free Classic Crochet Baby Beanie Pattern
Now let’s make the basic hat from beginning to end.
Skill Level
Beginner
You should be comfortable with:
- Magic ring
- Single crochet
- Increasing
- Slip stitching
- Working in rounds
Finished Shape
The hat is constructed from the crown downward.
You begin with a small circle, increase to create the crown, then work even rounds to create the sides.
Step 1: Make the Magic Ring
Create a magic ring.
Work:
6 sc into the ring.
Pull the center closed.
Place your stitch marker in the first stitch.
Why use a magic ring?
It creates a neat, closed crown without leaving a large hole in the center.
If you don’t like the magic ring technique, you can:
ch 2 and work 6 sc into the second chain from the hook.
Step 2: Build the Crown
Round 1
6 sc into the magic ring.
Total: 6 sts
Round 2
Increase in every stitch.
2 sc in each stitch around.
Total: 12 sts
Round 3
Repeat:
sc, inc
around.
Total: 18 sts
Round 4
Repeat:
sc, sc, inc
around.
Total: 24 sts
Round 5
Repeat:
sc in 3, inc
around.
Total: 30 sts
Round 6
Repeat:
sc in 4, inc
around.
Total: 36 sts
Continue increasing in the same general pattern until the crown reaches the circumference needed for your size.
Crown Diameter Guide
A practical way to check your work is to measure the diameter of the crown.
| Size | Approx. Crown Diameter |
|---|---|
| Preemie | 4–4.25 in |
| Newborn | 4.25–4.5 in |
| 3–6 months | 4.5–5 in |
| 6–12 months | 5–5.25 in |
| 12–24 months | 5.25–5.75 in |
Stop increasing once the crown is approximately the correct diameter.
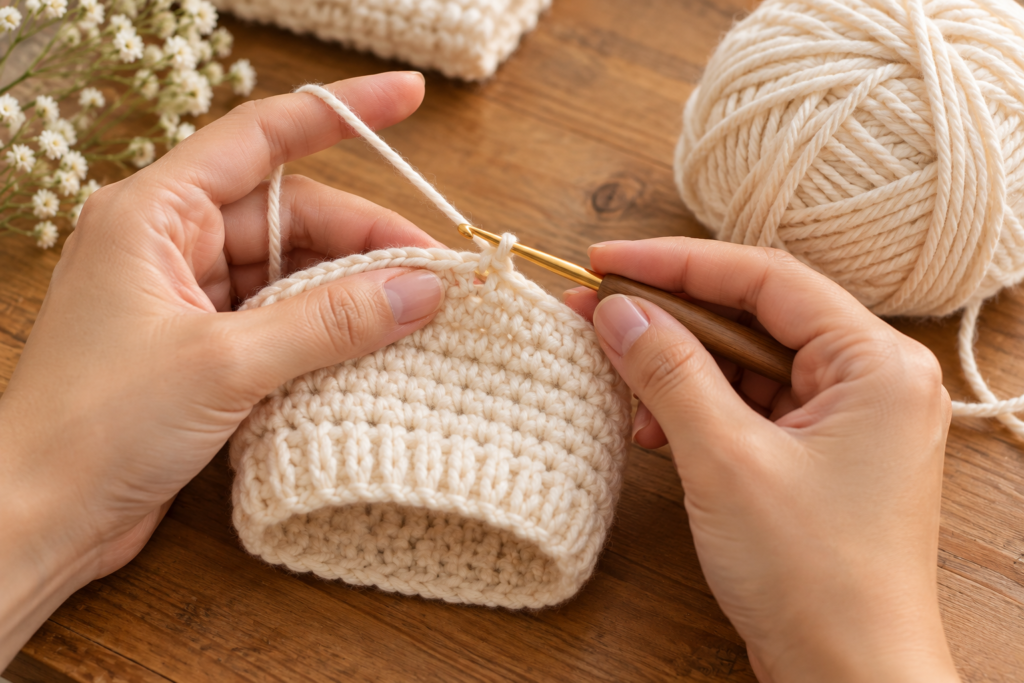
Step 3: Crochet the Sides
Once the crown reaches the correct size, stop increasing.
Work:
sc in every stitch around.
Continue for several rounds.
Do not worry if the hat initially looks slightly short. Baby hats gain their final shape after several rounds and blocking, if necessary.
Step 4: Check the Fit
Before finishing, measure:
crown → bottom edge
Compare the measurement with the desired hat height.
If the hat is too short:
Add another round.
If it is already deep enough:
Move on to the finishing edge.
Step 5: Create a Simple Ribbed Edge
For a more finished appearance, crochet 2–4 rounds of single crochet through the back loop.
This creates subtle horizontal ridges.
Round
sc BLO around
Repeat as needed.
The ribbed edge also gives the lower portion of the hat a little extra structure.
Step 6: Finish the Hat
Cut the yarn, leaving a tail of several inches.
Pull the yarn through the final loop.
Thread the yarn onto a yarn needle.
Weave the tail through several stitches on the inside of the hat.
Move back and forth through the stitches.
Trim the excess.
Repeat with any remaining ends.
How to Make the Hat More Stretchy
If your hat feels too tight, consider:
- Using a larger hook
- Switching from sc to hdc
- Using BLO stitches
- Choosing a yarn with some natural elasticity
- Increasing the finished circumference slightly
Don’t simply make every hat much larger. Excessive looseness can cause the hat to slip over the face.
How to Make the Hat Smaller
If the hat is too large:
- Use a smaller hook
- Stop increasing earlier
- Use fewer even rounds
- Choose a thinner yarn
Always test the crown before crocheting the entire hat.
A Simple HDC Version
Half double crochet produces a softer, slightly more flexible fabric.
Try this variation:
Crown
Round 1: 8 hdc into magic ring.
Round 2: 2 hdc in each stitch.
Round 3: (hdc, inc) around.
Round 4: (2 hdc, inc) around.
Continue increasing until the crown reaches the required diameter.
Then:
hdc around
without increases until the hat reaches the desired height.
This version works particularly well with soft DK yarn.
Crochet Gauge for Baby Hats
Gauge matters because a hat that is only slightly too large can become noticeably oversized on a newborn.
Make a small swatch before starting if you need a specific size.
For example, you might test:
16–18 sc = approximately 4 inches
But your actual gauge depends on:
- Yarn
- Hook
- Tension
- Stitch
- Individual crocheting style
The best measurement is always the gauge you personally achieve.
Hook Size Guide
| Yarn | Starting Hook Range |
|---|---|
| Fingering | 2.25–3.25 mm |
| Sport | 3–3.75 mm |
| DK | 3.5–4.5 mm |
| Worsted | 4.5–5.5 mm |
| Bulky | 6–8 mm |
Always check the yarn label and adjust according to your tension.
How to Add Stripes
Changing colors can completely transform the same basic pattern.
For a two-color hat:
Option 1 — Wide Stripes
4 rounds Color A
4 rounds Color B
Repeat.
Option 2 — Thin Stripes
2 rounds Color A
2 rounds Color B
Repeat.
Option 3 — Accent Stripe
Main color throughout with one contrasting round near the brim.
For baby designs, soft contrasting colors often create a particularly gentle look.
How to Add a Folded Brim
A folded brim creates a warmer, more structured finish.
After completing the hat body:
- Crochet several rounds in BLO.
- Continue until the brim reaches approximately 1–1.5 inches.
- Fold the brim upward.
- Secure the inside edge if desired.
This works especially well for winter hats.
How to Add a Decorative Border
A simple scalloped border can give the hat a more feminine or vintage appearance.
Try:
skip 1 stitch, 5 dc in next stitch, skip 1 stitch, sl st in next stitch
Repeat around.
This creates small shell-like scallops.
For baby hats, keep the edging soft and flexible rather than excessively raised.
How to Customize the Hat for Different Seasons
| Season | Yarn | Design |
|---|---|---|
| Spring | Cotton/DK | Lightweight beanie |
| Summer | Cotton | Open stitch bucket hat |
| Fall | DK | Textured beanie |
| Winter | Wool/acrylic blend | Thick folded-brim hat |
For warm climates, cotton or cotton blends can be more appropriate than thick winter yarns.
10 Cute Color Combinations
1. Classic Cream
Cream + oatmeal + warm beige
2. Soft Baby Girl
Blush + cream + dusty rose
3. Soft Baby Boy
Powder blue + cream + pale gray
4. Sage Nursery
Sage + ivory + taupe
5. Neutral Modern
Camel + cream + chocolate brown
6. Lavender Dream
Lavender + cream + pale pink
7. Woodland
Olive + beige + rust
8. Sunshine
Butter yellow + cream + oatmeal
9. Winter
Burgundy + cream + gray
10. Minimalist
White + natural beige
Troubleshooting Common Crochet Baby Hat Problems
The hat is turning into a flat circle
You’re probably increasing too much or continuing the increase rounds for too long.
Solution: stop increasing once the crown reaches the correct diameter.
The crown is curling upward
You may need additional increases.
Try checking whether your stitch count is increasing consistently.
The hat looks like a bowl
This can happen when there are too many increases.
Reduce the frequency of increases or move to even rounds sooner.
The hat is too stiff
Try:
- Larger hook
- Softer yarn
- HDC instead of SC
- Less dense stitch pattern
The hat is too loose
Try:
- Smaller hook
- Tighter gauge
- Slightly smaller circumference
- More elastic stitch pattern
How to Make a Matching Baby Hat Set
For a polished gift, make three hats using one base pattern.
Hat 1 — Classic
Cream with a simple ribbed brim.
Hat 2 — Striped
Cream and sage alternating every two rounds.
Hat 3 — Textured
Dusty pink with a bobble or flower detail.
Put all three into a small gift basket with coordinating baby accessories.
Baby Hat Pattern Planning Table
| Design | Difficulty | Main Stitch | Best Season |
|---|---|---|---|
| Classic Beanie | Beginner | SC | All seasons |
| Ribbed Hat | Beginner | HDC BLO | Fall/Winter |
| Bobble Hat | Intermediate | SC + bobble | Fall |
| Pom-Pom Hat | Beginner | SC | Winter |
| Bear Hat | Beginner | SC | All seasons |
| Bunny Hat | Beginner | SC | Spring |
| Bonnet | Intermediate | SC/HDC | Spring |
| Bucket Hat | Beginner | SC | Summer |
| Flower Hat | Beginner | SC + flower | Spring |
| Pumpkin Hat | Beginner | SC | Fall |
| Christmas Hat | Beginner | SC | Winter |
| Striped Hat | Beginner | SC/HDC | All seasons |
| Flower-Stitch Hat | Intermediate | Cluster stitches | Spring |
| Earflap Hat | Intermediate | SC | Winter |
| Gift Set | Intermediate | Mixed | Any season |
Tips for Getting a Professional Finish
Small details can make a handmade baby hat look much more polished.
Keep your tension consistent
Uneven tension creates visible changes in stitch size.
Count your stitches
Even when working simple rounds, periodically check your stitch count.
Hide yarn tails properly
Don’t simply cut the yarn close to the project. Weave it securely through several stitches.
Use clean color changes
When changing colors, finish the final stitch neatly before beginning the next round.
Measure as you work
Don’t wait until the end to discover the hat is too large or too small.
Keep embellishments secure
Any decorative addition should be firmly attached and appropriate for the intended use.
Crochet Baby Hat Gift Ideas
A handmade hat can become part of a larger themed gift.
Woodland Baby Gift
- Bear hat
- Cream booties
- Sage blanket
Winter Baby Gift
- Ribbed beanie
- Matching mittens
- Cozy blanket
Spring Baby Gift
- Flower hat
- Lightweight cardigan
- Crochet booties
Neutral Baby Gift
- Oatmeal beanie
- Beige booties
- Cream baby blanket
Frequently Asked Questions
What is the easiest crochet baby hat for beginners?
A simple single-crochet beanie worked from the crown downward is one of the easiest options because it uses only basic stitches and increases.
How much yarn do I need?
A small baby hat generally requires far less yarn than an adult hat. The exact amount depends on yarn weight, size, stitch density and whether you add decorative details. Keeping approximately 50–100 grams available is a practical starting point for many DK or worsted-weight projects.
Can I use cotton yarn?
Yes. Cotton can be a good choice for lightweight hats, especially in warmer weather. It generally produces a less stretchy fabric than some acrylic or wool blends, so gauge becomes particularly important.
Can I make this pattern for a toddler?
Yes. Continue the crown increases until you reach the required crown diameter, then work even rounds until you reach the desired height.
Can I make the hat without a magic ring?
Yes. Chain 2 and work the first round into the second chain from your hook. The center may be slightly different, but the overall construction works.
How do I know when to stop increasing?
Measure the crown diameter and compare it with the target size. Once the crown is wide enough, stop increasing and work the sides evenly.
Can I sell finished hats made from these instructions?
If you’re using the original tutorial in this article, you can generally use your finished handmade items as you choose, but always check the terms attached to any specific pattern, yarn design, purchased pattern or third-party design you incorporate. Do not redistribute someone else’s written pattern or photographs.
Final Tips
The beauty of crochet baby hats is that one basic construction can become dozens of different designs.
Start with the classic beanie, then experiment with:
- Different yarn weights
- HDC instead of SC
- Ribbed brims
- Stripes
- Flowers
- Bobbles
- Animal ears
- Pom-poms
- Scalloped edges
- Seasonal colors
- Matching accessories
Once you understand how the crown, circumference and height work together, you can stop relying entirely on fixed sizes and begin designing hats specifically for the baby you’re crocheting for.
For the cleanest result, measure the head, check your gauge, build the crown carefully and test the fit before adding decorative details. A simple cream beanie with beautiful stitch consistency can look just as polished as a much more complicated design.







