
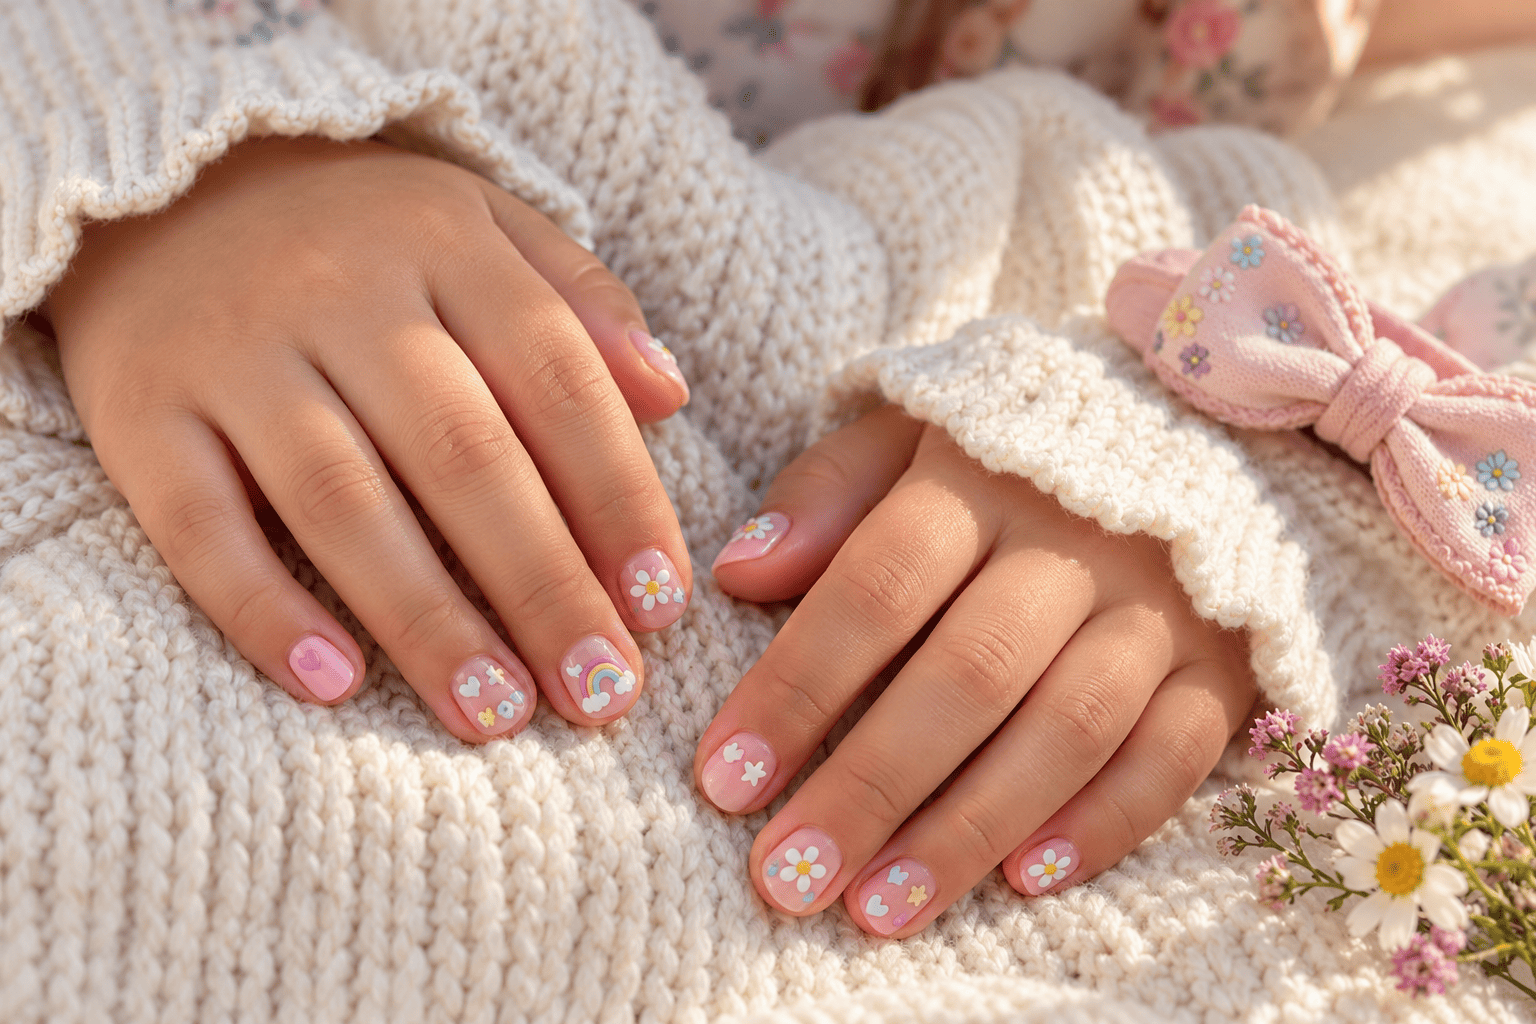
Kids’ nails are the perfect little canvas for playful colors, tiny flowers, cute characters, glitter, rainbows, and simple patterns. The best children’s nail designs don’t need to be complicated or look like miniature adult manicures. With the right colors, simple techniques, and age-appropriate products, you can create adorable nails that feel fun while still being practical for school, birthdays, holidays, sleepovers, and special occasions.
This guide brings together 32 cute nail designs for kids, from easy beginner patterns that can be created at home to more creative designs for parties and celebrations. You’ll also find step-by-step tutorials, color combinations, nail-shape suggestions, application tips, ideas for different ages, and practical advice for making children’s manicures safer and easier.
Why Kids’ Nail Designs Should Be Simple
When doing nails for children, simplicity is usually better than complexity. Small nails provide less surface area, and complicated designs can quickly become crowded.
Simple designs also have several advantages:
| Benefit | Why it matters |
|---|---|
| Faster application | Kids are less likely to get bored |
| Easier to recreate | Parents can do them at home |
| More comfortable | Less product and decoration on the nail |
| Better for beginners | Mistakes are easier to correct |
| More wearable | Designs work for school and everyday activities |
| More versatile | Colors can easily be changed |
The goal isn’t to create a professional salon-level manicure every time. A tiny flower, heart, rainbow, or polka-dot pattern can look just as charming as an elaborate design.
Before You Start: A Kid-Friendly Nail Prep Routine
Before choosing a design, prepare the nails properly. Good preparation makes the manicure look cleaner and helps the polish apply more evenly.
Step 1: Clean the hands
Wash the child’s hands with gentle soap and water and dry them thoroughly.
Make sure there is no lotion, oil, food residue, or dirt on the nails.
Step 2: Trim the nails
For children, short nails are usually the most practical choice.
Use clean nail clippers or scissors and avoid cutting extremely close to the skin.
A softly rounded or short-square shape works particularly well.
Step 3: Smooth the edges
Use a fine nail file to gently smooth any sharp edges.
File in one direction rather than aggressively sawing back and forth.
Step 4: Moisturize around the nails
Apply a small amount of gentle hand cream or cuticle moisturizer around the skin.
If you’re going to paint immediately afterward, remove excess oil from the nail plate before applying polish.
Step 5: Choose an appropriate product
For children, consider age-appropriate nail products and follow the manufacturer’s instructions. Avoid getting polish or remover on irritated, broken, or infected skin.
For very young children, especially those who still put their fingers in their mouths, it’s worth being particularly cautious about nail products and small decorations.
The 32 Cutest Nail Designs for Kids
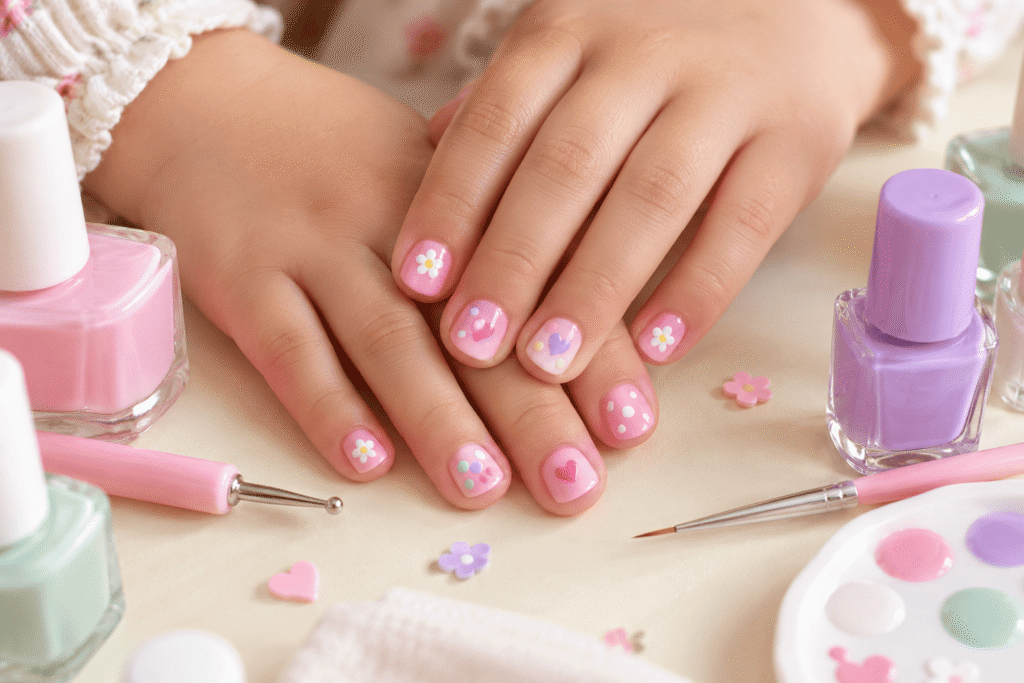
1. Pink Daisy Nails
The design shown in the inspiration image is a perfect example of how adorable a simple children’s manicure can be.
Use a soft pink base and add tiny white daisies with yellow centers.
Best colors:
- Baby pink
- White
- Sunshine yellow
How to create it:
- Apply one thin layer of pink polish.
- Allow it to dry.
- Add five tiny white dots in a circle.
- Place a yellow dot in the center.
- Repeat on each nail or alternate between decorated and plain nails.
- Finish with a suitable top coat.
This design is particularly cute for spring, birthdays, school events, and everyday wear.
2. Rainbow Nails
Rainbows are one of the easiest ways to make children’s nails look colorful.
Instead of painting a complete rainbow on every nail, create a tiny curved rainbow on one or two accent nails.
Color combination:
| Rainbow layer | Suggested color |
|---|---|
| 1 | Pink |
| 2 | Orange |
| 3 | Yellow |
| 4 | Green |
| 5 | Blue |
| 6 | Purple |
Keep each stripe extremely thin because children’s nails don’t have much space.
3. Pastel Polka Dots
This is one of the easiest designs for beginners.
Start with a white, nude, or pastel base and add dots in different colors.
Use a dotting tool, the rounded end of a small nail-art tool, or another appropriate tool designed for nail decoration.
Try:
- Pink
- Lavender
- Mint
- Baby blue
- Yellow
For an extra cute look, use different-sized dots.
4. Strawberry Nails
Paint the nails a soft pink or red and add tiny green leaves near the cuticle.
For a more detailed version, add tiny white or yellow dots representing strawberry seeds.
Simple tutorial:
- Apply pink or red polish.
- Let it dry.
- Add three small green triangular shapes near the top.
- Add tiny yellow or white dots.
- Seal with top coat.
5. Tiny Hearts
Hearts work beautifully on short nails.
Use a pale pink or nude background and create tiny red, pink, or purple hearts.
For an easier version, make two small dots next to each other and pull them downward into a point.
6. Lavender Flower Nails
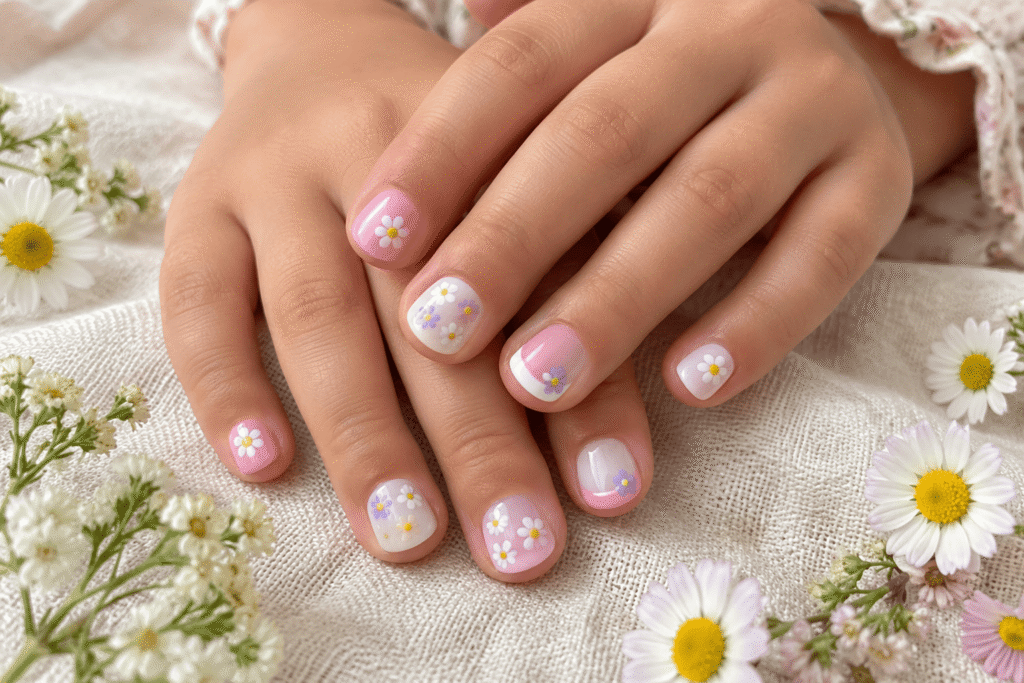
Lavender-colored nails paired with tiny white or purple flowers create a soft, dreamy manicure.
This design works especially well when you want something feminine without using bright colors.
7. Blue Sky Nails
Create a pale blue background and add tiny white clouds.
For an extra playful look, add a tiny yellow sun to one accent nail.
This is a particularly easy design for children because the clouds don’t need to be perfectly symmetrical.
8. Smiley Face Nails
Use a pale yellow base and add simple black smiley faces.
Alternatively, keep the nails nude or pink and add one tiny smiley face to each nail.
For a softer version, use pastel smileys.
9. Butterfly Nails
Butterflies can be simplified into four small dots or curved wings.
Try a pastel blue, pink, purple, and yellow combination.
For a beginner version, paint only one butterfly on the ring finger.
10. Ladybug Nails
Start with red polish.
Add a small black semicircle near the tip and tiny black dots.
A single white dot on each side can create cute eyes.
Because the design is small, an accent nail may work better than decorating every nail.
11. Watermelon Nails
Paint the nails pink or red and add a thin green section near the tip.
Add tiny black seeds.
For short nails, you can simplify the design by using only a few seeds.
12. Cute Cloud Nails
A light blue base with fluffy white clouds creates a simple sky-inspired manicure.
To create clouds:
- Place three or four small white dots close together.
- Connect them gently.
- Let the edges remain rounded.
- Add a tiny cloud to one or two nails.
13. Rainbow French Tips
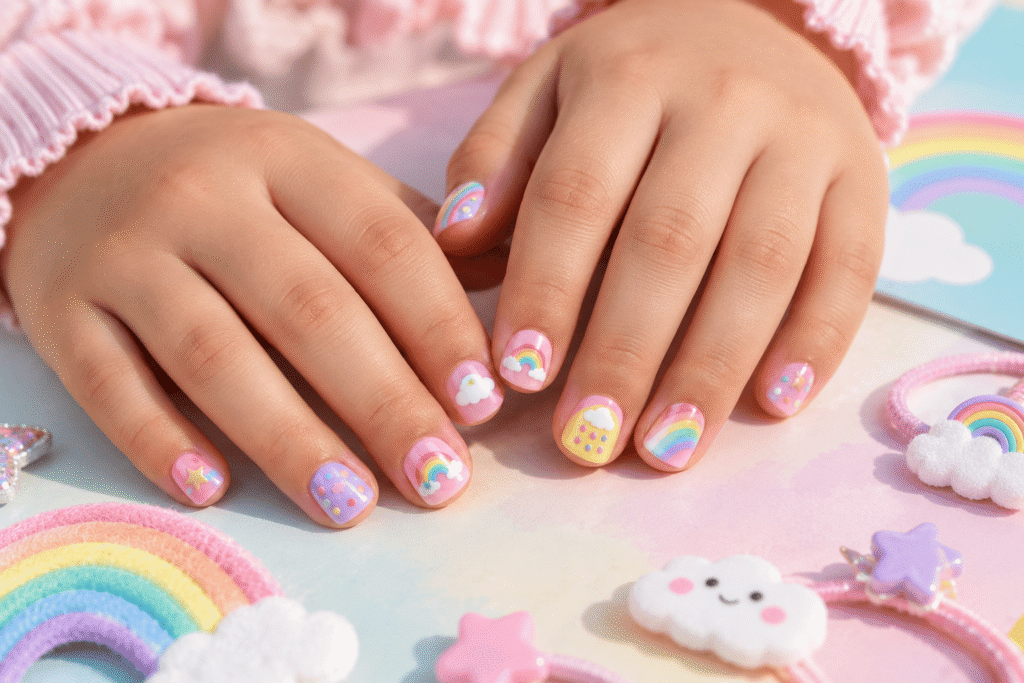
Instead of a traditional white French tip, use different pastel colors.
For example:
- Pink on the thumb
- Yellow on the index finger
- Green on the middle finger
- Blue on the ring finger
- Purple on the little finger
This gives a traditional manicure a playful children’s twist.
14. Glitter Accent Nails
Glitter doesn’t have to cover every nail.
Paint most nails in a soft pink or lavender and use glitter on one or two accent nails.
This creates sparkle without making the manicure visually overwhelming.
15. Little Stars
A pale blue, pink, or purple base looks beautiful with tiny white or yellow stars.
You can create simple stars using five small lines crossing at the center.
16. Minnie-Inspired Bow Nails
Create a pink or red base and add tiny bow shapes.
For a simplified version, paint one small bow on the ring finger.
If you’re creating character-inspired nails, keep the design simple and avoid trying to reproduce complicated details on very small nails.
17. Panda Nails
Use white as the base.
Add:
- Two black ears
- Two black eye patches
- A tiny black nose
You can make the panda only on the thumb or one accent nail.
18. Flower French Tips
Instead of a solid French tip, place tiny flowers along the edge of the nail.
A pale pink base with white flowers and yellow centers creates a delicate result.
19. Candy-Colored Nails
Give every nail a different pastel color.
Try:
| Nail | Color |
|---|---|
| Thumb | Pink |
| Index | Lavender |
| Middle | Mint |
| Ring | Baby blue |
| Little | Peach |
This is one of the easiest designs because it requires no nail art at all.
20. Tiny Fruit Nails
Create miniature fruit designs such as:
- Cherries
- Strawberries
- Lemons
- Watermelons
- Oranges
Use one fruit per accent nail rather than trying to fit several fruits onto one nail.
21. Pink and White Checkerboard
Checkerboard nails look complicated but can be simplified.
Use a pale pink base and add small white squares.
For children’s short nails, don’t worry about creating a perfectly uniform checkerboard. Slightly irregular squares can make the manicure look playful.
22. Animal Paw Prints
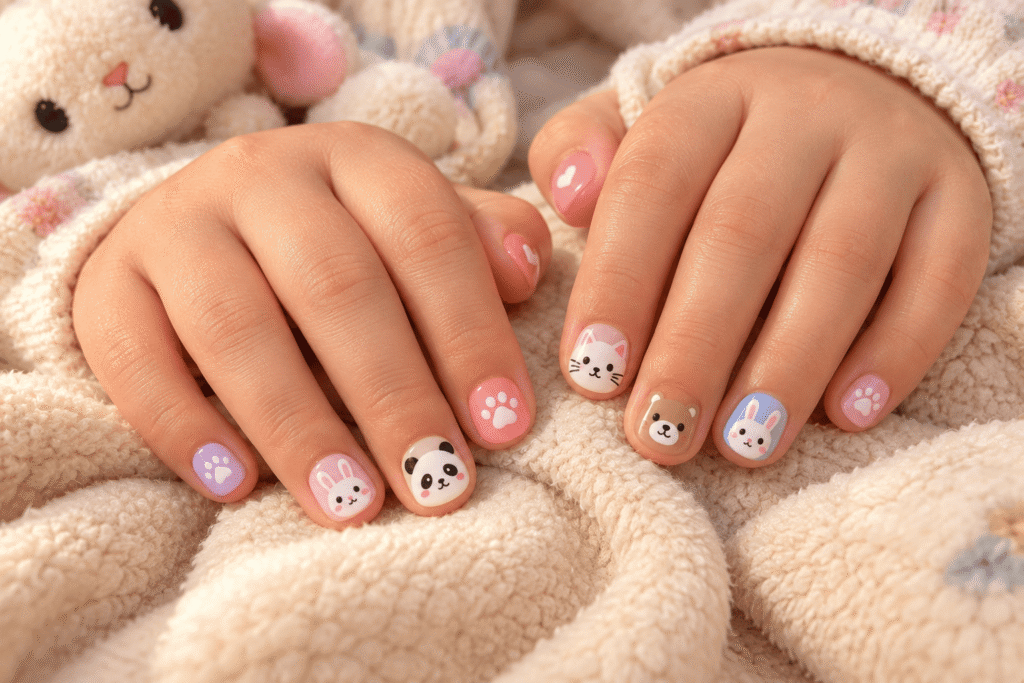
Create tiny paw prints using four small dots and one larger dot.
This is particularly cute for children who love animals.
Try:
- Pink and white
- Brown and cream
- Purple and lavender
- Blue and white
23. Mermaid Nails
Combine pastel purple, turquoise, pink, and glitter.
For an easy mermaid effect, use a shimmery polish instead of trying to paint scales.
24. Sunflower Nails
A yellow sunflower against a pale green or nude background creates a cheerful design.
Use a dark brown center surrounded by small yellow petals.
25. Cute Ghost Nails
For Halloween, create tiny white ghosts on a black, purple, orange, or nude base.
The simplest version only requires:
- White oval body
- Two black eyes
- Tiny black mouth
26. Pumpkin Nails
Paint tiny orange pumpkins with small green stems.
A neutral beige background makes the orange stand out.
27. Snowflake Nails
For winter, use a pale blue or white base with tiny snowflakes.
Instead of drawing complicated snowflakes, create three intersecting lines and add tiny branches.
28. Christmas Candy Cane Nails
Use white nails with tiny red candy-cane stripes.
A simple diagonal red stripe pattern can create the effect without needing a detailed candy cane.
29. Valentine Heart Nails
Use combinations of:
- Pink
- Red
- White
- Soft purple
Create one large heart on an accent nail and tiny hearts on the others.
30. Easter Egg Nails
Use pastel pink, blue, yellow, lavender, and green.
Add tiny stripes, dots, and zigzags.
Each nail can represent a different decorated Easter egg.
31. Glitter Rainbow Nails
Paint each nail in a different pastel color and add a very small amount of glitter.
This is particularly effective for birthday parties and celebrations.
32. Mix-and-Match Cute Nails
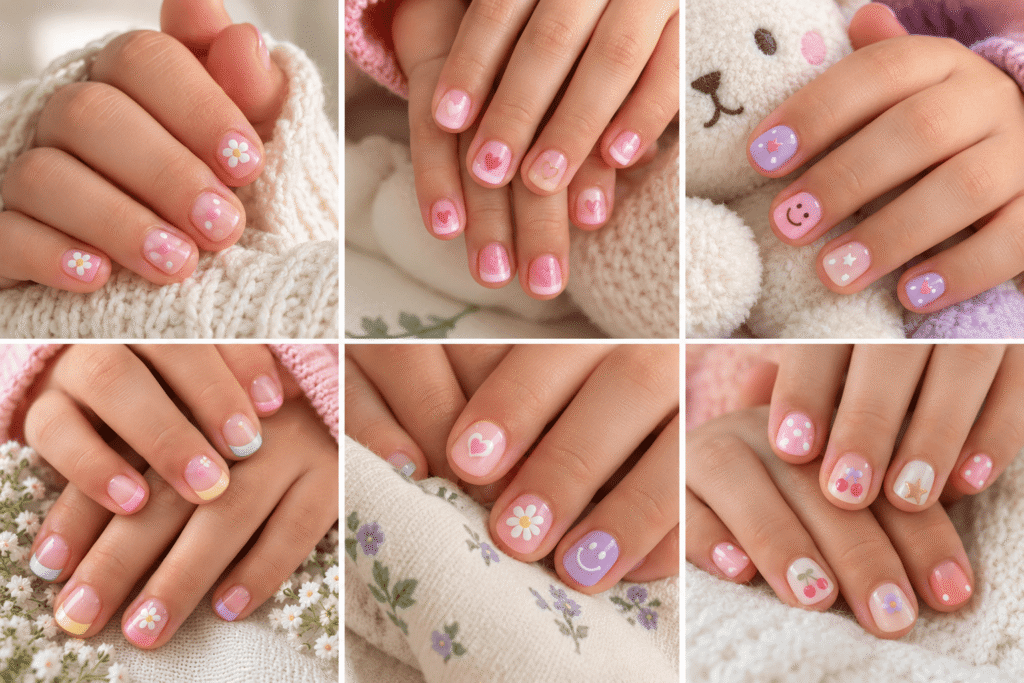
Can’t choose one design?
Combine several.
For example:
| Nail | Design |
|---|---|
| Thumb | Daisy |
| Index | Pink |
| Middle | Rainbow |
| Ring | Heart |
| Little | Polka dots |
The key is to keep the color palette consistent.
5 Easy Nail-Art Techniques Every Parent Can Learn
You don’t need professional nail-art equipment to create most children’s designs.
Technique 1: The Dot Method
The dot method is the foundation of many children’s nail designs.
It’s useful for:
- Flowers
- Polka dots
- Eyes
- Berries
- Paw prints
- Confetti
- Stars
Create one dot at a time and allow it to dry sufficiently before adding details.
Technique 2: The Dragged Dot
Place a small dot of polish and gently pull one side with a fine tool.
This can create:
- Hearts
- Petals
- Leaves
- Teardrops
Technique 3: The Simple Line
Use a fine nail-art brush to create short lines.
Don’t try to draw long complicated patterns immediately.
Short lines are much easier to control.
Technique 4: The Sponge Gradient
For a pastel ombré:
- Choose two or three compatible colors.
- Apply them next to each other on a makeup sponge.
- Dab gently onto the nail.
- Allow it to dry.
- Clean around the edges.
- Add a suitable top coat.
Technique 5: Nail Stickers
Nail stickers can be an excellent option when you want detailed designs without spending a long time painting.
Look for appropriately sized stickers and follow the product instructions.
How to Make Nail Art Last Longer
Children naturally use their hands constantly, so some wear is unavoidable.
However, several simple steps can improve durability.
1. Keep the nails short
Short nails are less likely to catch on clothing or objects.
2. Apply thin coats
Thick polish can take longer to dry and may dent more easily.
3. Allow adequate drying time
One of the biggest causes of ruined nail art is touching the nails before they’re properly dry.
4. Seal the design
A compatible top coat can help protect the artwork.
5. Avoid picking
Once a corner starts lifting, peeling it can remove layers of the manicure and potentially damage the nail surface.
Best Color Combinations for Children’s Nails
Choosing a coordinated palette can make even the simplest manicure look professionally planned.
| Style | Color palette |
|---|---|
| Sweet | Pink + white + yellow |
| Rainbow | Pink + yellow + blue + purple |
| Ocean | Blue + turquoise + white |
| Garden | Green + pink + yellow |
| Princess-inspired | Lavender + pink + silver |
| Summer | Coral + yellow + turquoise |
| Winter | White + blue + silver |
| Halloween | Orange + black + purple |
| Christmas | Red + green + white |
| Soft neutral | Cream + beige + blush |
Nail Designs by Age and Skill Level
Not every design is equally practical for every child.
| Level | Recommended designs |
|---|---|
| Very easy | Solid colors, dots, stickers |
| Beginner | Flowers, hearts, clouds |
| Intermediate | Rainbows, fruit, butterflies |
| Creative | Characters, checkerboards, detailed scenes |
For younger children, prioritize simplicity, short nails, and designs that don’t require prolonged stillness.
Nail Designs for Different Occasions
For School
Choose subtle designs:
- Pink daisies
- Tiny hearts
- Pastel dots
- Rainbow tips
- One-color pastel manicure
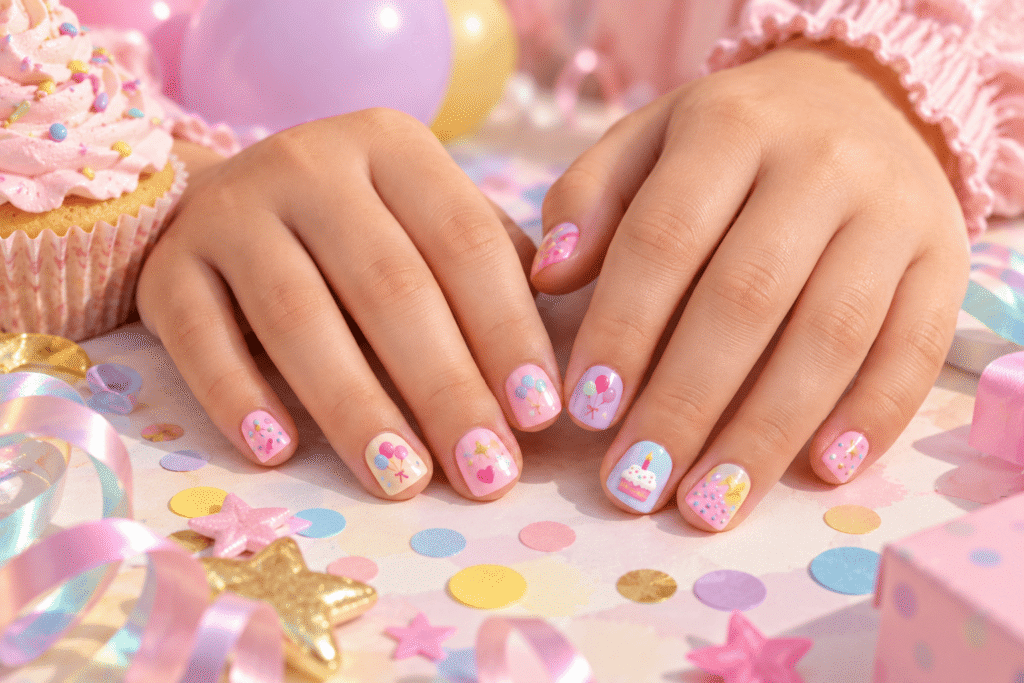
For Birthdays
Go brighter:
- Glitter
- Rainbow
- Confetti
- Balloons
- Colorful flowers
For Sleepovers
Try:
- Smiley faces
- Stars
- Hearts
- Pastel colors
- Mix-and-match nails
For Holidays
Use seasonal designs:
Halloween: ghosts, pumpkins, bats
Christmas: candy canes, snowflakes, trees
Easter: eggs, flowers, pastel patterns
Valentine’s Day: hearts and pink/red combinations
A Simple 10-Minute Kids’ Manicure
If you don’t have much time, use this routine.
Minute 1–2: Clean and prepare the nails.
Minute 3: Apply the base color.
Minute 4–5: Add the first layer of nail art.
Minute 6–7: Add small details.
Minute 8: Correct any obvious mistakes around the edges.
Minute 9: Add a compatible top coat if appropriate.
Minute 10: Let the nails remain untouched.
The secret is choosing a design that doesn’t require precision.
Common Mistakes to Avoid
Using too much polish
More product doesn’t necessarily mean better coverage. Thick layers can take longer to dry and are easier to dent.
Making every nail complicated
One or two statement nails can often look better than five highly detailed nails.
Ignoring nail size
A design that looks beautiful on long adult nails may become crowded on a child’s short nail.
Rushing the drying process
Patience is especially important when children are involved.
Choosing colors without a plan
Three coordinated colors usually look more cohesive than six unrelated shades.
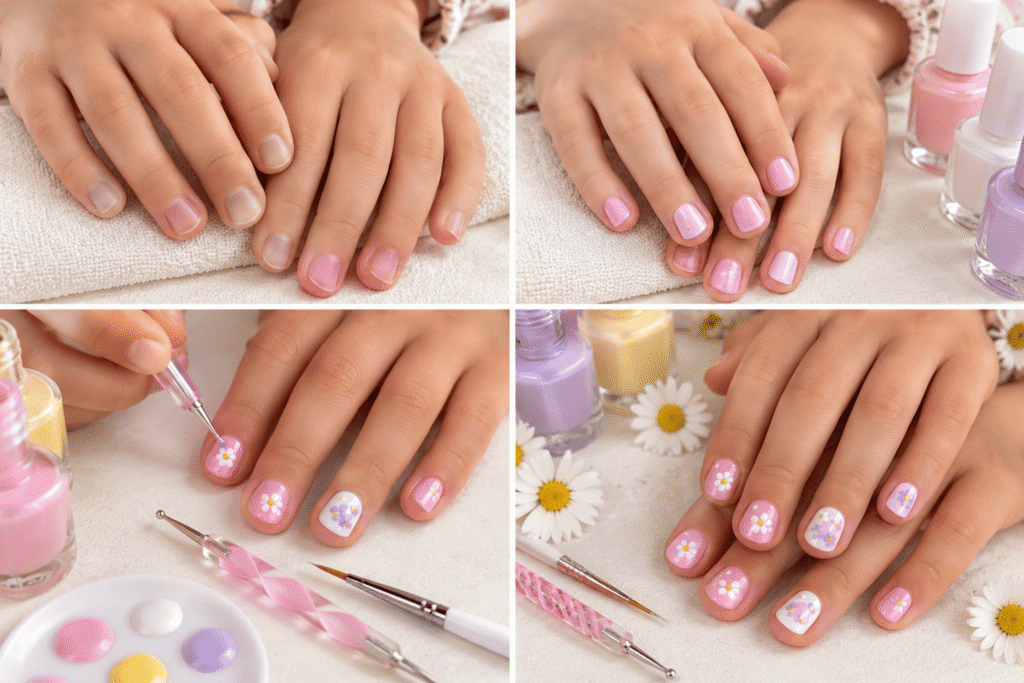
How to Create the Pink Daisy Design at Home
Since the pink daisy manicure is the inspiration for this collection, here’s a more detailed tutorial.
What you’ll need
- Soft pink nail polish
- White nail polish
- Yellow nail polish
- Suitable base coat
- Suitable top coat
- Fine dotting tool
- Small cleanup brush if needed
- Nail polish remover for correcting mistakes
Step 1: Prepare
Clean and shape the nails.
Step 2: Apply the base
Apply a thin layer of pink polish.
Allow it to dry according to the product instructions.
Apply a second thin layer if necessary.
Step 3: Create the petals
Place five small white dots around an imaginary center point.
Don’t make the dots too large.
Step 4: Add the center
Place a tiny yellow dot in the middle.
Step 5: Repeat strategically
You don’t necessarily need a flower on every nail.
Try flowers on the thumb, middle, and ring fingers while leaving the others pink.
Step 6: Finish
Once everything is sufficiently dry, apply a compatible top coat if appropriate.
The result should be playful, clean, and easy to wear.
How to Make Children’s Nail Art Look More Professional
The biggest difference between messy nail art and polished-looking nail art isn’t always artistic ability.
It’s consistency.
Try to keep:
- Similar dot sizes
- Similar flower sizes
- Similar spacing
- A limited color palette
- Consistent nail length
- Clean edges
Even an extremely simple design can look beautiful when these details are controlled.
10 Quick Design Combinations to Save for Later
| Combination | Base | Detail |
|---|---|---|
| 1 | Pink | White daisies |
| 2 | White | Rainbow dots |
| 3 | Lavender | Tiny stars |
| 4 | Baby blue | Clouds |
| 5 | Nude | Hearts |
| 6 | Mint | Butterflies |
| 7 | Peach | Flowers |
| 8 | Pale yellow | White dots |
| 9 | Pink | Cherry motifs |
| 10 | Cream | Colorful confetti |
Final Thoughts
The best nail designs for kids are the ones that feel fun rather than complicated. A few tiny dots can become flowers, two curves can become a heart, and a handful of pastel colors can transform a simple manicure into something memorable.
Start with easy designs such as daisies, polka dots, hearts, clouds, rainbows, and stickers. Once you become comfortable with those techniques, you can experiment with butterflies, fruit, animals, seasonal designs, and mix-and-match manicures.
And remember: children’s nails are small, so you don’t need to fill every millimeter. A simple design with clean application often looks much more charming than an overcrowded one.
Whether you’re preparing nails for a birthday party, school holiday, sleepover, or simply a fun afternoon at home, these 32 kids’ nail designs give you plenty of ideas to try and customize.







