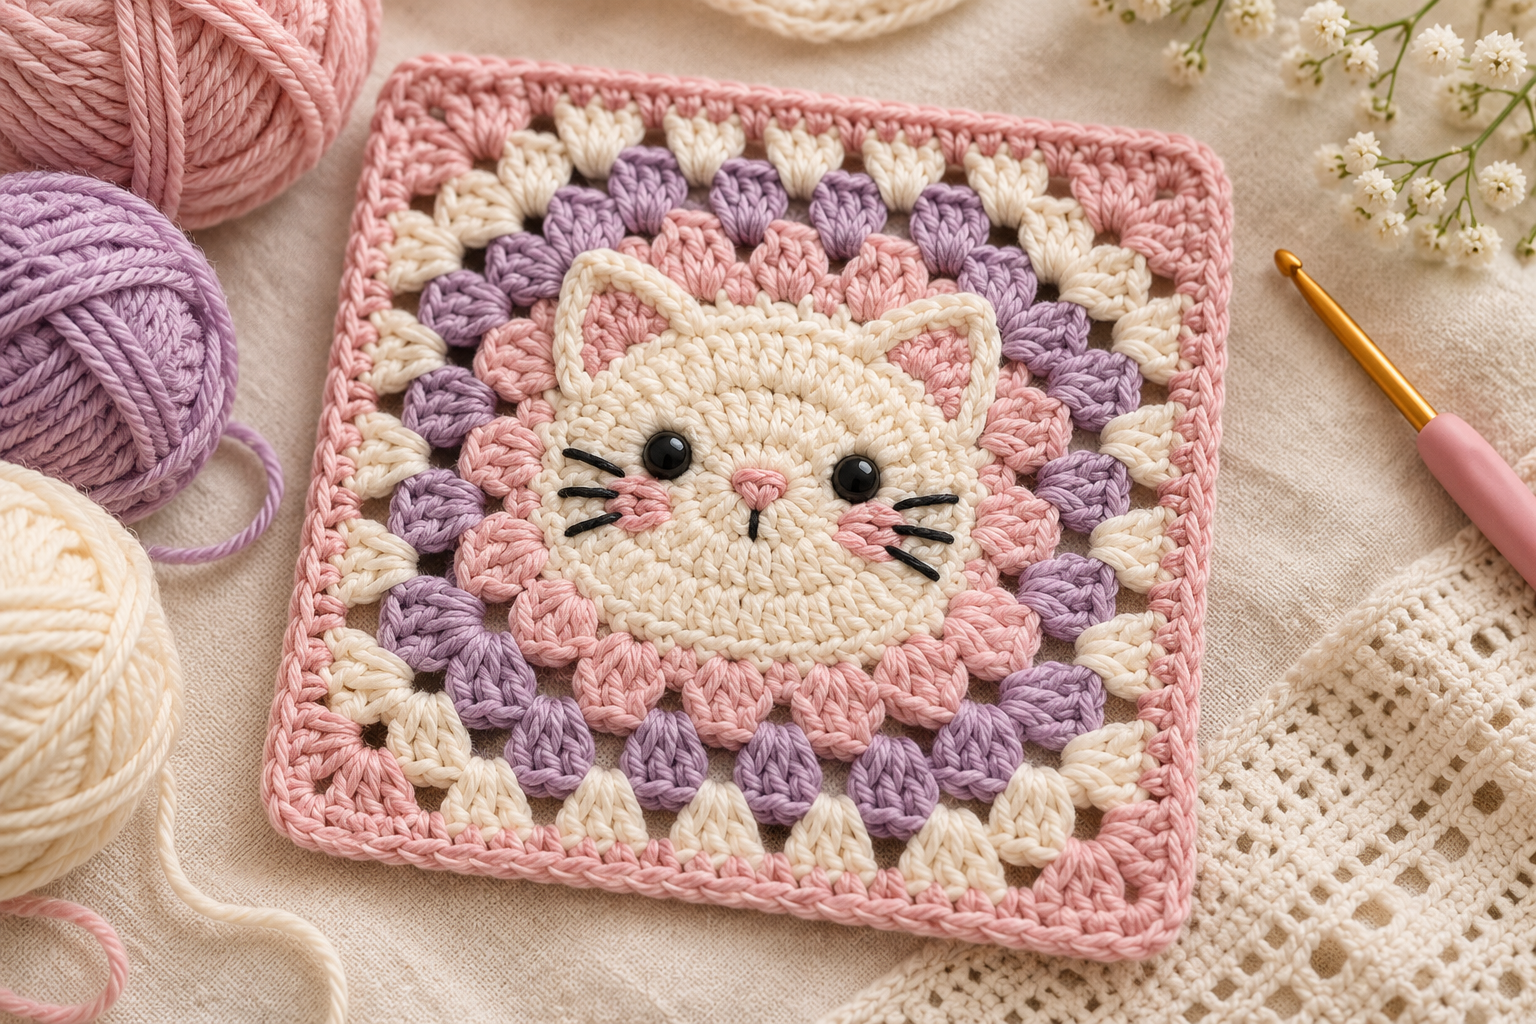
If you love crochet projects with a cute handmade touch, this Cat Crochet Granny Square Pattern is a fun project to add to your collection. The design combines a classic granny-square construction with a simple cat face, creating a versatile motif that can be used for blankets, bags, pillows, cardigans, baby accessories, wall décor, and many other handmade projects.
The best part is that you can customize almost everything. Change the cat’s colors, make a whole collection of different kitty faces, combine several squares into a larger project, or use just one square as a small decorative piece.
This tutorial explains how to make the square from the center outward, how to create the cat features, how to keep your square flat and even, and how to join several squares together.
Cat Crochet Granny Square at a Glance
| Feature | Details |
|---|---|
| Project type | Cat granny square |
| Skill level | Beginner to intermediate |
| Crochet style | Classic granny-square construction |
| Terminology | US crochet terms |
| Main stitches | Chain, slip stitch, single crochet, double crochet |
| Approximate finished size | 4–5 inches (10–13 cm) |
| Main hook | 3.5–4.0 mm |
| Yarn | Worsted or DK weight cotton/acrylic |
| Colors | 3–5 colors |
| Construction | Worked from center outward |
| Uses | Blankets, bags, pillows, clothing, accessories |
| Customizable | Yes |
Why You’ll Love This Cat Granny Square Pattern
A traditional granny square is already one of the most useful crochet motifs, but adding a little cat face makes it much more playful.
You can make the squares in matching colors for a coordinated project or intentionally mix different color combinations for a patchwork effect.
This project is also useful if you’re trying to improve your crochet skills because it lets you practice several important techniques:
- Working in rounds
- Making granny clusters
- Increasing at corners
- Maintaining consistent tension
- Changing colors
- Working into chain spaces
- Adding embroidered details
- Joining motifs
- Blocking crochet pieces
Once you understand the basic construction, you can create dozens of variations without learning an entirely new pattern.
Materials You’ll Need
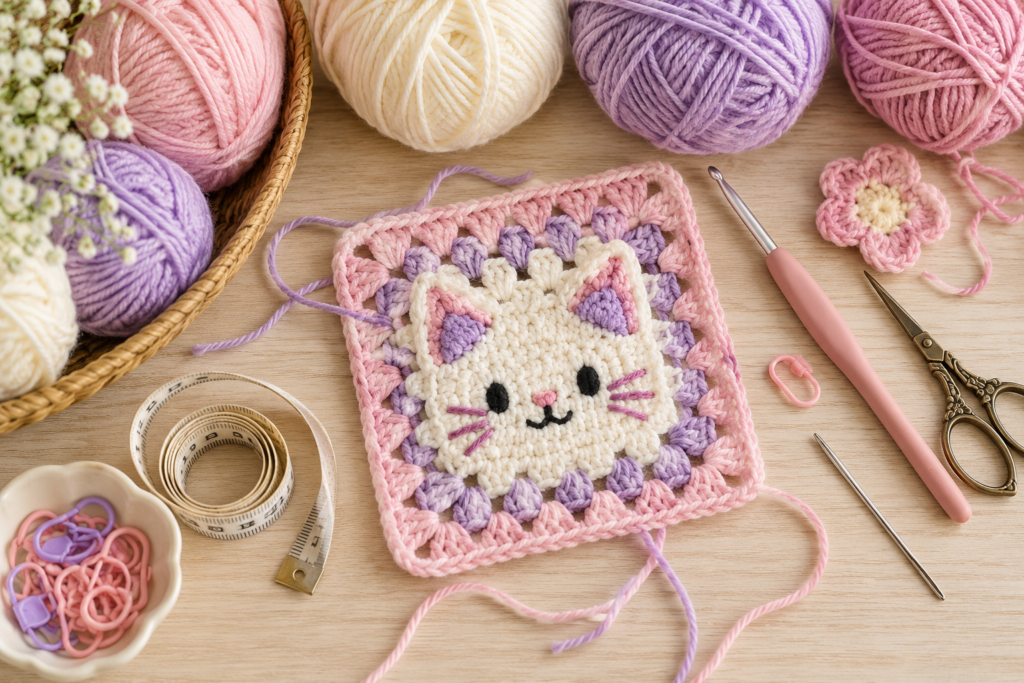
Yarn
For a standard 4–5 inch square, cotton or cotton-blend yarn works especially well because it produces defined stitches and keeps the motif relatively stable.
Recommended:
- DK weight yarn for a lighter square
- Worsted weight yarn for a slightly thicker square
You will need approximately 10–20 g of yarn per square depending on the yarn weight, hook size, border size, and tension.
Suggested Color Palette
| Color | Purpose |
|---|---|
| Cream or white | Cat face |
| Pink | Nose and ears |
| Black or dark brown | Eyes and whiskers |
| Lavender | Background |
| Soft pink | Border |
| Green, blue, yellow, etc. | Alternative backgrounds |
You don’t need to use exactly these colors. One of the easiest ways to make your cat granny squares look unique is to experiment with contrasting backgrounds.
Crochet Hook
For worsted-weight yarn, start with approximately a 3.5–4.0 mm crochet hook.
For DK yarn, a 3.0–3.5 mm hook may work better.
Your personal tension matters more than the exact hook size. If your square becomes stiff and curls, try a slightly larger hook. If the stitches are extremely loose and the square looks floppy, try a smaller hook.
Other Supplies
You will also need:
- Yarn needle
- Scissors
- Stitch marker
- Measuring tape
- Optional blocking mats
- Optional rust-resistant pins
- Small amount of black yarn for the eyes
- Small amount of pink yarn for the nose
- Optional tapestry needle for embroidery
Crochet Abbreviations
The pattern uses standard US crochet terminology.
| Abbreviation | Meaning |
|---|---|
| ch | Chain |
| sl st | Slip stitch |
| sc | Single crochet |
| dc | Double crochet |
| st | Stitch |
| sts | Stitches |
| sp | Space |
| rnd | Round |
| rep | Repeat |
| sk | Skip |
| inc | Increase |
A granny cluster in this tutorial means a group of 3 double crochets worked into the same space.
Basic Stitch Guide
Chain Stitch
Make a slip knot on your hook, then yarn over and pull the yarn through the loop on your hook.
Repeat until you have the required number of chains.
Single Crochet
Insert your hook into the indicated stitch or space.
Yarn over and pull up a loop.
You now have two loops on your hook.
Yarn over again and pull through both loops.
Double Crochet
Yarn over.
Insert the hook into the indicated stitch or space.
Yarn over and pull up a loop.
You now have three loops.
Yarn over and pull through two loops.
Yarn over again and pull through the remaining two loops.
Finished Size
With worsted-weight yarn and a 3.75 mm hook, the finished square should measure approximately 4½ inches to 5 inches (11–13 cm).
Your exact size will depend on:
- yarn thickness
- hook size
- crochet tension
- number of border rounds
If you’re making a blanket from multiple squares, consistency is more important than reaching an exact measurement.
Part 1: Crochet the Center
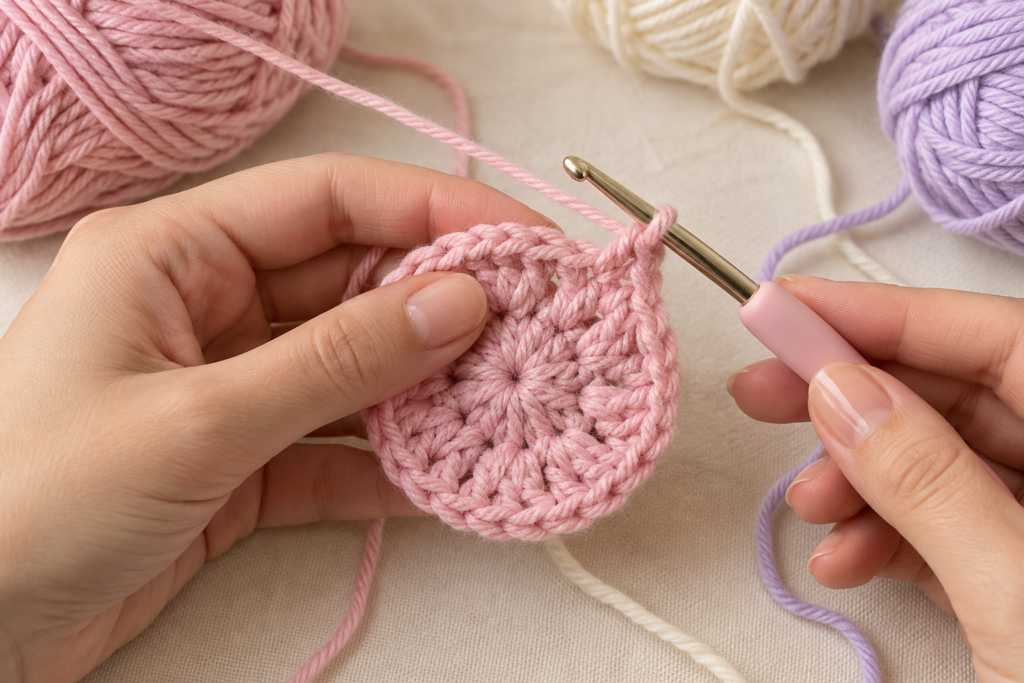
The cat face begins in the center of the square.
For this version, use your cat-face color first.
Round 1: Create the Center Ring
Start with a magic ring.
Chain 3. This counts as your first double crochet.
Work 11 double crochets into the ring.
Pull the magic ring closed.
Slip stitch into the top of the beginning chain-3.
You should have 12 double crochets in the center.
Alternative to the Magic Ring
If you don’t like working with a magic ring, chain 4 and slip stitch into the first chain to create a ring.
Then work your stitches into that ring.
The magic ring generally produces a tighter center, but either method works.
Round 2: Begin the Granny Shape
Join your background color.
Chain 3.
Work 2 double crochets into the same space.
Chain 2.
In the next section, work 3 double crochets.
Chain 2.
Continue around the center.
The important idea is that the chain-2 spaces become your future corners.
At the end of the round, slip stitch into the beginning chain.
You should now have a small circular center surrounded by granny clusters.
Round 3: Create the Four Corners
This is the round where the circular center begins turning into a square.
Move to the nearest corner space.
Work:
3 dc, ch 2, 3 dc
into the same corner space.
Then move to the next corner.
Repeat:
3 dc, ch 2, 3 dc
in each corner.
Work 3 dc into the side spaces between corners.
Finish the round with a slip stitch.
Your motif should now clearly resemble a small square.
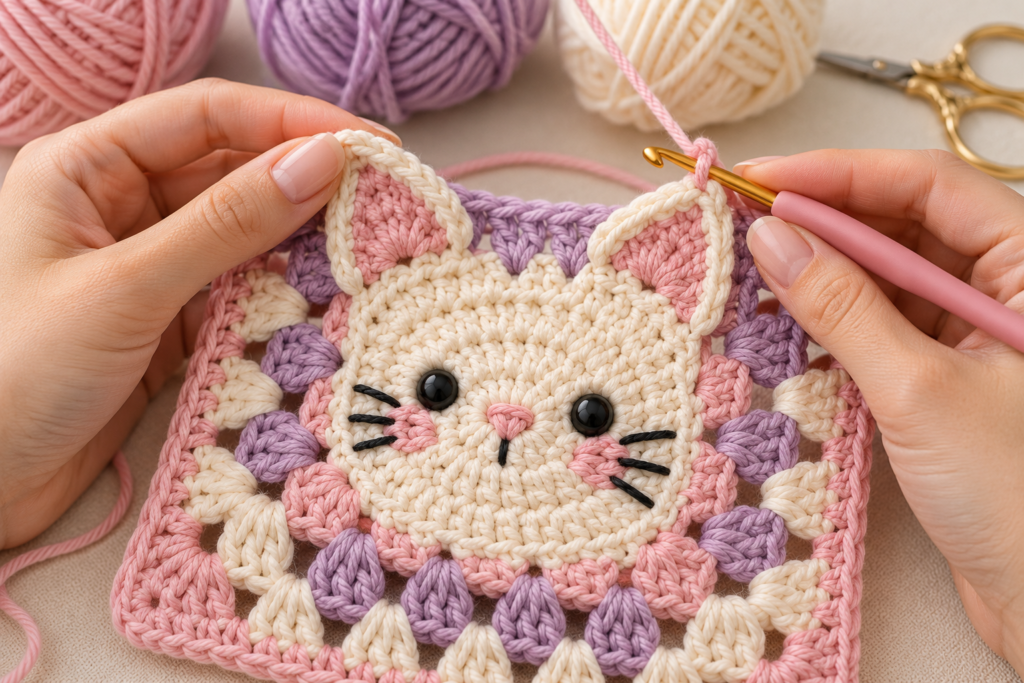
Round 4: Expand the Square
Continue working granny clusters.
At every corner, work:
3 dc, ch 2, 3 dc
In each side space, work:
3 dc
Continue around the entire square.
At the end of the round, slip stitch to close.
Your square should remain relatively flat.
If the edges begin curling upward, check your tension before continuing.
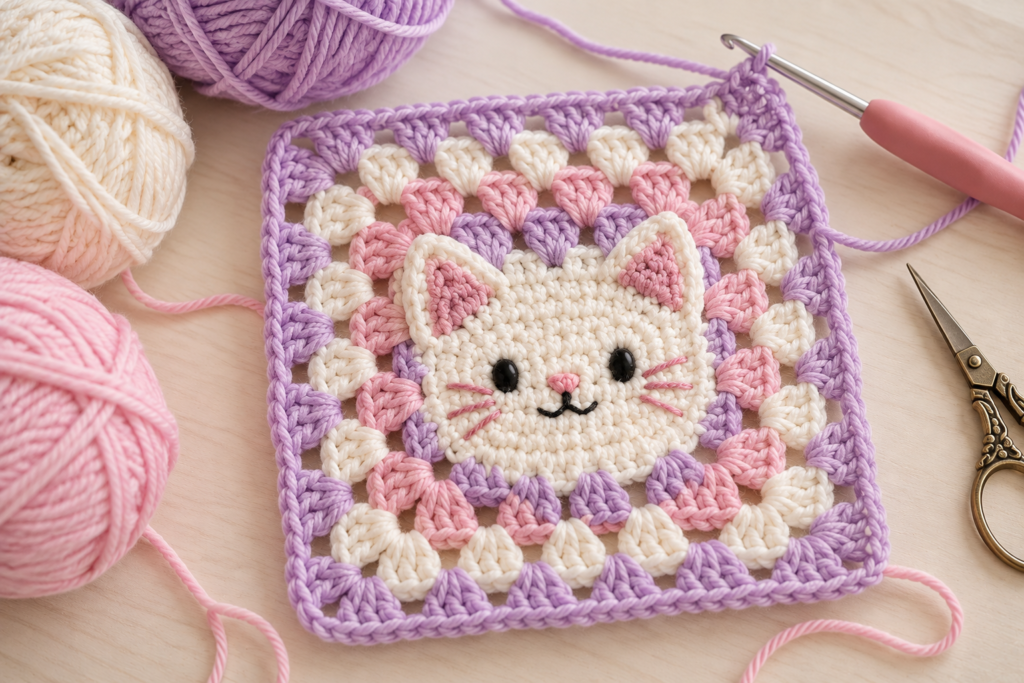
Round 5: Add Another Border
For a larger cat granny square, add another granny round.
At every corner:
3 dc, ch 2, 3 dc
At every side space:
3 dc
Continue around.
You can stop here if you want a smaller motif or add another round if you want a larger square.
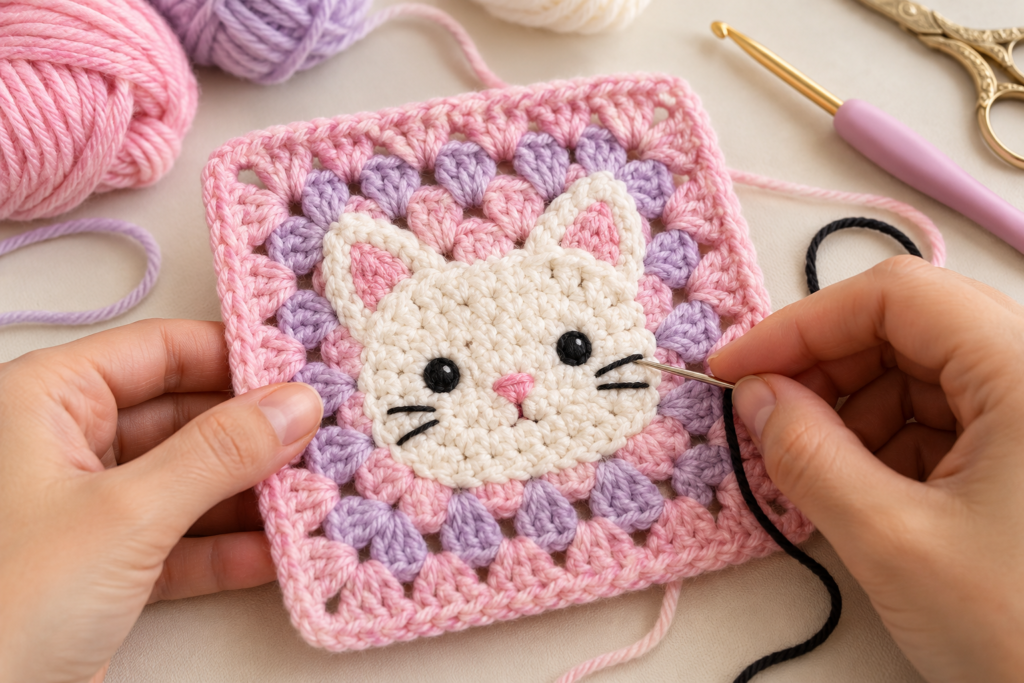
Creating the Cat Face
Now comes the part that transforms a normal granny square into a kitty granny square.
The cat face can be created using simple embroidery rather than complicated crochet shaping.
This makes the design easier to customize.
Cat Ears
Using your cat-face color, create two small triangular ears.
You can either crochet the ears separately and sew them onto the square or embroider them directly.
Simple Crochet Ear
Chain 5.
Starting in the second chain from the hook:
- 1 sc
- 1 hdc
- 1 dc
- 1 tr
Fasten off.
Make a second ear.
Sew the ears onto the upper portion of the cat face.
For a softer appearance, use a slightly darker or contrasting shade inside each ear.
Cat Eyes
Use black, dark brown, or another contrasting color.
You have several options.
Embroidered Eyes
Make two small vertical ovals using satin stitches.
Keep the eyes approximately the same size.
For a cute expression, place them slightly closer together.
French-Knot Eyes
Make several small wraps around the needle and pull the yarn through carefully.
This creates a small raised eye.
Safety Eyes
If you want to use safety eyes, they can work for decorative projects.
However, for baby items, children’s items, or anything intended for very young children, embroidered facial details are generally preferable because they don’t create detachable small parts.
Cat Nose
Use pink yarn for the nose.
A simple embroidered triangle works beautifully.
Make a small triangular shape in the center of the face.
Then use dark yarn to create a short line underneath.
Cat Mouth
From the bottom of the nose, embroider a short vertical line.
Add two small curved lines on each side.
This creates a simple smiling cat expression.
You can make the mouth:
- smiling
- neutral
- sleepy
- surprised
- playful
This tiny detail can completely change the personality of the square.
Cat Whiskers
Use black or dark brown yarn.
Insert your needle close to the cheek and create three short horizontal lines.
Repeat on the opposite side.
Try to keep the whiskers symmetrical, but don’t worry about making them perfectly identical. Small variations give handmade crochet projects character.
Adding the Final Border
Once the cat face is finished, add your final border.
A simple single-crochet border works particularly well because it creates a clean frame around the granny square.
Join your border color at any corner.
Chain 1.
Work single crochet stitches around the square.
At each corner, work:
sc, ch 2, sc
This keeps the corners sharp without making them too tight.
Continue around the square.
Slip stitch to the first single crochet.
Fasten off.
Optional Decorative Border
For a more decorative square, you can use a scalloped edge.
A simple version is:
Skip 2 stitches, work 5 dc into the next stitch, skip 2 stitches, sc into the next stitch.
Repeat around the edge.
This produces a small shell border.
For blankets and bags, however, a straight border is usually easier to join.
Complete Cat Granny Square Pattern
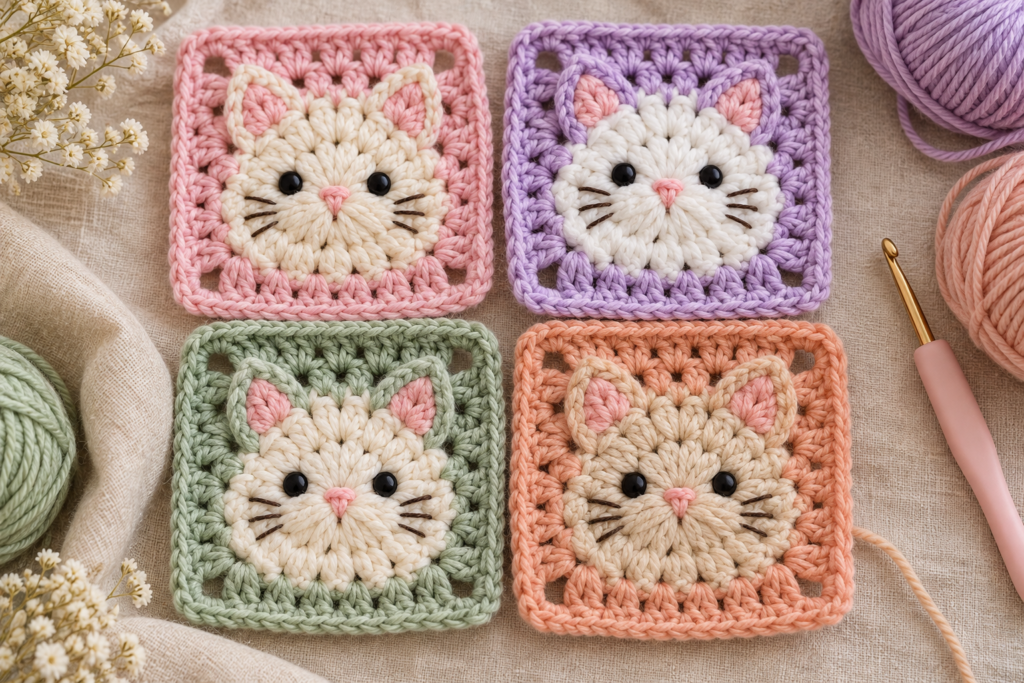
Here is the simplified pattern in one place.
Center
Round 1: Magic ring, ch 3, 11 dc into ring, sl st to top of beginning ch-3.
Granny Round
Round 2: Join background color. Ch 3, 2 dc in same space, ch 2. Work 3 dc into each section with ch-2 spaces between clusters.
Square Formation
Round 3: Work 3 dc in side spaces. At each corner work 3 dc, ch 2, 3 dc.
Additional Rounds
Round 4: 3 dc in each side space; 3 dc, ch 2, 3 dc in every corner.
Round 5: Repeat Round 4 if a larger square is desired.
Border
Work sc around the entire square.
At each corner:
sc, ch 2, sc
Fasten off and weave in the ends.
Face
Add:
- two ears
- two eyes
- one nose
- one mouth
- six whiskers
How to Keep Your Granny Square Flat
One of the most common problems with granny squares is curling.
If your square isn’t lying flat, don’t immediately assume you’ve made a mistake.
There are several possible causes.
| Problem | Possible Cause | Solution |
|---|---|---|
| Square curls upward | Tension too tight | Use a larger hook |
| Square becomes wavy | Too many stitches | Check cluster placement |
| Corners pull inward | Corner chains too short | Use ch-2 or ch-3 |
| Center is too tight | Magic ring pulled excessively | Leave enough flexibility |
| Square looks uneven | Uneven tension | Slow down and maintain consistent tension |
| Border ripples | Too many border stitches | Reduce stitch count |
Blocking can also dramatically improve the final appearance.
How to Block Your Cat Granny Square
Blocking is optional, but it can make handmade squares look much more polished.
First, lightly dampen the square.
Do not soak it unless your yarn label recommends wet blocking.
Place it on a blocking mat.
Gently stretch the square until the four corners are even.
Pin each corner.
Then pin the sides if necessary.
Allow the square to dry completely before removing the pins.
Once dry, the square should have a cleaner and more consistent shape.
How to Make Multiple Cat Squares
The real fun begins when you make several.
Instead of making every square identical, create a small collection of different cats.
For example:
| Square | Face | Background | Border |
|---|---|---|---|
| 1 | White | Lavender | Pink |
| 2 | Cream | Sage | Cream |
| 3 | Gray | Dusty Blue | White |
| 4 | Orange | Cream | Brown |
| 5 | Black | Pink | Cream |
| 6 | Calico | Lavender | White |
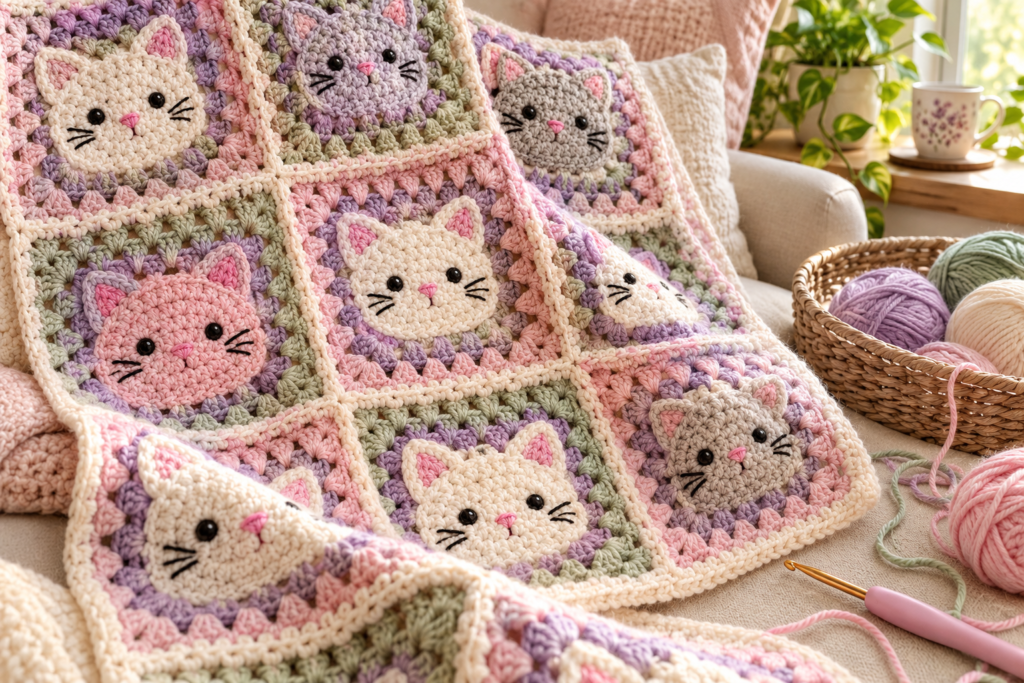
This creates a playful patchwork effect.
Easy Cat Color Ideas
Pink Kitty
Use:
- cream face
- pink ears
- pink nose
- dusty pink border
This works especially well for baby blankets.
Gray Kitty
Use:
- gray face
- pink ears
- black eyes
- cream background
This creates a soft neutral look.
Orange Tabby
Use:
- orange face
- cream muzzle
- dark brown stripes
- cream border
Add three small stripes on each cheek for a recognizable tabby-inspired look.
Black Cat
Use:
- black face
- pink ears
- yellow or green embroidered eyes
- lavender or orange background
This would be especially cute for a Halloween crochet project.
Calico-Inspired Cat
Use several small patches of:
- cream
- orange
- brown
- black
Instead of changing colors constantly, you can embroider small patches onto the finished face.
How to Make a Larger Cat Granny Square
If you want to use this design for a blanket or large project, you don’t need to dramatically enlarge the cat face.
Instead, keep the face relatively compact and add additional granny rounds around it.
For example:
Center → cat face → 3 granny rounds → border
This makes the face the focal point while allowing you to reach your desired square size.
How to Join Cat Granny Squares
Once you have several squares, there are several ways to join them.
Whip Stitch
Place two squares together with the wrong sides facing.
Use a yarn needle and stitch through the outer loops.
This creates a simple visible seam.
Mattress Stitch
The mattress stitch creates a cleaner, less noticeable seam.
Place the squares side by side.
Work through corresponding loops on each side.
Pull the yarn gently after every few stitches.
Don’t pull too tightly because the seam can pucker.
Single Crochet Join
Place two squares together.
Work single crochet through both layers along the edge.
This creates a raised decorative seam.
A contrasting color can make the joining lines part of the design.
Cat Granny Square Blanket Idea
For a small baby blanket, you could use approximately:
5 squares × 6 squares = 30 squares
For a larger throw:
7 squares × 8 squares = 56 squares
The exact number depends on your finished square size.
If each square is approximately 5 inches:
| Layout | Approximate Size |
|---|---|
| 4 × 4 | 20 × 20 in |
| 5 × 6 | 25 × 30 in |
| 6 × 7 | 30 × 35 in |
| 7 × 8 | 35 × 40 in |
| 8 × 10 | 40 × 50 in |
These measurements are approximate because crochet tension and border size can change the final dimensions.
Other Things You Can Make
You don’t have to make a blanket.
These cat granny squares can become:
Crochet Tote Bag
Join 8–12 squares and add a simple crocheted base and handles.
Decorative Pillow
Join squares into a front panel and sew or crochet it onto a simple pillow back.
Cardigan
Use cat squares as statement motifs on the front, back, sleeves, or pockets.
Baby Blanket
Use pastel cat faces with cream borders for a playful nursery blanket.
Crochet Wall Hanging
Make one large square, add a hanging loop, and display it as handmade wall décor.
Cushion Covers
A single large cat square can become the front of a decorative cushion.
Book Sleeve
Join two or three squares and add a simple lining.
Crochet Bag Flap
Use one cat square as the decorative flap on a small crossbody bag.
Beginner Tips for Better Results
Count Your Corners
Every granny-square round should have four clear corners.
If you accidentally create an extra corner, the square will become distorted.
Don’t Over-Tighten the Face
When embroidering the eyes, nose, and whiskers, avoid pulling the yarn too hard.
Tight embroidery can pull the crochet fabric inward.
Use a Sharp Yarn Needle
A blunt needle can make embroidery frustrating.
A tapestry needle with a large enough eye for your yarn is ideal.
Weave in Ends Carefully
Don’t simply cut the yarn close to the project.
Thread the tail through several stitches on the wrong side.
Change direction once or twice before trimming.
This reduces the chance of the end coming loose.
Common Problems and How to Fix Them
My square isn’t square.
Check whether your corners are positioned correctly.
Each corner needs the same increase structure.
My cat face looks crooked.
This is usually caused by uneven placement of the eyes, nose, or ears.
Before sewing anything permanently, place the pieces on the square and take a look from a distance.
My ears look too large.
Reduce the number of chains in the ear or use a smaller hook.
My square is too small.
Add another granny round around the outside.
My square is too large.
Remove one granny round or use a smaller hook and lighter yarn for future squares.
My border is wavy.
You may have too many stitches along the edge.
Try using fewer stitches or a smaller border.
How to Customize the Cat Expression
You can create completely different personalities with the same basic pattern.
Sleepy Cat
Embroider the eyes as two curved lines.
Happy Cat
Make the eyes slightly curved and give the mouth a larger smile.
Surprised Cat
Use larger round eyes and a small circular mouth.
Cute Blushing Cat
Add two tiny pink circles to the cheeks.
Whiskered Cat
Use three longer whiskers on each side.
Minimalist Cat
Skip the mouth and whiskers and use only two eyes and a small nose.
How to Make the Pattern More Beginner-Friendly
If you’re teaching someone who has never made a granny square before, break the project into three stages.
Stage 1: Make the granny square
Practice the center and four corners.
Stage 2: Add the cat
Practice embroidery and positioning.
Stage 3: Add the border
Practice clean finishing and weaving in ends.
This approach makes the project feel much easier than trying to learn everything at once.
Yarn Substitution Guide
You don’t have to use the exact yarn shown in an inspiration image.
| Yarn Type | Result |
|---|---|
| Cotton | Crisp, defined stitches |
| Cotton blend | Soft but structured |
| Acrylic | Affordable and lightweight |
| Wool blend | Warm and slightly textured |
| Bamboo blend | Soft and drapey |
| Chenille | Very soft but less stitch definition |
For detailed cat faces, cotton or cotton-blend yarn is particularly useful because the stitches remain visible.
How to Calculate Yarn for a Larger Project
If one square uses approximately 10–20 g of yarn, multiply the amount by the number of squares.
For example, if your finished square uses 15 g:
15 g × 30 squares = approximately 450 g
Always purchase a little extra, especially if you’re using multiple colors.
Color changes can make yarn consumption difficult to predict precisely.
Turning This Into a Matching Collection
One of the best things about a cat granny square is that you can turn it into an entire crochet collection.
Make:
- Cat granny square
- Paw-print granny square
- Fish granny square
- Yarn-ball granny square
- Cat-face square
- Sleeping cat square
- Black-cat Halloween square
- Kitten square
Keep the same border color across every motif.
This creates a cohesive finished project even when the center designs are different.
Final Finishing Checklist
Before considering your square finished, check:
☐ Four corners are clearly defined
☐ Square lies relatively flat
☐ Cat face is centered
☐ Eyes are approximately even
☐ Nose is centered
☐ Whiskers are balanced
☐ Border is consistent
☐ All yarn ends are woven in
☐ Square has been blocked if necessary
☐ Measurements are consistent with your other squares
Frequently Asked Questions
Is this cat granny square beginner-friendly?
Yes. The granny-square construction is suitable for beginners who already know basic crochet stitches such as chains, single crochet, and double crochet. The facial details are added separately, so you don’t need complicated colorwork techniques.
What yarn is best for cat granny squares?
Cotton and cotton-blend yarn are excellent choices because they provide clear stitch definition. Acrylic can also work well, particularly for blankets and larger projects.
Can I make the square bigger?
Yes. Simply add additional granny rounds around the cat motif before finishing the border.
Can I use a different hook size?
Yes. Your hook size can be adjusted according to your yarn and tension. Remember that changing the hook will also change the finished size and fabric density.
Can I make these squares for a baby blanket?
Absolutely. For baby projects, choose washable yarn and consider embroidered facial features rather than detachable embellishments.
Can I sell items made from this pattern?
If you’re using your own original version of the pattern, check the terms associated with any pattern or design inspiration you’re working from. For your own handmade finished products, always make sure your use of any copyrighted or trademarked character designs is permitted.
Final Thoughts
This Cat Crochet Granny Square Pattern is a great example of how a simple classic crochet technique can become a much more personalized design.
Start with one square to practice the construction. Once you’re comfortable with the basic pattern, experiment with different cat colors, expressions, borders, and backgrounds.
The same basic motif can become a cozy blanket, a cute tote bag, a decorative pillow, a cardigan panel, or a handmade gift.
The most important thing is to keep your tension consistent, pay attention to the four corners, and take your time with the embroidered face. Those small details are what give each kitty its personality.
And once you’ve made your first cat granny square, don’t be surprised if you want to make an entire collection of different little cats.