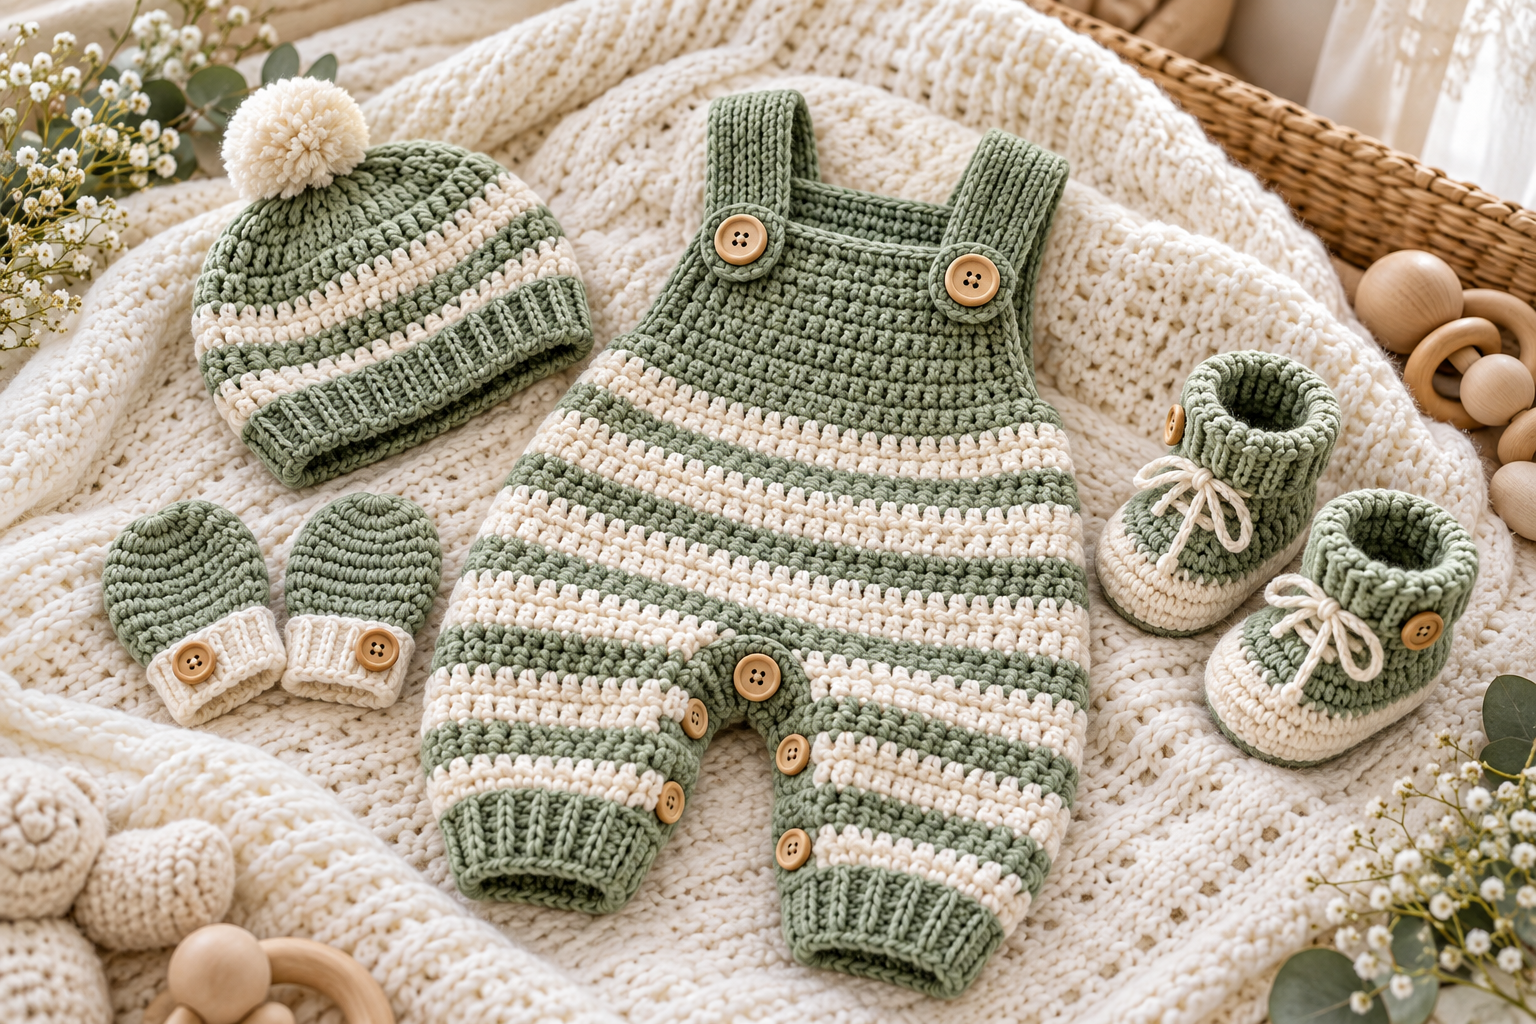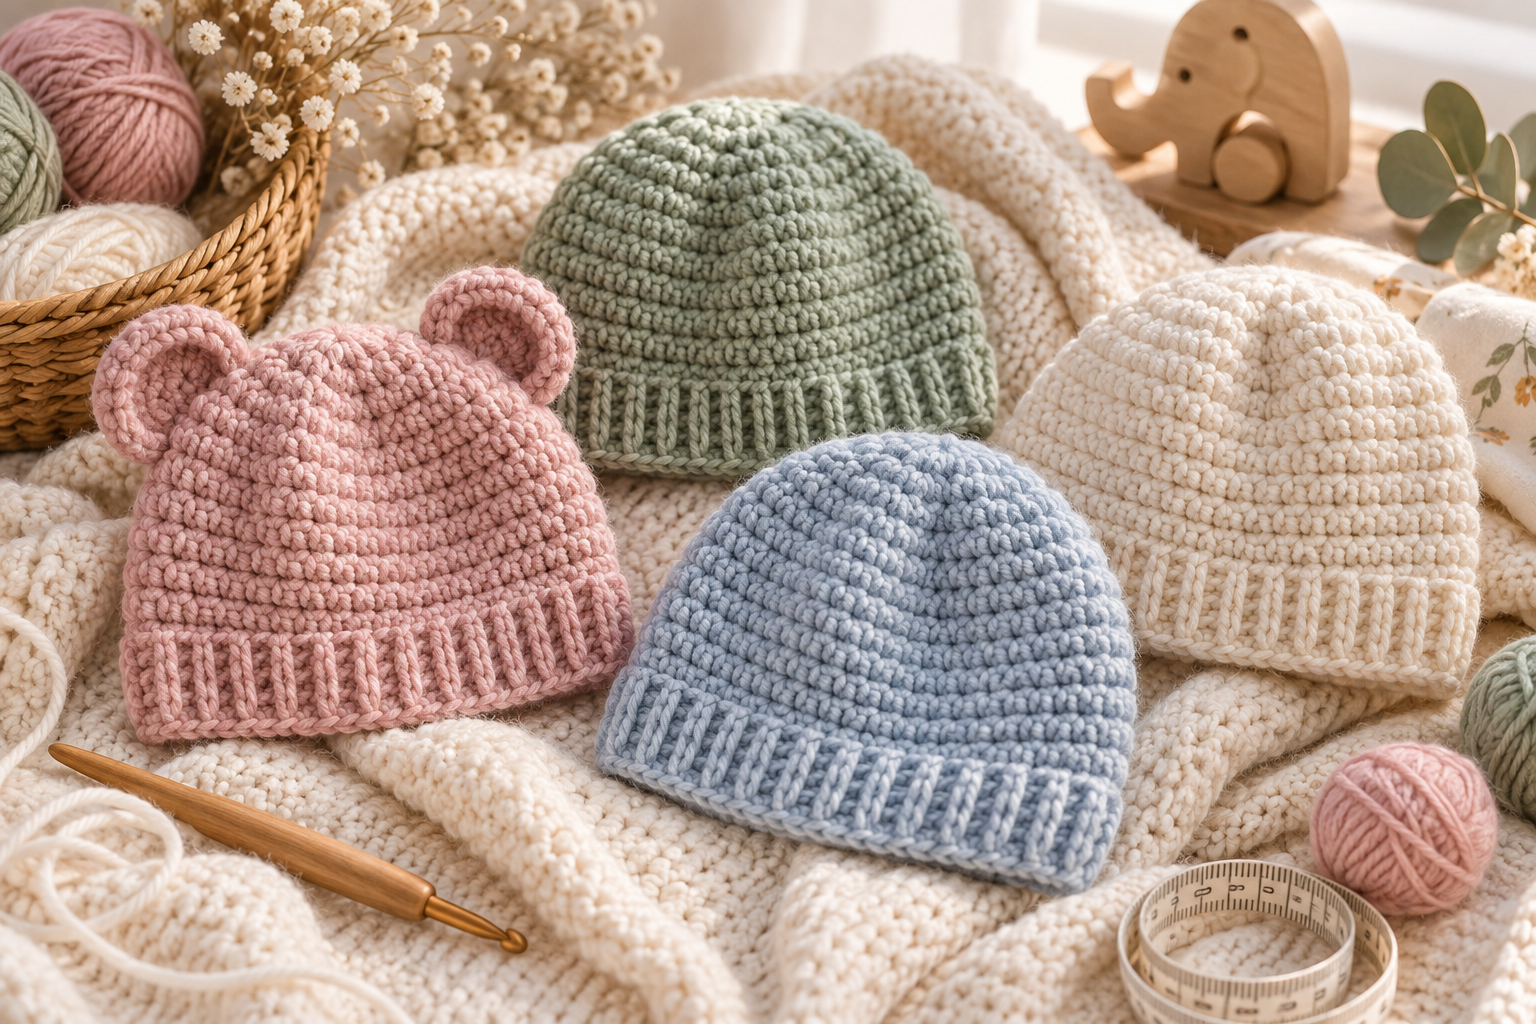
A handmade baby hat is one of those crochet projects that looks adorable, works up relatively quickly, and makes a thoughtful baby-shower gift. This easy crochet baby hat pattern creates a soft, rounded beanie with a simple crocheted crown, optional bear-style ears, and a stretchy ribbed-look brim.
The design is worked from the top down, so you can easily adjust the height and circumference as you crochet. It is also a useful beginner project because the main body relies on basic stitches and regular increases rather than complicated colorwork or advanced shaping.
This tutorial includes a complete original pattern inspired by the style shown in the reference image, plus a 0–24 month size guide, yarn recommendations, gauge information, ear instructions, brim options, customization ideas, troubleshooting, finishing tips, washing advice and gift ideas.
Pattern note: The instructions below are an original pattern developed from the visual concept. They are not a transcription of the stitch instructions shown in the reference graphic.
Why Crochet a Baby Hat?
Baby hats are excellent small crochet projects because they require relatively little yarn and can be customized in countless ways.
You can make them for:
- Newborn photo sessions
- Baby showers
- Hospital-homecoming outfits
- First birthdays
- Winter baby wardrobes
- Handmade gifts
- Matching sibling outfits
- Seasonal photographs
- Craft fairs
- Handmade baby boutiques
The basic beanie can also become the foundation for dozens of designs. Add bear ears for a cute animal hat, a pom-pom for a classic winter look, flowers for a feminine style, or stripes for a more playful version.
Finished Baby Hat Sizes
Babies grow quickly, so measuring the baby’s head is preferable whenever possible.
The following measurements are approximate starting points.
| Age | Approx. Head Circumference | Approx. Hat Height |
|---|---|---|
| 0–3 months | 35–38 cm | 13–14 cm |
| 3–6 months | 38–43 cm | 14–15 cm |
| 6–12 months | 42–45 cm | 15–16 cm |
| 12–18 months | 44–47 cm | 16–17 cm |
| 18–24 months | 46–49 cm | 17–18 cm |
The finished circumference should generally be slightly smaller than the baby’s head circumference because crochet fabric needs some negative ease to stay comfortably in place.
How to Measure a Baby’s Head
If you have access to the baby, use a soft measuring tape.
Wrap it around:
- The widest part of the head
- Across the forehead
- Above the ears
- Around the back of the head
Do not pull the tape tightly.
Record the measurement and choose the closest size.
If the measurement falls between two sizes, you can modify the pattern by adjusting the number of increase rounds.
Materials
| Material | Recommended Amount |
|---|---|
| Yarn | DK/light worsted baby-friendly yarn |
| Hook | 3.5 mm |
| Tapestry needle | 1 |
| Scissors | 1 |
| Stitch marker | Optional |
| Measuring tape | 1 |
| Optional stuffing | Small amount for ears |
| Optional contrasting yarn | For ears/details |
For the standard hat, approximately 40–70 g of DK-weight yarn is usually enough, depending on size, tension and whether you add ears or other decorations.
Choosing Yarn for a Baby Hat
For baby projects, prioritize yarn that feels soft against delicate skin.
Good choices include:
- Soft acrylic
- Cotton blends
- Bamboo blends
- Baby yarn
- Superwash wool blends where appropriate
A yarn that is washable is particularly practical for baby clothing.
Look at the yarn label for recommended hook size, fiber content and care instructions.
Avoid very rough or scratchy yarn.
A hat may look beautiful but still be uncomfortable if the fibers feel coarse.
Yarn Color Ideas
The simple design looks beautiful in almost any color.
| Style | Main Color | Optional Detail |
|---|---|---|
| Classic Baby Pink | Dusty pink | Cream |
| Neutral | Oatmeal | Ivory |
| Scandinavian | Sage green | Beige |
| Soft Blue | Powder blue | White |
| Teddy Bear | Camel | Cream |
| Pastel | Lavender | Blush |
| Woodland | Olive | Brown |
| Minimalist | Cream | Taupe |
| Strawberry | Pink | Red/green |
| Winter | Burgundy | Ivory |
Crochet Hook and Gauge
Start with a 3.5 mm crochet hook and DK-weight yarn.
The exact gauge depends on your yarn and tension.
For this style of baby hat, aim for a fabric that is:
- Dense enough to provide warmth
- Flexible enough to stretch
- Soft rather than stiff
- Consistent in tension
Make a small swatch before beginning if you want a precise fit.
If Your Hat Is Too Large
Try:
- A smaller hook
- Slightly tighter tension
- Fewer increase rounds
If Your Hat Is Too Small
Try:
- A larger hook
- Slightly looser tension
- An additional increase round
Crochet Abbreviations
The pattern uses US crochet terminology.
| Abbreviation | Meaning |
|---|---|
| MR | Magic ring |
| ch | Chain |
| sc | Single crochet |
| hdc | Half double crochet |
| sl st | Slip stitch |
| inc | Increase |
| dec | Decrease |
| BLO | Back loop only |
| st | Stitch |
| sts | Stitches |
| FO | Fasten off |
Basic Crochet Techniques Used
You only need a few techniques for this project.
Magic Ring
A magic ring creates the adjustable center needed for the top of the hat.
Single Crochet
Insert the hook into the stitch, yarn over, pull up a loop, yarn over and pull through both loops.
Half Double Crochet
Yarn over, insert the hook, pull up a loop, yarn over and pull through all three loops.
Increase
Work two stitches into the same stitch.
Back Loop Only
Work your stitch through only the back loop of the stitch.
This creates a horizontal ridge that is useful for making a ribbed-looking brim.
Easy Crochet Baby Hat Pattern
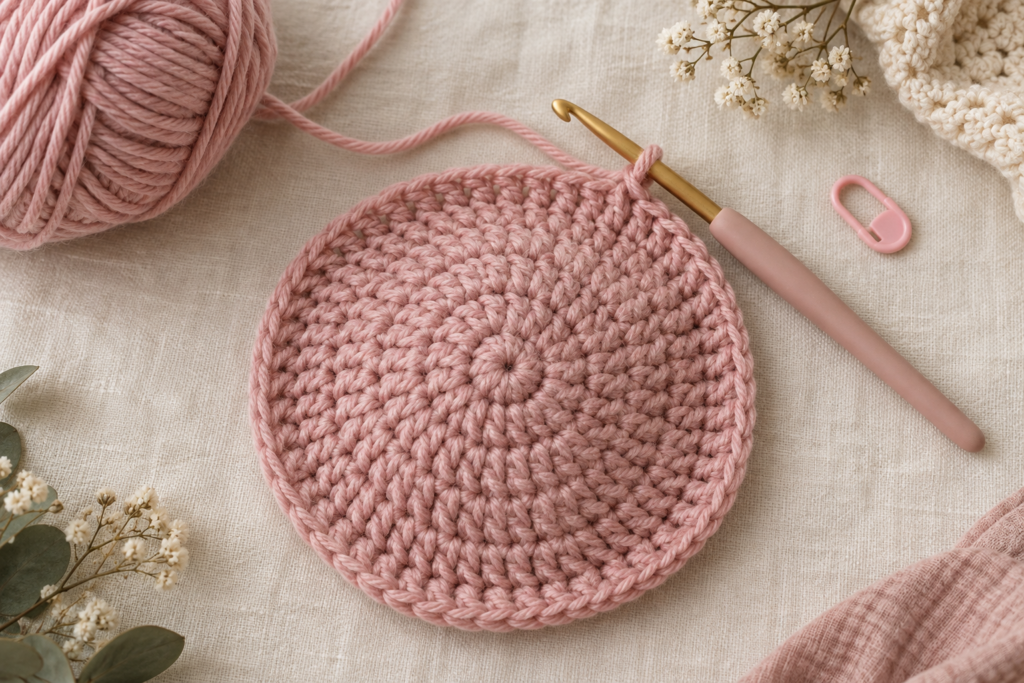
This pattern is worked from the crown downward.
The main body uses half double crochet for a soft, slightly stretchy fabric.
Pattern Overview
The basic construction is:
Crown → Increase Rounds → Straight Rounds → Brim → Optional Ears
For the best fit, compare your hat’s circumference with the baby’s head measurement as you work.
Crown Pattern
Use your main color.
Round 1
Make a magic ring.
Work:
8 hdc into the ring.
Join with a slip stitch if you prefer joined rounds.
Total: 8 sts
Place your stitch marker if you are working continuously.
Round 2
Work:
2 hdc in each stitch around.
Total: 16 sts
Round 3
Work:
(1 hdc, 2 hdc in next stitch) around.
Total: 24 sts
Round 4
Work:
(2 hdc, 2 hdc in next stitch) around.
Total: 32 sts
Round 5
Work:
(3 hdc, 2 hdc in next stitch) around.
Total: 40 sts
At this point, the crown should look like a small flat circle.
Adjusting the Crown for Different Sizes
Continue increasing until the crown reaches approximately the diameter required for your chosen size.
A useful approach is to measure the crown rather than relying only on the round number.
Approximate target crown diameters:
| Size | Approx. Crown Diameter |
|---|---|
| 0–3 months | 11–12 cm |
| 3–6 months | 12–13.5 cm |
| 6–12 months | 13–14 cm |
| 12–18 months | 14–15 cm |
| 18–24 months | 15–16 cm |
These are starting points rather than rigid measurements because yarn, tension and baby’s head shape can vary.
Baby Hat Body
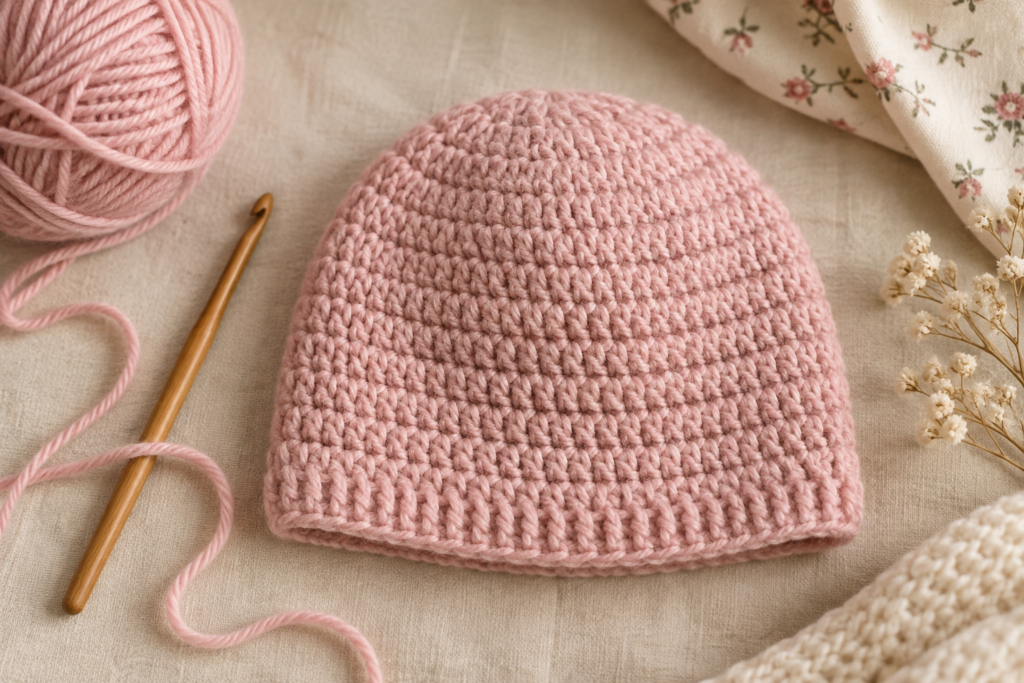
Once the crown reaches the desired diameter, stop increasing.
Work even rounds of hdc.
For example:
hdc around
Repeat until the hat reaches the desired height.
Approximate Number of Body Rounds
| Size | Approx. Straight Rounds |
|---|---|
| 0–3 months | 6–8 |
| 3–6 months | 7–9 |
| 6–12 months | 8–10 |
| 12–18 months | 9–11 |
| 18–24 months | 10–12 |
Do not rely solely on the number of rounds.
Measure the hat.
The finished hat should cover the head comfortably without reaching too far down over the eyes.
Creating the Ribbed-Look Brim
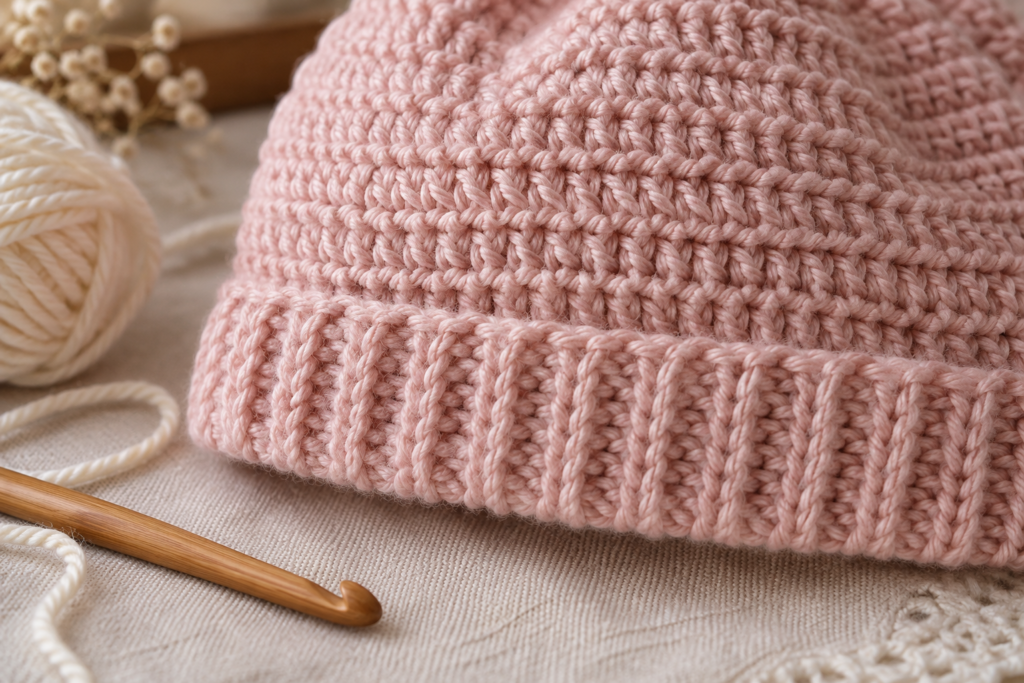
For a more polished finish, create a ribbed-look brim using BLO stitches.
Brim Round 1
Work:
hdc BLO around.
Join.
Brim Round 2
Repeat:
hdc BLO around.
Continue for:
4–6 rounds
depending on the desired brim height.
For a larger folded cuff, work additional rounds.
Optional Folded Brim
For a warmer winter hat, make the brim approximately 3–4 cm tall.
Fold the brim upward.
This gives the baby beanie a classic cuffed appearance.
For newborns, a narrower brim often creates a softer silhouette.
How to Make Bear Ears
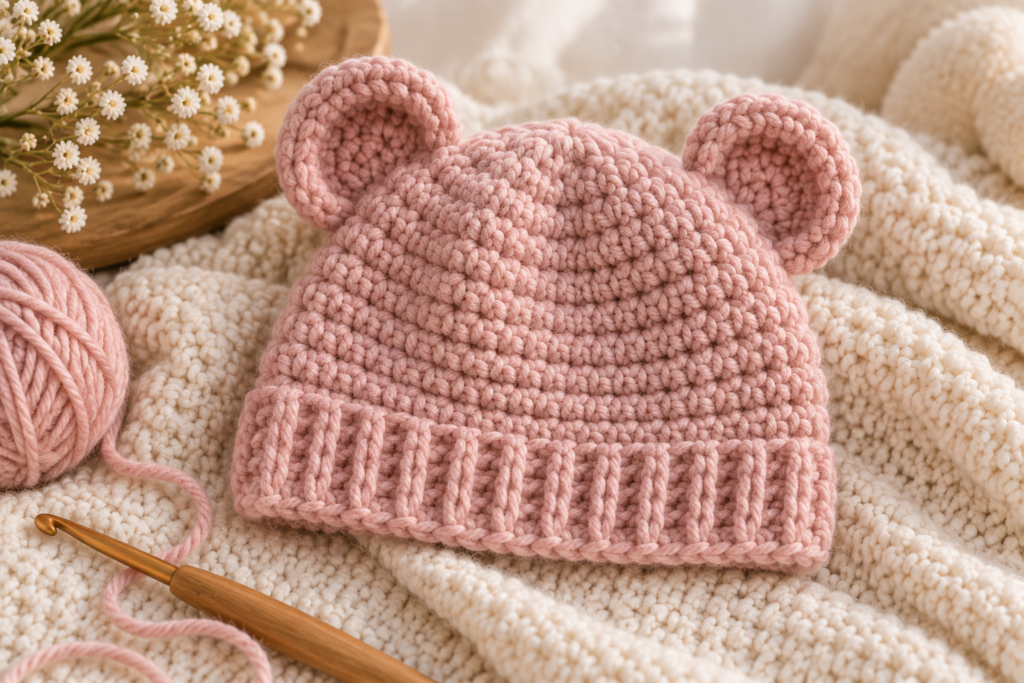
The bear ears are optional.
They transform a simple baby beanie into a cute animal-inspired hat.
Make two.
Ear Round 1
Make a magic ring.
Work:
6 sc into the ring.
Round 2
Work:
2 sc in each stitch around.
12 sts
Round 3
Work:
(sc, inc) around.
18 sts
Round 4
Work:
sc around.
18 sts
Fasten off.
Leave a long sewing tail.
Do not close the ear completely if you want to flatten it.
Shaping the Ears
Fold each ear slightly in half.
Pinch the bottom together.
Use a few stitches to create a gentle curved shape.
The ears should resemble small rounded semicircles rather than completely flat circles.
Attaching the Ears
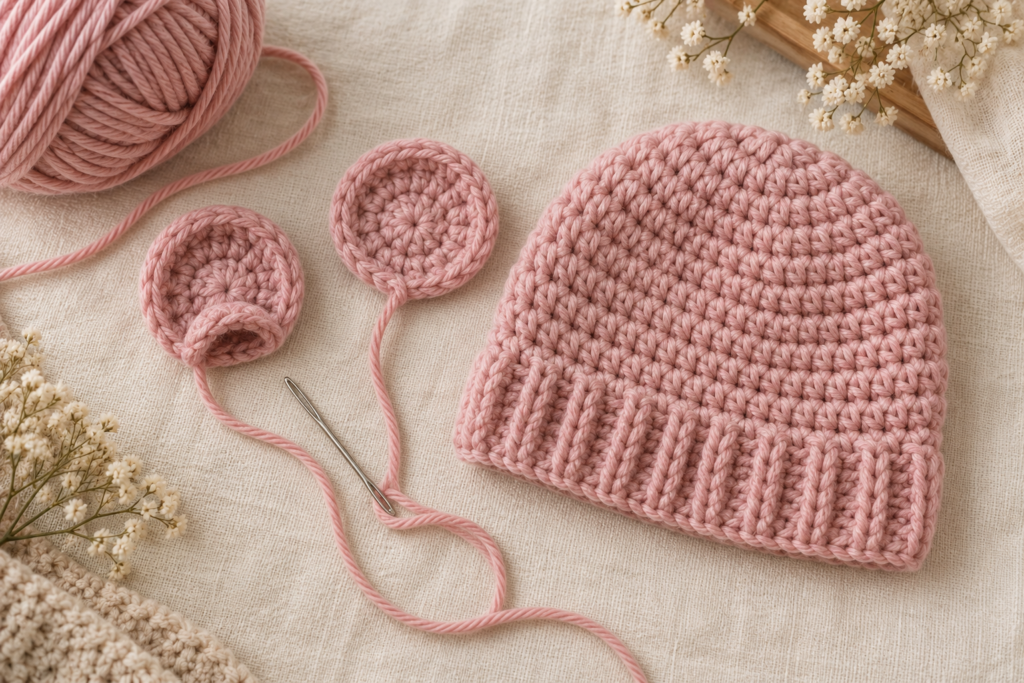
Position the ears symmetrically near the top sides of the hat.
For a traditional bear appearance, place them approximately:
2–4 cm apart from the center line
depending on the hat size.
Sew them securely using the yarn tail.
Before sewing permanently, place both ears on the hat and check that they are at the same height.
Optional Inner Ear
For more detail, crochet a smaller inner-ear piece in cream, beige or pink.
Use the same basic construction but stop after Round 2.
Sew it onto the center of the larger ear.
This creates a two-tone teddy-bear appearance.
How to Make a Simple Pom-Pom
Instead of ears, you can finish the hat with a pom-pom.
Wrap yarn around a pom-pom maker or several fingers.
Tie the center securely.
Cut the loops.
Trim the pom-pom into a rounded shape.
Attach it firmly to the top of the hat.
Crochet Flower Variation
For a floral baby hat, replace the ears with a small crochet flower.
A simple flower can be made with:
5 chain spaces
followed by small groups of stitches to create petals.
Use cream, blush or lavender for the flower.
Sew the flower securely to one side of the hat.
Crochet Baby Hat With a Bow
A small crochet bow can also be attached to the side.
You can use the same rectangular construction as a basic crochet bow:
- Crochet a small rectangle.
- Fold it in the center.
- Wrap yarn around the middle.
- Secure the back.
- Sew the finished bow to the hat.
This creates a coordinated look, especially when using dusty pink or cream yarn.
Two-Color Baby Hat
A two-color version is easy to create.
Change yarn after selected rounds.
For example:
| Rounds | Color |
|---|---|
| 1–3 | Dusty pink |
| 4–6 | Cream |
| 7–9 | Dusty pink |
| Brim | Cream |
This creates subtle horizontal stripes.
Simple Striped Hat
For more visible stripes, change colors every two rounds.
Try:
Pink → cream → pink → cream
or:
Sage → ivory → sage → ivory
Weave in the color changes carefully so the inside remains comfortable.
Color-Blocked Baby Hat
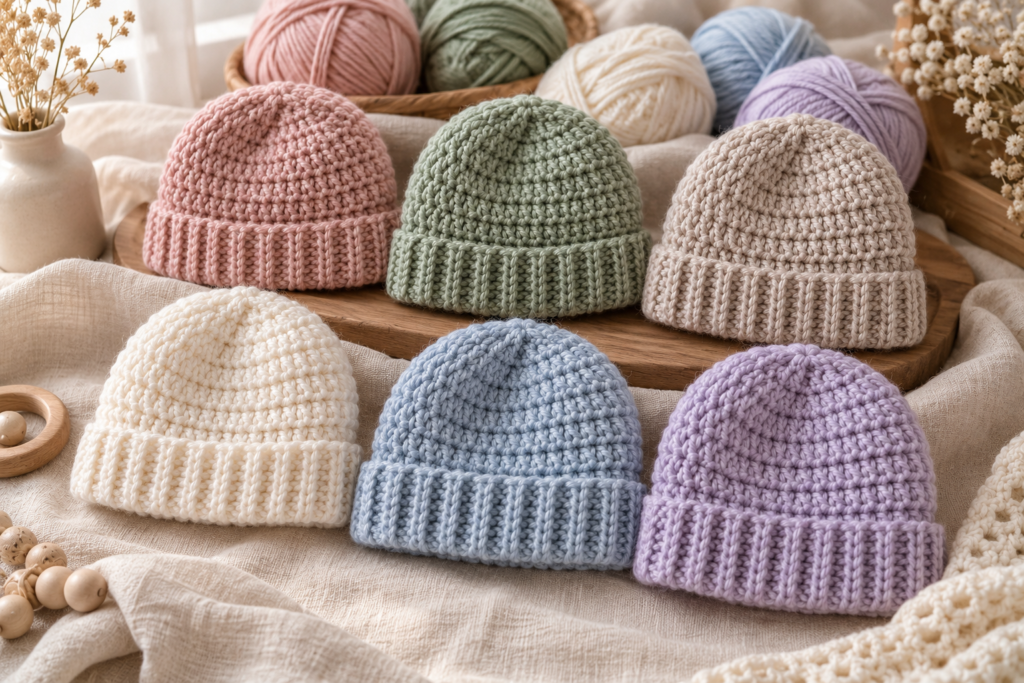
Instead of stripes, use one color for the crown and another for the body.
For example:
Cream crown + dusty-pink body
or:
Sage crown + ivory body
This gives the hat a modern handmade appearance.
How to Make a Newborn Version
For a newborn hat, focus on circumference rather than simply reducing the number of rounds.
Start with the same crown technique but stop increasing once the crown reaches approximately:
11–12 cm diameter
Then work the body until the hat reaches approximately:
13–14 cm total height
Finish with a short brim.
How to Make a 6–12 Month Hat
For this size, continue the crown increases until approximately:
13–14 cm diameter
Then work straight rounds until the finished hat reaches around:
15–16 cm height
Add the brim.
Check the circumference before finishing.
How to Make a 12–24 Month Hat
For older babies and toddlers, continue the crown until it reaches approximately:
14–16 cm diameter
Work additional straight rounds to achieve approximately:
16–18 cm total height
The exact number of rounds depends on your yarn and tension.
How to Adjust the Pattern
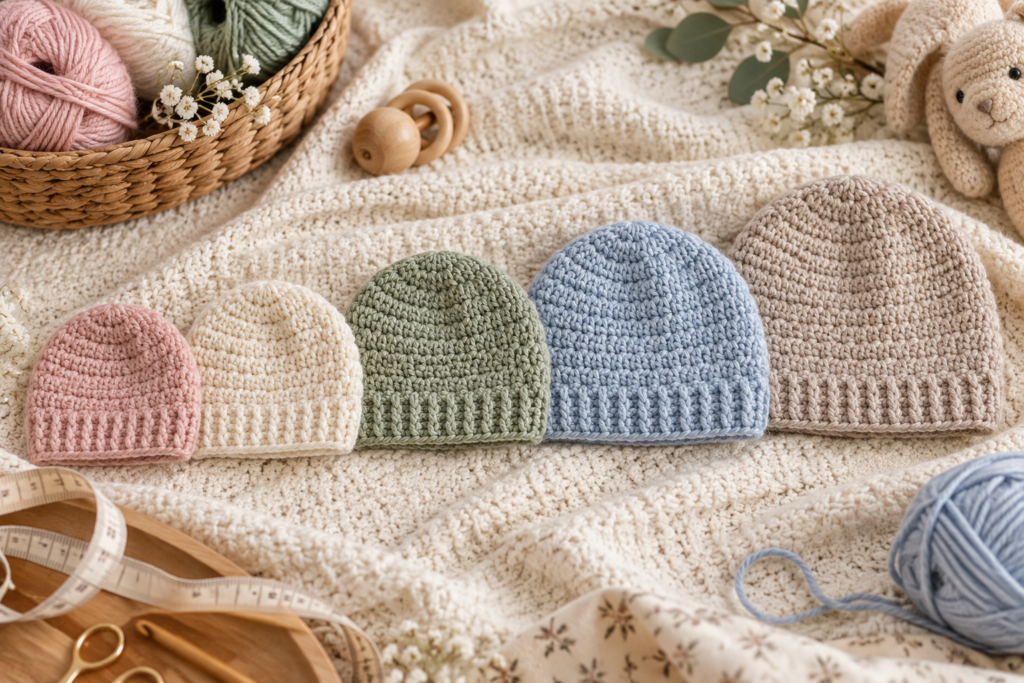
The easiest way to customize this hat is to separate the project into two measurements:
Crown diameter
and
Hat height
Increase the crown until you reach the required diameter.
Then stop increasing and work straight until you reach the desired height.
This is much more reliable than blindly adding or removing rounds.
How to Calculate the Finished Circumference
If you’re comfortable with measurements, you can use:
Desired head circumference × 0.90–0.95
as a starting target for the finished unstretched circumference.
For example, if the baby’s head measures approximately 44 cm:
44 × 0.92 = 40.5 cm
So a finished hat around 40–41 cm in circumference may provide gentle negative ease, depending on the yarn’s stretch.
Always prioritize actual fit and fabric stretch over a mathematical formula.
Checking Your Fit
Before fastening off, gently stretch the hat.
It should:
- Fit over the head
- Stay in place
- Cover the ears if desired
- Not press tightly against the forehead
- Not cover the baby’s eyes
- Feel flexible rather than rigid
Making the Hat More Stretchy
If your hat feels too stiff:
- Use a slightly larger hook
- Choose a more elastic yarn
- Use hdc rather than dense sc
- Avoid overly tight tension
- Add a ribbed BLO brim
Making the Hat Warmer
For colder weather:
- Choose a slightly thicker yarn
- Use a dense stitch
- Add a folded brim
- Make the body slightly longer
- Use a soft wool blend if appropriate for the baby
Avoid making the hat excessively tight.
Making the Hat Lighter
For spring or mild weather:
- Use lightweight cotton or cotton blend
- Use a slightly larger hook
- Choose a breathable stitch
- Make the fabric less dense
How to Keep the Top Round
If the crown starts looking wavy, you’re probably adding increases too quickly.
If it cups upward sharply, you may need more increases.
A correctly shaped crown should gradually flatten as the increases are worked.
Troubleshooting
| Problem | Likely Cause | Solution |
|---|---|---|
| Crown curls upward | Too few increases | Add another increase round |
| Crown becomes wavy | Too many increases | Stop increasing sooner |
| Hat is too small | Tight tension | Use larger hook |
| Hat is too large | Loose tension | Use smaller hook |
| Hat is too short | Not enough body rounds | Add rounds |
| Hat is too tall | Too many body rounds | Remove rounds |
| Brim is too tight | Too little stretch | Use larger hook |
| Brim is too loose | Too many stitches | Reduce stitches |
| Ears look uneven | Different placement | Mark positions before sewing |
| Hat loses shape | Very loose stitches | Use smaller hook |
| Stuffing shows in ears | Too much stuffing | Use less |
| Stripes look uneven | Inconsistent color changes | Change yarn at the same point |
Common Beginner Mistakes
Making the Crown Too Large
The crown determines the eventual circumference.
If you continue increasing after reaching the correct diameter, the hat may become too loose.
Making the Body Too Long
Always measure the hat on a flat surface as you work.
A few extra rounds can significantly change the final proportions on a baby-sized project.
Using a Very Large Hook
A large hook can create gaps between stitches.
For baby hats, a dense but flexible fabric is generally preferable.
Tightening the Brim Too Much
The brim should stretch gently.
It should never feel restrictive.
Professional Finishing
The difference between an amateur-looking and polished crochet hat often comes down to finishing.
After completing the hat:
- Fasten off securely.
- Leave a sufficient yarn tail.
- Weave the tail through several stitches.
- Hide the end inside the fabric.
- Trim the excess.
- Check the brim.
- Shape the crown.
- Position any ears or decorations.
- Check all seams.
- Remove loose fibers.
Baby Safety Considerations
Because this is a baby accessory, keep the design simple and secure.
Avoid loose decorations that could detach.
For very young babies, don’t add:
- Loose buttons
- Beads
- Sequins
- Small bells
- Plastic eyes
- Other detachable small components
If you add ears, bows, flowers or other decorations, sew them securely and inspect the finished hat before use.
The hat should fit comfortably and should never obstruct the baby’s eyes, nose or mouth.
For sleep, follow current safe-sleep guidance from your baby’s healthcare professional rather than treating a crochet hat as sleepwear.
Washing Your Crochet Baby Hat
Always check the yarn label first.
For washable yarn:
- Use gentle detergent.
- Wash according to the yarn manufacturer’s instructions.
- Avoid harsh agitation.
- Reshape while damp.
- Allow it to dry completely.
Avoid high heat if the yarn can shrink or lose its shape.
How to Reshape a Baby Hat
After washing, gently place the hat over a rounded object approximately matching the desired size.
Don’t stretch it aggressively.
Allow it to dry naturally.
This can help restore the original shape.
Crochet Baby Hat Gift Ideas
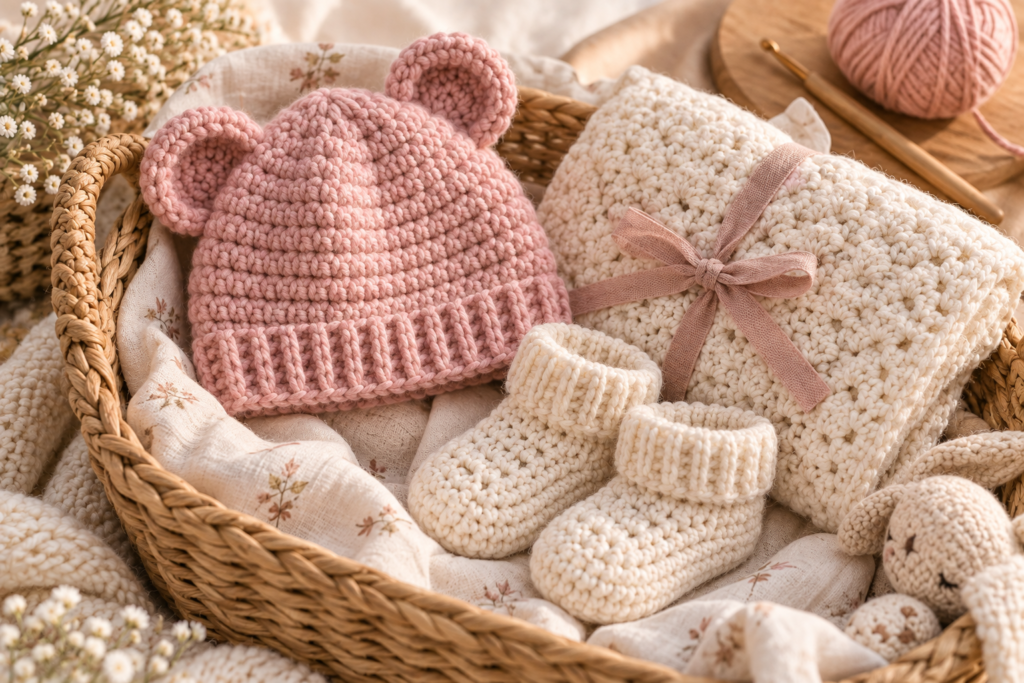
A handmade baby hat becomes even more special as part of a small crochet gift set.
Pair it with:
- Crochet baby socks
- Crochet baby blanket
- Matching baby booties
- Crochet baby sweater
- Baby bib
- Small crochet toy
- Handmade baby card
A coordinated color palette makes the entire gift feel more intentional.
Example Baby Gift Set
| Item | Color |
|---|---|
| Baby Hat | Dusty pink |
| Baby Socks | Cream |
| Baby Blanket | Sage + ivory |
| Booties | Dusty pink |
| Small Bow | Cream |
Baby Shower Color Combinations
For a soft baby-shower aesthetic:
Girl-Inspired
Dusty pink + cream + sage
Boy-Inspired
Powder blue + cream + beige
Gender Neutral
Sage + oatmeal + ivory
Modern Neutral
Taupe + cream + warm gray
Woodland
Olive + camel + cream
Seasonal Baby Hat Ideas
The same basic pattern can become a different project simply by changing the colors and finishing.
Spring
Cream + pastel green
Summer
Soft cotton + pale yellow
Fall
Mustard + rust + cream
Winter
Burgundy + ivory
Christmas
Forest green + cream + red
Valentine’s Day
Dusty pink + burgundy
How to Photograph Your Crochet Baby Hat
For a blog article, photograph the hat from several angles.
Front View
Show the complete silhouette.
Top View
Show the crown construction.
Side View
Show the height and brim.
Close-Up
Focus on:
- Stitch texture
- Ribbed brim
- Ear details
- Yarn fibers
Flat Lay
Place the hat alongside:
- Yarn
- Crochet hook
- Tapestry needle
- Measuring tape
Use soft cream backgrounds and natural light to create a consistent visual identity across your crochet articles.
Turning This Into a Crochet Collection
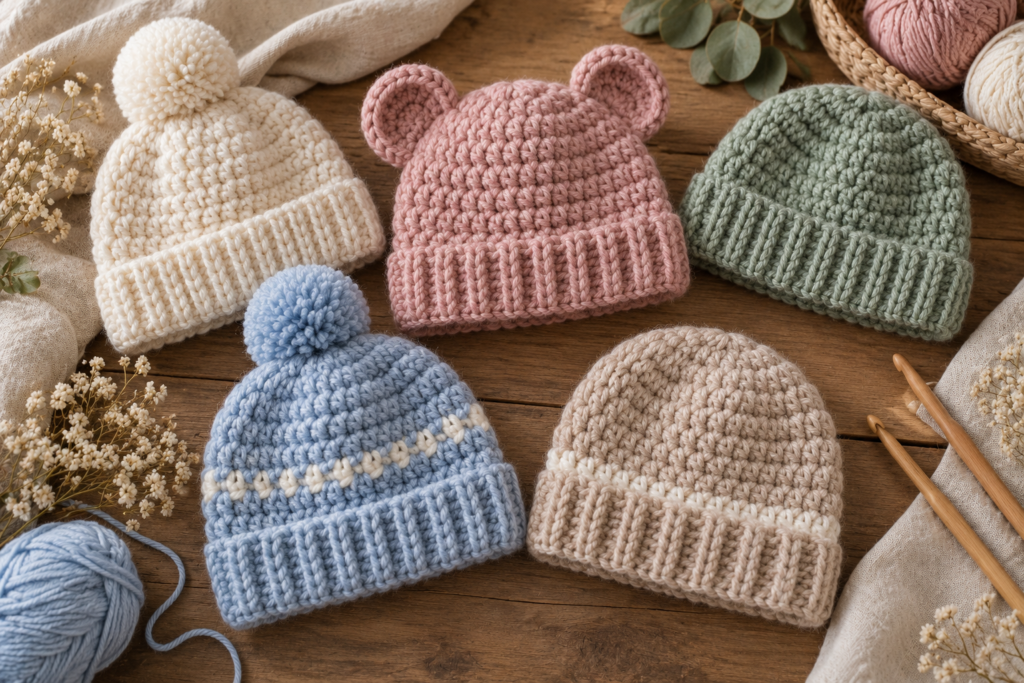
Once you’ve made one baby hat, you can use the same basic construction for an entire collection.
Ideas include:
- Classic baby beanie
- Bear-ear baby hat
- Bunny-ear hat
- Pom-pom winter hat
- Striped baby hat
- Floral baby hat
- Christmas baby hat
- Pumpkin baby hat
- Strawberry baby hat
- Woodland baby hat
This makes the project particularly useful if you’re building a baby crochet content cluster.
Tips for Making Multiple Hats
If you’re making several hats as gifts or for selling:
- Use the same hook
- Keep your tension consistent
- Make one sample in each size
- Record your stitch counts
- Weigh your yarn before and after
- Keep your color combinations organized
- Photograph every finished variation
This makes it easier to reproduce the design later.
Quick Pattern Reference
Crown
R1: MR, 8 hdc
R2: 2 hdc in each stitch = 16
R3: (hdc, inc) around = 24
R4: (2 hdc, inc) around = 32
R5: (3 hdc, inc) around = 40
Continue increasing as necessary until the crown reaches the desired diameter.
Body
Once the crown reaches the desired size:
hdc around
Repeat until the required hat height is reached.
Ribbed Brim
Work:
hdc BLO around
for approximately 4–6 rounds.
Fasten off and weave in the ends.
Optional Bear Ears
R1: MR, 6 sc
R2: inc around = 12
R3: (sc, inc) around = 18
R4: sc around = 18
Fasten off.
Flatten, shape and sew securely to the hat.
Frequently Asked Questions
Is this crochet baby hat pattern beginner-friendly?
Yes. The main hat uses basic crochet stitches, increases and simple shaping. The optional ears require only a few additional rounds.
What yarn is best for a crochet baby hat?
Soft DK-weight washable yarn is a practical choice. Baby acrylic, cotton blends and other soft fibers can work well depending on the desired warmth and care requirements.
What crochet hook should I use?
A 3.5 mm hook is a good starting point for DK-weight yarn, but adjust the hook to achieve a comfortable, flexible fabric and the required gauge.
How much yarn does a baby hat use?
A small hat may require approximately 40–50 g, while larger sizes and designs with ears or other additions may require closer to 60–70 g.
Can I make this crochet hat for a newborn?
Yes. Use the smallest size measurements and stop increasing the crown once it reaches approximately 11–12 cm in diameter. Check the actual fit whenever possible.
Can I make the hat for a toddler?
Yes. Continue increasing the crown to the appropriate diameter and add additional body rounds for the desired height.
How do I make the crochet baby hat bigger?
Increase the crown for additional rounds until you reach the required diameter, then continue with straight rounds.
How do I make the hat smaller?
Stop the increase rounds sooner and use a smaller hook if necessary.
Can I add bear ears?
Yes. The pattern includes optional rounded bear ears that can be sewn securely onto the sides of the hat.
Can I make a pom-pom instead?
Absolutely. A small yarn pom-pom is a simple alternative to the ears.
Can I use cotton yarn?
Yes, provided it produces a comfortable fabric and meets your intended use. Cotton can create a breathable hat, while acrylic or blends may provide more stretch.
Why is my crochet baby hat curling?
A crown that curls upward may need additional increases. If the crown becomes wavy, you may have added too many increases.
Why is my brim too tight?
Your tension may be too tight, or the hook may be too small. Try a slightly larger hook or a more elastic stitch.
How do I know if the hat fits correctly?
Measure the baby’s head and compare it with the finished circumference. The hat should stay comfortably in place without being excessively tight.
Can I sell hats made from this pattern?
You can make finished handmade hats for personal use or sale, subject to any applicable pattern-use terms and local requirements. Use your own photography and product descriptions.
Final Thoughts
This crochet baby hat pattern is a simple foundation for creating an entire collection of handmade baby accessories.
The top-down construction makes the design particularly useful because you can stop increasing when the crown reaches the desired size and then simply continue working the body until the hat reaches the correct height.
For a classic version, keep the hat in one soft color and finish it with a simple ribbed-look brim. For something more playful, add bear ears, a pom-pom, stripes, flowers or contrasting colors.
The most important part is the fit. Baby sizing can vary considerably, so use the measurements as starting points and check the finished circumference whenever possible.
With a soft yarn, a 3.5 mm crochet hook, basic stitches and a little patience, you can turn this simple beanie construction into everything from a newborn hat to a cute toddler accessory.
And once you’ve made one, it’s easy to build a matching handmade collection with crochet baby socks, baby booties, blankets and sweaters for an especially thoughtful baby-shower gift.