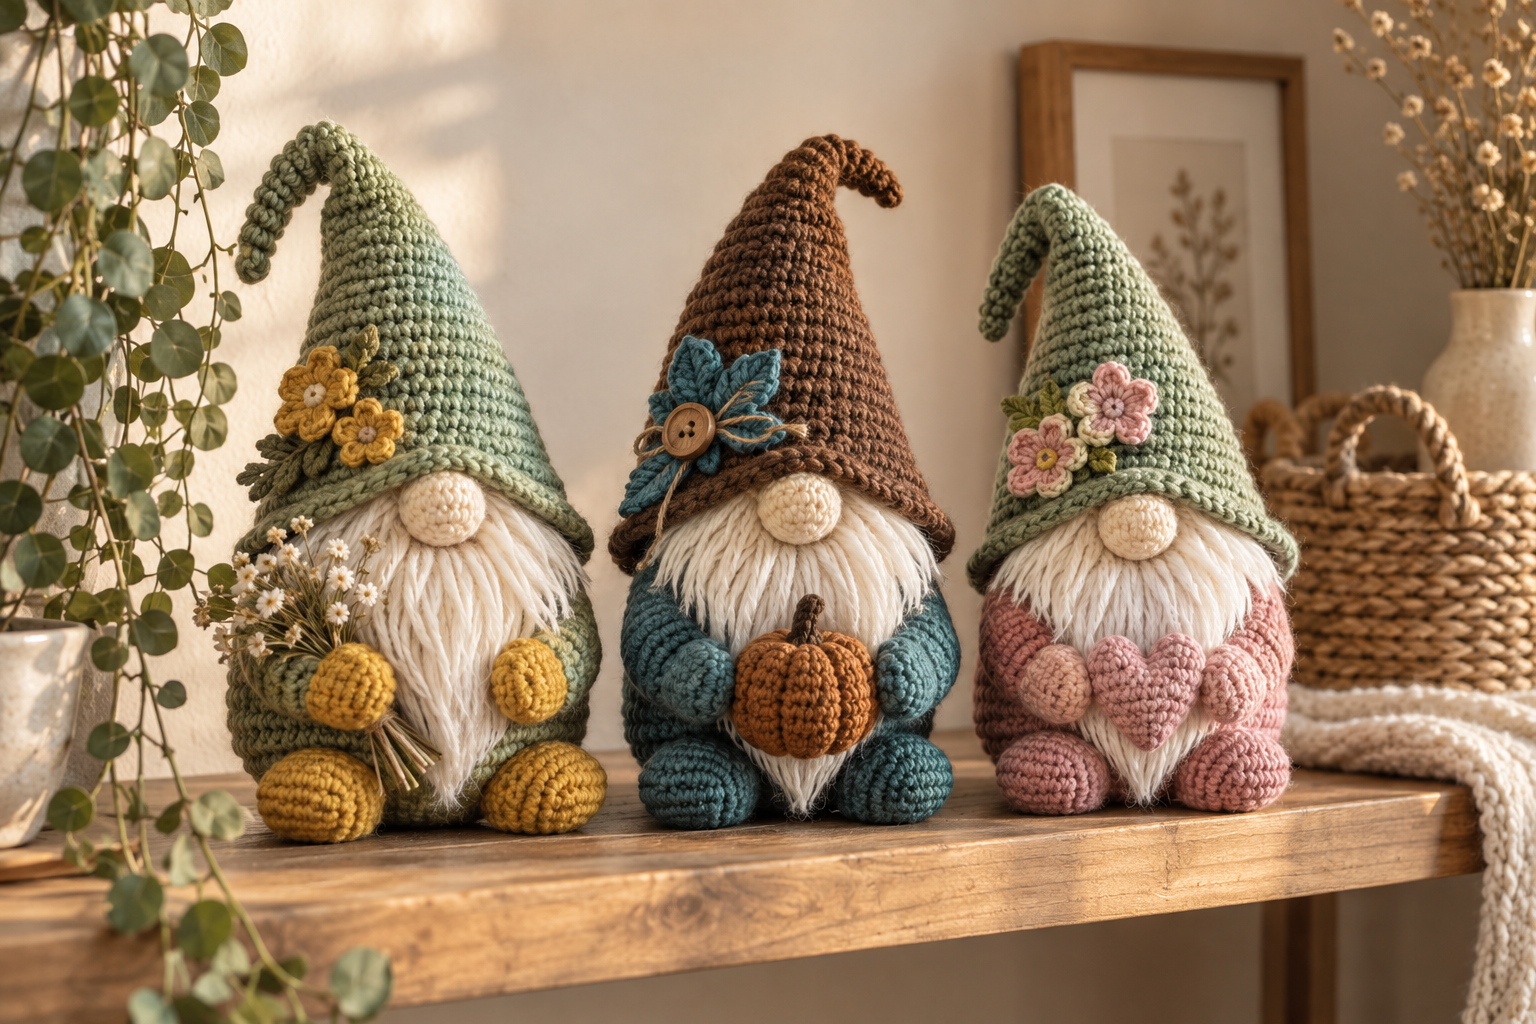
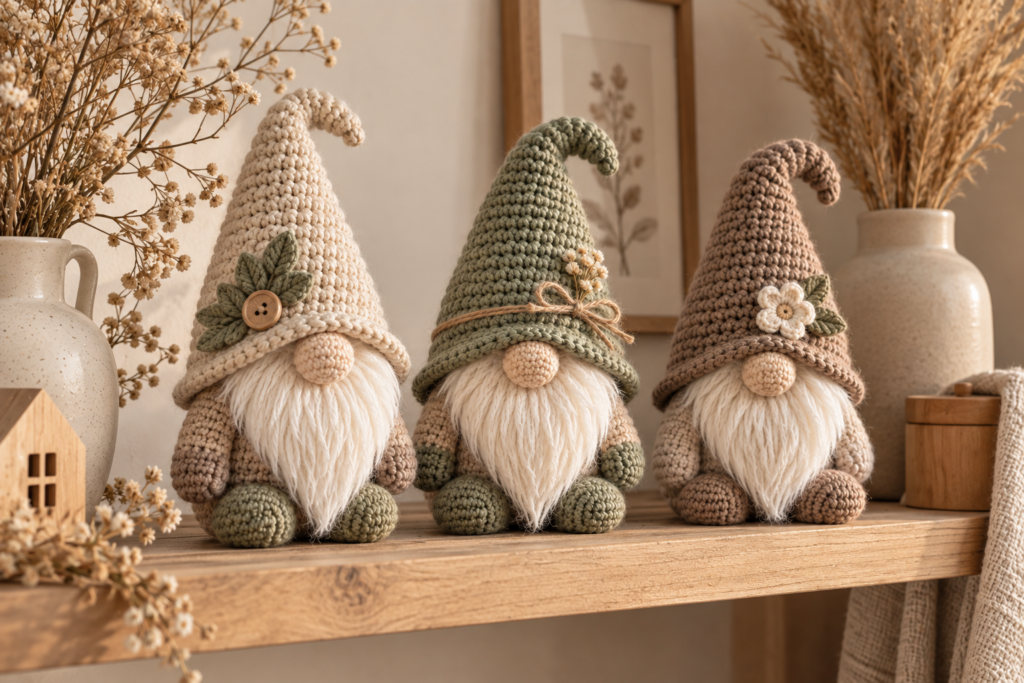
If you love cute handmade home décor, this easy crochet gnome pattern is a fun project to add to your seasonal and everyday crochet collection. These little gnomes are made from simple crocheted shapes, fluffy yarn beards, a pointed hat and a small wooden bead or crocheted nose.
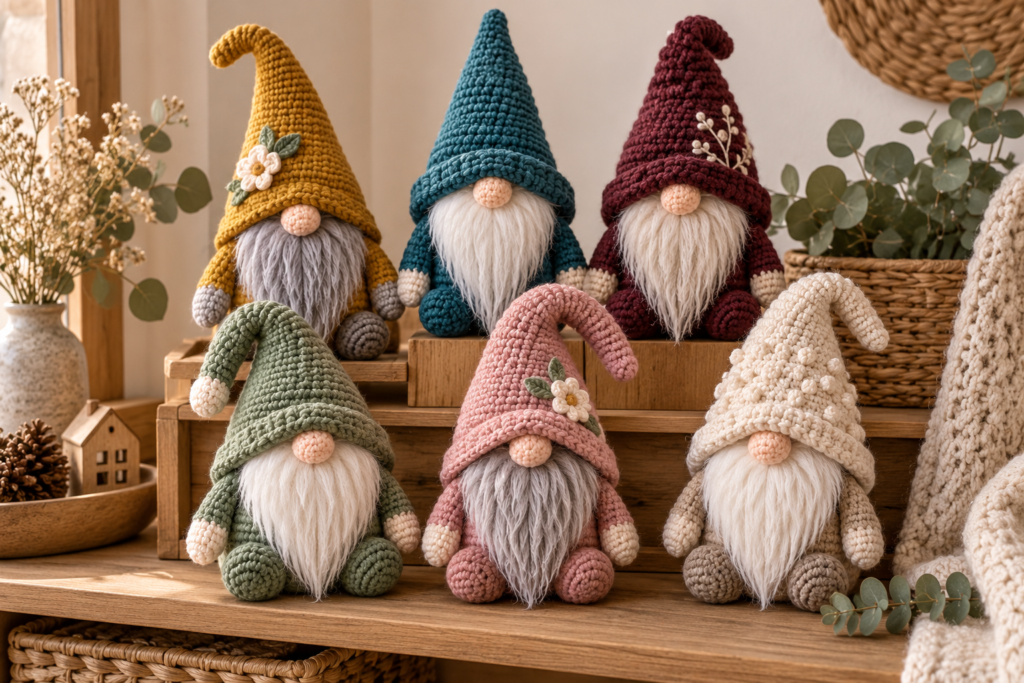
The beauty of this project is that you can make an entire family of gnomes simply by changing the yarn colors. Try sage green and cream for a Scandinavian look, mustard and brown for autumn, pink and ivory for Valentine’s Day, or red and green for Christmas.
This tutorial includes an original, beginner-friendly gnome construction inspired by the uploaded visual. It includes the body, pointed hat, nose, arms, feet, beard, assembly, sizing, color combinations, finishing techniques and troubleshooting.
Why Make These Crochet Gnomes?
Crochet gnomes are particularly good projects when you want something decorative without making a large item.
They’re useful for:
- Fall decorations
- Christmas décor
- Scandinavian-style home décor
- Shelf styling
- Tiered trays
- Mantel decorations
- Handmade gifts
- Craft fairs
- Seasonal table decorations
- Scrap-yarn projects
- Beginner crochet practice
You can also make three or more gnomes in coordinated colors to create a little decorative collection.
Finished Gnome Size
The sample design is approximately 18–22 cm tall, depending on your yarn, hook size and tension.
| Version | Approx. Height | Recommended Use |
|---|---|---|
| Mini | 10–13 cm | Tiered trays, gifts |
| Small | 14–17 cm | Shelves, baskets |
| Medium | 18–22 cm | Mantel, table décor |
| Large | 23–28 cm | Floor baskets, large displays |
The pattern below is written for the medium version.
You can adjust the height later using the instructions in the sizing section.
Materials
| Material | Recommendation |
|---|---|
| Main yarn | Worsted/medium weight |
| Body color | Green, cream, brown or preferred color |
| Hat yarn | Contrasting color |
| Beard yarn | Cream, white, gray or beige |
| Crochet hook | 3.5 mm |
| Tapestry needle | 1 |
| Scissors | 1 |
| Stuffing | Polyester fiberfill |
| Nose | 20 mm wooden bead or crocheted nose |
| Stitch marker | Optional |
| Sewing needle | For assembly |
| Optional | Small pom-pom |
Yarn Colors
For a classic gnome collection, try:
Traditional
- Forest green
- Mustard
- Burgundy
- Cream
Scandinavian
- Sage
- Ivory
- Beige
- Dusty rose
Christmas
- Red
- Forest green
- White
- Brown
Neutral
- Oatmeal
- Taupe
- Cream
- Warm gray
Choosing the Yarn
A smooth worsted-weight yarn works particularly well for the body and hat because it gives you clear stitch definition.
For the beard, use a yarn that can be brushed, separated or gently unraveled to create a fluffy appearance.
Avoid extremely bulky yarn for the body unless you adjust the hook size and pattern accordingly.
Crochet Hook
A 3.5 mm crochet hook is a good starting point for worsted-weight yarn.
Your goal is to create a fabric that is dense enough that the stuffing doesn’t show through.
If your stitches are very loose, try a smaller hook.
If the fabric feels excessively stiff, move up slightly.
Crochet Abbreviations
This pattern uses US crochet terminology.
| Abbreviation | Meaning |
|---|---|
| MR | Magic ring |
| ch | Chain |
| sc | Single crochet |
| inc | Increase |
| dec | Decrease |
| sl st | Slip stitch |
| st | Stitch |
| sts | Stitches |
| FO | Fasten off |
| BLO | Back loop only |
Important Construction Note
The gnome consists of five main components:
- Body
- Pointed hat
- Nose
- Arms and feet
- Beard
The body and hat are worked in rounds.
The nose can be crocheted or replaced with a wooden bead.
The beard is made separately and attached beneath the nose.
Crochet Gnome Body Pattern
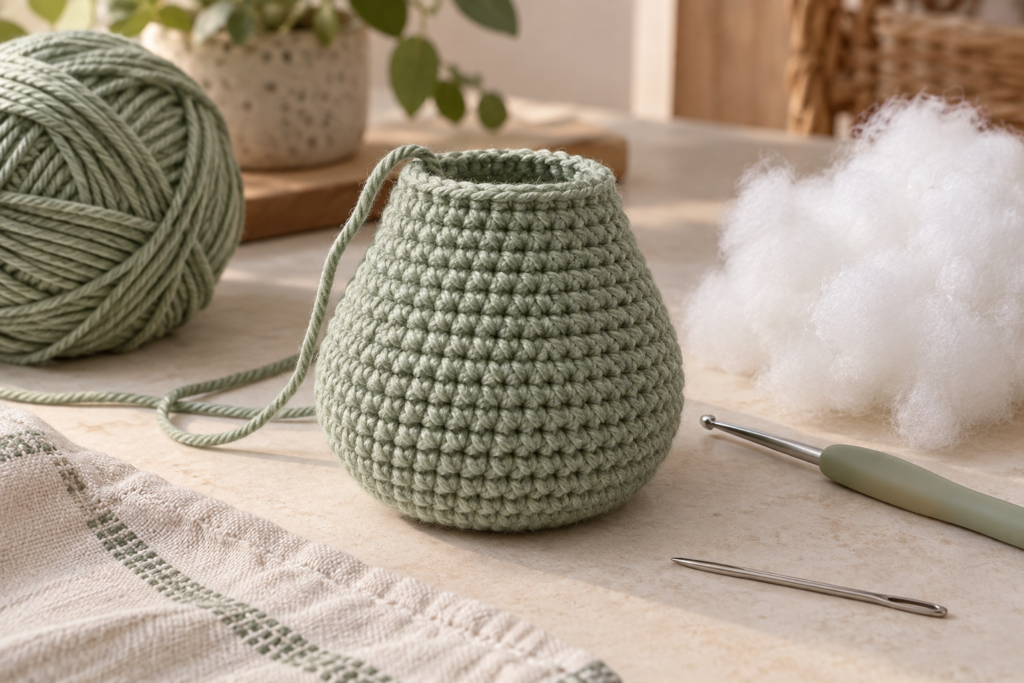
The body is designed as a rounded stuffed shape with a relatively flat bottom.
Use your main body color.
Body — Round 1
Make a magic ring.
Work:
6 sc into the ring.
Stitch count:
6
Round 2
Work:
inc around
You should have:
12 sts
Round 3
Work:
(sc, inc) × 6
Stitch count:
18
Round 4
Work:
(2 sc, inc) × 6
Stitch count:
24
Rounds 5–13
Work:
sc around
Each round:
24 sts
This creates the main height of the body.
At this stage, the piece should resemble a small rounded pouch.
Round 14
Work:
(2 sc, dec) × 6
Stitch count:
18
Round 15
Work:
(sc, dec) × 6
Stitch count:
12
Begin adding stuffing gradually.
Don’t wait until the final round to stuff the body.
Round 16
Work:
dec × 6
Stitch count:
6
Fasten off.
Leave a yarn tail.
Use your tapestry needle to close the remaining opening.
Weave in the end securely.
How to Stuff the Gnome Body
The stuffing determines the final shape.
Add small amounts at a time.
Push stuffing toward the sides first.
Then fill the center.
The body should feel firm but not rock-hard.
Too little stuffing can make the gnome collapse.
Too much can stretch the stitches and make the stuffing visible.
Professional Tip
Before closing the bottom, place the body on a flat surface.
If it rocks excessively, redistribute the stuffing.
A stable bottom will make the finished gnome look much more polished.
Crochet Gnome Hat Pattern
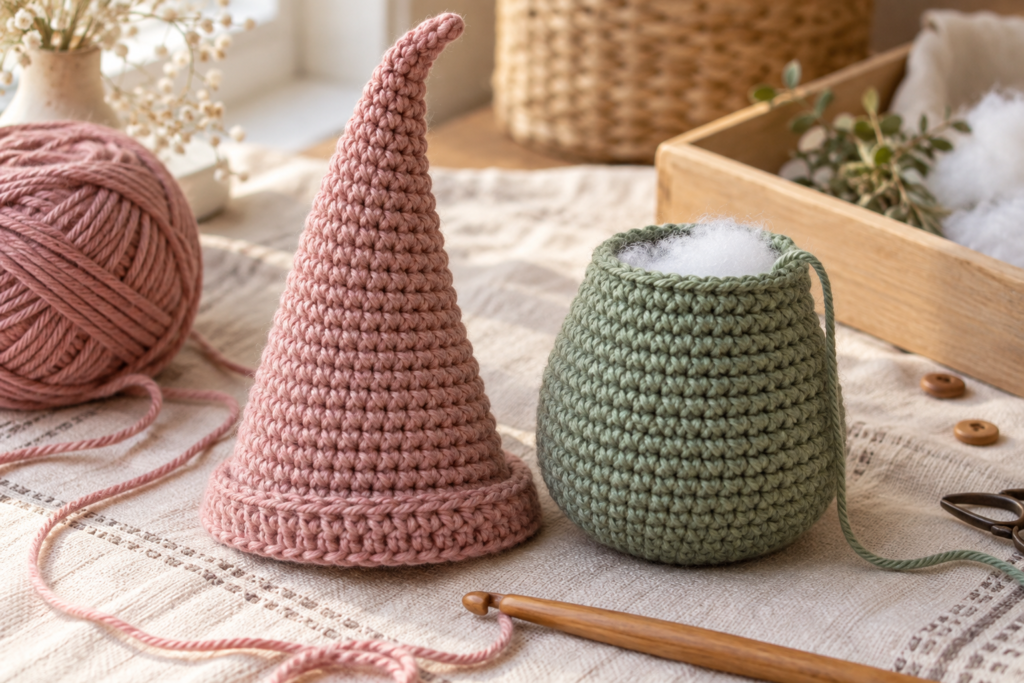
The pointed hat is one of the most recognizable parts of the gnome.
Use a contrasting color.
For example:
Sage body + mustard hat
or
Cream body + dusty-pink hat
Hat — Round 1
Make a magic ring.
Work:
6 sc into the ring
Stitch count:
6
Round 2
inc around
Stitch count:
12
Round 3
(sc, inc) × 6
Stitch count:
18
Round 4
(2 sc, inc) × 6
Stitch count:
24
Round 5
(3 sc, inc) × 6
Stitch count:
30
Rounds 6–20
Work:
sc around
Stitch count:
30 sts
This creates the long pointed section of the hat.
For a softer, floppy hat, you can work a few additional rounds.
For a shorter hat, stop earlier.
Shaping the Bottom of the Hat
Round 21
Work:
(3 sc, dec) × 6
Stitch count:
24
Round 22
Work:
(2 sc, dec) × 6
Stitch count:
18
Round 23
Work:
(sc, dec) × 6
Stitch count:
12
Round 24
Work:
dec × 6
Stitch count:
6
Fasten off.
Leave a long yarn tail.
You can either close the top or use the remaining opening as part of the hat construction depending on your preferred finishing method.
Making the Hat Brim
For a cleaner finished hat, attach yarn around the lower edge.
Work 1–2 rounds of single crochet.
For a slightly rolled brim:
Sc around for 2 rounds.
For a textured brim:
Work one round in BLO single crochet.
This creates a subtle ridge.
Optional Hat Pom-Pom
A small pom-pom can be attached to the tip.
You can make one from matching yarn or use a small handmade pom-pom.
Keep decorative components securely attached.
For a minimalist gnome, simply leave the tip plain.
Crochet Gnome Nose Pattern
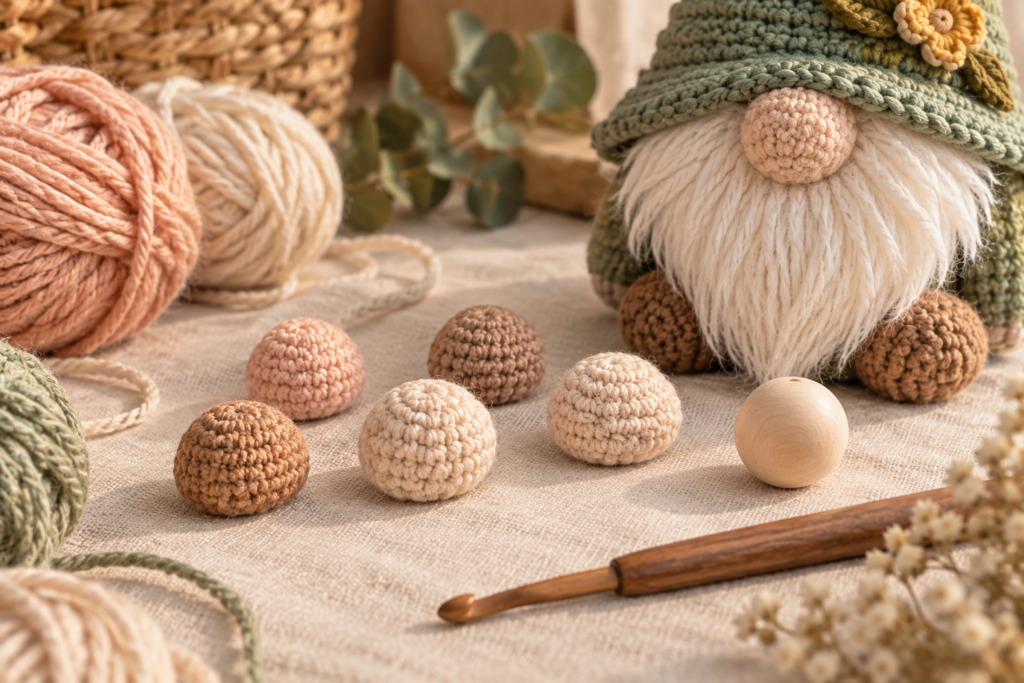
The nose can be made from a small wooden bead, as shown in the inspiration image, or crocheted.
For the crocheted version, use a peach, beige or light-brown yarn.
Nose — Round 1
Make a magic ring.
Work:
6 sc into the ring
Stitch count:
6
Round 2
inc around
Stitch count:
12
Round 3
sc around
Stitch count:
12
Fasten off.
Leave a long tail.
Stuff very lightly.
Sew the opening closed.
The finished nose should resemble a small rounded ball.
Wooden Bead Nose
If you prefer the appearance of the original visual, use an approximately 20 mm wooden bead.
Choose a bead with a smooth surface.
Attach it securely using strong thread or yarn.
The nose should sit firmly against the crochet body.
Crochet Gnome Arms
The arms are optional but add a lot of personality.
Use the body color.
Arm — Make 2
Round 1
MR.
6 sc
Round 2
(sc, inc) × 3
9 sts
Rounds 3–7
sc around
9 sts
Fasten off.
Leave a long tail.
Stuff very lightly.
You don’t want the arms to become stiff.
Flatten the top slightly.
Sew the arm to the side of the body.
Repeat for the second arm.
Optional Crochet Hands
For a more detailed gnome, use a contrasting yarn for a small hand.
Work:
MR, 6 sc
Then:
sc around for 2–3 rounds.
Fasten off.
Sew the hand to the bottom of the arm.
For a minimalist design, skip the hands.
Crochet Gnome Feet
The feet can be simple rounded pieces.
Use brown, mustard or the same color as the body.
Make 2.
Round 1
MR.
6 sc
Round 2
inc around
12 sts
Rounds 3–4
sc around
12 sts
Round 5
(sc, dec) × 6
6 sts
Stuff lightly.
Fasten off.
Close the opening.
Sew the feet to the bottom of the body.
Creating the Beard
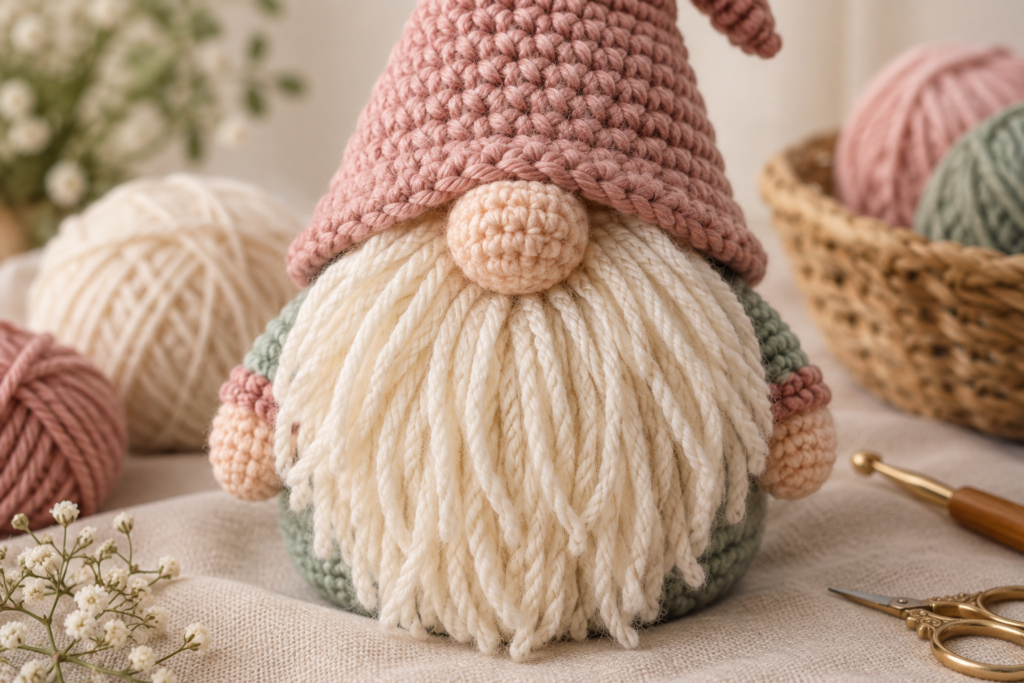
The beard gives the gnome its characteristic appearance.
You don’t need a complicated crochet stitch.
You can create a realistic beard with yarn strands.
What You’ll Need
- Cream, ivory or gray yarn
- Scissors
- Tapestry needle
Cut multiple strands approximately:
20–25 cm long
Fold each strand in half.
Attach them beneath the nose.
Continue adding strands until the beard reaches the desired fullness.
How to Make a Fuller Beard
Instead of attaching individual strands one at a time, create small groups of 2–3 strands.
Attach each group to the body.
This makes the beard fuller while reducing the amount of time required.
How to Shape the Beard
After attaching the strands, trim the bottom into your preferred shape.
Rounded Beard
Trim the center slightly shorter and keep the sides longer.
Straight Beard
Trim all strands to approximately the same length.
Long Beard
Leave the strands around 25–30 cm.
Short Beard
Use approximately 15–18 cm strands.
Making the Beard Fluffy
For a softer, fuller appearance, gently separate the yarn fibers.
You can use your fingers or a suitable yarn brush.
Work slowly.
Don’t pull aggressively because you can loosen the attachment points.
Gnome Assembly
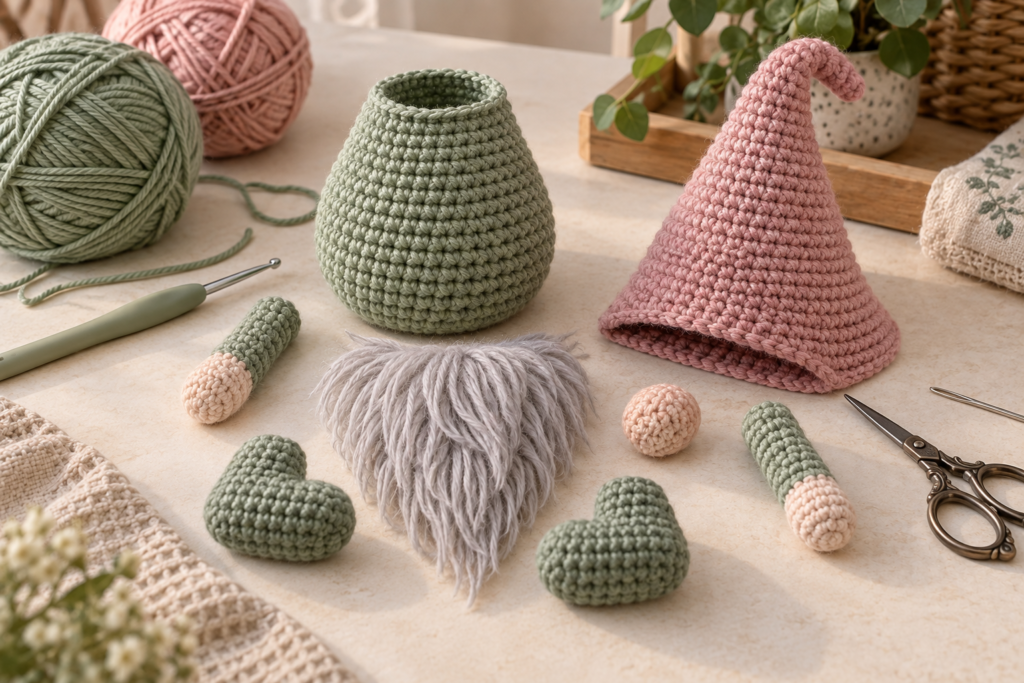
Now it’s time to bring the pieces together.
Step 1: Attach the Feet
Position the two feet at the bottom of the body.
Sew them securely.
Make sure the body can still sit upright.
Step 2: Attach the Arms
Position the arms on opposite sides.
Sew them securely using the yarn tails.
Step 3: Attach the Beard
Position the beard on the front of the body.
The top of the beard should sit around the upper-middle portion of the body.
Secure it with several stitches.
Step 4: Attach the Nose
Place the nose above the beard.
Sew it firmly into position.
Step 5: Add the Hat
Place the hat over the top of the body.
Adjust it until the brim sits naturally above the beard and nose.
Secure the hat with a few discreet stitches if desired.
You can leave it removable if you want to change hats.
Where Should the Nose Go?
The nose should sit:
above the beard
and
below the hat brim.
A slightly lower nose creates a cute, sleepy gnome appearance.
A higher nose creates a more traditional gnome silhouette.
Experiment before permanently sewing it in place.
Gnome Proportions
A cute gnome usually works best when the hat is relatively large compared with the body.
A useful visual proportion is:
| Component | Approximate Proportion |
|---|---|
| Body | 45–55% |
| Hat | 40–50% |
| Nose | Small focal point |
| Beard | 25–35% of body height |
The exact proportions can be changed depending on your preferred style.
How to Make a Taller Gnome
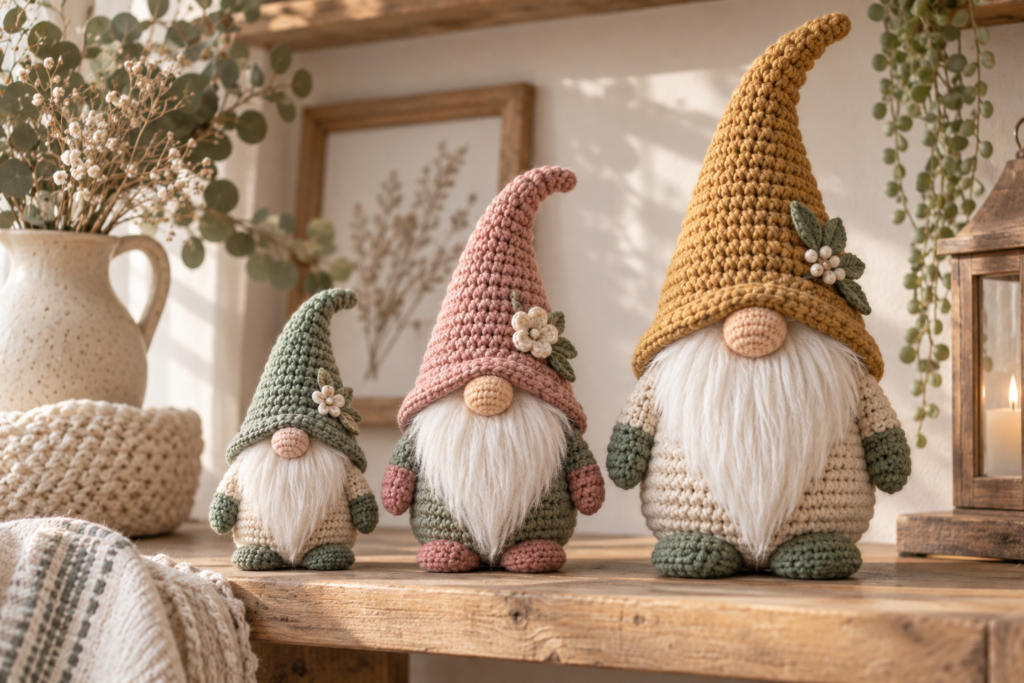
To create a taller gnome, add additional body rounds before beginning the decreases.
For example:
Instead of working straight through Round 13, continue the 24-sc rounds for several additional rounds.
This makes the body taller without changing the width.
For the hat, add additional straight rounds before beginning the decreases.
How to Make a Shorter Gnome
For a shorter version, reduce the number of straight rounds.
For example:
Body:
Rounds 5–9: sc around
instead of continuing through Round 13.
Hat:
Stop several rounds earlier.
This creates a shorter, more compact gnome.
How to Make a Wider Gnome
Add another increase round before beginning the straight rounds.
For example:
Round 5
(3 sc, inc) × 6
You now have:
30 sts
Then work several rounds at 30 stitches.
This creates a wider body.
Remember to increase the hat proportionally if you make a significantly wider body.
How to Make a Mini Crochet Gnome
For a mini gnome:
- Use lighter yarn
- Use a 2.5–3.0 mm hook
- Reduce the number of straight rounds
- Make a smaller hat
- Use a smaller nose
- Shorten the beard
Mini gnomes are excellent for:
- Tiered trays
- Gift toppers
- Christmas ornaments
- Shelf decorations
- Miniature displays
How to Make a Christmas Gnome
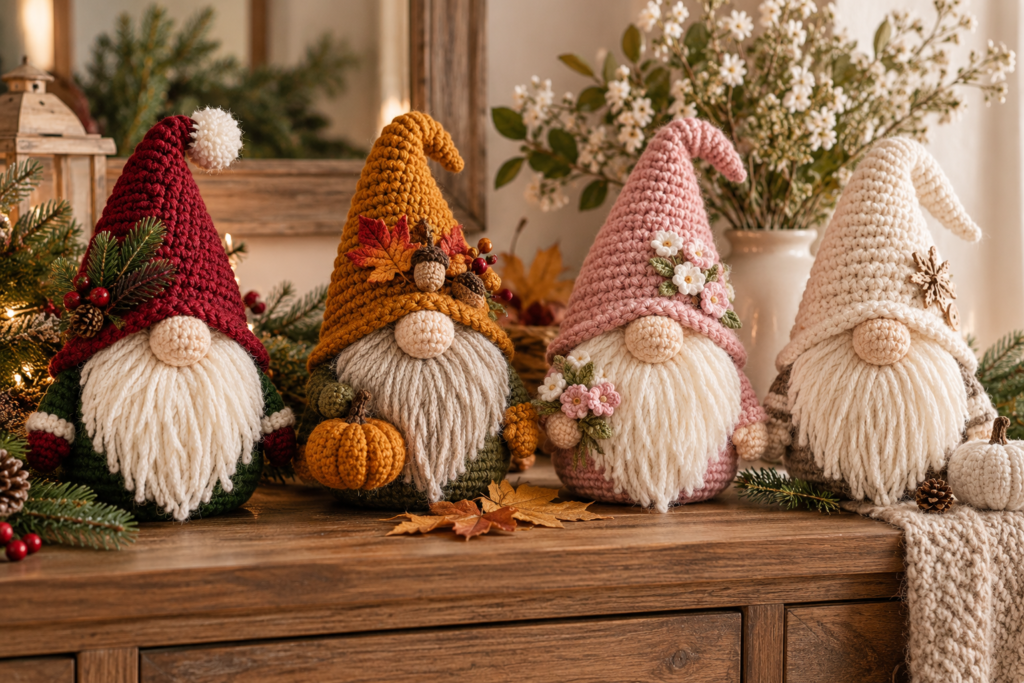
Use:
Burgundy body
Forest-green hat
Cream beard
Wood-tone nose
Add a small cream pom-pom to the hat.
You can also reverse the colors.
How to Make a Fall Gnome
Try:
Mustard hat
Olive body
Cream beard
Brown nose
This combination works beautifully with pumpkins, dried leaves and warm wooden décor.
How to Make a Pink Gnome
For a softer aesthetic:
Dusty pink hat
Sage body
Cream beard
Peach nose
This creates a pastel cottage-style gnome.
How to Make a Neutral Gnome
Use:
Oatmeal
Ivory
Taupe
Warm gray
Avoid strong color contrasts.
The result works particularly well with minimalist or Scandinavian interiors.
Crochet Gnome Color Combinations
| Gnome Style | Body | Hat | Beard | Nose |
|---|---|---|---|---|
| Scandinavian | Sage | Mustard | Cream | Peach |
| Neutral | Oatmeal | Taupe | Ivory | Beige |
| Christmas | Burgundy | Green | Cream | Brown |
| Pastel | Sage | Dusty Pink | Ivory | Peach |
| Autumn | Olive | Mustard | Cream | Brown |
| Coastal | Cream | Dusty Blue | Ivory | Beige |
| Traditional | Green | Red | White | Brown |
How to Make a Gnome Family
One of the cutest ways to display these is as a coordinated collection.
Make:
Small gnome
Medium gnome
Large gnome
Use different hat colors but keep the body colors coordinated.
For example:
| Gnome | Body | Hat |
|---|---|---|
| Small | Cream | Pink |
| Medium | Sage | Mustard |
| Large | Cream | Teal |
Place them together on a shelf or wooden tray.
Adding Crochet Details
You can customize your gnome with additional crochet elements.
Ideas include:
- Tiny hearts
- Small stars
- Crochet flowers
- Mini pumpkins
- Striped hats
- Textured hat brims
- Pom-poms
- Tiny scarves
Keep additions securely attached, especially if the gnome will be handled frequently.
Striped Gnome Hat
A striped hat is very easy to create.
Change colors every:
2 rounds
or
3 rounds.
For example:
| Rounds | Color |
|---|---|
| 1–3 | Burgundy |
| 4–6 | Cream |
| 7–9 | Burgundy |
| 10–12 | Cream |
| 13–15 | Burgundy |
Continue until the hat is complete.
Textured Hat
For additional texture, alternate rounds of:
sc
and
BLO sc
The back-loop rounds create subtle horizontal ridges.
This works particularly well with neutral yarn colors.
Adding a Hat Band
A simple contrasting hat band can make the design look more finished.
Crochet a narrow strip.
For example:
Chain 4
Work sc across.
Continue until the strip fits around the hat brim.
Sew it around the bottom of the hat.
Gnome With a Curved Hat
You can create a floppy curved hat by gently shaping the finished hat before attaching it.
Stuff the hat very lightly.
Bend the tip to one side.
Use a few hidden stitches to hold the curve.
This gives the gnome a playful personality.
Gnome With a Tall Pointed Hat
For a classic silhouette, make the hat longer.
Continue the straight rounds before starting the decreases.
A taller hat can make the gnome look more whimsical.
Making the Gnome Stand Upright
If your gnome tips over, check the following:
The stuffing
Redistribute the stuffing so the body is evenly filled.
The feet
Make sure both feet sit at the same level.
The bottom
The base should be relatively flat.
The hat
A very heavy hat can affect balance.
If necessary, reduce the stuffing in the hat.
Optional Weighted Base
For a decorative gnome that needs additional stability, place a small amount of suitable weight inside the bottom of the body before adding stuffing.
Make sure the weight is completely enclosed and cannot escape through the crochet fabric.
For a household decoration, you can also place the finished gnome on a stable decorative surface rather than adding internal weight.
Finishing the Crochet Gnome
After assembling the pieces:
- Check every seam.
- Trim excess yarn tails.
- Hide the ends inside the body.
- Shape the beard.
- Adjust the hat.
- Check the nose position.
- Straighten the arms and feet.
- Place the gnome on a flat surface.
- Make final adjustments.
Good finishing can make a simple crochet pattern look much more professional.
Blocking
The body usually doesn’t require blocking because it is stuffed.
The hat may benefit from light shaping.
If the brim is uneven, gently reshape it with your fingers.
Avoid aggressively wetting stuffed pieces.
Crochet Gnome Troubleshooting
| Problem | Cause | Solution |
|---|---|---|
| Body looks too narrow | Too few increase rounds | Add an increase round |
| Body is too wide | Too many increases | Reduce increase rounds |
| Stuffing shows | Stitches are too loose | Use a smaller hook |
| Gnome falls over | Uneven base | Adjust stuffing and feet |
| Hat is too loose | Brim is too wide | Reduce hook size or stitches |
| Hat is too short | Too few straight rounds | Add more rounds |
| Hat doesn’t stand | Too much stuffing | Reduce stuffing |
| Beard looks thin | Too few strands | Add more yarn strands |
| Beard looks messy | Uneven strands | Trim after attachment |
| Nose looks too large | Bead is oversized | Use a smaller nose |
| Arms don’t match | Different stuffing | Use the same amount |
| Feet look uneven | Different placement | Mark positions before sewing |
| Hat slips | Loose fit | Add discreet securing stitches |
Beginner Tips
If this is your first amigurumi-style project, remember these tips.
Use a stitch marker
Place a marker in the first stitch of each round.
This makes counting much easier.
Count regularly
Don’t wait until the end to discover that your stitch count changed.
Keep tension consistent
Uneven tension can make the body lumpy.
Stuff gradually
Adding stuffing little by little gives you much more control over the shape.
Don’t overstuff
The crochet fabric should remain smooth.
Common Mistakes
Losing the Beginning of the Round
If you work continuously without a stitch marker, it’s easy to lose your place.
Use a marker.
Increasing in the Wrong Stitch
This can cause the body to become uneven.
Count your stitches at the end of every increase round.
Overstuffing
Too much stuffing stretches the stitches.
Fill the body firmly but gently.
Sewing the Beard Too High
If the beard is placed too high, it may cover the nose.
Position the beard first, then place the nose.
How to Photograph Crochet Gnomes
These little projects are highly photogenic.
For your blog, create several different photographs.
Main Collection
Show three gnomes together in different colors.
Close-Up
Focus on:
- Beard texture
- Nose
- Crochet stitches
- Hat
- Pom-pom
Materials
Arrange:
- Yarn
- Hook
- Stuffing
- Needle
- Nose
- Scissors
Finished Size
Place small, medium and large gnomes together.
Seasonal Styling
Photograph the gnomes with:
- Mini pumpkins
- Pine branches
- Dried flowers
- Candles
- Wooden trays
- Seasonal textiles
Keep the decorative background subtle so the crochet project remains the focal point.
How to Turn One Pattern Into Multiple Products
Once you understand this construction, you can create an entire collection.
Try:
Mini gnome
Christmas gnome
Fall gnome
Pastel gnome
Neutral gnome
Striped gnome
Scandinavian gnome
Fluffy-beard gnome
Long-hat gnome
Miniature shelf gnome
The basic body and construction remain largely the same.
Crochet Gnome Gift Ideas
A handmade gnome makes a charming small gift.
You can package one with:
- A small crochet ornament
- A handmade mug cozy
- A mini crochet bow
- A seasonal card
- A small decorative basket
For Christmas, create a set of three coordinated gnomes.
For housewarming gifts, use neutral colors.
Selling Handmade Crochet Gnomes
These are also suitable for craft fairs and handmade shops.
Consider offering:
Individual Gnomes
One finished gnome in a selected color.
Gnome Families
Three coordinating gnomes.
Seasonal Collections
Halloween, fall, Christmas and Valentine’s Day.
Personalized Collections
Allow customers to choose:
- Hat color
- Body color
- Beard color
- Size
When selling handmade pieces, photograph your own finished work and clearly describe the dimensions and materials.
Crochet Gnome Size Comparison
| Version | Body | Hat | Best For |
|---|---|---|---|
| Mini | Short | Short | Small displays |
| Small | Compact | Medium | Shelves |
| Medium | Standard | Tall | Home décor |
| Large | Wide | Tall | Mantels |
| Extra Large | Oversized | Very tall | Statement décor |
Care Instructions
Because this is a decorative stuffed crochet item, care should be gentle.
Remove surface dust regularly.
Use a soft brush or low-suction vacuum attachment carefully.
For washable yarn, follow the yarn manufacturer’s instructions.
Avoid soaking a stuffed gnome unless all materials and internal components are suitable for washing.
Wooden beads should not be exposed to excessive moisture.
Frequently Asked Questions
Is this crochet gnome pattern beginner-friendly?
Yes. The main body and hat use basic single crochet, increases and decreases. The beard and assembly are also straightforward.
What yarn should I use?
Worsted-weight yarn is a good starting point. Smooth yarn works well for the body and hat, while a textured or brushable yarn can create a fuller beard.
How tall is the finished gnome?
The standard version is approximately 18–22 cm tall, depending on yarn, hook size and tension.
Can I make the gnome smaller?
Yes. Reduce the number of straight rounds in the body and hat and use lighter yarn.
Can I make the gnome larger?
Yes. Add additional straight rounds and consider adding an extra increase round if you want a wider body.
Can I use a wooden bead for the nose?
Yes. An approximately 20 mm wooden bead can create the classic gnome nose shown in the inspiration style. Attach it securely.
Can I crochet the nose instead?
Absolutely. The small crocheted nose included above is a good alternative.
What can I use for the beard?
You can use ordinary yarn, brushed yarn or a specialty yarn with a fluffy texture.
How do I make the beard fuller?
Add more yarn strands or small groups of strands and gently separate the fibers after attaching them.
Can I make the hat floppy?
Yes. Use additional straight rounds and avoid heavily stuffing the hat.
Can I make the hat curved?
Yes. Gently bend the finished hat and secure the desired shape with a few hidden stitches.
Why is my gnome falling over?
Check the bottom shape, stuffing distribution and placement of the feet. A flat, balanced base is important.
Can I make several gnomes from the same pattern?
Yes. Changing the colors and proportions can create an entire collection without changing the basic construction.
Can I sell finished gnomes made from this pattern?
You can use your own handmade work as finished products, subject to the terms that apply to your use of the pattern. Use your own photography and product descriptions rather than copying another creator’s content.
Quick Pattern Summary
For easy reference:
Body
MR 6
R2: inc ×6 = 12
R3: (sc, inc) ×6 = 18
R4: (2 sc, inc) ×6 = 24
R5–13: sc around = 24
R14: (2 sc, dec) ×6 = 18
R15: (sc, dec) ×6 = 12
R16: dec ×6 = 6
Stuff and close.
Hat
MR 6
R2: inc ×6 = 12
R3: (sc, inc) ×6 = 18
R4: (2 sc, inc) ×6 = 24
R5: (3 sc, inc) ×6 = 30
R6–20: sc around = 30
R21: (3 sc, dec) ×6 = 24
R22: (2 sc, dec) ×6 = 18
R23: (sc, dec) ×6 = 12
R24: dec ×6 = 6
Nose
MR 6
R2: inc ×6 = 12
R3: sc around = 12
Fasten off and lightly stuff.
Beard
Cut approximately 20–25 cm yarn strands and attach them beneath the nose until you achieve the desired fullness.
Final Thoughts
This easy crochet gnome pattern is a wonderful small project for beginners because the construction is simple but the finished result looks much more complicated than it actually is.
The rounded body, tall pointed hat, fluffy beard and small nose create the classic gnome silhouette, while color changes allow you to completely transform the personality of each finished piece.
Start with the standard medium version, then experiment with shorter bodies, taller hats, striped designs, fluffy beards and seasonal color palettes.
A trio of coordinating gnomes can become a beautiful centerpiece, while smaller versions are perfect for shelves, tiered trays and gift decorations.
And because the project uses relatively small amounts of yarn, it’s also an excellent way to use up leftover skeins from previous crochet projects.
Once you’ve mastered the basic construction, you can easily create an entire handmade crochet gnome collection for every season and decorating style.