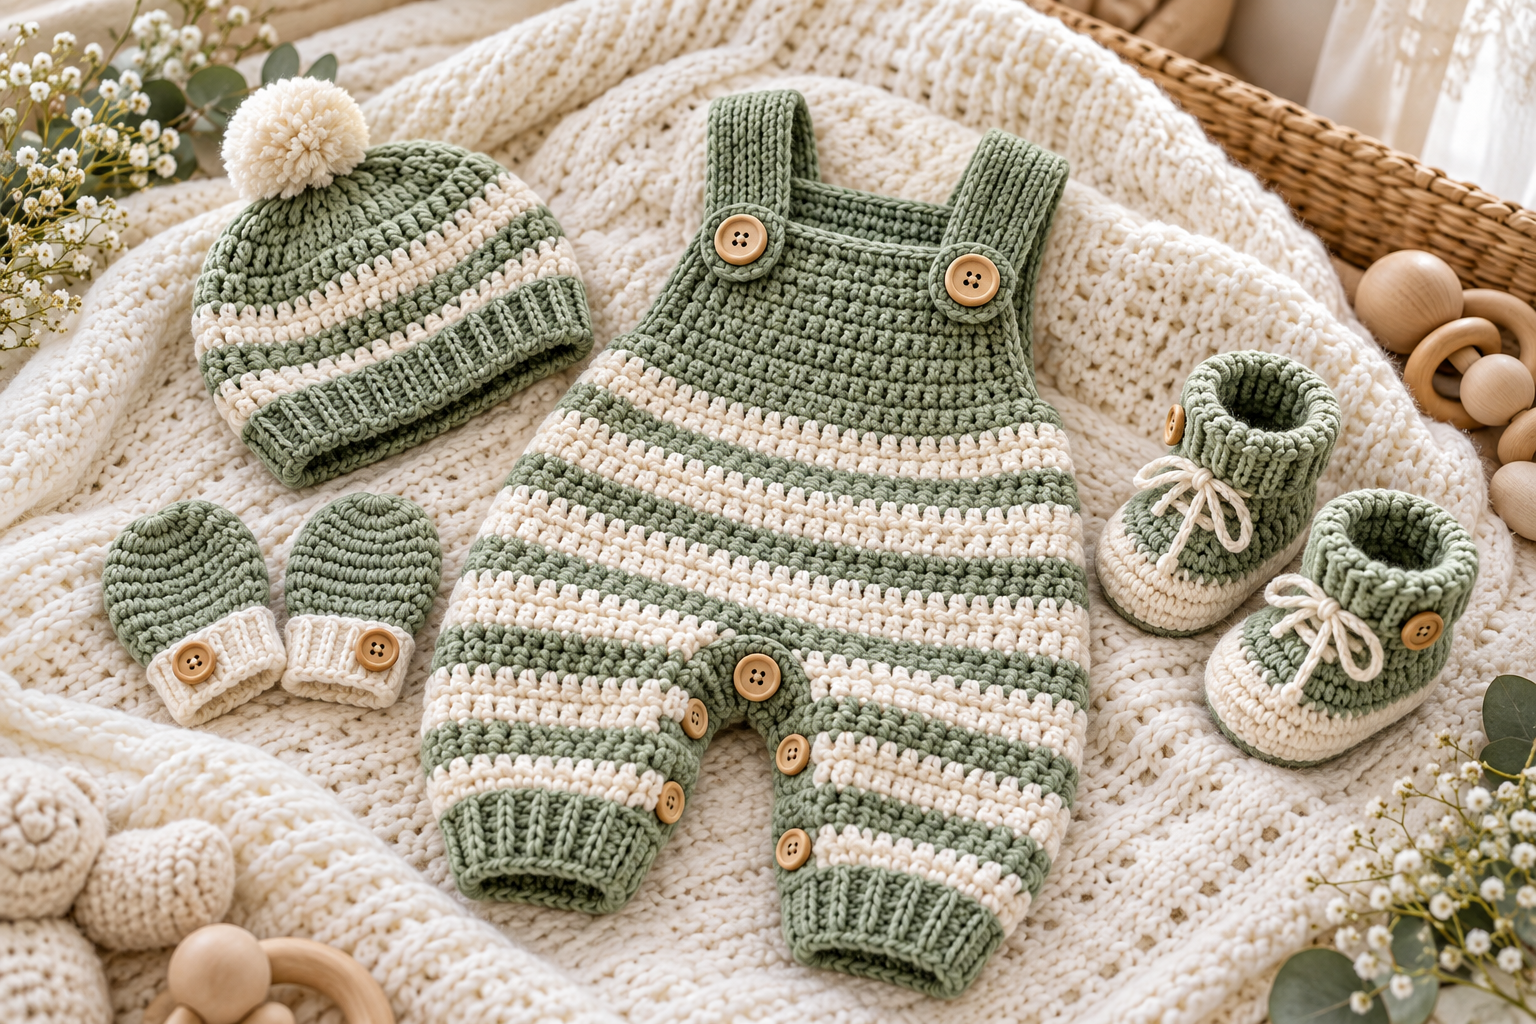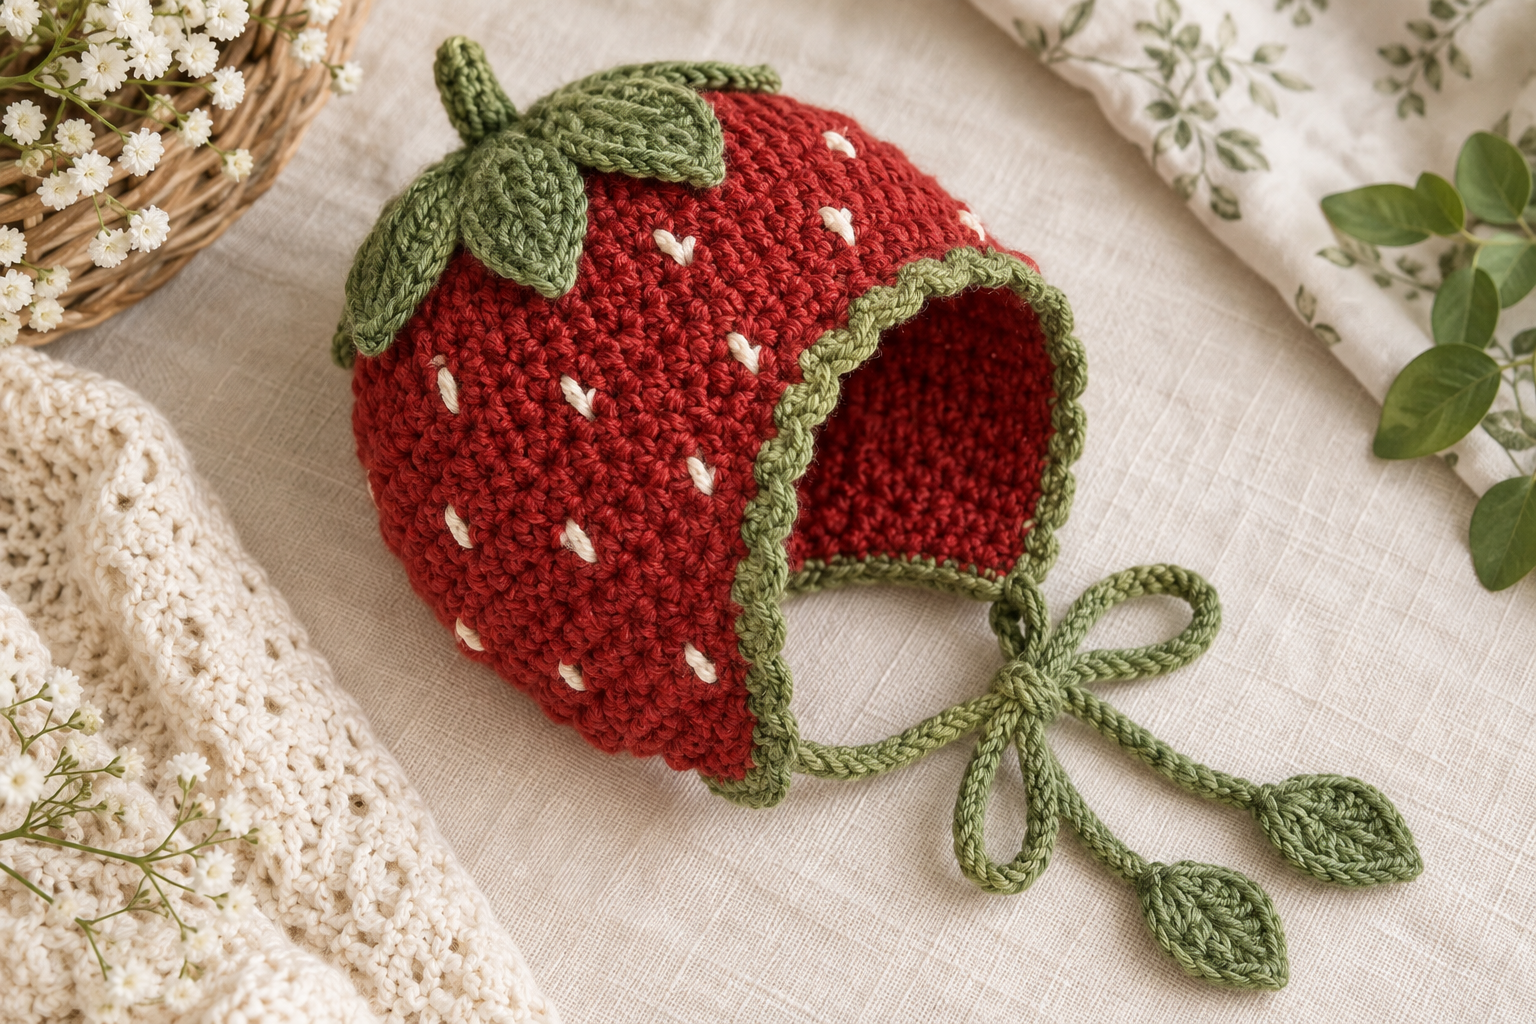
A strawberry-themed baby outfit is the kind of crochet project that instantly feels special. The combination of bright strawberry red, leafy green and tiny cream details creates a playful handmade look, while the matching pieces turn a simple crochet project into a complete baby gift.
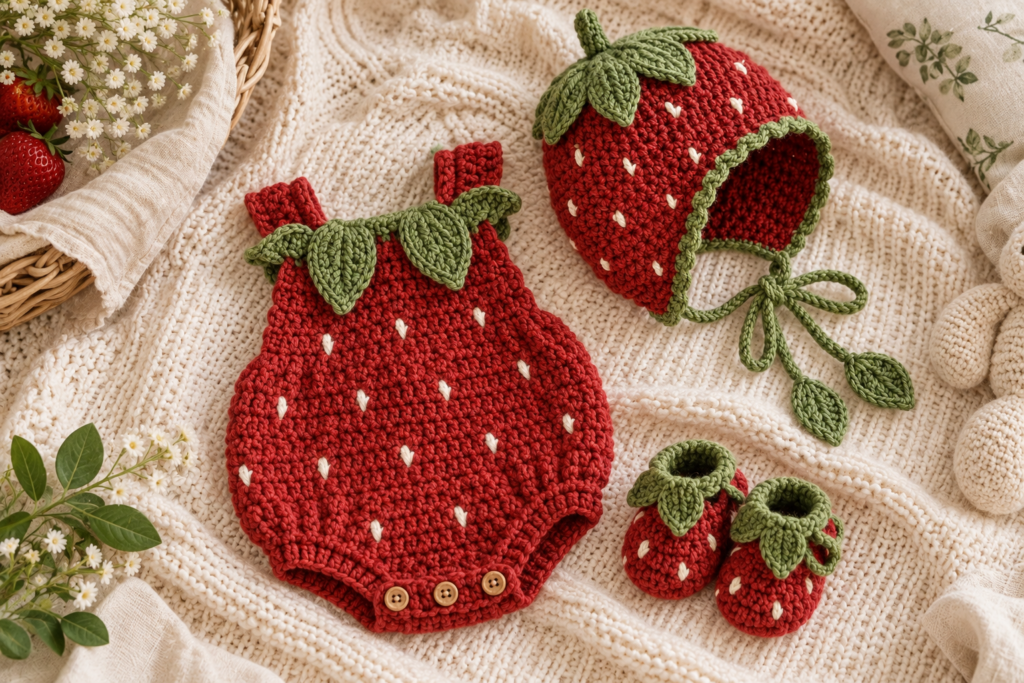
This crochet strawberry baby set includes a coordinating romper, strawberry bonnet and matching booties, with instructions for adding the signature strawberry details to each piece.
The patterns below are written as an original, coordinated design inspired by the strawberry aesthetic in the reference image, rather than copied from another designer’s pattern.
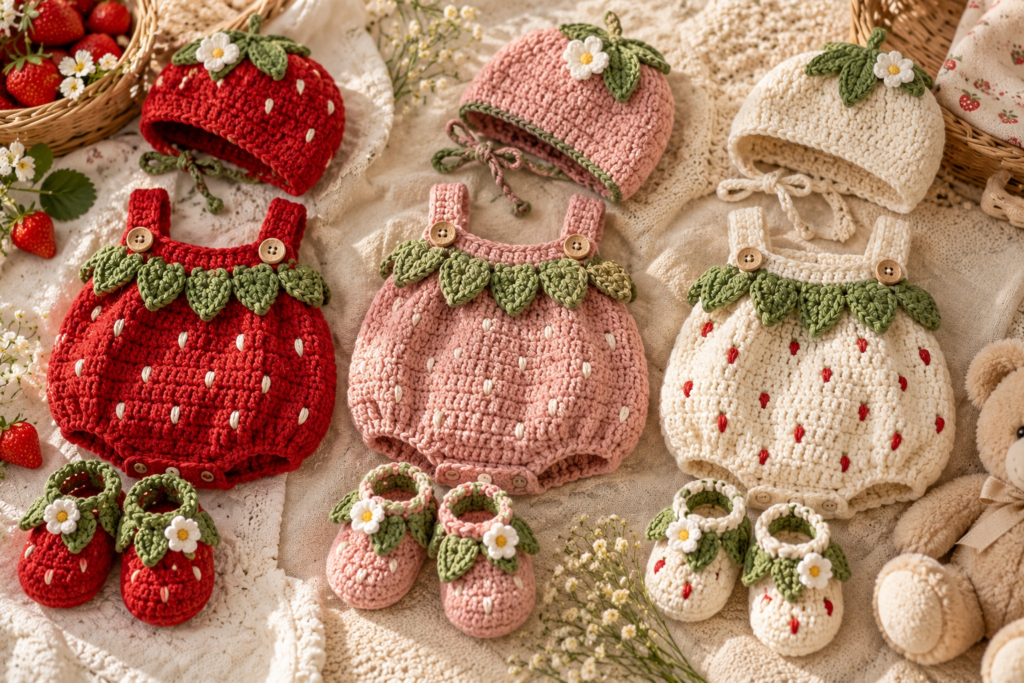
You can make the set in one classic strawberry palette or customize it with softer pinks, cream, sage or autumn colors.
Important: This pattern is intended as a handmade clothing/accessory project, not as sleepwear. For babies, avoid loose decorative components and regularly inspect handmade garments for loose buttons, appliqués, threads or other detachable pieces.
Crochet Strawberry Baby Set at a Glance
| Piece | Skill Level | Approx. Time | Main Yarn |
|---|---|---|---|
| Strawberry Romper | Intermediate | 4–6 hours | DK cotton |
| Strawberry Bonnet | Beginner–Intermediate | 1.5–2.5 hours | DK cotton |
| Strawberry Booties | Intermediate | 2–3 hours | DK cotton |
| Strawberry Appliqué | Beginner | 20–30 min | Small amounts |
| Leaf Motif | Beginner | 10–15 min | Green yarn |
| Complete Set | Intermediate | 7–11 hours | 150–250 g |
Actual yarn use depends on size, tension, hook size and how much decorative work you add.
Why Make a Crochet Strawberry Baby Set?
A matching crochet baby outfit has several advantages over making one isolated accessory.
You can use the same color palette throughout the project, so even simple stitches look coordinated.
The three-piece combination also makes an especially attractive handmade gift.
The set can work for:
- baby showers
- newborn photography
- first birthdays
- spring and summer outfits
- handmade gift baskets
- boutique-style crochet collections
- seasonal baby accessories
And because each piece can be made separately, you don’t have to finish the entire set at once.
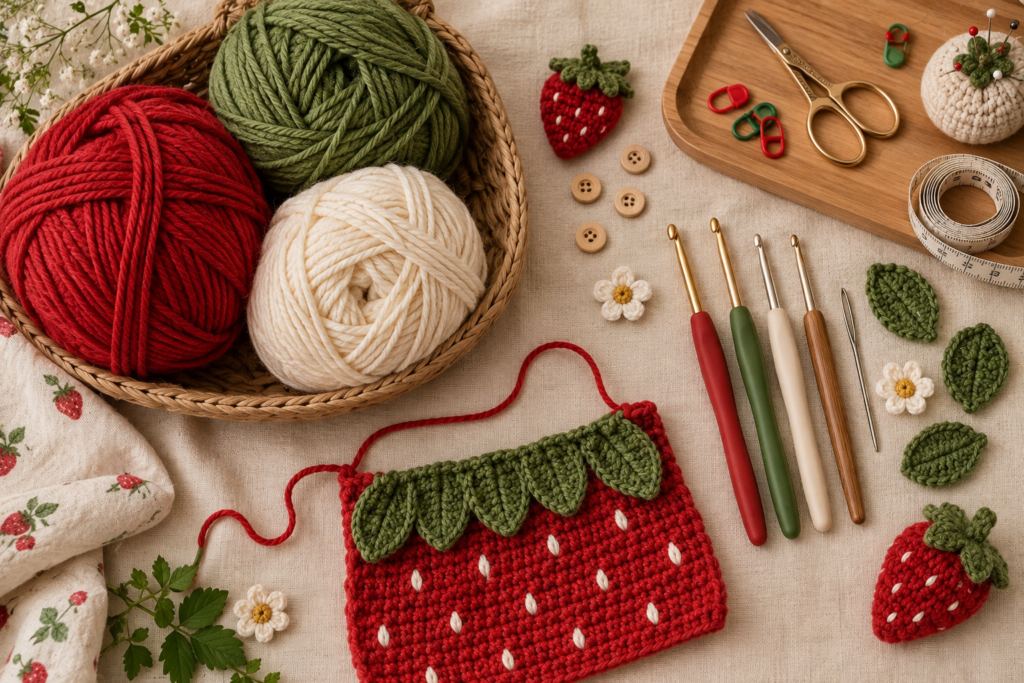
Materials
Main Materials
| Material | Suggested Amount |
|---|---|
| Red DK cotton yarn | 100–150 g |
| Green DK cotton yarn | 25–40 g |
| Cream/white DK cotton | 10–20 g |
| 3.5 mm crochet hook | 1 |
| 4 mm crochet hook | Optional |
| Yarn needle | 1 |
| Stitch markers | 4–6 |
| Scissors | 1 |
| Measuring tape | 1 |
| Small buttons | Optional |
For the best result, use a soft, washable yarn appropriate for baby clothing.
A light/worsted or DK-weight yarn is a practical starting point. The Craft Yarn Council classifies DK/light worsted as a light yarn category and provides general hook and gauge ranges, but it also emphasizes that pattern-specific gauge should take priority.
Craft Yarn Council Yarn Weight Standards
Choosing Yarn for Baby Crochet
For this particular project, cotton or a soft cotton blend works especially well because it gives the strawberry texture a clean stitch definition.
Look for yarn that is:
- soft against the skin
- washable
- colorfast
- comfortable in the intended season
- easy to maintain
Avoid choosing yarn solely because the label says “baby yarn.” The actual fiber, texture, washing instructions and finished fabric are more important.
The Craft Yarn Council’s yarn-label guidance is useful when comparing yarn categories and labels.
Craft Yarn Council Yarn Label Information
Crochet Hook and Gauge
For the DK version of this pattern, start around 3.5 mm and adjust according to your tension.
The Craft Yarn Council recommends using the millimeter measurement on a hook when comparing sizes and stresses the importance of making a gauge swatch rather than assuming one hook size will work for every yarn.
Craft Yarn Council Hooks & Needles Guide
Suggested Gauge
For the romper fabric:
18 hdc × 12 rows = approximately 4 × 4 inches
This is a target rather than a universal rule.
If your fabric is too stiff, go up one hook size.
If it is too loose, try a smaller hook.
Crochet Abbreviations
The patterns use US crochet terminology.
| Abbreviation | Meaning |
|---|---|
| ch | Chain |
| sc | Single crochet |
| hdc | Half double crochet |
| dc | Double crochet |
| sl st | Slip stitch |
| st | Stitch |
| sts | Stitches |
| inc | Increase |
| dec | Decrease |
| BLO | Back loop only |
| FLO | Front loop only |
| rep | Repeat |
| sk | Skip |
| FO | Fasten off |
Baby Size Guide
Baby sizing varies considerably, so use measurements rather than relying only on age.
The Craft Yarn Council’s standard baby measurements can be used as a useful reference when developing crochet garments.
Craft Yarn Council Baby Size Chart
For this pattern, use these approximate finished measurements:
| Size | Approx. Age | Chest | Romper Length |
|---|---|---|---|
| 0–3 months | Newborn–3 mo | 17 in / 43 cm | 13 in / 33 cm |
| 3–6 months | 3–6 mo | 18 in / 46 cm | 14 in / 36 cm |
| 6–12 months | 6–12 mo | 19 in / 48 cm | 16 in / 41 cm |
| 12–18 months | 12–18 mo | 20 in / 51 cm | 17.5 in / 44.5 cm |
These measurements are approximate and should be checked against the intended wearer.
Pattern 1: Crochet Strawberry Baby Romper
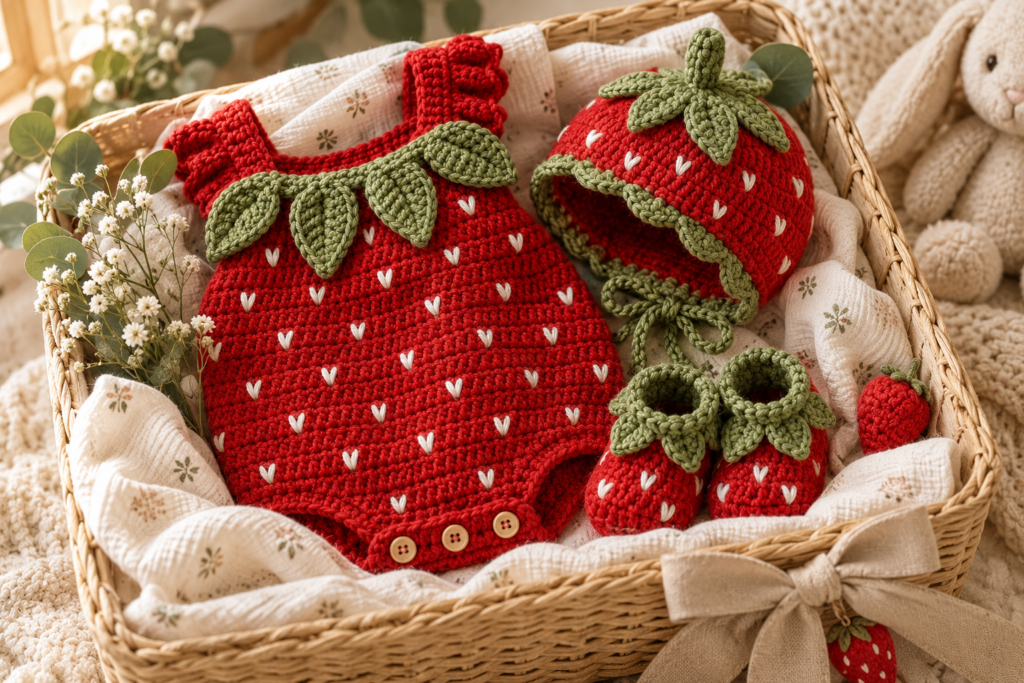
The romper is constructed in sections so that you can adjust the length and width more easily than with a complicated one-piece design.
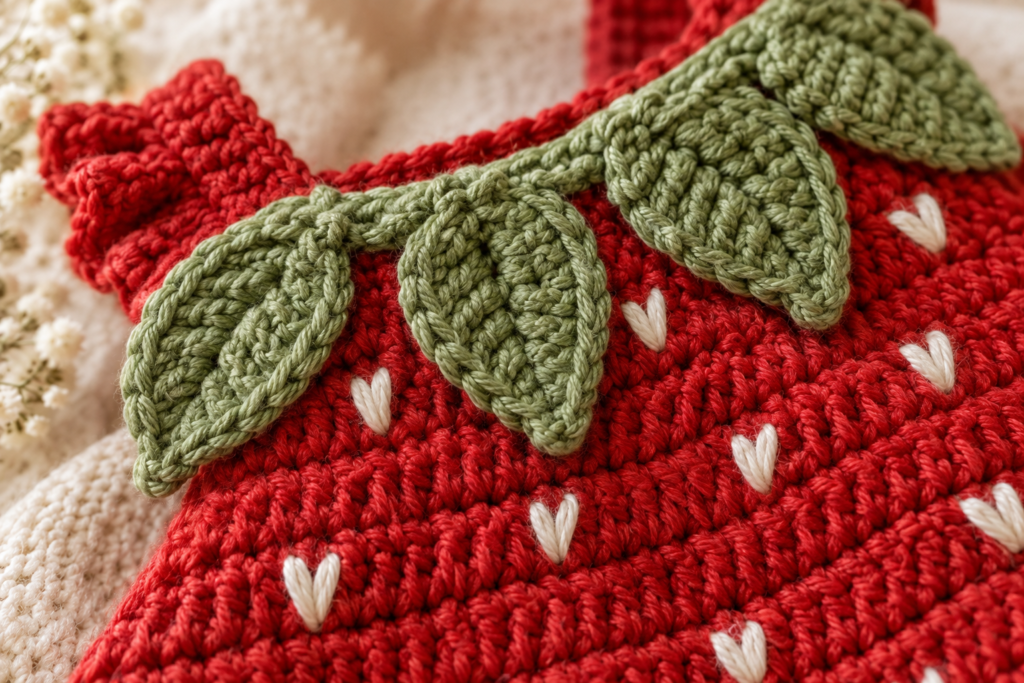
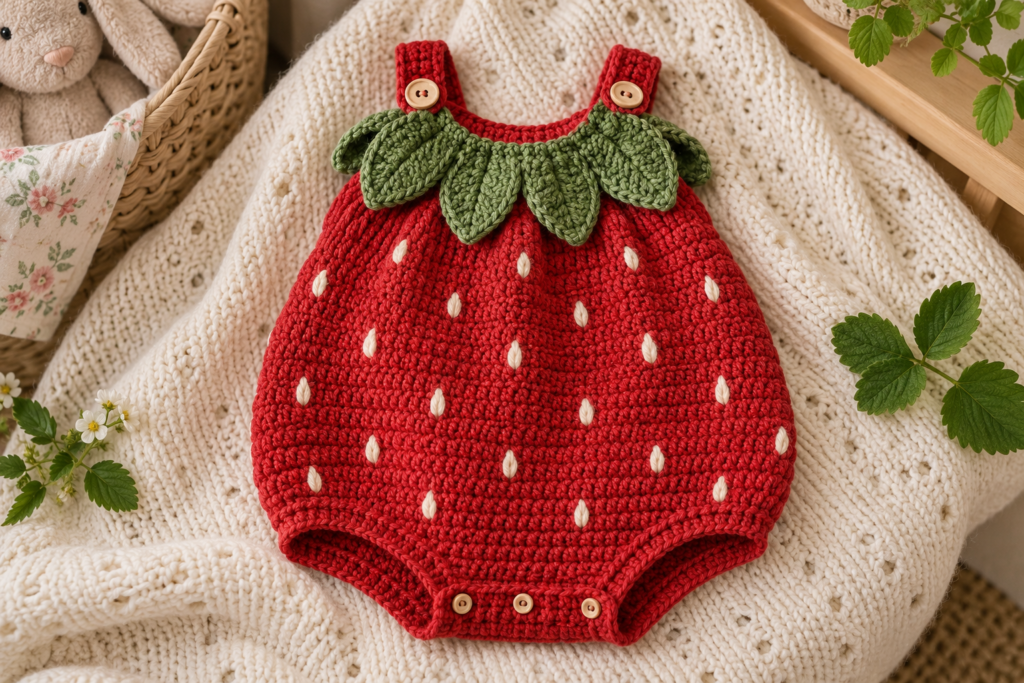
The strawberry appearance comes primarily from the red body + green leafy yoke detail + cream embroidered seeds.
Romper Construction
The basic structure is:
- upper yoke
- body
- leg opening
- edging
- straps/closures
- strawberry seeds
- leafy decoration
Step 1: Make the Yoke
Using red yarn:
Ch 52 for the base size.
For a larger or smaller size, adjust the foundation chain while maintaining an even stitch count.
Row 1
Hdc in the 2nd chain from hook and across.
You should have 51 hdc.
Row 2
Ch 2, turn.
Hdc across.
Row 3 — Increase Row
Ch 2, turn.
Work:
2 hdc in first stitch, hdc across, 2 hdc in last stitch.
You have increased by 2 stitches.
Row 4
Ch 2, turn.
Hdc across.
Repeat Rows 3–4 until the yoke reaches approximately:
3.5–4 inches
for the smallest size.
For larger sizes, continue until the yoke reaches the desired chest depth.
Step 2: Create the Armholes
Lay the yoke flat.
You want four sections:
- left front
- left armhole
- back
- right armhole
- right front
Use stitch markers to divide the sections evenly.
The exact division will depend on the size you are making, so measuring the intended chest and armhole area is more reliable than blindly following a fixed stitch count.
Join the front and back sections while leaving the armhole spaces open.
Step 3: Work the Body
Continue crocheting the joined body in rounds.
Round 1
Ch 2.
Hdc around.
Join with a sl st.
Rounds 2–8
Repeat:
Ch 2, hdc around, sl st to join.
For a longer romper, simply add additional rounds.
For a shorter romper, stop earlier.
Important Sizing Tip
The body should allow comfortable movement.
Don’t make it extremely fitted.
A baby’s clothing should have enough ease for movement and diaper changes.
Step 4: Shape the Leg Openings
Divide the lower body into two equal sections.
Mark the center.
You will work each leg opening separately.
Leg Section
Attach red yarn.
Work hdc around the first leg opening.
Continue for approximately:
2–3 rounds
depending on the desired length.
Finish with one round of sc.
Repeat for the second leg.
This creates a clean finished edge around each opening.
Step 5: Add the Bottom Closure
For a practical baby romper, the bottom opening can be finished with a simple overlap or button closure.
Create a small crochet flap at the bottom edge.
Work approximately:
4–6 rows of sc
Then create a buttonhole.
Buttonhole
Ch 2, skip 2 stitches, continue sc.
On the next row, work sc into the chain space.
If you use buttons, make sure they are very securely attached and inspect them regularly.
For a baby garment, a simple sewn closure is preferable to loose decorative hardware.
Step 6: Add the Shoulder Straps
At the upper front:
Attach yarn.
Work approximately:
5–7 sc
across the shoulder section.
Continue in rows until the strap measures approximately:
2–3 inches
Finish off.
Repeat on the opposite side.
Create buttonholes near the ends if using buttons.
Strawberry Seed Tutorial
Now comes the detail that makes the garment immediately recognizable.
Instead of crocheting dozens of separate seeds, use embroidery.
This creates a cleaner and lighter result.
Materials
- Cream or white yarn
- Yarn needle
Technique
Thread the needle.
Bring the yarn through from the back of the red fabric.
Create a short diagonal stitch.
Bring the needle back through approximately ¼–½ inch away.
Repeat.
Space the seeds irregularly.
Don’t make every row perfectly symmetrical.
A slightly natural arrangement looks much more like strawberry seeds.
Suggested Seed Layout
Use approximately:
- 5–7 seeds per front section
- 5–7 seeds on the back
- fewer around the armholes
Avoid placing bulky decorations where they could press against the baby’s skin.
Strawberry Leaf Tutorial
The green leafy top is the detail that completes the strawberry effect.
Using green yarn:
Leaf
Ch 6.
Starting in the second chain:
sl st, sc, hdc, dc, hdc
Work a second set of stitches along the opposite side of the foundation chain.
Sl st at the base.
Fasten off.
Make:
4–5 leaves
depending on the size of the motif.
Arrange them at the upper center of the romper.
Sew them securely to the fabric.
Pattern 2: Crochet Strawberry Bonnet
The bonnet is simpler than the romper and is a great way to use the same strawberry color palette.
Materials
- Red DK yarn
- Green yarn
- Cream yarn
- 3.5 mm hook
- Yarn needle
Step 1: Crown
Using red yarn:
Make a magic ring.
Round 1
6 sc into ring.
Round 2
Inc around.
12 sc
Round 3
(sc, inc) × 6
18 sc
Round 4
(2 sc, inc) × 6
24 sc
Round 5
(3 sc, inc) × 6
30 sc
Round 6
(4 sc, inc) × 6
36 sc
Continue increasing until the crown measures approximately:
5–6 inches across
for a newborn/small baby size.
For larger sizes, continue one or two additional increase rounds.
Step 2: Bonnet Sides
Once the crown is the desired diameter:
Work sc or hdc evenly around without increasing.
Continue for approximately:
4–5 inches
or until the bonnet reaches the desired depth.
Try the bonnet against the baby’s approximate head measurement rather than relying only on age.
Step 3: Face Opening
At the front section, stop working across the center portion.
Continue working along the side sections to create the opening around the face.
Add:
1–2 rounds of sc
around the opening for a clean edge.
Step 4: Chin Ties
Attach yarn to one lower side.
Chain:
25–35
depending on size.
Slip stitch back along the chain if you want a sturdier tie.
Repeat on the other side.
Avoid excessively long loose ties.
They should be long enough to tie comfortably but not hang unnecessarily.
Step 5: Strawberry Leaves
Create 4–5 green leaves using the leaf pattern above.
Arrange them at the top of the bonnet.
Sew securely.
Step 6: Strawberry Seeds
Add small cream embroidered seed shapes to the red bonnet.
Keep the seed placement sparse and visually balanced.
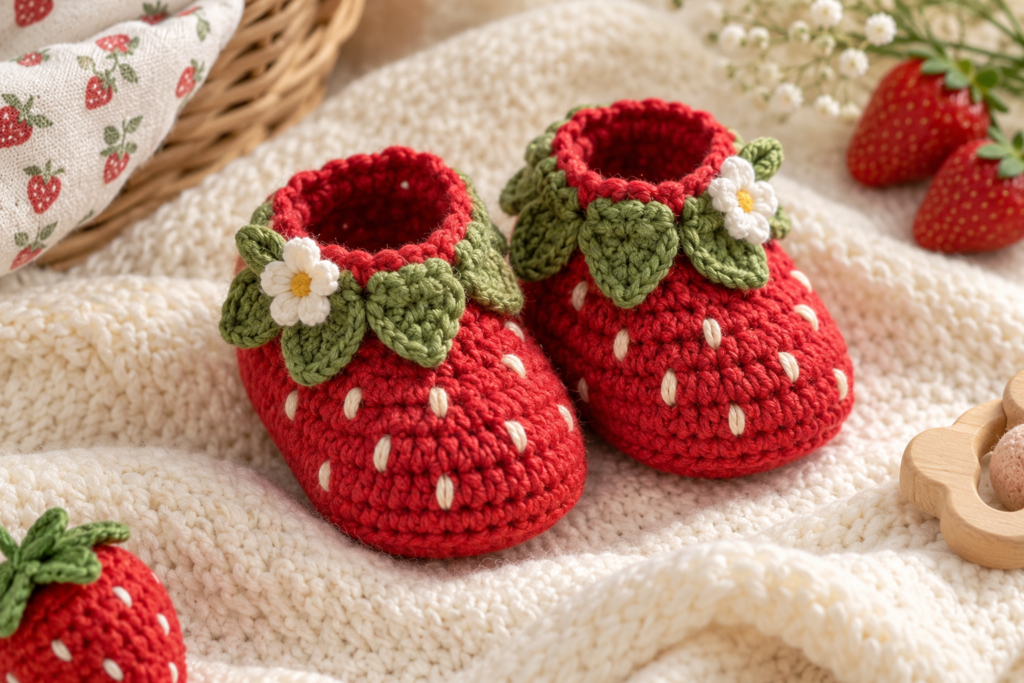
Pattern 3: Matching Crochet Strawberry Baby Booties
The booties complete the set and are particularly cute when the green leaf detail is added near the ankle.
Step 1: Sole
Using red yarn:
Ch 10.
Round 1
Sc in second chain from hook.
Sc across the chain.
Work 3 sc in the final chain.
Continue along the opposite side of the foundation chain.
Sc back to the beginning.
Join with sl st.
Round 2
Ch 1.
Work increases around the curved ends.
Continue sc around the straight sections.
The goal is an oval sole.
The finished sole should measure approximately:
| Size | Approx. Sole Length |
|---|---|
| Newborn | 3.25 in / 8.25 cm |
| 3–6 months | 3.75 in / 9.5 cm |
| 6–12 months | 4.25 in / 10.8 cm |
| 12–18 months | 4.5 in / 11.4 cm |
Stop increasing once you reach the desired length.
Step 2: Build the Sides
Work one round in BLO.
This creates a visible transition between the sole and upper.
Then work:
2–4 rounds of sc
around the bootie.
Keep the fabric flexible.
Step 3: Shape the Toe
At the front half of the bootie, gradually decrease.
A simple decrease sequence is:
sc, dec
repeated across the toe area.
Continue until the opening has the desired shape.
Don’t make the opening too tight.
Step 4: Ankle Cuff
Work:
2–3 rounds of sc
around the top.
For a more textured cuff, use hdc.
Step 5: Green Strawberry Leaves
Using green yarn, make 3–4 small leaves.
Attach them near the outer ankle area.
Step 6: Cream Seed Details
You can add a few tiny embroidered cream seeds to the red toe section.
Keep the decoration minimal.
Complete Strawberry Set Assembly
Once all three pieces are finished:
Romper
Check:
- shoulder seams
- leg openings
- bottom closure
- seed embroidery
- leaf attachment
Bonnet
Check:
- face opening
- crown shape
- ties
- leaf attachment
- embroidered seeds
Booties
Check:
- sole shape
- toe opening
- ankle fit
- leaf attachment
- embroidered details
Lay everything together before washing.
This is a good opportunity to check whether the three pieces have a consistent color and scale.
Matching Strawberry Appliqué
The strawberry motif can also be used separately.
This is one of the most useful parts of the project because you can turn the motif into another crochet project.
Mini Strawberry
Using red yarn:
Round 1
MR, 6 sc.
Round 2
Inc around.
12 sc.
Round 3
(sc, inc) × 6
18 sc.
Round 4
(2 sc, inc) × 6
24 sc.
Round 5
Sc around.
Round 6
(2 sc, dec) × 6
18 sc.
Round 7
(sc, dec) × 6
12 sc.
Stuff very lightly if making a dimensional strawberry.
Round 8
Dec around.
6 sc.
Fasten off.
Add green leaves to the top.
For baby clothing, however, a flat embroidered strawberry motif is preferable to a stuffed detachable piece.
Strawberry Color Combinations
The classic red-and-green version is only the beginning.
| Style | Strawberry | Leaves | Seeds |
|---|---|---|---|
| Classic | Bright red | Leaf green | Cream |
| Soft Pink | Blush pink | Sage | Cream |
| Pastel | Strawberry pink | Mint | White |
| Vintage | Brick red | Olive | Ivory |
| Autumn | Rust | Olive | Cream |
| Neutral | Terracotta | Sage | Oatmeal |
My Favorite
For a sophisticated baby boutique look:
Muted strawberry red + sage green + warm ivory
It keeps the theme recognizable without looking overly bright.
How to Make the Set Larger or Smaller
Don’t simply add random rows.
For the best fit, adjust three main measurements:
1. Chest Width
Increase the number of stitches in the yoke.
2. Body Length
Add or remove body rounds.
3. Arm/Leg Openings
Adjust the opening circumference independently.
This lets you create a larger garment without making every section proportionally longer.
How to Calculate Additional Rows
Suppose your gauge is:
18 hdc = 4 inches
You want the garment approximately 2 inches wider.
You need roughly:
9 additional stitches
However, because crochet construction often depends on symmetry and shaping, don’t simply add nine stitches anywhere.
Add them evenly across the relevant section.
Gauge Swatching
Make a small swatch before beginning the romper.
For example:
20 chains
Work several rows of hdc.
Measure the center 4 inches.
If you have too many stitches in 4 inches, your stitches are too small.
Use a larger hook.
If you have too few stitches, your stitches are too large.
Use a smaller hook.
The Craft Yarn Council specifically recommends comparing a gauge swatch with the pattern gauge and changing hook size when necessary.
How to Get a Professional Finish
Small finishing details make a huge difference.
Weave Ends Carefully
Don’t simply cut yarn ends.
Weave them through several stitches on the wrong side.
Then trim.
Hide Color Changes
When changing colors, work the final yarn-over of the previous stitch with the new color.
This creates a cleaner transition.
Block the Finished Pieces
Lightly dampen the finished crochet.
Shape it gently.
Allow it to dry flat.
Blocking is especially useful for the bonnet brim and romper edges.
Match the Tension
Try to maintain the same tension across the entire set.
A loose bonnet combined with a tightly crocheted romper can make the finished collection look mismatched.
How to Add the Strawberry Seeds Neatly
One of the easiest ways to make the set look homemade rather than professionally finished is to make the seeds too large.
Keep them:
- small
- narrow
- evenly spaced
- slightly angled
Avoid using large beads or plastic decorations as substitutes.
Embroidered yarn seeds are simpler and keep the surface soft.
Baby Safety Considerations
Because this project is intended for babies, safety deserves its own section.
For very young babies, avoid decorative components that could become loose.
That includes:
- beads
- sequins
- loose appliqués
- poorly attached buttons
- plastic eyes
- long unsecured cords
If buttons are used, sew them firmly and inspect them regularly.
For the safest decorative approach, use embroidered strawberry seeds and securely sewn flat crochet leaves.
The finished garment should also be checked for:
- loose yarn tails
- loose stitches
- damaged seams
- detached embellishments
- stretched closures
And remember: a handmade crochet outfit should not be treated as an unattended sleep garment simply because it is made from soft yarn.
How to Wash the Strawberry Baby Set
Always follow the yarn label first.
For washable cotton yarn, a gentle wash is often appropriate.
Recommended approach:
- Fasten and secure all loose ends.
- Place delicate pieces in a laundry bag if appropriate.
- Wash gently according to the yarn label.
- Avoid harsh bleaching products.
- Reshape while damp.
- Dry flat when possible.
- Check the embellishments after washing.
The Craft Yarn Council also provides general care-symbol guidance for interpreting yarn labels.
Craft Yarn Council Care Symbols & Standards
How to Turn This Into a Baby Shower Gift
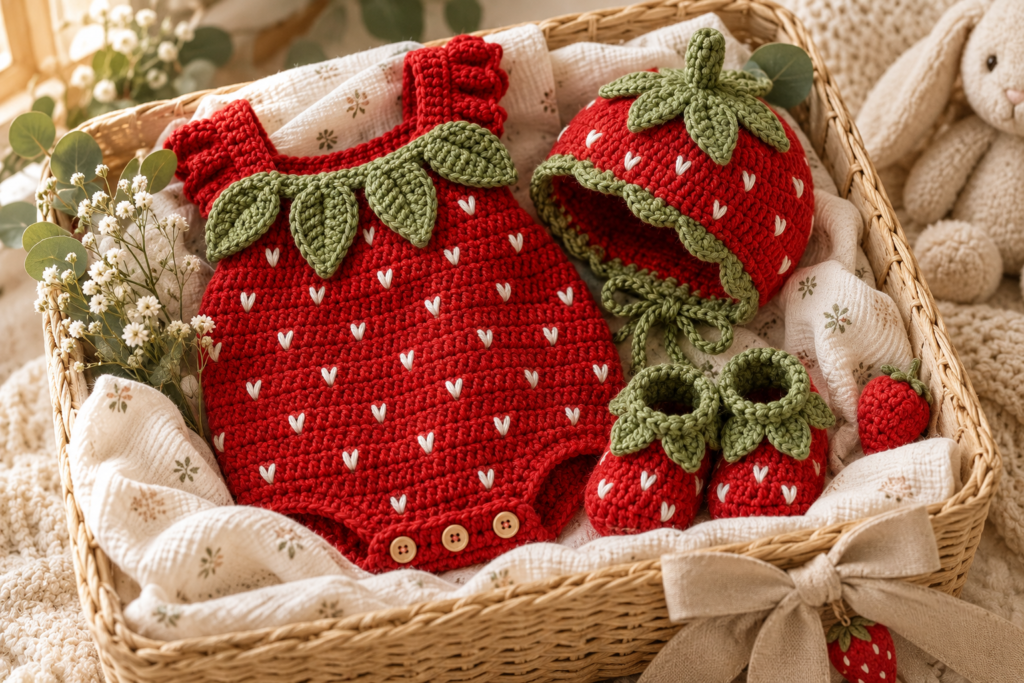
A complete strawberry set already feels special, but presentation can make it even better.
Place the:
- romper
- bonnet
- booties
together in a neutral gift box.
Add soft tissue paper and a simple handmade card.
You can also include a matching:
strawberry crochet baby blanket
or
strawberry crochet lovey
for a complete theme.
Strawberry Baby Set Gift Ideas
| Gift | Best For |
|---|---|
| Romper only | Simple handmade gift |
| Bonnet + booties | Small baby shower gift |
| Complete 3-piece set | Premium gift |
| Set + blanket | Larger baby shower present |
| Set + matching bib | Practical gift |
| Set + crochet strawberry toy | Themed gift collection |
How to Photograph the Finished Set
Photography can make a huge difference if you plan to share the pattern on Pinterest.
For the website, create:
Hero Photograph
Show the entire three-piece set together.
Detail Photograph
Close up on:
- strawberry seeds
- leaves
- stitches
Flat Lay
Arrange:
romper + bonnet + booties
on cream linen.
Lifestyle Photograph
A baby can be photographed wearing the pieces only with appropriate supervision and safe styling.
You don’t need a complicated background.
Cream linen, natural wood and soft daylight are enough.
Common Problems and Solutions
| Problem | Cause | Solution |
|---|---|---|
| Romper too tight | Gauge too small | Use larger hook |
| Romper too wide | Gauge too loose | Use smaller hook |
| Bonnet doesn’t sit properly | Crown too small | Add increase round |
| Bonnet is floppy | Too much ease | Reduce hook size |
| Bootie slips off | Opening too wide | Add a tighter cuff |
| Strawberry leaves curl | Tight tension | Loosen stitches or block |
| Seeds look bulky | Embroidery too large | Use thinner yarn |
| Edges wave | Too many stitches | Reduce border stitches |
| Fabric feels stiff | Hook too small | Increase hook size |
| Pieces don’t match | Different tension | Keep one gauge throughout |
3 Ways to Customize the Strawberry Set
1. Pink Strawberry Set
Replace red with blush pink.
Use sage green leaves and cream seeds.
This creates a softer baby-boutique look.
2. Woodland Strawberry Set
Use:
brick red + olive + oatmeal
Add a few small leaf motifs around the bonnet.
3. Minimal Strawberry Set
Use cream as the main color.
Add only:
- one red strawberry
- small green leaves
- a few cream/red details
This is ideal if you prefer understated baby clothing.
Can You Sell a Crochet Strawberry Baby Set?
Yes, but calculate the price carefully.
Your price should account for:
materials + labor + packaging + overhead + platform/payment fees + profit
For example, if a complete set takes 8 hours, pricing it only according to the yarn cost would undervalue your work.
A simple formula is:
Material Cost + Labor Cost + Overhead + Profit = Selling Price
Keep a record of:
- yarn used
- hours worked
- packaging
- buttons/closures
- pattern development time
- shipping materials
This makes it much easier to price future baby sets consistently.
Beginner-Friendly Version
If you’re new to crochet clothing, don’t start with the entire three-piece set.
Follow this progression:
Level 1
Make the strawberry appliqué.
Level 2
Make the bonnet.
Level 3
Make the booties.
Level 4
Make the romper.
This lets you practice shaping and finishing gradually.
Frequently Asked Questions
What yarn is best for a crochet strawberry baby set?
A soft, washable DK-weight cotton or cotton blend is a practical choice. Always check the yarn label and make a gauge swatch before starting.
What crochet hook size should I use?
For the DK version, a 3.5 mm hook is a good starting point, but your actual hook size should be determined by your gauge. Hook sizing varies by yarn and tension.
How much yarn does the complete set need?
A complete three-piece set may use approximately 150–250 g, depending on size, yarn weight, stitch density and how much decoration you add.
Can I make the set for a newborn?
Yes, but newborn sizing should be based on measurements rather than age alone. Baby proportions vary, and a garment intended for a particular baby should be checked against their measurements.
Can I make the strawberry seeds with beads?
For baby clothing, embroidered yarn seeds are the safer design choice. Avoid small detachable decorative components.
Can I make the romper without buttons?
Yes. You can modify the closure using crochet ties or another securely finished construction, although the closure should always be practical and safe for the intended wearer.
Can I make the bonnet without ties?
Yes. You can create a fitted bonnet with a shaped edge instead, although the exact construction will need to be adjusted to keep it comfortably positioned.
Can I use acrylic yarn?
You can, provided the yarn is soft and suitable for the intended garment, but always check its care instructions and how it feels against skin.
Is this pattern suitable for beginners?
The bonnet and strawberry motifs are more beginner-friendly. The romper requires more experience because it involves garment shaping, sizing and construction.
How can I make the set larger?
Increase the yoke circumference, add body length and adjust the openings separately rather than simply adding the same number of rows everywhere.
Final Thoughts
This crochet strawberry baby set is a perfect example of how a simple color palette can turn basic crochet stitches into a memorable handmade design.
The strawberry theme works because the three pieces share the same visual language:
red fruit + green leaves + tiny cream seeds.
You can keep the original palette for a classic strawberry look, soften it with blush and sage, or turn it into a completely different seasonal collection.
For the best result, focus on soft yarn, accurate measurements, consistent gauge and secure finishing. The small details — especially the strawberry seeds and leafy tops — are what turn the romper, bonnet and booties from ordinary crochet pieces into a coordinated set.
And if you’re making it as a gift, the complete romper + bonnet + booties combination is much more memorable than a single accessory.