Crochet bandanas are one of those projects that look much more complicated than they actually are. They use relatively little yarn, can be made in a wide range of colors, and work beautifully as hair accessories, neck scarves, summer accessories, festival pieces and handmade gifts.
Whether you prefer a simple beginner crochet bandana, a colorful granny-square design, a floral style, a boho fringe version or something more modern and minimalist, there are endless ways to customize the basic triangle shape.
In this guide, you’ll find 25 crochet bandana ideas, plus several detailed original patterns, step-by-step instructions, sizing information, yarn recommendations, stitch options, finishing techniques and styling ideas.
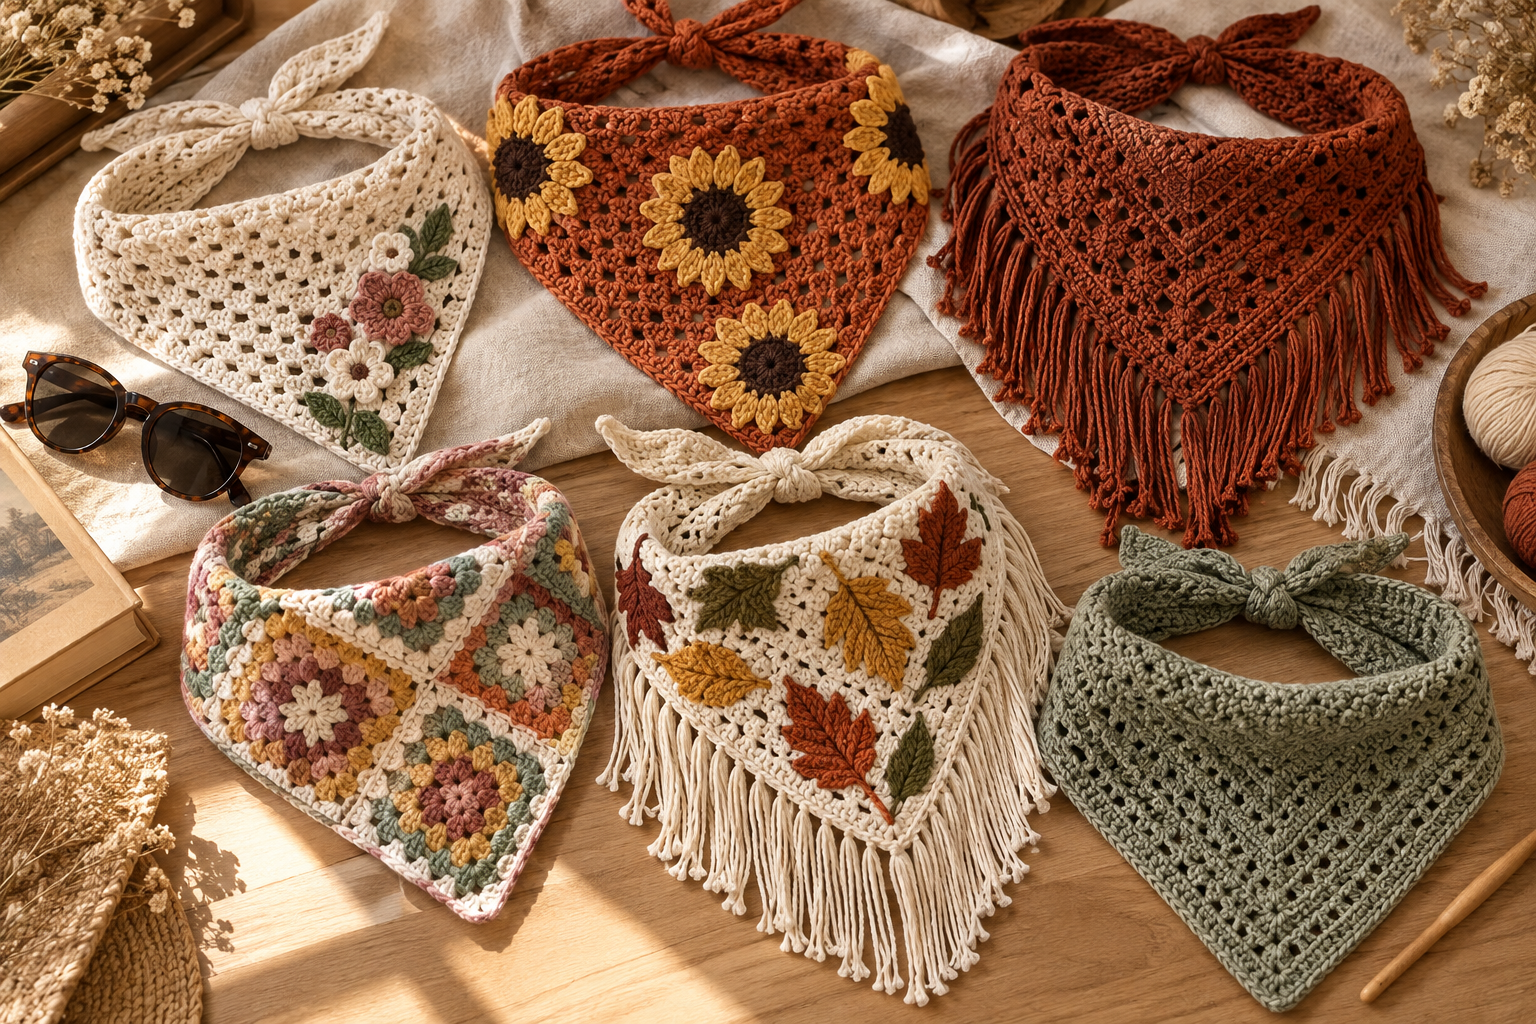
Pattern note: The patterns in this article are original patterns written for this guide and are not copied from the photographed design or from another designer’s pattern. The reference image is used only as visual inspiration for the style and variety of crochet bandanas.
Crochet Bandana Ideas at a Glance
| # | Bandana Style | Skill Level | Approx. Time | Best Feature |
|---|---|---|---|---|
| 1 | Classic Triangle Bandana | Beginner | 1–2 hrs | Simple construction |
| 2 | Floral Crochet Bandana | Beginner–Intermediate | 2–3 hrs | 3D flowers |
| 3 | Granny Square Bandana | Intermediate | 2–4 hrs | Colorful motifs |
| 4 | Boho Fringe Bandana | Beginner | 1–2 hrs | Fringe detail |
| 5 | Simple Summer Bandana | Beginner | 1–2 hrs | Lightweight |
| 6 | Daisy Bandana | Beginner–Intermediate | 2–3 hrs | Floral look |
| 7 | Butterfly Bandana | Intermediate | 2–3 hrs | Appliqué detail |
| 8 | Sunflower Bandana | Intermediate | 2–3 hrs | Statement flower |
| 9 | Cottagecore Bandana | Beginner–Intermediate | 2–3 hrs | Romantic colors |
| 10 | Pastel Bandana | Beginner | 1–2 hrs | Soft color palette |
| 11 | Checkerboard Bandana | Intermediate | 2–3 hrs | Graphic pattern |
| 12 | Striped Bandana | Beginner | 1–2 hrs | Easy color changes |
| 13 | Minimalist Solid Bandana | Beginner | 1–2 hrs | Everyday wear |
| 14 | Vintage-Inspired Bandana | Intermediate | 2–3 hrs | Retro styling |
| 15 | Crochet Head Scarf | Beginner | 1–2 hrs | Versatile |
| 16 | Beach Bandana | Beginner | 1–2 hrs | Lightweight yarn |
| 17 | Festival Bandana | Intermediate | 2–3 hrs | Bold colors |
| 18 | Mesh Bandana | Intermediate | 2–3 hrs | Open texture |
| 19 | Lacy Bandana | Intermediate | 2–4 hrs | Delicate finish |
| 20 | Half-Double-Crochet Bandana | Beginner | 1–2 hrs | Easy stitches |
| 21 | Scrap-Yarn Bandana | Beginner | 1–3 hrs | Uses leftovers |
| 22 | Granny-Stitch Bandana | Beginner–Intermediate | 2–3 hrs | Textured rows |
| 23 | Reversible Bandana | Intermediate | 3–4 hrs | Two looks |
| 24 | Bandana + Scrunchie Set | Beginner | 2–3 hrs | Matching accessory |
| 25 | Crochet Gift Bandana | Beginner–Intermediate | 2–3 hrs | Handmade gift |
Why Crochet Bandanas Are Such a Great Project
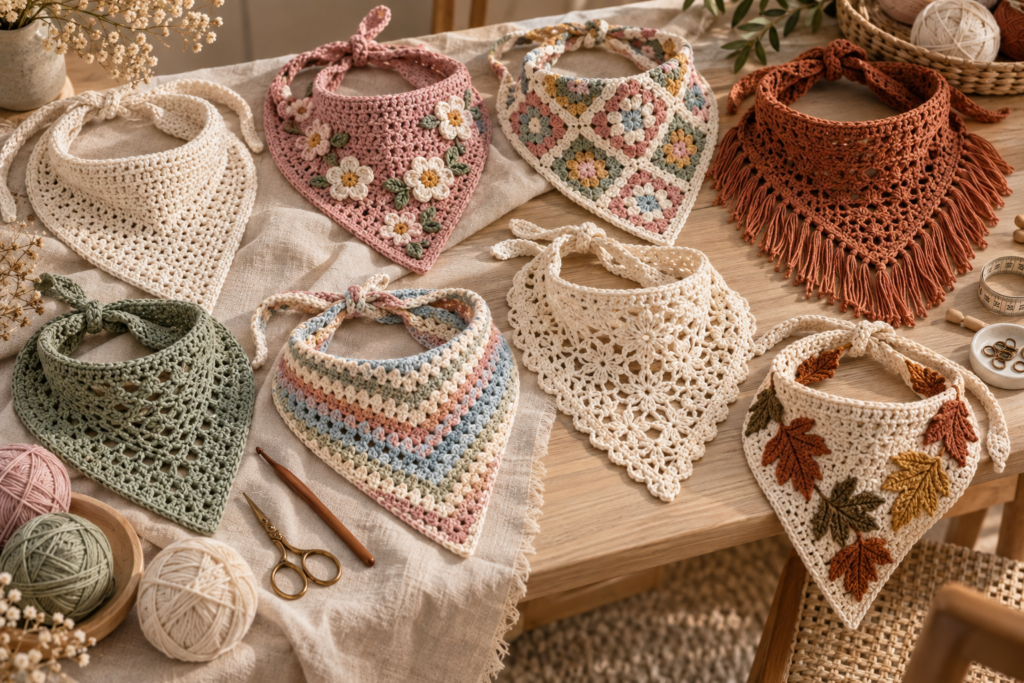
A crochet bandana is an especially useful project if you want something that sits between a tiny accessory and a full garment.
You don’t need a large amount of yarn, and the basic construction is relatively simple.
The triangle shape also makes sizing surprisingly flexible.
You can make one:
- smaller for a minimalist hair accessory
- wider for fuller head coverage
- longer for wearing around the neck
- lighter for summer
- thicker for cooler weather
- colorful for festivals
- neutral for everyday outfits
And because the finished piece is relatively small, it’s an excellent project for practicing new stitches without committing to a large garment.
Yarn Guide for Crochet Bandanas
For most bandanas, cotton is an excellent choice.
Cotton creates a defined stitch pattern, doesn’t have excessive stretch, and works particularly well for warm-weather accessories.
| Yarn | Weight | Best For |
|---|---|---|
| Cotton | Sport | Lightweight bandanas |
| Cotton | DK | Most everyday bandanas |
| Cotton blend | DK | Soft drape |
| Mercerized cotton | Sport/DK | More polished finish |
| Bamboo blend | Sport/DK | Soft summer styles |
| Acrylic blend | DK | Budget-friendly projects |
| Wool blend | DK | Autumn/winter versions |
Prefer to buy instead of make?
You can also find ready-made crochet bandanas and beginner-friendly kits on Amazon:
👉 Crochet Bandanas for Women
👉 Granny Square Crochet Kits
As an Amazon Associate, I earn from qualifying purchases.
For a first bandana, DK cotton with a 3.5–4 mm crochet hook is an excellent starting point.
Avoid extremely bulky yarn unless you specifically want an oversized winter scarf-style bandana.
How Much Yarn Do You Need?
The amount depends on the finished size, stitch pattern and yarn weight.
| Finished Style | Approx. Yarn |
|---|---|
| Small hair bandana | 40–60 g |
| Standard adult bandana | 60–100 g |
| Large neck bandana | 80–120 g |
| Granny-square style | 70–120 g |
| Lace style | 50–90 g |
| Fringe style | 70–110 g |
Always buy a little extra if you’re using multiple colors or adding large decorative motifs.
Crochet Hook Guide
| Yarn Weight | Suggested Hook |
|---|---|
| Sport | 3–3.5 mm |
| DK | 3.5–4 mm |
| Worsted | 4–5 mm |
Your hook should ultimately be chosen according to the fabric you want.
A tighter hook creates a denser bandana.
A larger hook creates more drape and openness.
Crochet Abbreviations
The patterns below use US crochet terminology.
| Abbreviation | Meaning |
|---|---|
| ch | Chain |
| sc | Single crochet |
| hdc | Half double crochet |
| dc | Double crochet |
| sl st | Slip stitch |
| st | Stitch |
| sts | Stitches |
| inc | Increase |
| dec | Decrease |
| BLO | Back loop only |
| FLO | Front loop only |
| MR | Magic ring |
| rep | Repeat |
| FO | Fasten off |
Pattern 1: Easy Classic Crochet Triangle Bandana
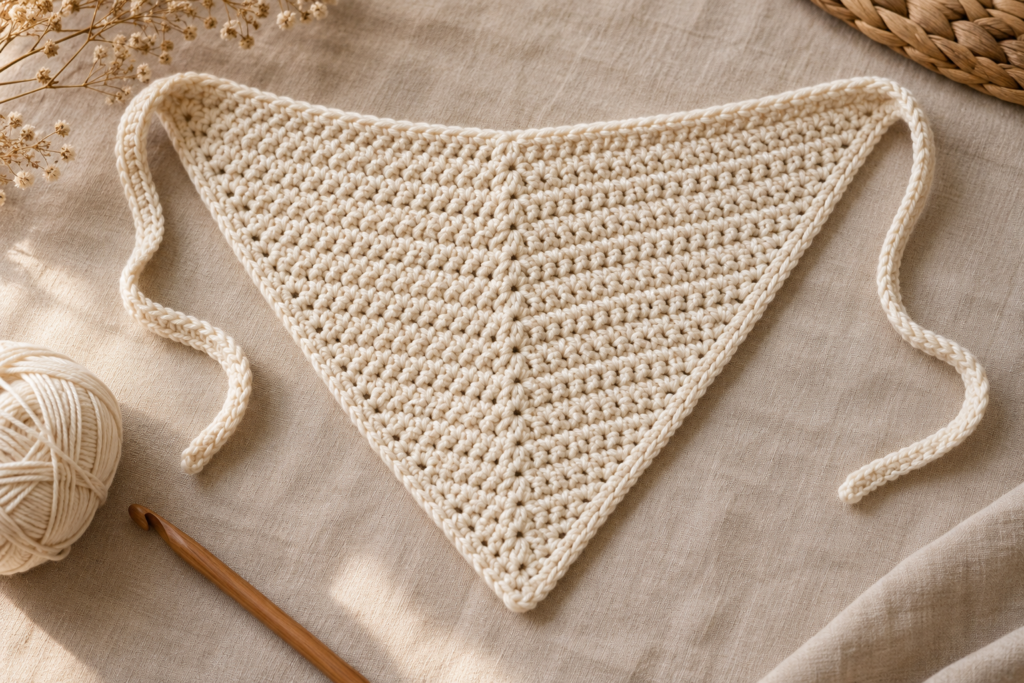
This is the pattern I’d recommend if you’ve never crocheted a bandana before.
It uses a very simple triangle construction: each row increases by two stitches.
Finished Size
Approximately:
20–22 inches wide × 9–10 inches deep
The final size will vary with yarn, hook and tension.
Materials
- Approximately 70–90 g DK cotton yarn
- 3.5–4 mm crochet hook
- Yarn needle
- Scissors
- Measuring tape
Pattern
Start with:
Ch 3
Row 1
Work:
2 hdc into the 3rd ch from hook
You now have 2 hdc.
Row 2
Ch 2, turn.
Work:
2 hdc in first stitch, hdc in next stitch, 2 hdc in final stitch.
Total: 4 hdc
Row 3
Ch 2, turn.
Work:
2 hdc in first stitch, hdc across until the final stitch, 2 hdc in final stitch.
Total: 6 hdc
Continue
Repeat the same increase structure.
Every row:
Ch 2, turn, 2 hdc in first stitch, hdc across, 2 hdc in final stitch.
Each completed row increases by exactly 2 stitches.
Continue until the top edge measures approximately 20–22 inches.
Final Border
Do not fasten off immediately.
Work sc evenly around the two diagonal edges and top edge.
At the bottom point, work:
3 sc in the point
This helps prevent the corner from becoming too sharp or curling.
Finish with a sl st.
Fasten off and weave in the ends.
Ties
For each side:
Attach yarn near one upper corner.
Chain approximately 30–40 chains.
Fasten off.
Repeat on the opposite side.
Adjust the chain length according to how you want to tie the bandana.
How to Make the Classic Bandana Bigger
The easiest method is simply to continue adding rows.
Because every row adds two stitches, the triangle grows predictably.
For a smaller bandana, stop earlier.
For a larger bandana, continue for additional rows.
Always measure the actual garment rather than relying only on row count because yarn and tension can significantly change the final dimensions.
Pattern 2: Floral Crochet Bandana
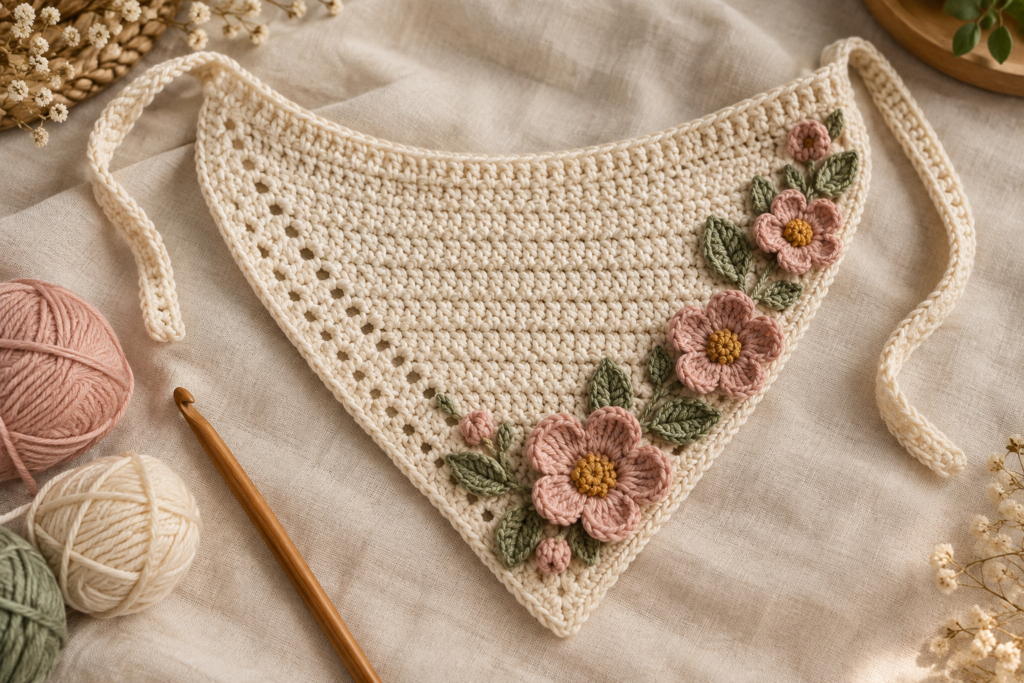
If you want something more decorative, add small crochet flowers to the classic triangle base.
Materials
- 70–100 g DK cotton
- 3.5–4 mm hook
- Small amounts of contrasting yarn
- Yarn needle
- Scissors
First make the classic triangle bandana from Pattern 1.
Then add flowers.
Simple Crochet Flower
Using your flower color:
Create a magic ring.
Work five petals around the ring.
For each petal:
sl st, ch 2, 3 dc, ch 2, sl st
Repeat five times.
Pull the magic ring closed.
Fasten off.
Flower Center
Using a contrasting color, sew a small center into the middle.
You can also crochet a tiny circle:
MR, 6 sc, sl st
Fasten off.
Add Leaves
Using green yarn:
Ch 5.
Starting in the second chain:
sl st, sc, hdc, sc
Sl st into the starting point.
Fasten off.
Placement
You can sew flowers:
- near the bottom point
- along one diagonal edge
- across one corner
- in a scattered arrangement
- symmetrically on both sides
For a more expensive-looking design, resist the temptation to cover the entire bandana.
A few carefully positioned flowers usually look more elegant.
Pattern 3: Beginner Granny Square Bandana
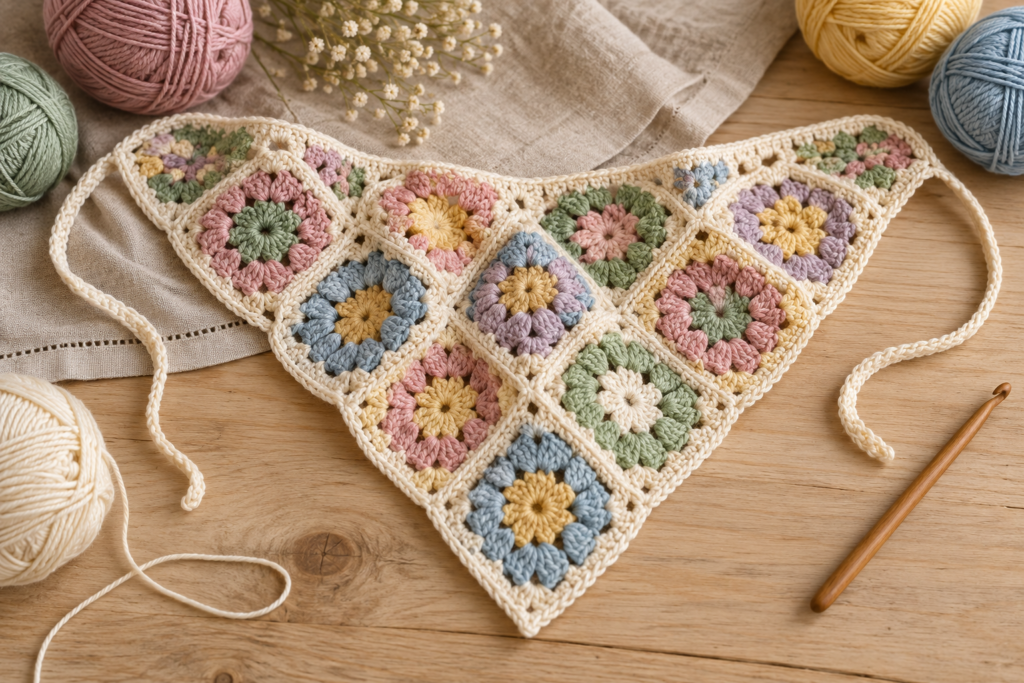
Granny-square bandanas are perfect for colorful yarn combinations.
Instead of making one large triangle from rows, this design combines small motifs.
Granny Square
Using your main color:
Round 1
MR.
Ch 3, then work:
2 dc, ch 2
Repeat three more times.
Join with a sl st.
You should have four corners.
Round 2
Sl st toward the next corner.
In each corner space work:
3 dc, ch 2, 3 dc
Join.
Round 3
In each corner:
3 dc, ch 2, 3 dc
In each side space:
3 dc
Repeat around.
Round 4
Continue the same construction.
Make enough squares to create your desired bandana arrangement.
Joining
Lay the squares into a triangle formation.
For example:
1 square
then
2 squares
then
3 squares
then
4 squares
depending on the finished size you want.
Join using:
- slip stitch
- single crochet
- mattress stitch
For a flatter, cleaner appearance, mattress stitch works particularly well.
Border
After joining, work one or two rounds of sc around the entire outside edge.
At each major corner, work additional stitches if needed to keep the edge flat.
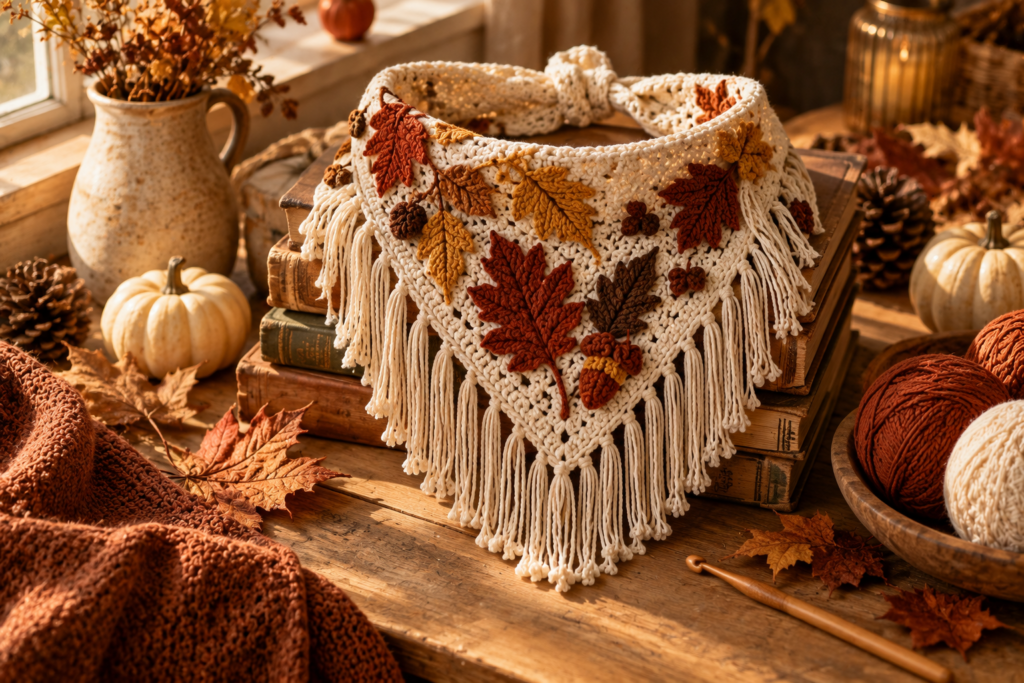
Pattern 4: Boho Fringe Crochet Bandana
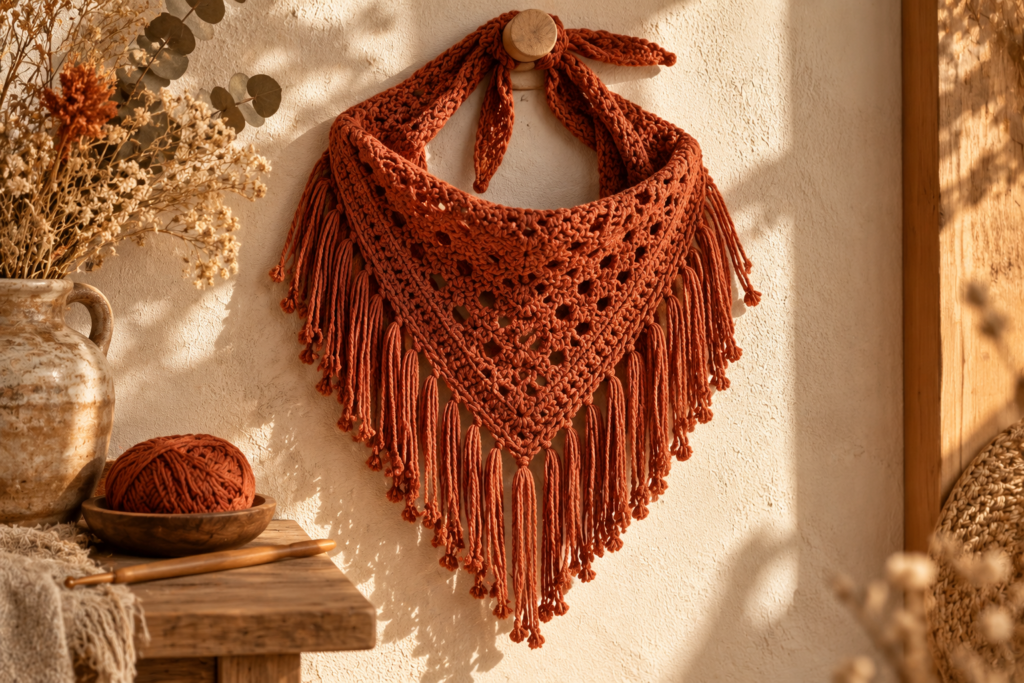
This version has a completely different personality.
It works beautifully with:
- cream
- rust
- terracotta
- mustard
- brown
- olive
Base
Use the classic triangle pattern.
A slightly larger bandana works especially well for fringe.
Fringe
Cut equal lengths of yarn approximately 8–10 inches long.
Fold each strand in half.
Insert the folded loop through the edge.
Pull the loose ends through the loop.
Gently tighten.
Repeat along the bottom two diagonal edges.
Make the Fringe Fuller
For a delicate fringe:
Use one strand per attachment.
For a fuller boho appearance:
Use two or three strands per attachment.
Trim the finished fringe evenly.
A wooden comb can help separate the strands before trimming.
Pattern 5: Simple Half-Double-Crochet Summer Bandana
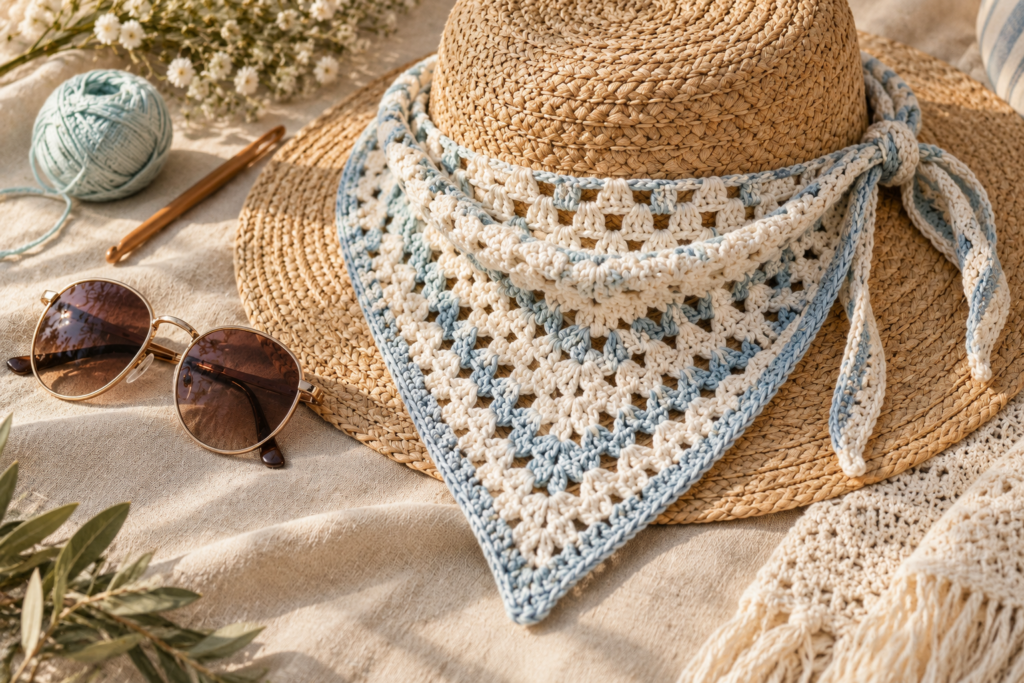
This is another excellent beginner pattern.
Instead of decorative motifs, the focus is on simple construction and beautiful yarn.
Materials
- Lightweight cotton
- 3.5 mm hook
Start
Ch 3.
Row 1
2 hdc into third chain.
Row 2
Ch 2, turn.
2 hdc in first stitch.
Hdc in next stitch.
2 hdc in last stitch.
Every Following Row
Ch 2.
2 hdc in first stitch.
Hdc across.
2 hdc in final stitch.
Continue until the bandana reaches your preferred size.
Finishing
Add a simple sc border.
For a modern look, use the same color.
For a more decorative design, switch to a contrasting color for the final round.
20 More Crochet Bandana Ideas
You don’t need to completely redesign the construction to create a different bandana.
Small changes in color, texture, edging and embellishment can produce dramatically different results.
6. Daisy Bandana
Use a cream base and attach small yellow-and-white daisies around the bottom edge.
This is especially pretty for spring and summer outfits.
7. Butterfly Bandana
Make small crochet butterfly appliqués and sew them asymmetrically across one corner.
Use pastel pink, lavender, blue and yellow.
8. Sunflower Bandana
Use a warm brown or cream base and add one large sunflower near the center point.
This makes an excellent autumn accessory.
9. Cottagecore Bandana
Choose:
- cream
- sage
- dusty rose
- butter yellow
Add tiny flowers, leaves and a scalloped border.
10. Pastel Bandana
Use three or four soft colors in alternating rows.
Try:
pink → lavender → cream → sage
The simple triangle shape allows the colors to become the main design feature.
11. Checkerboard Bandana
Alternate two colors in a small checkerboard stitch pattern.
Black and cream create a modern look.
Pink and cream create a softer version.
Brown and cream create a vintage appearance.
12. Striped Bandana
Simply change colors every:
- 2 rows
- 3 rows
- 4 rows
You can create horizontal stripes without changing the basic pattern.
13. Minimalist Solid Bandana
Sometimes the simplest design looks the most expensive.
Use one neutral shade:
- ivory
- oatmeal
- taupe
- black
- chocolate brown
Add only a clean border.
14. Vintage-Inspired Bandana
Try:
- cream
- rust
- mustard
- brown
Add scalloped edging and a small floral motif.
15. Crochet Head Scarf
Make the classic triangle larger.
Instead of tying it tightly around the head, wear the point toward the back.
This creates a softer head-scarf appearance.
16. Summer Beach Bandana
Use lightweight cotton or bamboo-blend yarn.
Choose:
- white
- sand
- ocean blue
- coral
- pale yellow
A simple open stitch works especially well.
17. Festival Bandana
Go bolder.
Try:
- orange + pink
- purple + yellow
- turquoise + coral
- red + pink
Add fringe, flowers or small geometric motifs.
18. Mesh Bandana
Use chain spaces to create an open fabric.
This reduces weight and improves airflow during warm weather.
19. Lacy Bandana
Use:
- dc
- chain spaces
- shells
- picots
A delicate scalloped edge creates a romantic finish.
20. Beginner HDC Bandana
Use only half double crochet.
This is one of the easiest versions to customize.
The visual interest comes from your yarn choice rather than complicated stitches.
21. Scrap-Yarn Bandana
Use leftover yarn from other projects.
Change colors whenever you finish a small amount of yarn.
The result becomes intentionally colorful and completely unique.
22. Granny-Stitch Bandana
Instead of traditional granny squares, work granny-style clusters directly into triangular rows.
A basic cluster can be:
3 dc in the same space
with chain spaces between clusters.
23. Reversible Bandana
Make two matching triangles in contrasting colors.
Join them around the edges.
You now have two wearable sides.
For example:
sage green on one side + cream on the other.
24. Matching Bandana and Scrunchie
Make a bandana in one color palette and use leftover yarn to create a matching crochet scrunchie.
This transforms a single project into a coordinated accessory set.
25. Crochet Bandana Gift Set
Pair the bandana with:
- matching scrunchie
- small crochet flower
- handmade hair clip
- crochet pouch
Package everything together as a handmade accessory set.
Crochet Bandana Size Guide
Sizing is one of the most important parts of making a wearable bandana.
| Size | Approx. Top Width | Approx. Depth |
|---|---|---|
| Child | 15–17 in | 6–7 in |
| Teen | 17–19 in | 7–8 in |
| Small Adult | 19–21 in | 8–9 in |
| Standard Adult | 21–23 in | 9–10 in |
| Large Adult | 23–25 in | 10–11 in |
These are starting measurements rather than strict rules.
Everyone’s head shape and preferred fit are different.
How to Measure
Measure around the head where the bandana will sit.
For a head-worn bandana, you generally want enough length to tie comfortably without making the fabric excessively loose.
For a neck bandana, you’ll want a larger finished triangle.
How to Customize the Size
The beauty of a triangular bandana is that you don’t need a complicated grading system.
Simply:
Stop earlier = smaller bandana
Continue longer = larger bandana
However, don’t judge size by rows alone.
Instead, periodically lay the project flat and measure the actual width and depth.
Different yarns can produce dramatically different dimensions from the same number of rows.
Gauge for Crochet Bandanas
Gauge is less critical than it is for a fitted sweater, but it still affects the finished appearance.
Make a small swatch using your chosen stitch.
For example:
15 hdc × 10 rows
Measure the resulting square.
If your fabric is very dense and stiff, try a slightly larger hook.
If the fabric is too loose and floppy, try a smaller hook.
For a summer bandana, you generally want a fabric that is flexible enough to drape comfortably without losing its shape.
Best Crochet Stitches for Bandanas
| Stitch | Appearance | Difficulty |
|---|---|---|
| Sc | Dense, neat | Beginner |
| Hdc | Soft texture | Beginner |
| Dc | Taller and drapier | Beginner |
| Granny stitch | Textured/colorful | Beginner–Intermediate |
| Shell stitch | Decorative | Intermediate |
| V-stitch | Open/lacy | Beginner–Intermediate |
| Mesh | Lightweight | Intermediate |
| Picot | Decorative edging | Intermediate |
How to Add a Beautiful Border
A border can completely change the appearance of a simple bandana.
Simple Border
One round of sc.
Best for:
minimalist styles
Scalloped Border
Work a repeated shell such as:
5 dc in one stitch, skip stitches, sl st
Adjust spacing to keep the edge flat.
Best for:
cottagecore and vintage styles
Picot Border
Work:
sc, ch 3, sl st into first chain
Repeat along the edge.
Best for:
delicate and romantic bandanas
Contrast Border
Make the entire bandana in one color and use a second color for the final round.
This is one of the easiest ways to make a simple project look more polished.
How to Add Crochet Ties
You have several options.
Simple Chain Ties
Attach yarn to one corner.
Chain approximately:
30–40 chains
Slip stitch back along the chain if you want a thicker tie.
Repeat on the other side.
Braided Ties
Create three long chains.
Braid them together.
This gives a more decorative appearance.
Corded Ties
Make a crochet cord using slip stitches or single crochet.
This creates a stronger, more substantial tie.
How to Keep the Triangle Flat
A common problem with crochet triangles is curling.
If your bandana curls:
Check Your Tension
Very tight stitches can cause the fabric to pull upward.
Block the Finished Piece
Lightly dampen the bandana and shape it flat.
Pin the edges into position.
Allow it to dry completely.
Check Your Increases
The two increases at the beginning and end of each row are important for maintaining the triangular shape.
If you accidentally miss an increase, the edges can become uneven.
Blocking a Crochet Bandana
Blocking is particularly useful for lace and openwork designs.
Step 1
Wash or lightly dampen the finished bandana according to the yarn manufacturer’s care instructions.
Step 2
Lay it flat on a suitable blocking surface.
Step 3
Stretch the triangle gently into shape.
Step 4
Pin the top corners and bottom point.
Step 5
Smooth the edges.
Step 6
Allow the piece to dry completely.
Don’t aggressively stretch the fabric.
The goal is to improve the shape, not distort the stitches.
Color Combinations That Work Beautifully
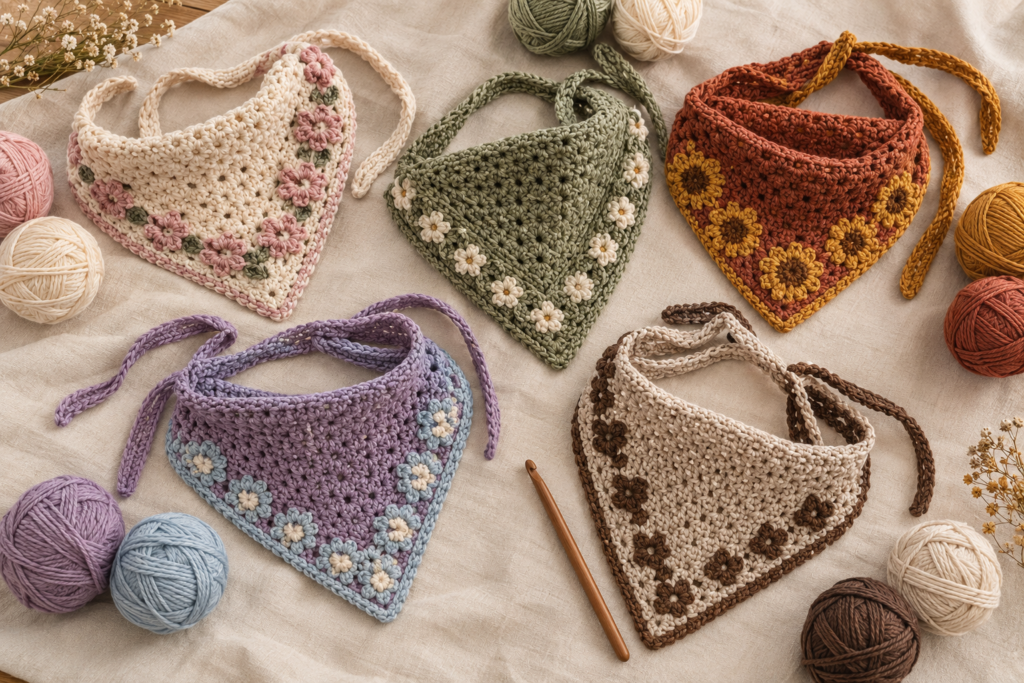
Soft Cottagecore
Cream + Dusty Pink + Sage + Butter Yellow
Autumn Boho
Rust + Mustard + Cream + Chocolate Brown
Coastal Summer
Cream + Sand + Dusty Blue + Seafoam
Modern Neutral
Oatmeal + Taupe + Mocha + Ivory
Romantic
Blush + Lavender + Cream + Soft Sage
Retro
Terracotta + Mustard + Olive + Cream
Bold Festival
Coral + Magenta + Orange + Purple
How to Style a Crochet Bandana
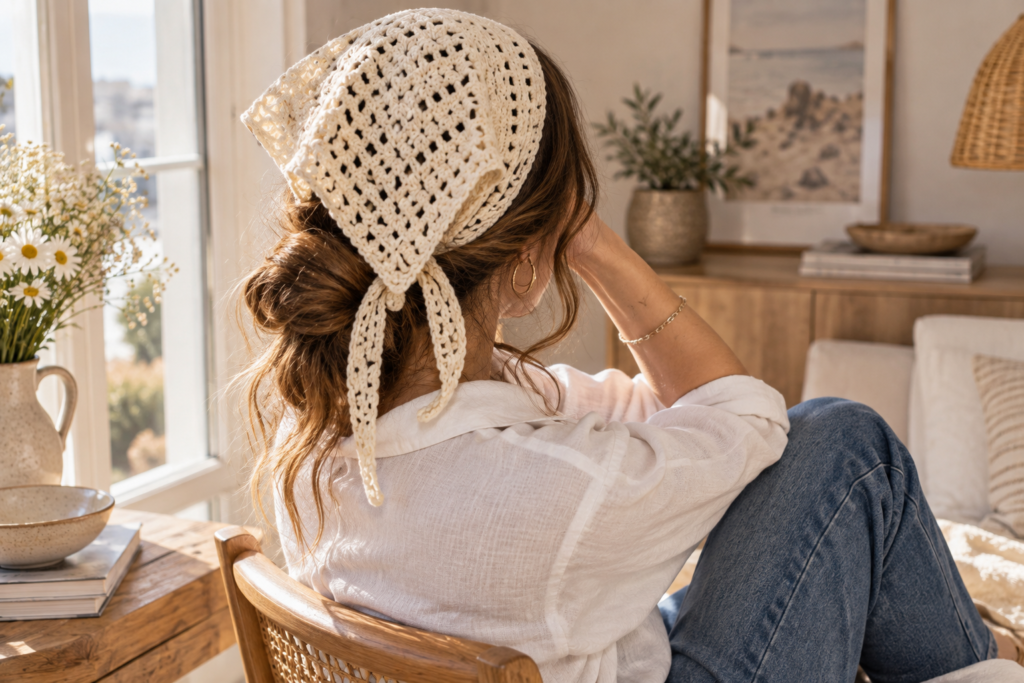
A crochet bandana doesn’t have to be worn only in your hair.
With Jeans and a T-Shirt
Pair a neutral bandana with:
- straight-leg jeans
- white T-shirt
- sneakers
- simple jewelry
This is an easy everyday outfit.
With a Summer Dress
A cream or pastel crochet bandana looks beautiful with a simple white or floral dress.
With an Oversized Shirt
Wear a small triangle bandana as a neck accessory with:
- oversized button-down
- jeans
- loafers or sandals
With a Festival Outfit
Choose bright colors, fringe and flowers.
Pair it with:
- denim shorts
- crochet top
- boots
- layered jewelry
With a Cottagecore Outfit
Try:
floral bandana + midi dress + cardigan + simple sandals
The colors don’t need to match exactly.
Choose one shared accent color instead.
Ways to Wear a Crochet Bandana
Classic Head Tie
Place the center point toward the back and tie the two ends underneath your hair.
Headband
Fold the triangle into a narrower strip.
Tie around the head.
Neck Scarf
Wear the triangle toward the front of the neck and tie behind.
Ponytail Accessory
Fold the bandana and tie it around a low ponytail.
Bag Accessory
Tie a small bandana around a handbag handle.
This is especially cute with a minimalist solid-color bag.
How to Make a Crochet Bandana More Beginner-Friendly
If you’re completely new to crochet, don’t start with:
- lace
- complicated motifs
- multiple-color intarsia
- elaborate flowers
- advanced shaping
Start with:
HDC + simple triangle increases + SC border
Once you’ve made one, experiment with colors and decorations.
The construction is simple enough that the second bandana can become a completely different design.
How to Use Leftover Yarn
Bandanas are excellent scrap-yarn projects.
Instead of throwing away small quantities of yarn, organize your leftovers by color.
For example:
Pink family
- blush
- dusty rose
- mauve
Green family
- sage
- olive
- mint
Then combine related shades into a striped or granny-style bandana.
This gives the finished project a coordinated look instead of appearing random.
Troubleshooting Guide
| Problem | Likely Cause | Solution |
|---|---|---|
| Triangle isn’t symmetrical | Missed increase | Count the first and last increases |
| Edge curls | Tight tension | Try a larger hook |
| Fabric is too stiff | Hook too small | Increase hook size |
| Bandana is too floppy | Hook too large | Use smaller hook |
| Point looks twisted | Uneven increases | Check both edges |
| Border waves | Too many stitches | Reduce border increases |
| Border pulls inward | Too few stitches | Add stitches around edge |
| Ties stretch | Weak attachment | Reinforce corners |
| Colors look messy | Too many unrelated shades | Use a planned palette |
| Flowers fall off | Weak attachment | Sew through several points |
Care Instructions
Always check the yarn label first.
For many cotton bandanas:
- wash gently
- avoid excessive heat
- reshape while damp
- dry flat when possible
- store folded or flat
If you’ve added delicate appliqués or fringe, hand washing may be preferable.
Can You Sell Crochet Bandanas?
Absolutely.
Bandanas are attractive products for handmade sellers because they’re:
- relatively quick to make
- lightweight
- inexpensive to ship
- easy to photograph
- easy to customize
- available in many color combinations
- suitable for seasonal collections
Instead of listing one generic bandana, create collections.
Example Collection
The Wildflower Collection
- Daisy
- Sunflower
- Lavender
- Cottagecore floral
Example
The Autumn Collection
- Rust
- Mustard
- Cream
- Chocolate brown
Example
The Coastal Collection
- Sand
- Cream
- Seafoam
- Dusty blue
This makes your shop or craft-market display look much more intentional.
How to Photograph Crochet Bandanas
Good photography can make a simple crochet project look significantly more premium.
Try three types of photographs:
Flat Lay
Lay the bandana flat against linen or wood.
Hanging Photograph
Hang it from a wooden peg against a neutral wall.
Lifestyle Photograph
Show the bandana styled with:
- sunglasses
- handbag
- book
- coffee
- flowers
- summer clothing
For your website, use clean horizontal images.
For Pinterest, create separate vertical graphics with strong typography and CTAs.
Crochet Bandana Gift Ideas
A handmade bandana makes an easy gift for:
- sisters
- daughters
- friends
- mothers
- teenagers
- crochet lovers
- fashion lovers
- festival lovers
- teachers
- coworkers
You can make the gift more special by adding a matching accessory.
For example:
Crochet bandana + scrunchie
or
Crochet bandana + mini pouch
or
Crochet bandana + handmade hair accessories
Frequently Asked Questions
Is a crochet bandana easy for beginners?
Yes. A basic triangular bandana can be made using only chains, half double crochet and simple increases. The classic pattern in this article is a good place to start.
How much yarn do I need for a crochet bandana?
A standard adult bandana generally uses around 60–100 g of DK-weight yarn, although the exact amount depends on size, stitch pattern, hook size and tension.
What yarn is best for a crochet bandana?
Cotton is one of the best choices, particularly for summer bandanas. It has good stitch definition and generally holds its shape well.
What size should a crochet bandana be?
A typical adult head bandana may measure around 21–23 inches across the top and 9–10 inches deep, but personal preference and head size should determine the final measurements.
Can I make a crochet bandana with leftover yarn?
Yes. Smaller amounts of yarn are perfect for striped, granny-square and patchwork-inspired bandanas.
How long does it take to crochet a bandana?
A simple bandana can often be completed in approximately 1–2 hours, while floral, granny-square or lace designs may take several hours.
Can I wear a crochet bandana around my neck?
Yes. Simply make the triangle slightly larger if you want more coverage and drape.
How do I make my crochet bandana less stiff?
Try a slightly larger crochet hook or a yarn with more drape. Cotton blends and bamboo blends can create a softer fabric than some tightly spun cotton yarns.
How do I stop my crochet bandana from curling?
Check your tension, make sure you’re completing the increases correctly and consider blocking the finished bandana.
What crochet bandana is best for beginners?
The classic HDC triangle bandana is the easiest starting point because it uses a repetitive row structure and doesn’t require complicated shaping.
Final Thoughts
A crochet bandana is a surprisingly versatile project.
The basic triangle can become a completely different accessory simply by changing the yarn, stitch, colors, border or embellishments.
Start with the classic beginner bandana if you want a quick and satisfying project. Once you’re comfortable with the construction, try flowers, granny squares, stripes, fringe, lace or scrap-yarn combinations.
And if you’re making crochet accessories to sell, don’t underestimate the value of small projects. A carefully finished bandana in a beautiful color palette can become the foundation of an entire handmade accessory collection.
One simple triangle can become 25 completely different crochet projects — and that’s what makes bandanas such a fun project to keep experimenting with.