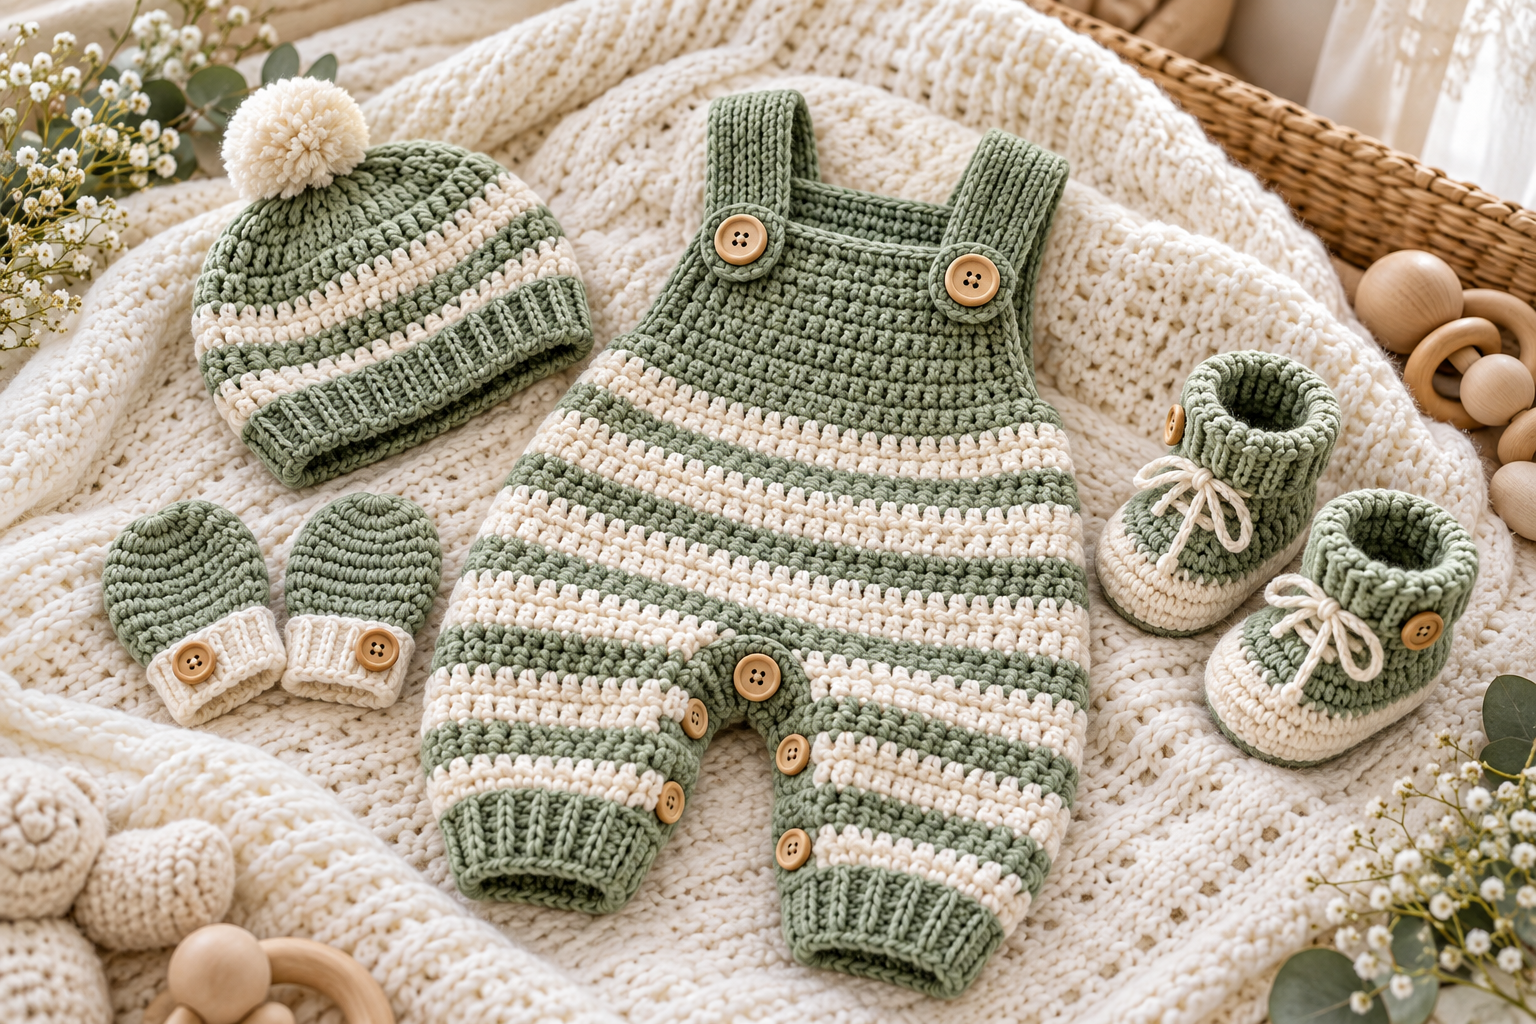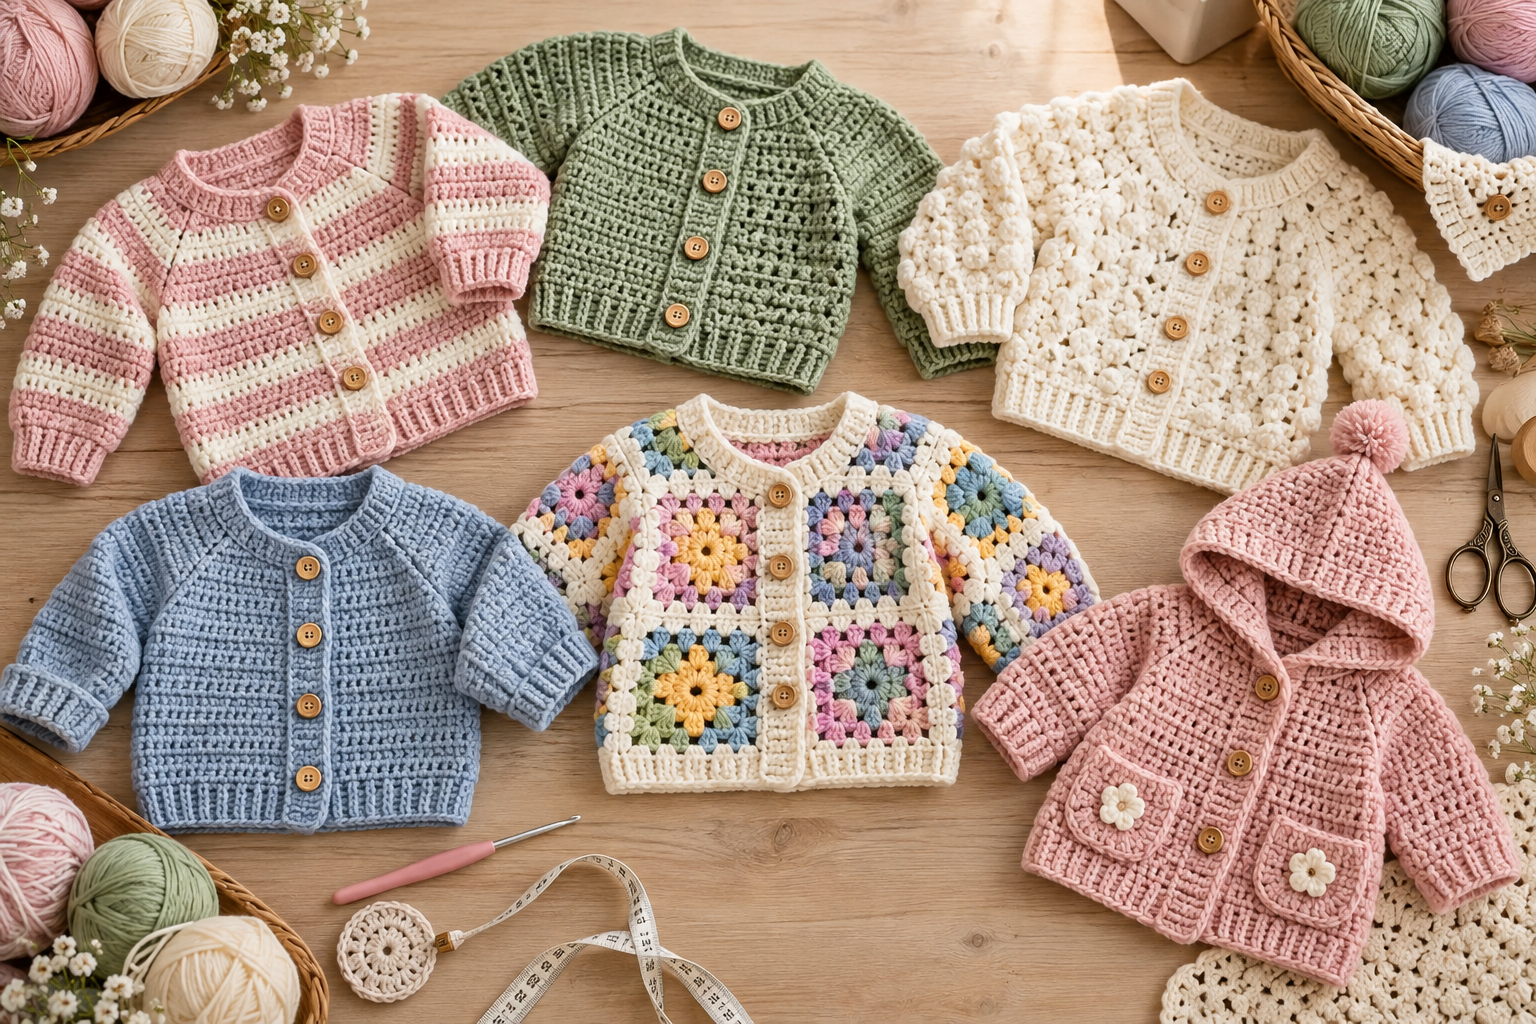
Crochet baby cardigans are one of the sweetest handmade projects you can make. They are practical, customizable, relatively quick to crochet, and make beautiful baby-shower or newborn gifts.
Whether you are looking for a newborn crochet cardigan, a simple first baby sweater, a striped design, a granny-square cardigan, or something cozy for cooler weather, this collection gives you plenty of ideas to try.
To make this guide genuinely useful, you will find 15 original crochet baby cardigan ideas, sizing information, yarn recommendations, stitch guides, construction methods, step-by-step instructions, customization ideas, and a complete beginner-friendly cardigan pattern you can use as your starting point.
Pattern note: The patterns and instructions in this article are original designs created for this guide and are inspired by the general look of handmade crochet baby cardigans. They are not copied from the pattern shown in the reference image.
Quick Overview: Which Baby Cardigan Should You Make?
| Pattern | Skill Level | Construction | Best For |
|---|---|---|---|
| Classic Button Cardigan | Beginner | One-piece style | First garment |
| Simple Striped Cardigan | Beginner | One-piece style | Color lovers |
| Granny Square Cardigan | Intermediate | Squares + assembly | Statement gifts |
| Pastel Baby Cardigan | Beginner | One-piece style | Baby showers |
| Hooded Cardigan | Intermediate | Body + hood | Cooler weather |
| Kimono Cardigan | Beginner | Flat panels | Easy construction |
| Raglan Cardigan | Intermediate | Top-down | Custom sizing |
| Textured Cardigan | Intermediate | One-piece style | Handmade texture |
| Summer Cotton Cardigan | Beginner | Lightweight panels | Warm weather |
| Cozy Winter Cardigan | Intermediate | Panels | Cold weather |
| Oversized Cardigan | Beginner | Simple panels | Layering |
| Color-Block Cardigan | Beginner | Panels | Modern style |
| Pocket Cardigan | Beginner | Basic body + pockets | Everyday wear |
| Buttonless Cardigan | Beginner | Open front | Quick projects |
| Baby Gift Cardigan Set | Beginner | Cardigan + accessories | Baby shower gifts |
Baby Cardigan Size Guide
Before starting any cardigan, measure the baby whenever possible. Babies grow quickly, so a little extra room is usually more practical than a very fitted garment.
The measurements below are approximate and should be treated as a starting point rather than strict sizing standards.
| Size | Approx. Chest | Approx. Length | Sleeve Length |
|---|---|---|---|
| Newborn | 16–17 in / 41–43 cm | 8.5–9 in / 22–23 cm | 5.5–6 in / 14–15 cm |
| 0–3 months | 17–18 in / 43–46 cm | 9–10 in / 23–25 cm | 6–6.5 in / 15–17 cm |
| 3–6 months | 18–19 in / 46–48 cm | 10–10.5 in / 25–27 cm | 6.5–7 in / 17–18 cm |
| 6–12 months | 19–20 in / 48–51 cm | 11–12 in / 28–30 cm | 7–8 in / 18–20 cm |
| 12–18 months | 20–21 in / 51–53 cm | 12–13 in / 30–33 cm | 8–9 in / 20–23 cm |
| 18–24 months | 21–22 in / 53–56 cm | 13–14 in / 33–36 cm | 9–10 in / 23–25 cm |
Tip: If the baby is between sizes, consider making the larger size. A cardigan is naturally suitable for layering, so a little extra ease can be useful.
Yarn Guide for Crochet Baby Cardigans
Baby clothing should be soft, washable, comfortable, and not excessively heavy.
| Yarn Type | Weight | Best Use |
|---|---|---|
| Cotton | DK / Light | Spring & summer |
| Cotton blend | DK | Everyday wear |
| Acrylic | DK / Light | Easy-care cardigans |
| Superwash wool | DK | Cooler weather |
| Bamboo blend | DK | Soft lightweight garments |
| Merino blend | DK | Warm winter cardigan |
For a beginner-friendly cardigan, DK/light worsted yarn is an excellent choice because it provides enough structure without making the garment too bulky.
Always check the yarn label for washing instructions, especially when making a gift for a baby.
Crochet Abbreviations
This article uses US crochet terminology.
| Abbreviation | Meaning |
|---|---|
| ch | chain |
| sc | single crochet |
| hdc | half double crochet |
| dc | double crochet |
| sl st | slip stitch |
| st | stitch |
| sts | stitches |
| sk | skip |
| inc | increase |
| dec | decrease |
| BLO | back loop only |
| FLO | front loop only |
| rep | repeat |
| RS | right side |
| WS | wrong side |
| MC | main color |
| CC | contrast color |
| FO | fasten off |
| MR | magic ring |
Basic Stitches Used in Baby Cardigans
Single Crochet
Insert your hook into the stitch, yarn over, pull up a loop, yarn over again, and pull through both loops.
Half Double Crochet
Yarn over, insert the hook, yarn over and pull up a loop, then yarn over and pull through all three loops.
Double Crochet
Yarn over, insert the hook, yarn over and pull up a loop, yarn over and pull through two loops, then yarn over and pull through the final two loops.
Half Double Crochet in the Back Loop
Work a normal hdc, but insert your hook into the back loop only. This creates a subtle ribbed texture that works beautifully for cuffs and borders.
1. Classic Crochet Baby Cardigan
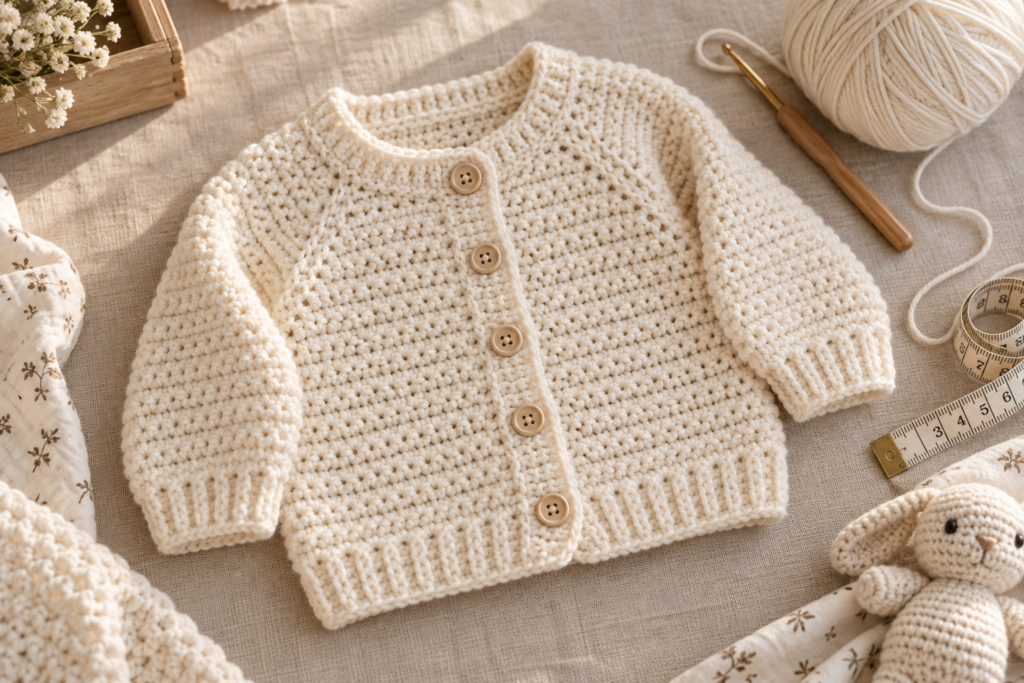
This is the best place to start if you are making your first crochet baby garment.
Materials
- DK/light worsted yarn
- 4 mm crochet hook
- Yarn needle
- Scissors
- 3–5 baby-safe buttons
- Stitch markers
- Measuring tape
Finished construction
The cardigan is made from:
- A back panel
- Two front panels
- Two sleeves
- A neckline and front border
- Buttons
Suggested gauge
Approximately 16 hdc × 12 rows = 4 × 4 inches / 10 × 10 cm.
Always make a gauge swatch before starting the garment.
Back Panel
For a 0–3 month size:
Foundation: Ch 38.
Row 1
Hdc in the 2nd chain from the hook and across.
You should have 37 hdc.
Row 2
Ch 1, turn.
Hdc across.
Rows 3–28
Repeat Row 2.
Measure your work. The finished back should be approximately 9–10 inches wide and 9–10 inches long, depending on your gauge.
Fasten off.
Front Panels
Make two identical panels.
Foundation
Ch 20.
Row 1
Hdc in the 2nd chain from the hook and across.
Rows 2–28
Ch 1, turn, hdc across.
Fasten off.
You should now have:
- 1 back panel
- 2 front panels
Assemble the Shoulders
Place the two front panels over the back panel with the right sides facing each other.
Leave approximately 3.5–4 inches open for the neckline.
Sew or slip stitch the shoulder seams.
Try not to make the neckline too tight.
Add the Sleeves
Fold the cardigan so the shoulder seams line up.
Mark approximately 4–4.5 inches down from each shoulder.
This opening becomes the armhole.
Attach your yarn around the armhole and work hdc stitches evenly around.
For a simple sleeve:
Round 1
Hdc around the armhole.
Rounds 2–12
Ch 1, hdc around.
For a slightly tapered sleeve, work a decrease approximately every 3–4 rounds.
Finish with 2–3 rounds of hdc in the back loop only for a soft ribbed cuff.
Front Border
Join yarn at the bottom corner.
Work sc evenly along the first front edge, around the neckline, and down the other front edge.
Work 2–3 rounds.
Do not pull the stitches too tightly around the neckline.
Buttonholes
On the final border round, decide where you want your buttons.
For a small buttonhole:
Ch 2, skip 2 stitches, continue sc.
Repeat at each button position.
After finishing the border, sew the buttons securely on the opposite side.
Important baby-safety note
For garments intended for babies, avoid loose decorative pieces such as beads, charms, detachable appliqués, or other small objects that could become choking hazards. Sew buttons extremely securely, or choose a button-free closure.
2. Easy Striped Crochet Baby Cardigan
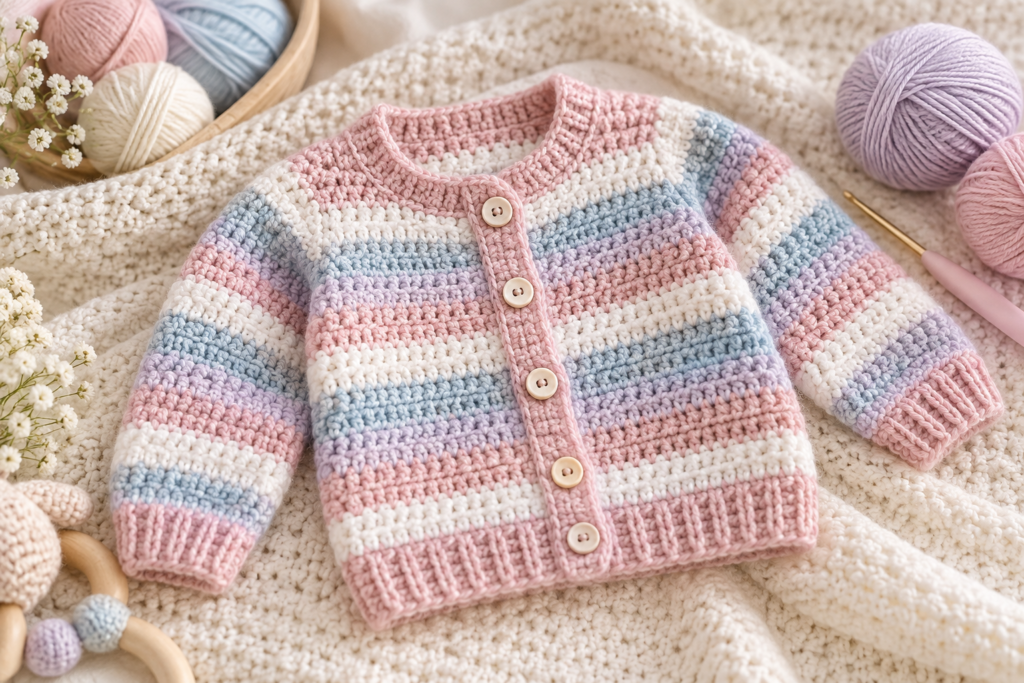
A striped cardigan is one of the easiest ways to make a basic pattern look much more special.
Suggested palette
| Color | Suggested Amount |
|---|---|
| Soft pink | 40% |
| White/cream | 30% |
| Baby blue | 20% |
| Accent color | 10% |
You can use the same basic construction as the classic cardigan.
Stripe Tutorial
Work:
- 2 rows Color A
- 2 rows Color B
- 2 rows Color A
- 2 rows Color C
Repeat the sequence.
For a more delicate design, make the stripes wider:
- 4 rows pink
- 2 rows cream
- 4 rows pink
- 2 rows blue
Color Change
On the final yarn-over of the last stitch in the old color, pull through using the new color.
This gives you a cleaner transition.
3. Granny Square Baby Cardigan
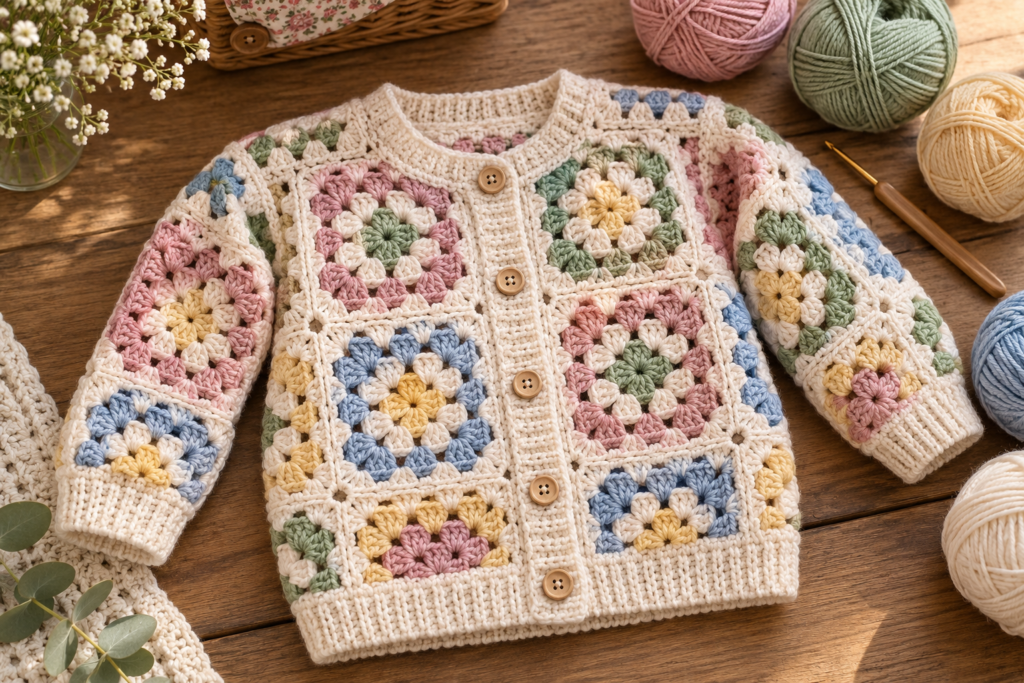
A granny-square cardigan is perfect if you want something colorful and eye-catching.
Instead of making the entire garment from individual squares, you can create a simple four-square construction:
- 2 squares for the back
- 1 square for each front section
Simple Granny Square
Start with a magic ring.
Round 1
Ch 3, 2 dc into the ring, ch 2.
Repeat:
3 dc, ch 2
three more times.
Join with a sl st.
Round 2
Slip stitch to the nearest corner.
Ch 3, 2 dc, ch 2, 3 dc in the same corner.
Ch 1.
Work 3 dc, ch 2, 3 dc in each corner.
Join.
Round 3
Work 3 dc groups along each side with ch-1 spaces between groups.
In each corner, work:
3 dc, ch 2, 3 dc.
Continue until the square reaches your desired size.
Construction
Join squares using slip stitch or mattress stitch.
Add a simple hdc border around the entire cardigan.
This design is particularly attractive when using:
- cream
- dusty pink
- sage
- pale blue
- lavender
- butter yellow
4. Pastel Baby Cardigan
This design is inspired by the soft pink-and-white style seen in many traditional handmade baby garments.
Color Formula
| Section | Color |
|---|---|
| Main body | Soft pink |
| Stripe 1 | Cream |
| Stripe 2 | Baby blue |
| Border | Soft pink |
| Buttons | Cream |
Use the classic cardigan pattern and introduce color every 2–4 rows.
Pretty Border
For the final round:
Sc 2, ch 2, skip 1 stitch.
Repeat around the cardigan.
This creates a delicate open border without making the entire garment lacy.
5. Hooded Crochet Baby Cardigan
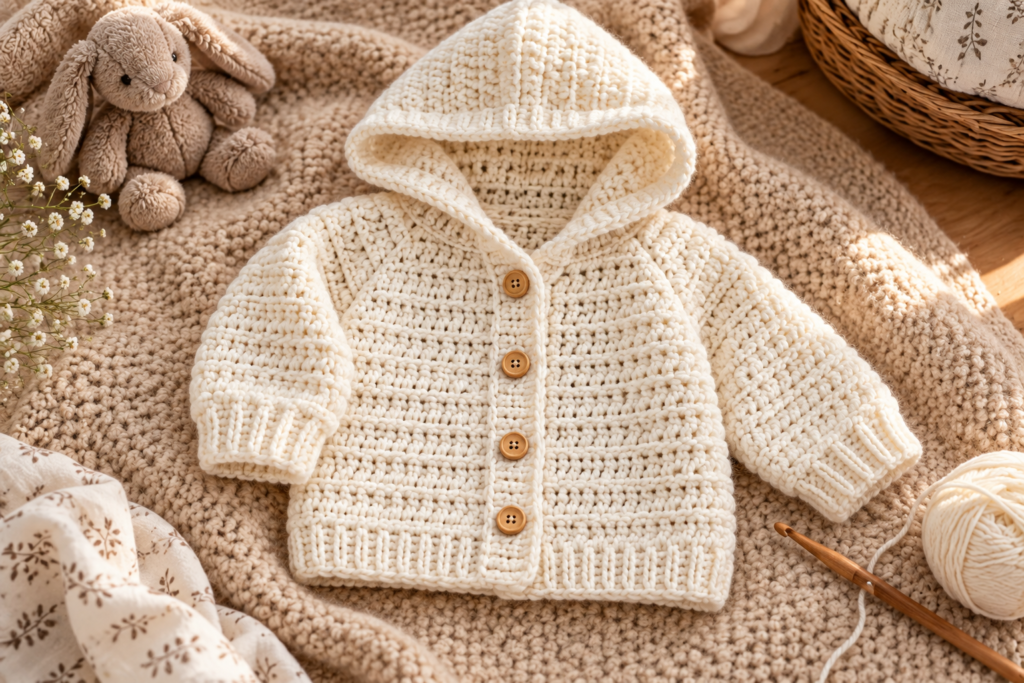
A hooded cardigan is perfect for cooler weather.
Make the body using the classic cardigan construction.
Hood
Attach yarn around the neckline.
Work hdc evenly around the neckline.
Row 1
Hdc around.
Rows 2–14
Ch 1, turn, hdc across.
Fold the hood in half.
Sew the top seam together.
Add 1–2 rounds of sc around the hood opening for a neat finish.
Optional Hood Border
Work:
sc, ch 1, skip 1
around the edge.
For babies, avoid adding long drawstrings or cords around the neck.
6. Crochet Baby Kimono Cardigan
The kimono shape is particularly beginner-friendly because it does not require complicated shaping.
Construction
Make:
- 1 back rectangle
- 2 front rectangles
- 2 simple sleeves
Use hdc throughout.
The front pieces overlap slightly when worn.
Closure
Instead of buttons, use:
- a short fabric tie positioned away from the neck
- a sewn internal closure
- or leave the cardigan open
The open-front option is especially quick.
7. Top-Down Raglan Baby Cardigan
A raglan cardigan is useful when you want a garment that can be adjusted while crocheting.
Basic Raglan Formula
Divide your neckline stitches into:
- left front
- left sleeve
- back
- right sleeve
- right front
Place stitch markers at the four raglan points.
At each marker, work an increase.
A simple increase section can be:
hdc, ch 1, hdc
in the same space.
Continue increasing until the yoke reaches the baby’s underarm.
Then separate the sleeves from the body.
This method makes it easier to adjust:
- body width
- sleeve size
- cardigan length
8. Textured Crochet Baby Cardigan
For a more sophisticated handmade look, use alternating hdc and front-post stitches.
Simple Texture Row
Work:
1 hdc, 1 front-post double crochet
across the row.
On the following row, work hdc over the hdc and front-post stitches according to the desired texture.
Keep the texture relatively subtle for baby clothing so the fabric remains soft and comfortable.
9. Lightweight Summer Baby Cardigan
For warm weather, choose breathable yarn such as cotton or a cotton blend.
Recommended Construction
Use:
- DK cotton
- 3.5–4 mm hook
- hdc or dc
- open but not overly loose stitch patterns
Simple Summer Stitch
Work:
dc, ch 1, skip 1
across.
On the next row, work dc into the chain spaces.
This creates a lightweight fabric.
Avoid making the holes excessively large for a baby’s garment.
10. Cozy Winter Crochet Cardigan
For colder weather, use a soft DK yarn or suitable wool blend.
Instead of an open stitch pattern, use:
hdc in BLO
throughout the body.
This produces a dense, flexible fabric with attractive horizontal ridges.
Winter Details
Add:
- ribbed cuffs
- a slightly higher neckline
- long sleeves
- a simple hood
- a wide front border
Avoid making the garment excessively heavy.
11. Oversized Baby Cardigan
An oversized cardigan is great for layering over a bodysuit or lightweight outfit.
Take the baby’s chest measurement and add approximately 2–3 inches / 5–7.5 cm of ease.
Keep the construction simple.
Styling Details
Try:
- cream body + pastel border
- sage body + cream cuffs
- dusty pink + white
- oatmeal + caramel
- pale blue + beige
The key is to make the body wider without making the sleeves excessively long.
12. Color-Block Baby Cardigan
Color blocking gives a modern look without requiring a complicated stitch pattern.
Example
| Section | Color |
|---|---|
| Upper body | Cream |
| Middle body | Dusty pink |
| Lower body | Sage |
| Sleeves | Cream |
| Border | Dusty pink |
Work each color for approximately 4–8 rows.
For clean color changes, change colors at the end of a row.
13. Baby Cardigan With Pockets
Start with the classic cardigan.
Once the body is finished, make two small rectangular pockets.
Pocket Pattern
Ch 12.
Row 1
Sc in the second chain from the hook and across.
Rows 2–8
Ch 1, turn, sc across.
Work a final round of sc around the pocket.
Sew each pocket securely onto the lower front portion of the cardigan.
For baby garments, keep pockets simple and avoid adding small decorative objects.
14. Buttonless Open-Front Cardigan
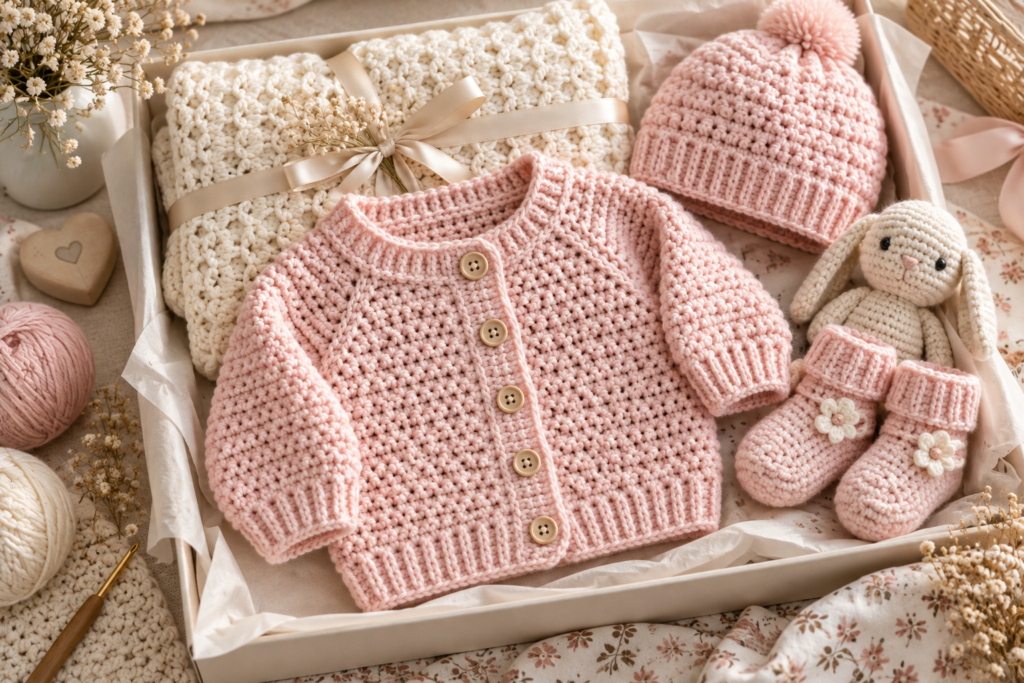
This is probably the fastest design in the collection.
Make:
- one back panel
- two front panels
- two sleeves
Then add a simple sc border.
There are no buttonholes and no buttons.
Easy Decorative Border
Work:
3 sc in the corner, sc across the edge
and repeat around the cardigan.
You can use a contrasting yarn for the final border.
This design is especially useful when you want a quick handmade baby gift.
15. Baby Shower Cardigan Gift Set
Turn any of the cardigan designs above into a coordinated handmade gift.
A simple set can include:
- crochet baby cardigan
- matching beanie
- baby socks
- small crochet blanket
- matching headband
Coordinated Color Palette
| Item | Color |
|---|---|
| Cardigan | Cream + dusty pink |
| Beanie | Dusty pink |
| Socks | Cream |
| Blanket | Cream + pink |
| Border | Soft blue |
Keeping the palette consistent makes even simple patterns look like a professionally designed baby set.
How to Make the Classic Baby Cardigan Step by Step
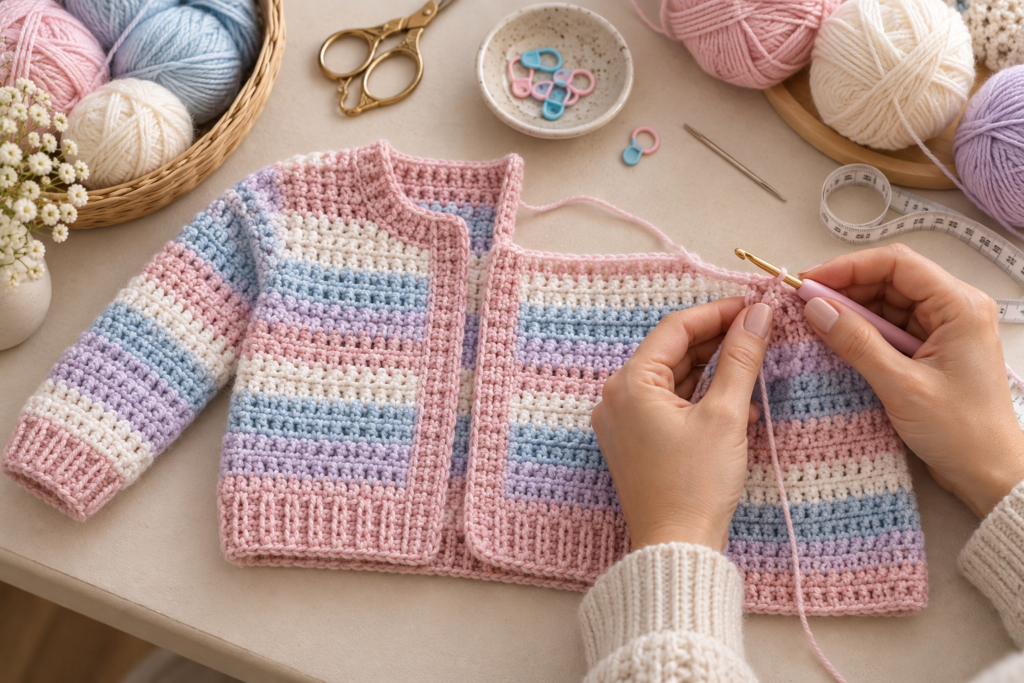
If you are completely new to crochet garments, follow this workflow.
Step 1: Make Your Gauge Swatch
Crochet approximately a 5 × 5 inch square using the yarn and hook you plan to use.
Measure the central 4 inches.
If you have:
- too many stitches → use a larger hook
- too few stitches → use a smaller hook
Do not skip this step if you want predictable sizing.
Step 2: Choose the Size
Measure the baby if possible.
If you don’t have measurements, use the size table above as a starting point.
Step 3: Crochet the Back
Make the back panel first.
This establishes the overall width and length of the garment.
Step 4: Crochet the Fronts
Make two front panels approximately half the width of the back.
For a deeper neckline, stop the inside edge slightly earlier than the outside edge.
Step 5: Join the Shoulders
Leave the neckline open.
Check the width before sewing permanently.
Step 6: Create the Armholes
Mark the same distance on both sides.
Symmetry is important here.
Step 7: Crochet the Sleeves
Work hdc rounds or rows.
Gradually decrease toward the wrist if you want a fitted sleeve.
Step 8: Add the Cuffs
Work 2–3 rounds of hdc BLO.
This creates a stretchy ribbed effect.
Step 9: Add the Front Border
Work sc around both front edges and the neckline.
Keep the tension relaxed.
Step 10: Add Closures
If using buttons, make small buttonholes and sew the buttons very securely.
Alternatively, make the cardigan open-front.
Step 11: Weave in the Ends
Use a yarn needle to weave each end securely into the fabric.
Step 12: Block the Cardigan
Lightly wet or steam-block according to the yarn manufacturer’s instructions.
Shape the cardigan gently and allow it to dry completely.
How to Customize the Cardigan
One of the biggest advantages of making baby clothes yourself is that you can change almost everything.
Change the Length
For a longer cardigan, simply add rows to the body before joining the shoulders.
Change the Sleeve Length
Add or remove sleeve rounds.
For a three-quarter sleeve, stop several rounds earlier.
Make It Wider
Increase the number of foundation chains or use a larger size.
Make It More Fitted
Reduce the amount of ease and use a slightly more fitted construction.
Add a Scalloped Border
For a decorative edge:
Skip 2 stitches, 5 dc in the next stitch, skip 2 stitches, sl st.
Repeat.
This creates a classic scalloped finish.
Add a Ribbed Border
Use hdc BLO for several rows.
This works particularly well around:
- cuffs
- hem
- front edges
How Much Yarn Do You Need?
Yarn requirements depend heavily on size, stitch, gauge, yarn weight, sleeve length, and design.
A useful starting estimate is:
| Size | Approx. Yarn |
|---|---|
| Newborn | 250–350 yd |
| 0–3 months | 300–400 yd |
| 3–6 months | 350–450 yd |
| 6–12 months | 400–550 yd |
| 12–18 months | 450–600 yd |
| 18–24 months | 500–700 yd |
For stripes, color blocking, pockets, hoods, or oversized designs, purchase additional yarn.
Best Colors for Baby Crochet Cardigans
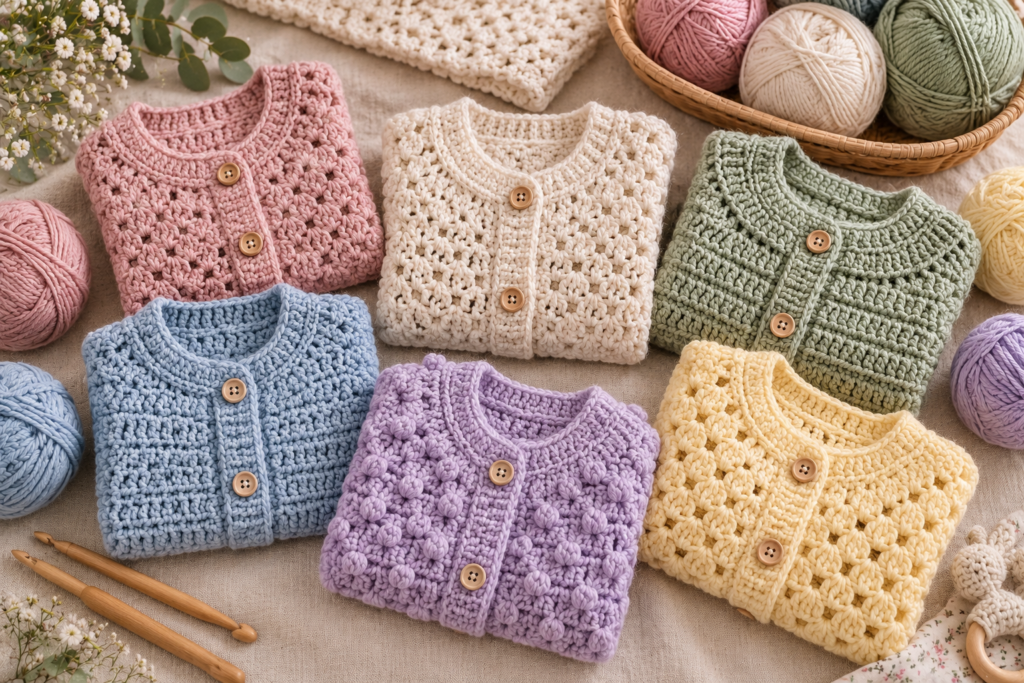
You don’t have to stick to traditional pink and blue.
Soft Neutral
- cream
- oatmeal
- beige
- taupe
- warm white
Soft Pastel
- blush
- lavender
- mint
- powder blue
- butter yellow
Modern Baby Palette
- sage
- dusty rose
- terracotta
- chocolate brown
- ivory
Vintage-Inspired Palette
- cream
- dusty pink
- pale blue
- mustard
- muted green
How to Make Your Crochet Cardigan Look More Professional
The difference between a basic handmade cardigan and a polished one often comes down to finishing.
1. Keep Your Tension Consistent
Uneven tension can make the garment look lumpy or distorted.
2. Match Both Sleeves
Write down the exact number of rounds used for the first sleeve.
Then repeat it on the second.
3. Hide Your Yarn Ends
Weave them securely rather than simply trimming them.
4. Use a Clean Border
A simple sc border can dramatically improve the appearance.
5. Check the Symmetry
Before finishing, compare:
- sleeve lengths
- front panel widths
- shoulder seams
- button positions
6. Block Carefully
Blocking can help straighten edges and improve the final shape.
Baby-Safe Crochet Tips
Baby clothing requires a little extra attention to construction.
- Choose soft, washable yarn.
- Avoid loose embellishments.
- Avoid small detachable decorations.
- Secure buttons extremely well.
- Avoid long cords or drawstrings around the neck.
- Check seams carefully.
- Make sure sleeves are not excessively long.
- Trim and secure all yarn ends.
- Inspect the cardigan before giving it to a baby.
- Follow the yarn manufacturer’s washing instructions.
For very young babies, a simple design with minimal decoration is generally the easiest choice.
Common Crochet Baby Cardigan Problems
| Problem | Likely Cause | Solution |
|---|---|---|
| Cardigan is too wide | Loose gauge | Use smaller hook |
| Cardigan is too small | Tight gauge | Use larger hook |
| Sleeves don’t match | Different round counts | Record each round |
| Front edges curl | Uneven tension | Add a border/block |
| Neckline is too tight | Too little opening | Increase neckline |
| Cardigan feels stiff | Yarn/hook combination | Try softer yarn or larger hook |
| Buttons pull fabric | Button placement | Reinforce the area |
| Body twists | Panels assembled unevenly | Block and check seams |
How to Choose the Right Pattern
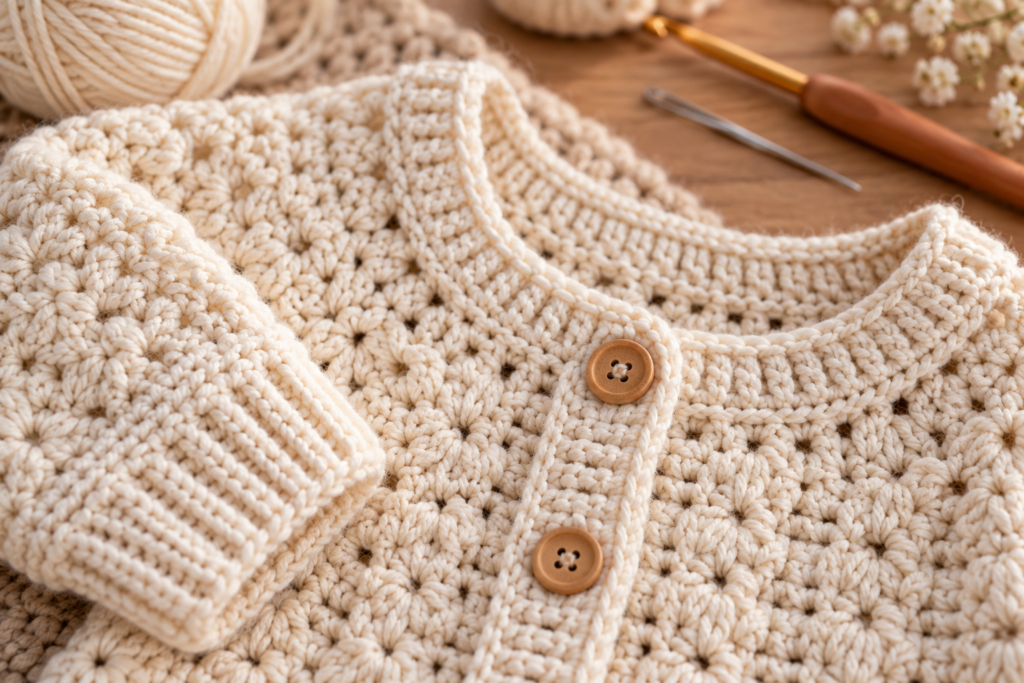
If you’re a complete beginner, start with:
Classic Button Cardigan
If you want something fast:
Buttonless Open-Front Cardigan
If you love color:
Striped or Color-Block Cardigan
If you want something special:
Granny Square Cardigan
For cold weather:
Hooded or Cozy Winter Cardigan
For summer:
Lightweight Cotton Cardigan
For a baby shower:
Baby Shower Cardigan Gift Set
Crochet Baby Cardigan Construction Cheat Sheet
| You Want… | Choose… |
|---|---|
| Easiest construction | Flat panels |
| Adjustable sizing | Top-down raglan |
| Quick project | Open-front |
| Traditional appearance | Button cardigan |
| Colorful design | Granny squares |
| Summer garment | Cotton + open stitch |
| Winter garment | Hdc BLO |
| Modern appearance | Color blocking |
| Extra warmth | Hood |
| Handmade gift | Matching set |
Frequently Asked Questions
What is the easiest crochet baby cardigan pattern for beginners?
A simple cardigan made from rectangular back and front panels using half double crochet is one of the easiest constructions. It avoids complicated shaping and allows you to adjust the length and width easily.
What yarn is best for a baby cardigan?
Soft DK-weight cotton, cotton blends, washable acrylic, or suitable superwash wool blends can all work well. Choose yarn according to the season and the baby’s comfort.
How many stitches should a baby cardigan have?
There is no universal number because stitch counts depend on yarn weight, hook size, gauge, and the baby’s measurements. It is better to work from finished measurements and gauge than blindly follow one stitch count.
Can I make the cardigan larger?
Yes. Add stitches to increase width and rows to increase length. For sleeves, add additional rounds.
Can I make a newborn cardigan bigger for a baby to grow into?
Yes, but avoid making it excessively oversized. A little extra ease can make the cardigan last longer, while very long sleeves or an excessively loose neckline can make the garment impractical.
Is crochet suitable for baby clothes?
Yes, crochet is commonly used for handmade baby garments. The most important considerations are yarn softness, secure construction, appropriate sizing, and avoiding detachable small decorations.
How do I wash a crochet baby cardigan?
Follow the yarn label first. If the yarn permits machine washing, use the recommended cycle and dry according to the manufacturer’s instructions. For handmade garments, gentle washing and careful reshaping can help preserve their shape.
Final Thoughts
A handmade crochet baby cardigan is more than just a cute piece of clothing. It is a practical project that allows you to experiment with color, texture, sizing, construction, and finishing techniques while creating something meaningful.
If you’re new to crochet garments, start with the Classic Baby Cardigan or the Buttonless Open-Front Cardigan. Once you’re comfortable with the construction, try stripes, color blocking, textured stitches, granny squares, or a hood.
And if you’re making a baby-shower gift, a coordinated cardigan with a matching beanie, socks, or blanket can turn a relatively simple crochet project into a beautiful handmade set.