
A Cute Beginner-Friendly Amigurumi Duck With Step-by-Step Instructions
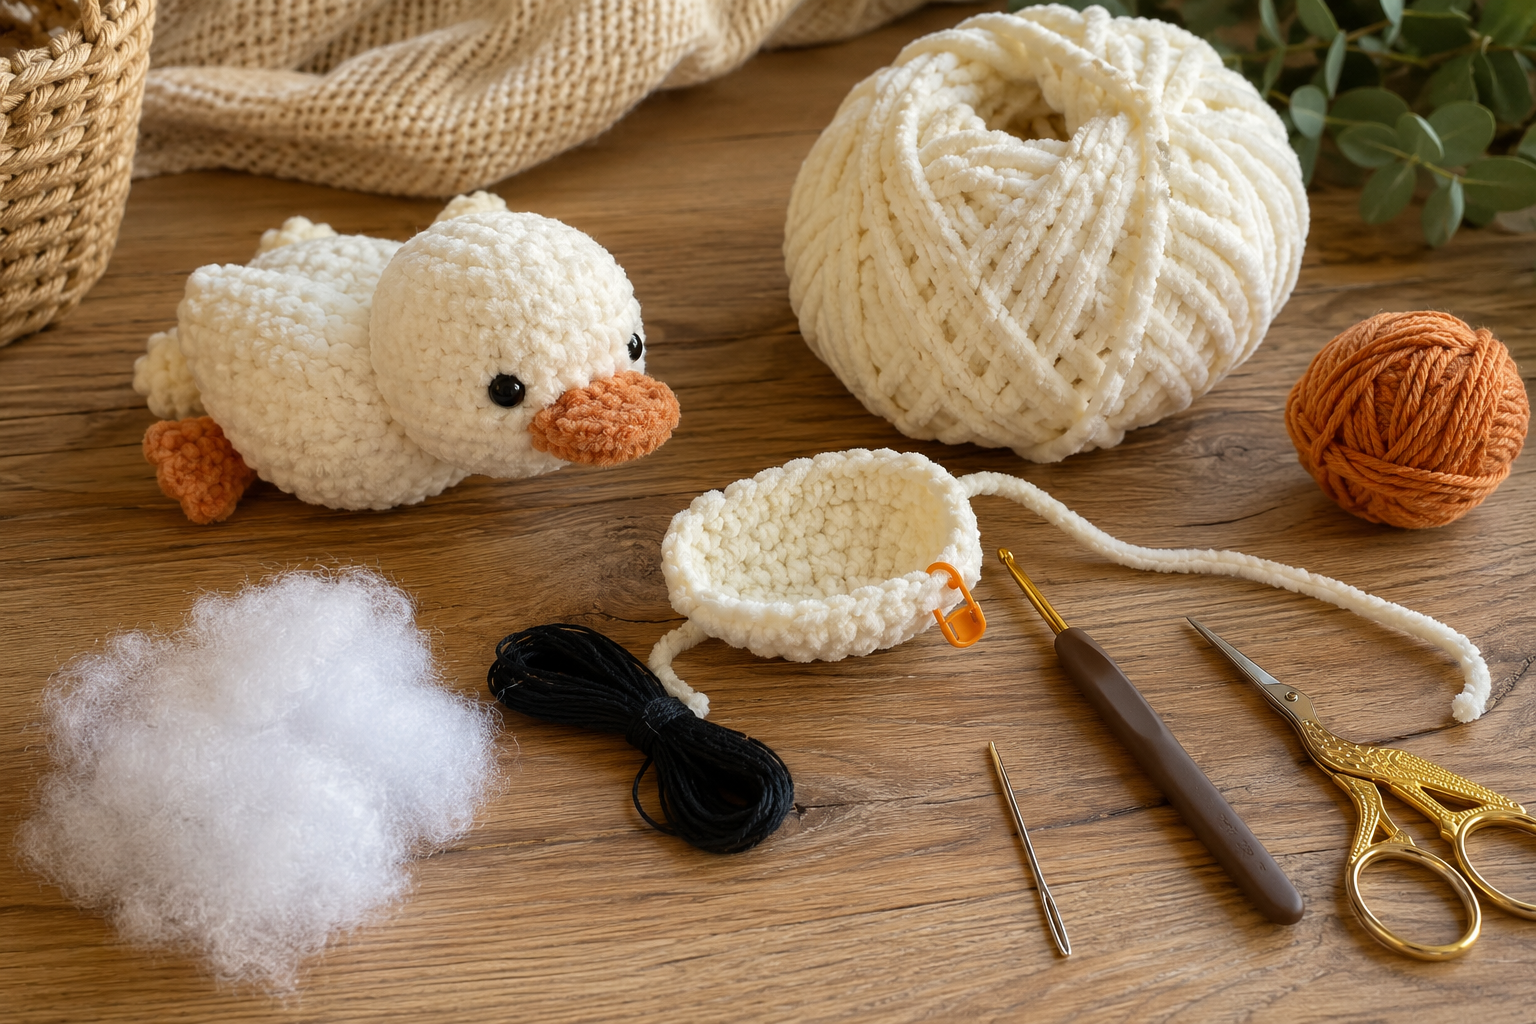
If you love making cute crochet animals, this lying duck amigurumi is a fun little project to add to your collection. Its rounded body, fluffy texture, tiny orange beak and soft wings make it especially adorable as a handmade gift, shelf decoration or seasonal crochet project.
This pattern is designed to be simple enough for confident beginners, while still giving you enough shaping and assembly details to create a polished finished duck.
Pattern note: The inspiration image you provided contains a few stitch-count inconsistencies in the original instructions. The pattern below is a cleaned-up, internally consistent version created for this article, rather than a verbatim reproduction of those instructions. Always check your stitch count at the end of each round.
Table of Contents
- What You’ll Make
- Pattern Details at a Glance
- Materials You’ll Need
- Yarn and Hook Recommendations
- Crochet Abbreviations
- Important Techniques
- Lying Duck Crochet Pattern
- Head Pattern
- Body Pattern
- Beak Pattern
- Wing Pattern
- Leg Pattern
- Tail Pattern
- Assembly Step by Step
- How to Position the Face
- How to Get a Cute Lying Shape
- Stuffing Tips
- Color Variations
- Beginner Tips & Common Mistakes
- Baby-Safe Considerations
- Finishing Checklist
- Frequently Asked Questions
- Final Thoughts
1. What You’ll Make
This pattern creates a small, soft lying duck amigurumi with:
- A rounded head
- A plump horizontal body
- Two small wings
- A tiny orange beak
- Two feet
- A small tail
- Embroidered facial details
The finished duck is intended to look soft and slightly flattened rather than standing upright.
Finished Size
Using plush or chenille yarn and an appropriately sized hook, expect approximately:
10–12 cm (4–5 in) long
Your final size will vary according to:
- Yarn thickness
- Hook size
- Your crochet tension
- How firmly you stuff the body
2. Pattern Details at a Glance
| Detail | Recommendation |
|---|---|
| Skill level | Beginner–Intermediate |
| Project type | Amigurumi |
| Construction | Worked in rounds |
| Approx. size | 10–12 cm |
| Main color | White, cream or pale yellow |
| Beak | Orange |
| Feet | Orange |
| Hook | 3.5–4 mm for plush yarn |
| Stuffing | Polyester fiberfill |
| Eyes | Embroidery recommended for baby-related use |
| Stitch marker | Strongly recommended |
| Sewing needle | Tapestry needle |
| Scissors | Small sharp scissors |
3. Materials You’ll Need
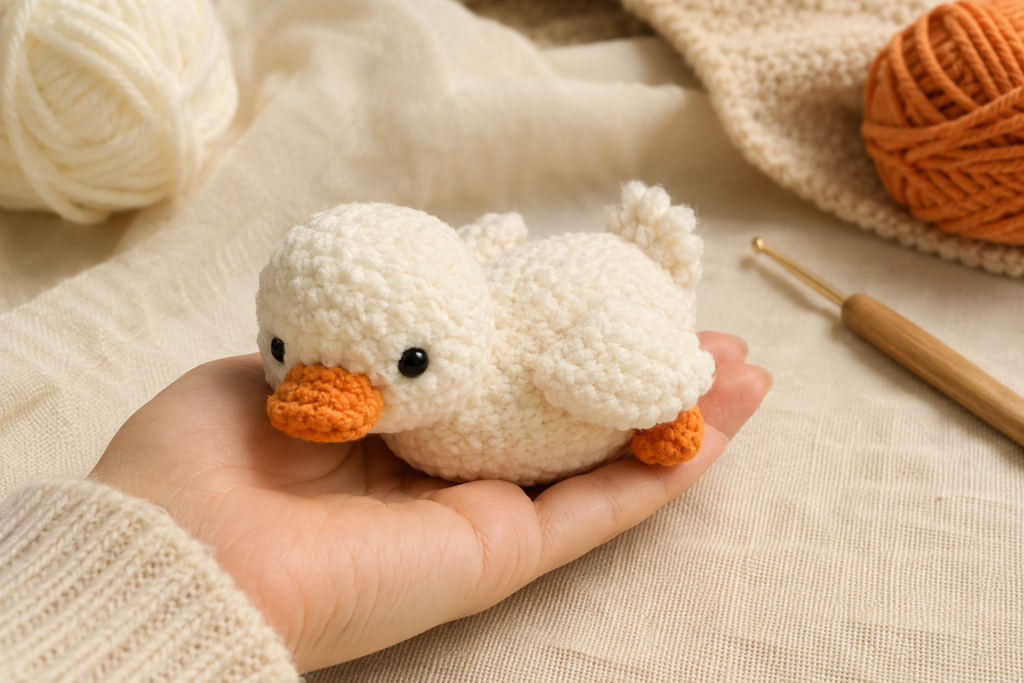
Yarn
You will need approximately:
- 50–70 g white, cream or pale-yellow yarn
- Small amount of orange yarn
- Small amount of black embroidery thread
The exact quantity depends on the yarn weight and size of your finished duck.
Other Supplies
You’ll also need:
- Crochet hook appropriate for your yarn
- Polyester fiberfill
- Tapestry needle
- Stitch marker
- Scissors
- Optional: pins for positioning pieces before sewing
4. Yarn and Hook Recommendations
For the soft appearance shown in the inspiration image, a chenille, velvet or plush yarn works beautifully.
However, plush yarn can make it harder to see individual stitches.
If you’re a beginner, consider making your first version with a smooth worsted-weight yarn. Once you are comfortable with the shaping, try the plush version.
Hook Size
For amigurumi, your hook should generally create tight stitches.
You don’t want large holes between stitches because stuffing can show through.
If your yarn label recommends a 4–5 mm hook, you might use approximately:
3.5–4 mm
depending on your tension.
5. Crochet Abbreviations
The pattern uses US crochet terminology.
| Abbreviation | Meaning |
|---|---|
| MR | Magic ring |
| ch | Chain |
| sc | Single crochet |
| hdc | Half double crochet |
| dc | Double crochet |
| sl st | Slip stitch |
| inc | Increase — 2 sc in the same stitch |
| dec | Decrease — single crochet 2 stitches together |
| st | Stitch |
| sts | Stitches |
| FO | Fasten off |
Pattern notation
When you see:
(sc, inc) × 6
it means:
Crochet 1 single crochet, then 1 increase, and repeat that sequence 6 times.
You should have 18 stitches at the end of that round.
6. Important Techniques
Before beginning, make sure you’re comfortable with:
Magic Ring
The magic ring gives the center of your amigurumi a tight, closed beginning.
Invisible Decrease
For a smoother amigurumi finish, use an invisible decrease whenever possible.
Working in Continuous Rounds
Most of the duck is worked continuously rather than joining every round.
Use a stitch marker to identify the first stitch of each round.
7. Lying Duck Crochet Pattern
We’ll make the duck in separate pieces:
- Head
- Body
- Beak
- Wings ×2
- Feet ×2
- Tail
- Facial details
The head and body are stuffed separately before being sewn together.
8. Head Pattern
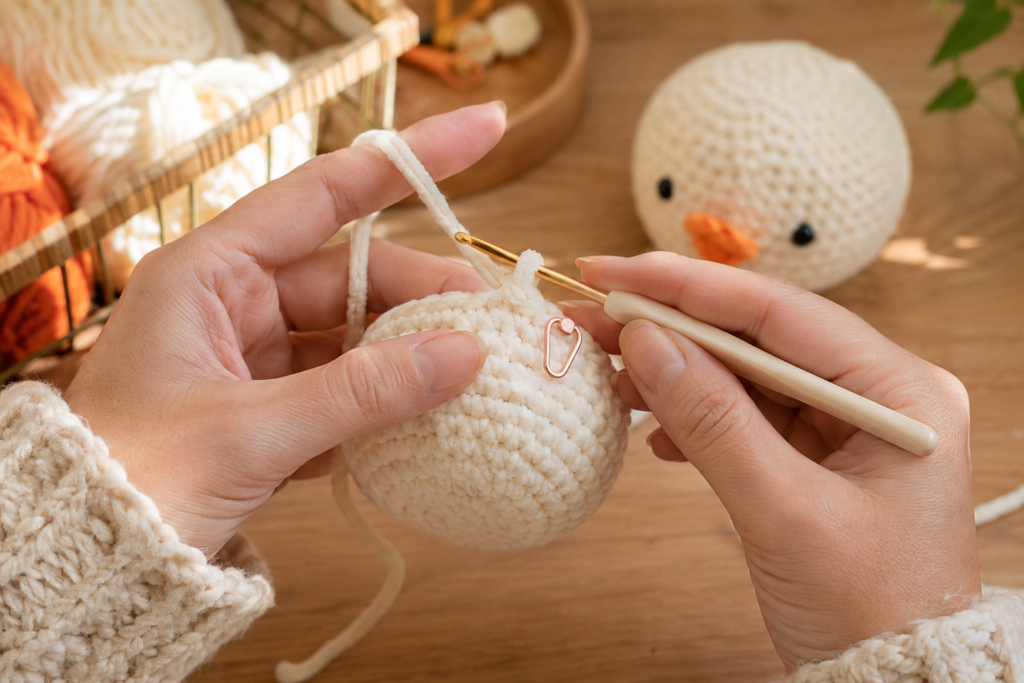
Use your main body color.
Head — Round by Round
| Round | Instructions | Stitch Count |
|---|---|---|
| R1 | 6 sc in MR | 6 |
| R2 | inc × 6 | 12 |
| R3 | (sc, inc) × 6 | 18 |
| R4 | (2 sc, inc) × 6 | 24 |
| R5 | (3 sc, inc) × 6 | 30 |
| R6 | sc around | 30 |
| R7 | sc around | 30 |
| R8 | sc around | 30 |
| R9 | (3 sc, dec) × 6 | 24 |
| R10 | (2 sc, dec) × 6 | 18 |
| R11 | (sc, dec) × 6 | 12 |
| R12 | dec × 6 | 6 |
Step-by-Step
R1: Make a magic ring and crochet 6 sc into the ring.
Pull the ring closed.
R2: Work 2 sc into each stitch.
You now have 12 stitches.
R3: Repeat:
sc, inc
six times.
You should have 18 stitches.
R4: Repeat:
2 sc, inc
six times.
You should have 24 stitches.
R5: Repeat:
3 sc, inc
six times.
You should have 30 stitches.
R6–R8: Crochet 1 sc in every stitch.
Keep the tension consistent.
Begin Shaping
R9:
Repeat:
3 sc, dec
six times.
24 stitches
R10:
Repeat:
2 sc, dec
six times.
18 stitches
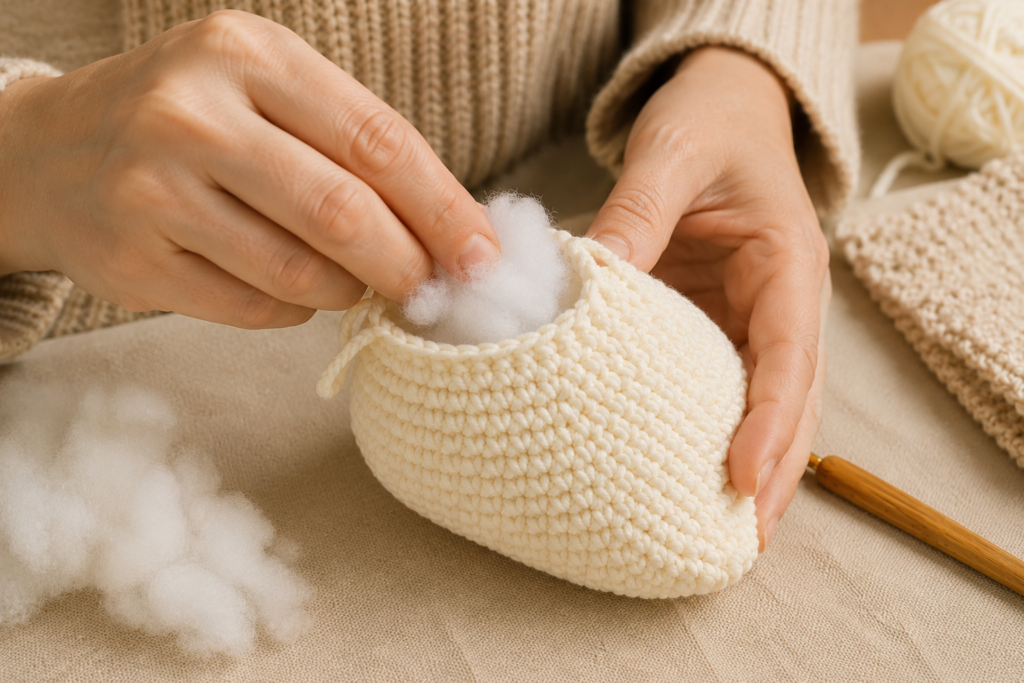
At this point, begin adding small amounts of stuffing.
Don’t completely fill the head yet.
R11:
Repeat:
sc, dec
six times.
12 stitches
Add more stuffing and shape the head gently.
R12:
Decrease around.
You should have 6 stitches.
Fasten off and leave a long yarn tail for sewing.
9. Body Pattern
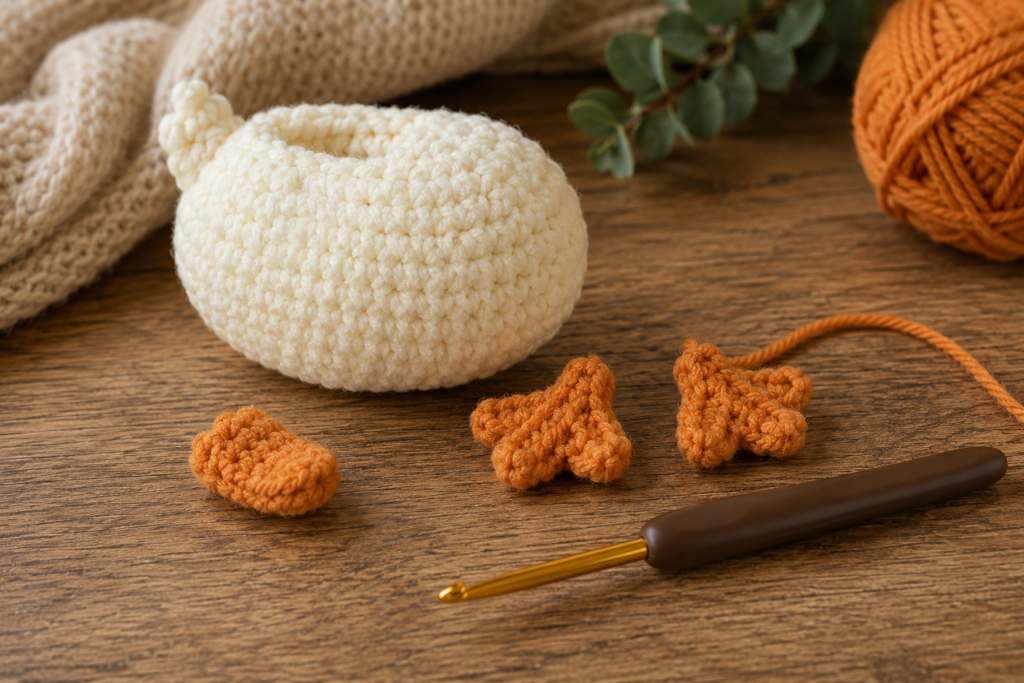
The body is slightly larger than the head and is shaped to create a soft, rounded lying form.
Use your main color.
| Round | Instructions | Stitch Count |
|---|---|---|
| R1 | 6 sc in MR | 6 |
| R2 | inc × 6 | 12 |
| R3 | (sc, inc) × 6 | 18 |
| R4 | (2 sc, inc) × 6 | 24 |
| R5 | (3 sc, inc) × 6 | 30 |
| R6 | (4 sc, inc) × 6 | 36 |
| R7 | sc around | 36 |
| R8 | sc around | 36 |
| R9 | sc around | 36 |
| R10 | sc around | 36 |
| R11 | (4 sc, dec) × 6 | 30 |
| R12 | (3 sc, dec) × 6 | 24 |
| R13 | sc around | 24 |
| R14 | (2 sc, dec) × 6 | 18 |
| R15 | (sc, dec) × 6 | 12 |
| R16 | dec × 6 | 6 |
Body Instructions
Begin with a magic ring.
Work R1–R6 according to the table.
At R6, you should have:
36 stitches
Work four even rounds:
R7–R10: 36 sc
This creates the main volume of the duck.
Shaping the Back End
R11:
(4 sc, dec) × 6 = 30 sts
R12:
(3 sc, dec) × 6 = 24 sts
R13:
24 sc
R14:
(2 sc, dec) × 6 = 18 sts
Begin stuffing gradually.
Important Body Tip
Because this is supposed to be a lying duck, don’t stuff the body into a perfectly round ball.
Instead:
- Fill the center firmly.
- Keep the lower section slightly softer.
- Gently flatten the underside with your fingers.
- Leave enough flexibility for the duck to sit naturally.
Continue:
R15:
(sc, dec) × 6 = 12 sts
Add the final stuffing.
R16:
dec × 6 = 6 sts
Fasten off and close the opening.
10. Beak Pattern
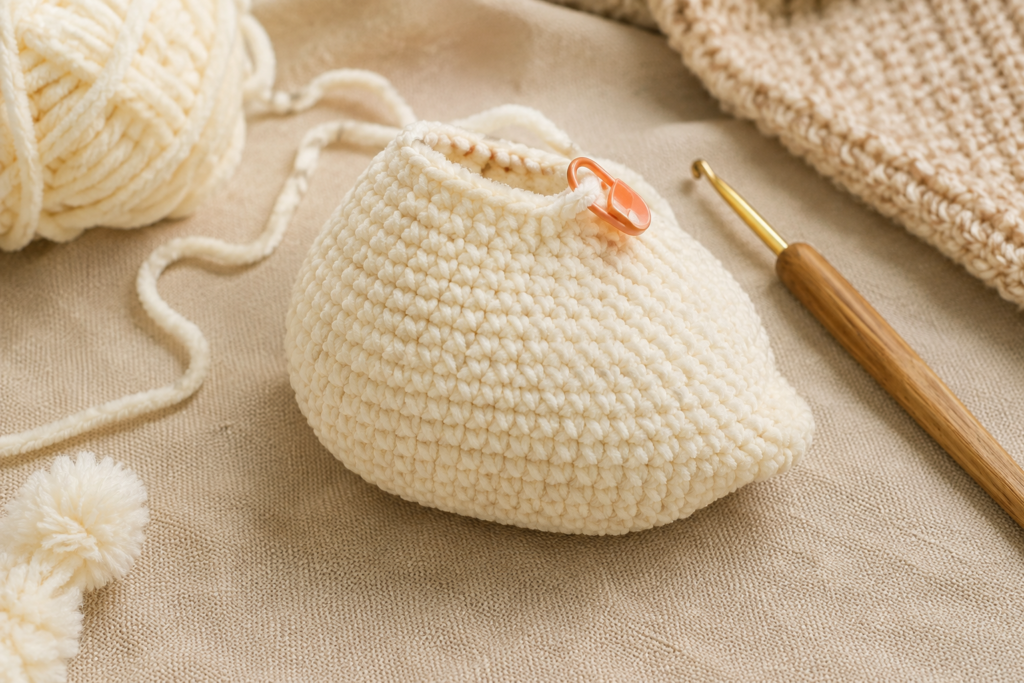
Use orange yarn.
For a small rounded beak:
Round 1
Make a magic ring.
Work:
6 sc
6 sts.
Round 2
Increase around:
inc × 6
12 sts.
Round 3
Work:
12 sc
Fasten off.
Don’t overstuff the beak.
Flatten it slightly between your fingers to create a small duck-bill shape.
Leave a long tail for sewing.
Beak Tip
The beak should be small compared with the head.
A common beginner mistake is making the beak too large, which can make the animal look more like a bird character than a soft baby duck.
11. Wing Pattern
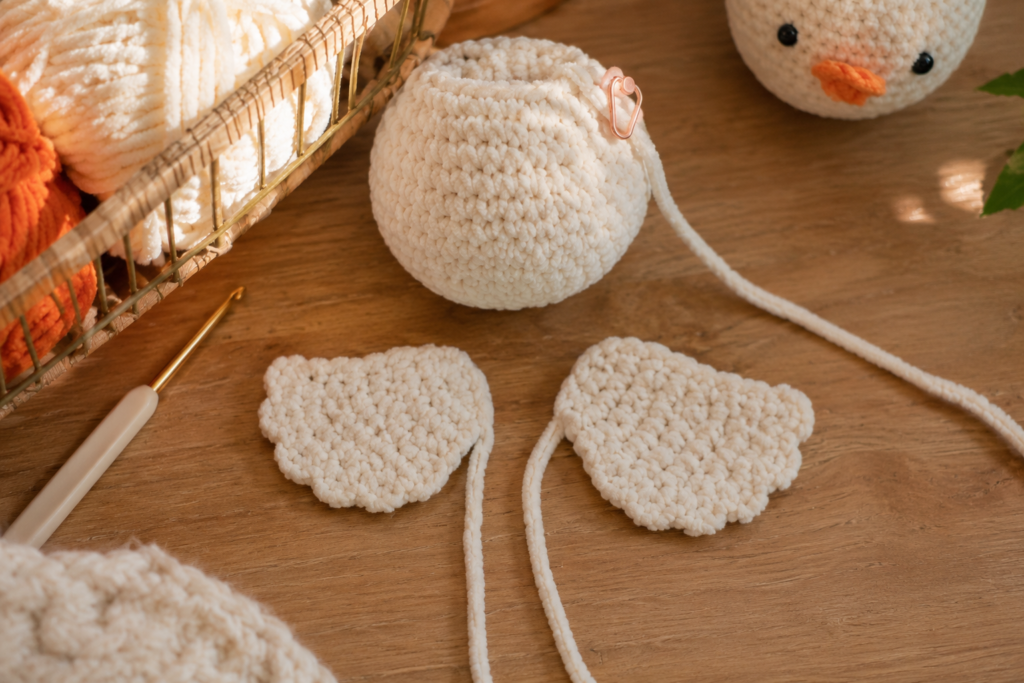
Make 2 wings.
Use your main color.
Wing
Chain 6.
Beginning in the second chain from the hook:
Row 1:
sc, sc, hdc, hdc, hdc
You should have 5 worked stitches.
Turn.
Row 2:
2 hdc in first stitch, hdc in next 2 stitches, 2 hdc in last stitch.
Fasten off.
Leave a long tail for sewing.
Shape the Wing
The wing should look slightly rounded.
Don’t worry if it doesn’t look perfect while flat.
Once sewn to the body, gently curve it downward.
12. Leg Pattern
Make 2 feet.
Use orange yarn.
Foot
Chain 5.
Starting in the second chain from the hook:
Row 1:
2 hdc, hdc, sl st
Fasten off.
Leave a long tail.
Make the Feet More Duck-Like
Flatten each foot slightly.
You can also add two small embroidered lines with darker orange yarn to suggest toes.
This small detail makes a surprisingly big difference.
13. Tail Pattern
The tail can be very simple.
Use your main color.
Tail
Make a magic ring.
R1: 6 sc
R2: inc × 6 = 12 sts
R3: (sc, inc) × 6 = 18 sts
R4: sc around = 18 sts
Fasten off.
Do not stuff heavily.
Fold the piece slightly and sew it to the back of the body.
You can also make two small overlapping tail pieces if you want a fluffier appearance.
14. Assembly Step by Step
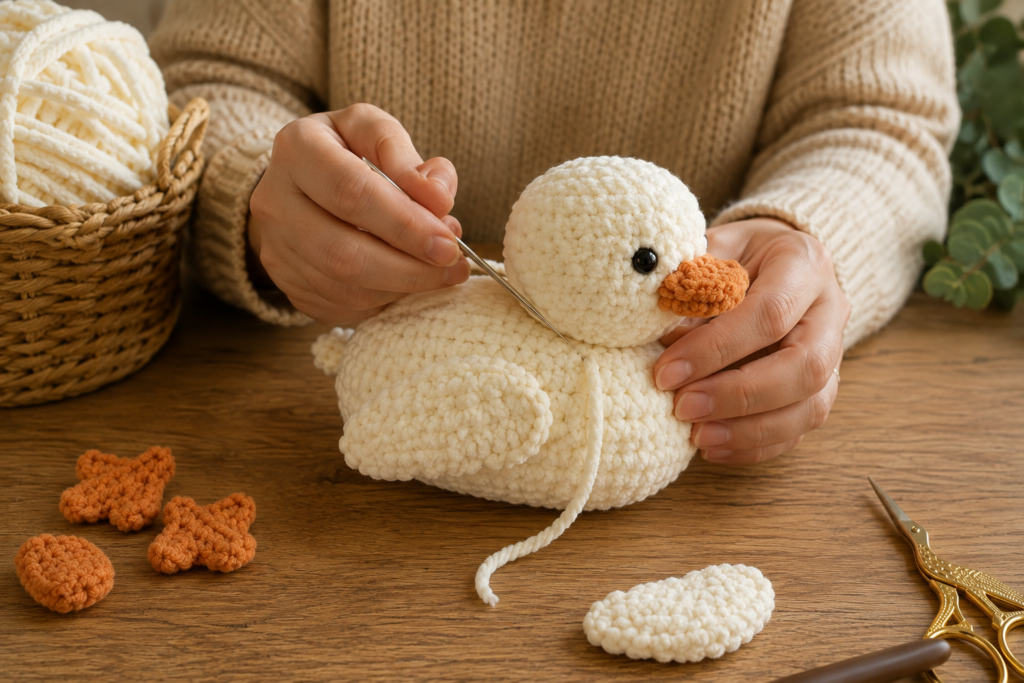
This is where your duck really starts to take shape.
Before permanently sewing anything, use pins to test the placement.
Step 1 — Attach the Head
Place the head against the front of the body.
The lower portion of the head should overlap the upper portion of the body.
Pin it first.
Check the duck from:
- Front
- Side
- Top
Make sure the head isn’t leaning too far forward or backward.
Then sew around the connection using the long yarn tail.
Take small, secure stitches through both pieces.
Step 2 — Attach the Wings
Position one wing on each side of the body.
For a lying duck, the wings look particularly cute when they angle slightly backward and downward.
Don’t position them too high.
A good starting point is approximately halfway down the side of the body.
Sew securely.
Step 3 — Attach the Feet
Place the feet toward the front underside of the body.
The feet should be visible from the front but shouldn’t make the duck look as though it is standing.
Pin first.
Check the sitting position.
Then sew securely.
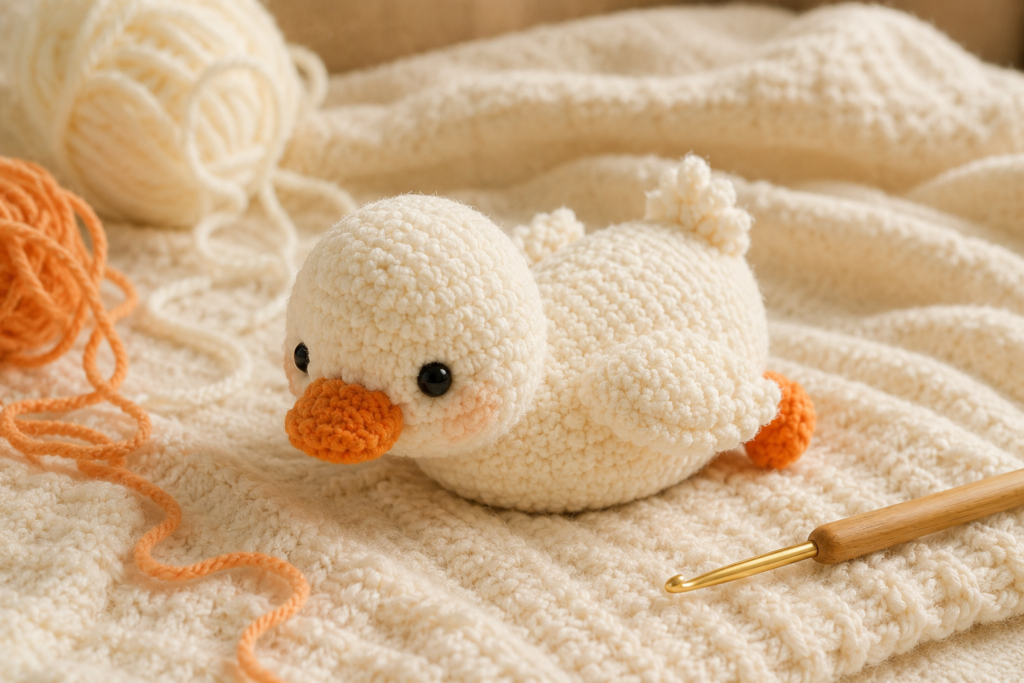
Step 4 — Attach the Tail
Place the tail at the back of the body.
Angle it slightly upward.
Sew around the base.
If you want more volume, gently fold the tail before securing it.
Step 5 — Attach the Beak
The beak should sit approximately in the center of the face.
Place it between the eyes.
For a cute expression, position it slightly lower than the vertical midpoint of the eyes.
Pin it first.
Look at the duck from the front.
Once you’re happy, sew the beak securely.
15. How to Position the Face
Facial placement is one of the most important parts of an amigurumi project.
Even a beautifully crocheted animal can look strange if the eyes are too far apart or too high.
Recommended Layout
For a small duck head:
Eyes: approximately 5–7 stitches apart
Beak: centered between the eyes and slightly below them
Cheeks: optional and placed just outside/below the eyes
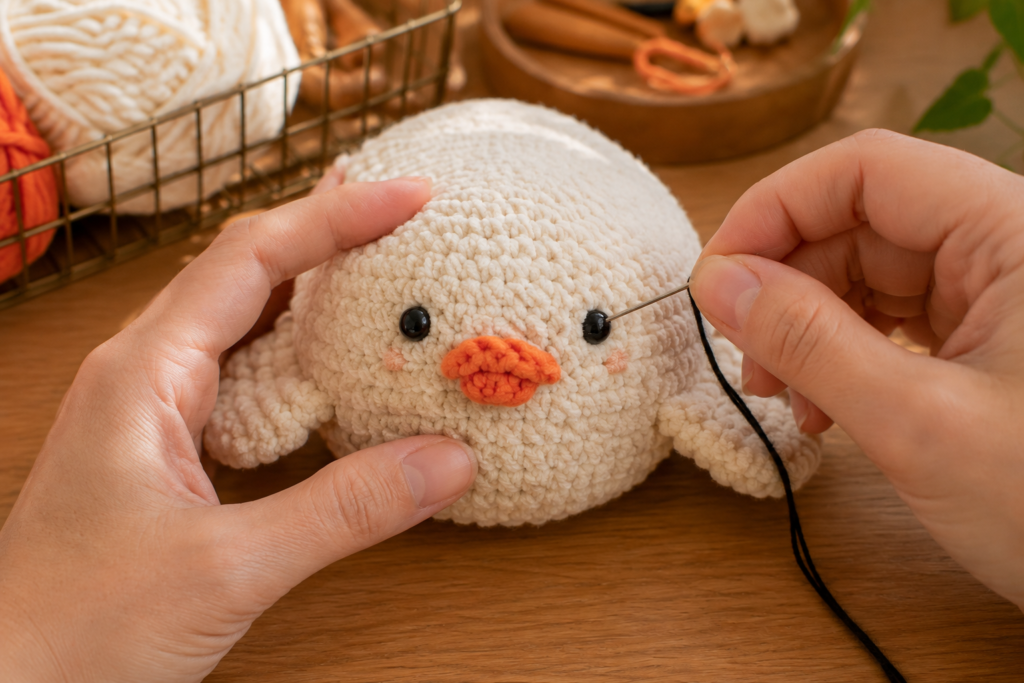
Embroidered Eyes
For the style shown in the inspiration image, use black embroidery thread.
Create two small vertical or slightly curved stitches.
You can add tiny blush-colored cheeks underneath.
Why I Prefer Embroidered Eyes
If the duck might be handled by a baby or young child, embroidered facial features avoid the detachable parts associated with plastic safety eyes.
For a decorative adult-owned amigurumi, safety eyes can be used if they are appropriate for the project.
16. How to Get the Cute Lying Shape
This is one of the most important finishing techniques.
Don’t simply stuff the body until it becomes perfectly spherical.
Instead:
1. Stuff the Center
Add stuffing gradually.
2. Shape With Your Hands
Gently press the underside flatter.
3. Keep the Upper Back Rounded
The top should remain plump.
4. Flatten the Bottom
The bottom should have enough surface area for the duck to rest naturally.
5. Check the Side Profile
Your duck should look approximately like:
rounded head → long soft body → small raised tail
rather than a round ball.
17. Stuffing Tips
Stuffing can completely change the finished result.
Don’t Stuff Everything at Once
Add small pieces.
Push the stuffing toward the edges.
Then add more.
Avoid Overstuffing
If you stretch the crochet fabric too much, you may start seeing the stuffing between stitches.
Avoid Understuffing
The finished duck shouldn’t collapse when gently squeezed.
Best Technique
Use your fingers or the blunt end of your crochet hook to distribute stuffing evenly.
18. Color Variations
The classic white-and-orange version is adorable, but you can easily customize the duck.
Classic White Duck
- White body
- Orange beak
- Orange feet
- Black eyes
Soft Yellow Duck
- Pale yellow body
- Orange beak
- Orange feet
This creates a more traditional baby-duck appearance.
Cream & Peach
- Warm cream body
- Peach-orange beak
- Peach feet
- Brown embroidered eyes
Pastel Pink Duck
- Pale pink body
- Soft orange beak
- Pink cheeks
Lavender Duck
- Pale lavender body
- Golden-orange beak
- Tiny embroidered flowers
19. Beginner Tips & Common Mistakes
Mistake 1: Losing Your Round Count
Amigurumi is much easier when you use a stitch marker.
Move it to the first stitch of every round.
Mistake 2: Making Loose Stitches
Loose stitches can create holes.
Use a smaller hook if necessary.
Mistake 3: Stuffing Too Early
If you overstuff before shaping the piece, it becomes difficult to achieve a smooth silhouette.
Mistake 4: Making the Head Too Large
The head should be cute and rounded, but the body should still have enough visual volume.
Mistake 5: Sewing Pieces Without Checking Placement
Always pin your pieces first.
Take a quick look from different angles.
Mistake 6: Uneven Eyes
Mark the eye positions before embroidering.
You can use removable stitch markers or pins to check symmetry.
20. Baby-Safe Considerations
Although this duck has a soft, baby-friendly appearance, not every handmade amigurumi is automatically suitable as a baby toy.
If you’re making this for an infant:
- Use embroidered eyes rather than detachable plastic eyes.
- Avoid small detachable decorations.
- Secure every sewn component extremely well.
- Weave yarn ends securely into the work.
- Avoid ribbons, beads, buttons and other loose embellishments.
- Use appropriate washable yarn.
- Inspect the toy regularly for loose components or damaged stitching.
For very young children, always consider the manufacturer’s safety guidance for the materials you use and the child’s age.
21. Finishing Checklist
Before calling your duck finished, check:
☐ Head securely attached
☐ Body securely closed
☐ Both wings firmly sewn
☐ Both feet secure
☐ Tail attached
☐ Beak securely attached
☐ Eyes symmetrical
☐ No loose yarn ends
☐ No exposed stuffing
☐ Body sits naturally
☐ All small decorative parts are secure
Give the finished duck a gentle squeeze and inspect every seam.
Quick Pattern Summary
| Part | Quantity | Main Color | Orange |
|---|---|---|---|
| Head | 1 | ✓ | — |
| Body | 1 | ✓ | — |
| Wings | 2 | ✓ | — |
| Beak | 1 | — | ✓ |
| Feet | 2 | — | ✓ |
| Tail | 1 | ✓ | — |
| Eyes | 2 | Black embroidery | — |
Frequently Asked Questions
Is this lying duck crochet pattern beginner-friendly?
Yes. The main pieces use basic amigurumi techniques such as single crochet, increases and decreases. Beginners should be comfortable working in continuous rounds.
How big will the finished duck be?
With plush yarn and a suitable hook, the finished duck should be approximately 10–12 cm (4–5 inches) long, although your final dimensions will depend on your yarn and tension.
What yarn is best for this crochet duck?
Chenille or plush yarn gives the soft fluffy appearance seen in the inspiration image. Smooth worsted-weight yarn is easier for beginners because individual stitches are easier to see.
Can I make the duck larger?
Yes. Using thicker yarn and a larger hook will generally produce a larger duck. You can also enlarge individual pieces, but remember that changing the size of one component may require adjusting the others.
Can I use yellow yarn instead of white?
Absolutely. Pale yellow creates a classic duck appearance, while cream gives a softer neutral aesthetic.
How do I make the duck extra fluffy?
Use a plush or chenille yarn with a soft pile. Work with tight stitches and avoid leaving large gaps between stitches.
Why does my body look like a ball?
The body needs to be shaped and gently flattened after stuffing. Don’t overstuff the underside. Press it into a slightly elongated shape before attaching the head, wings and feet.
How do I keep the eyes even?
Mark the eye positions before attaching or embroidering them. Look at the face directly from the front rather than judging the placement from an angle.
Can I sell ducks made from this pattern?
If you are the designer of the pattern on your site, you can state your own policy regarding finished items. A practical approach is to allow small-scale sales of finished handmade items while asking sellers not to redistribute the written pattern itself.
Can I use this pattern for a baby gift?
You can make it as a handmade gift, but if the recipient is an infant, use embroidered facial features and avoid loose small parts, ribbons, buttons or other detachable decorations. Always inspect handmade toys regularly.
A Few Ideas for Your Finished Duck
Once you’ve mastered the basic pattern, you can create several variations without completely redesigning the project.
🦆 Sleepy Duck
Embroider closed eyes instead of open eyes.
🌸 Flower Duck
Sew a tiny crocheted flower beside one ear.
🎀 Gift Duck
Add a removable decorative bow for display, keeping loose accessories away from babies.
🐣 Baby Duck
Use pale yellow yarn and a slightly smaller beak.
☁️ Cloud Duck
Use white fluffy yarn and embroidered pastel details.
🌈 Rainbow Duck
Use small pastel color changes for the wings or feet.
Final Thoughts
This little lying duck is a great project when you want something cute, quick and giftable without needing an extremely complicated amigurumi pattern.
The most important parts aren’t actually the number of stitches—they’re the tension, stuffing and assembly.
Keep your stitches tight, stuff gradually and take your time positioning the face and body pieces. Those small finishing decisions are what turn a basic crocheted shape into an adorable character.
And don’t be afraid to experiment.
Try cream instead of white, yellow instead of cream, embroidered sleepy eyes, pastel wings or a tiny flower accessory. Once you understand the basic construction, you can turn the same pattern into several different duck designs.
Happy crocheting! 🧶🦆







