
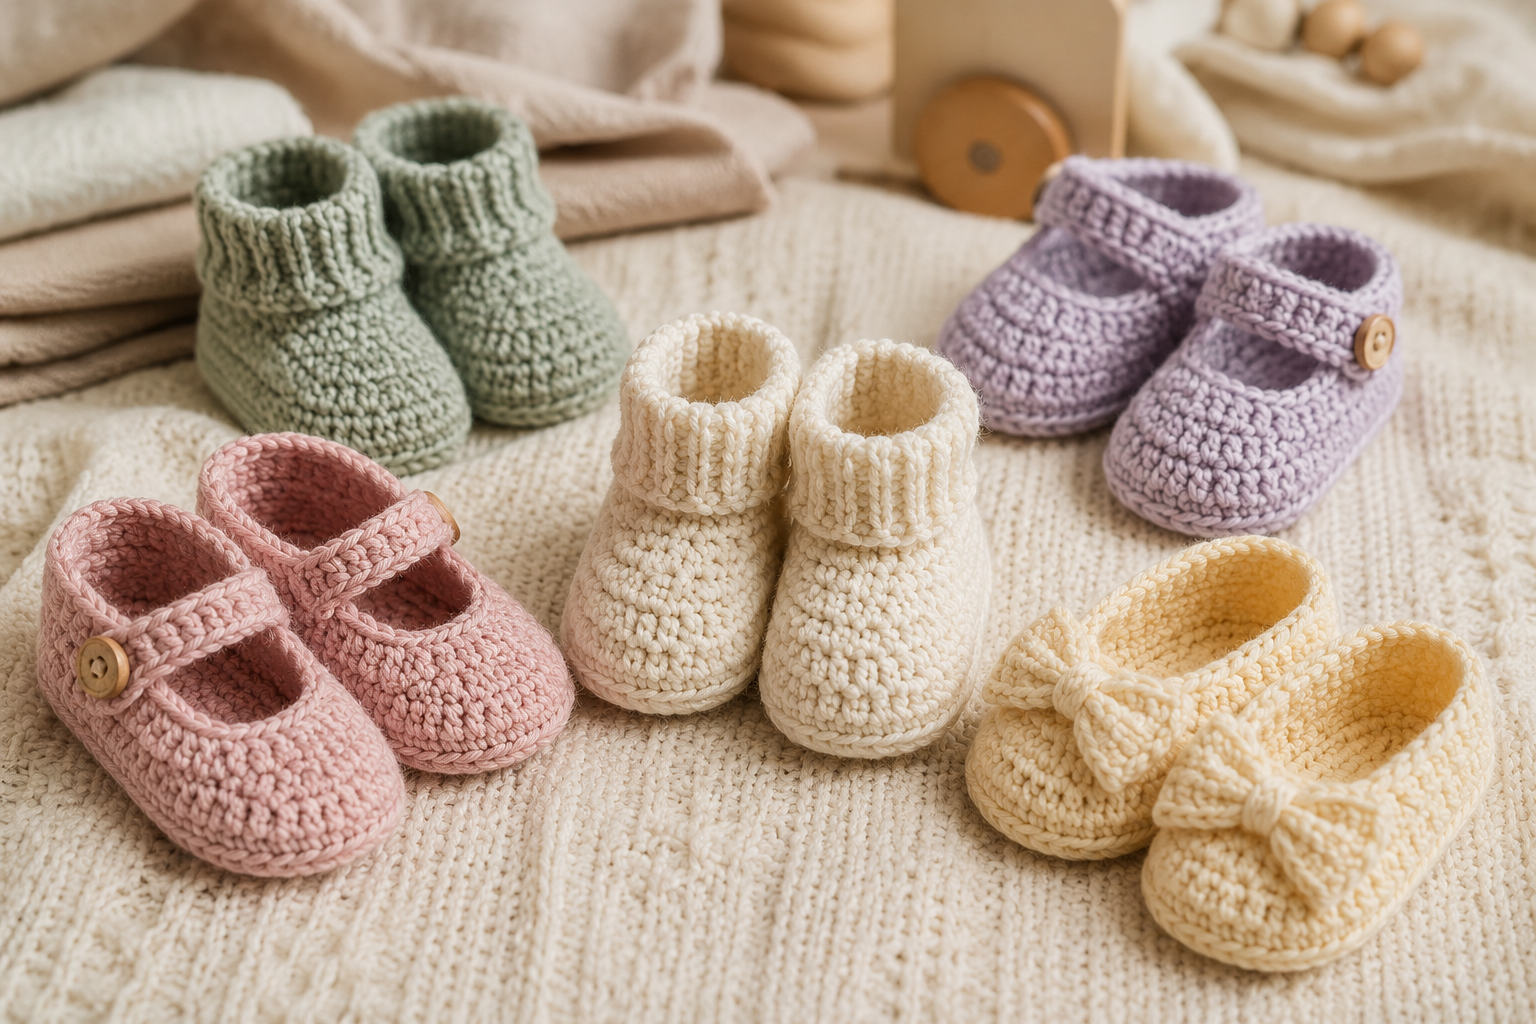
Crochet baby booties are one of those projects that are small enough to finish in an afternoon but special enough to make a memorable handmade gift. They are perfect for baby showers, newborn photo sessions, coming-home outfits, or simply adding a cozy handmade touch to a little wardrobe.
The best part? You don’t need an advanced crochet skill set to make a beautiful pair.
This guide includes 5 crochet baby bootie styles, ranging from a simple beginner-friendly pair to Mary Jane-inspired booties, ribbed booties, cozy cuffed booties, and a sweet bow-inspired style.
You’ll also find a complete step-by-step crochet baby bootie pattern, including the sole, upper, toe shaping, heel, finishing and sizing adjustments.
Important: Crochet baby booties are decorative and wearable accessories, not walking shoes. Always check the fit and construction before use. Avoid small detachable decorations, loose ribbons, buttons, beads and other pieces that could become choking hazards. Never leave a baby unattended while wearing handmade accessories.
5 Crochet Baby Booties at a Glance
| Pattern | Skill Level | Approx. Size | Style | Best For |
|---|---|---|---|---|
| Classic Soft Booties | Beginner | 0–3 months | Simple & cozy | First project |
| Mary Jane Booties | Beginner | 0–3 months | Sweet & classic | Baby gifts |
| Ribbed Cuff Booties | Beginner–Intermediate | 0–3 months | Cozy & textured | Cooler weather |
| Button-Free Strap Booties | Intermediate | 0–3 months | Decorative | Baby showers |
| Bow-Trim Booties | Intermediate | 0–3 months | Feminine & delicate | Special outfits |
Tip: The sizes above are approximate. Babies grow at different rates, so measuring the baby’s foot is more reliable than choosing a size by age alone.
Before You Start: Choosing Yarn for Baby Booties
The yarn you choose can make a huge difference in the finished booties.
For baby footwear, look for yarn that is:
- Soft against delicate skin
- Washable
- Comfortable
- Not overly fuzzy
- Easy to work with
- Appropriate for the intended season
A soft DK/light worsted or baby-weight yarn works beautifully for small booties.
Good color combinations
You don’t have to stick to traditional pink and blue.
Try:
- Cream + dusty pink
- Ivory + sage green
- Lavender + white
- Butter yellow + cream
- Dusty blue + beige
- Peach + ivory
- Mint + soft gray
- Terracotta + cream
For a modern handmade look, choose one neutral color and one accent color.
Materials You’ll Need
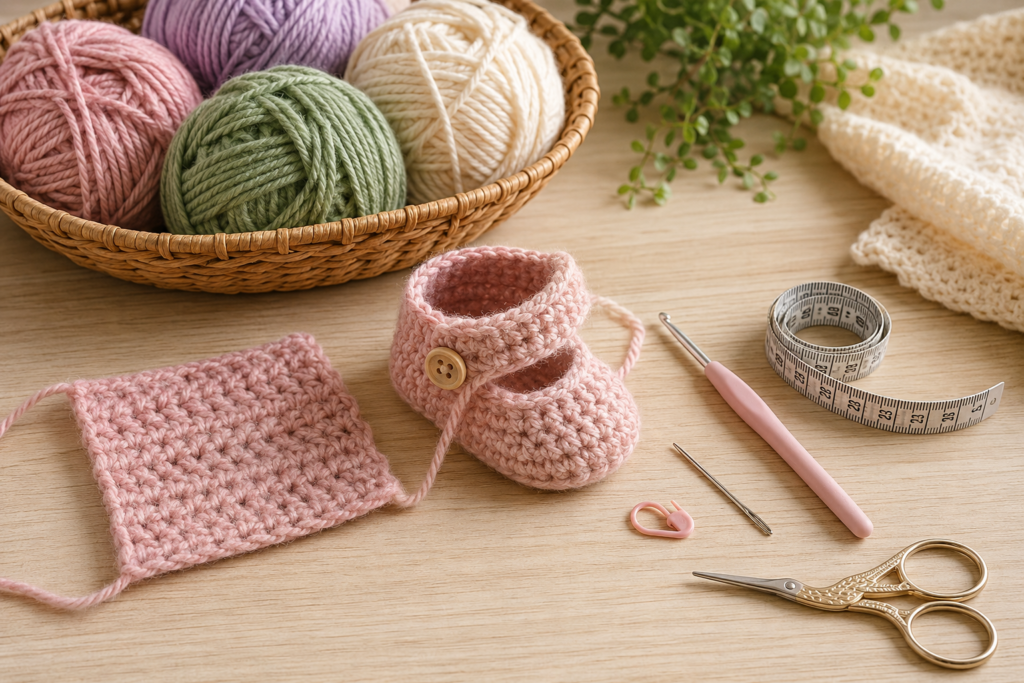
For the main pattern, gather:
- Approximately 50–75 g of soft washable yarn
- 4.0 mm crochet hook
- Tapestry needle
- Scissors
- Stitch marker
- Measuring tape
Optional:
- Small removable decorative ribbon for photography only
- Stitch counter
Why a 4.0 mm hook?
A 4.0 mm hook gives a relatively compact fabric with medium-weight yarn while still keeping the stitches comfortable to work.
However, your gauge matters more than the exact hook size.
If your stitches are too loose, try a smaller hook.
If your fabric is too stiff, try a slightly larger hook.
Crochet Abbreviations
The pattern uses US crochet terminology.
| Abbreviation | Meaning |
|---|---|
| ch | Chain |
| sc | Single crochet |
| hdc | Half double crochet |
| dc | Double crochet |
| sl st | Slip stitch |
| st | Stitch |
| inc | Increase |
| dec | Decrease |
| BLO | Back loop only |
| FO | Fasten off |
What does “inc” mean?
An increase means working 2 stitches into the same stitch.
What does “dec” mean?
A decrease combines two stitches into one.
For single crochet, insert the hook into the next stitch, pull up a loop, insert into the following stitch, pull up another loop, then yarn over and pull through all loops.
Gauge
Before beginning the booties, make a small swatch.
A useful starting gauge is approximately:
18–20 stitches × 20–22 rows = 10 × 10 cm
The exact gauge will depend on your yarn and hook.
For baby booties, finished measurements are more important than matching a particular gauge perfectly.
Finished Size
The main pattern is designed as an approximate 0–3 month size.
Target sole length:
Approximately 9–10 cm
Target sole width:
Approximately 4.5–5 cm
These measurements are only a starting point.
Baby feet vary considerably, so measure whenever possible.
Pattern 1: Classic Crochet Baby Booties
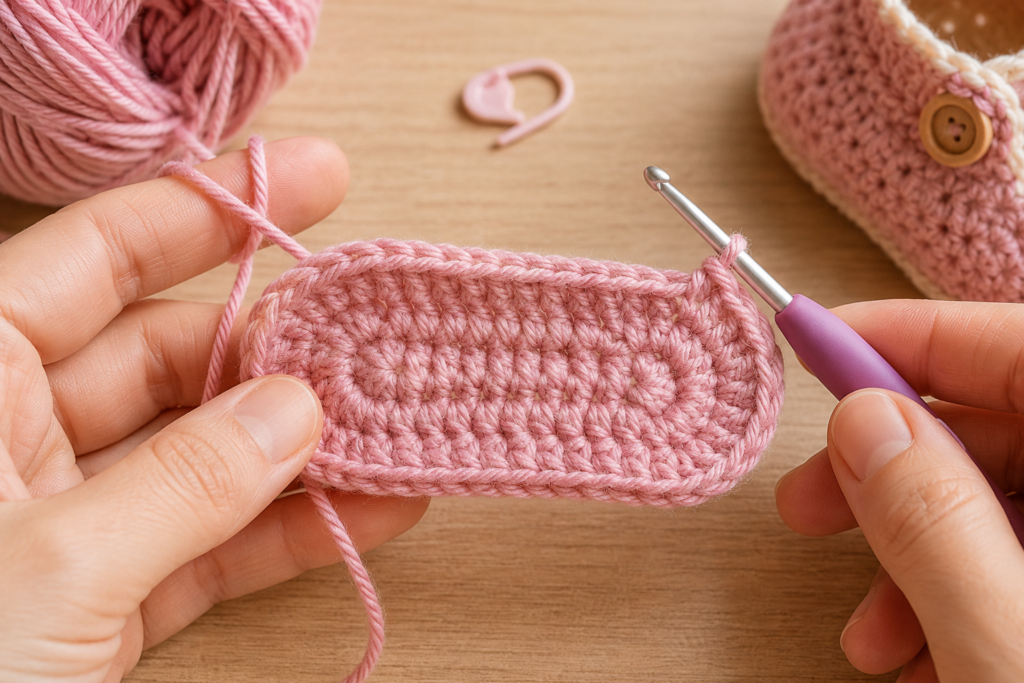
This is the pattern I recommend starting with.
The bootie is built in three main sections:
Sole → Upper → Cuff
The sole is worked first, then the sides are built upward. The toe is shaped by strategically reducing stitches, while the heel remains relatively simple.
Step 1: Make the Sole
Begin with your main color.
Foundation
Chain:
11
The first chain does not count as a stitch unless otherwise specified.
Round 1
Starting in the second chain from the hook:
- sc in the next 9 chains
- 3 sc in the final chain
- turn your work and continue along the opposite side of the foundation chain
- sc in the next 8 chains
- 2 sc in the final chain
You should have approximately:
22 stitches
Don’t worry if the oval looks slightly uneven at this stage. The next rounds will define the shape.
Round 2
Work around the oval.
- sc in the next 9 stitches
- 2 sc in each of the next 3 stitches
- sc in the next 8 stitches
- 2 sc in each of the final 2 stitches
You should have approximately:
28 stitches
Your sole should now look like a small elongated oval.
Round 3
Continue shaping the sole.
Work:
- sc across the straight side
- increase around the rounded toe end
- sc across the opposite side
- increase around the heel end
Maintain the oval shape rather than creating sharp corners.
You should finish with approximately:
34 stitches
Check your work
Place the sole on a flat surface.
It should be:
- Flat
- Symmetrical
- Slightly elongated
- Wider at the rounded ends
If the sole curls upward, your tension may be too tight.
If it becomes wavy, you may be adding too many increases.
Step 2: Build the Sides
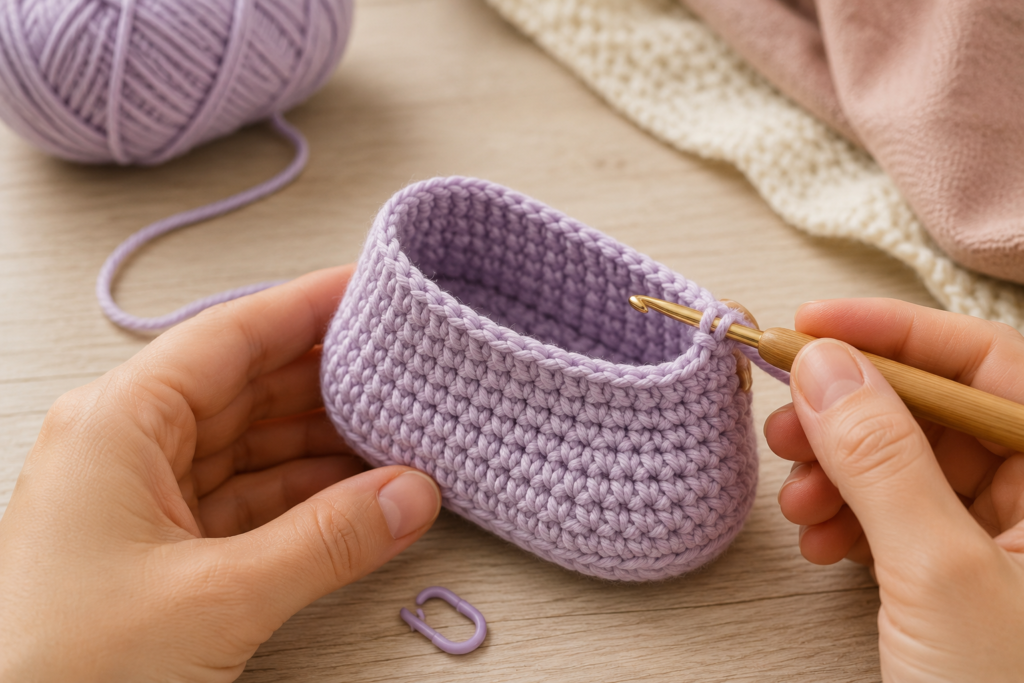
The next round begins to create the walls of the bootie.
Round 4
Work:
1 sc in every stitch around, working in the back loop only.
This creates a small ridge separating the sole from the upper.
You should have approximately:
34 stitches
The bootie should now begin to look three-dimensional.
Step 3: Create the Upper
Round 5
Work:
1 sc in every stitch around.
Keep your tension even.
Do not pull the yarn excessively tight.
Round 6
Continue with:
1 sc in every stitch around.
At this point, the bootie should have visible sides.
The toe should still be relatively open.
Step 4: Shape the Toe
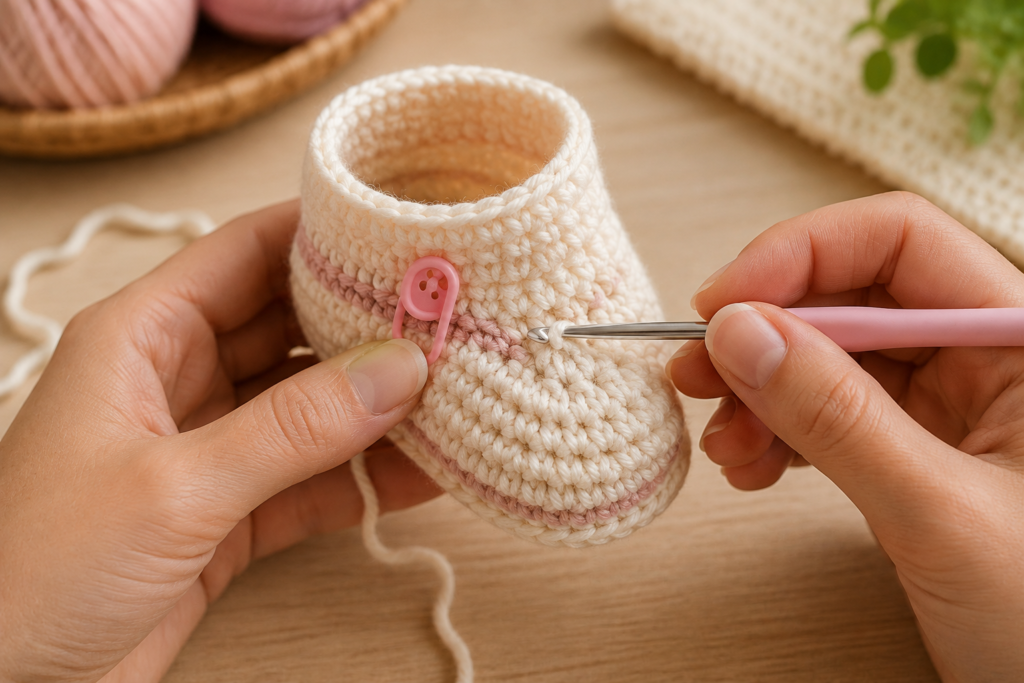
This is where the flat shoe-like shape begins turning into a bootie.
Place your stitch marker at the center back of the heel.
This makes it easier to identify the front section.
The toe occupies approximately the front third of the bootie.
Round 7
Work sc around until you reach the toe section.
Across the toe:
sc, sc, dec
Repeat the decrease sequence across the front.
Then continue sc around the heel.
The purpose is to gradually reduce the front circumference without dramatically shrinking the heel.
Round 8
Continue working around the bootie.
Across the toe:
sc, dec
Repeat as needed across the center front.
Work sc across the heel section.
The opening should now become noticeably smaller.
Round 9
Work another decrease round across the toe.
Avoid making too many decreases at once.
The goal is a smooth rounded toe rather than a sharply pointed shape.
Step 5: Check the Fit
At this point, stop and examine the shape.
The bootie should have:
- A defined sole
- A rounded toe
- A comfortable opening
- A recognizable heel
- Enough room for the baby’s foot
If the opening is too narrow, remove one decrease round.
If the bootie is too loose, add another gentle decrease round.
This is one of the advantages of crochet: you can customize the shape as you go.
Step 6: Create the Cuff
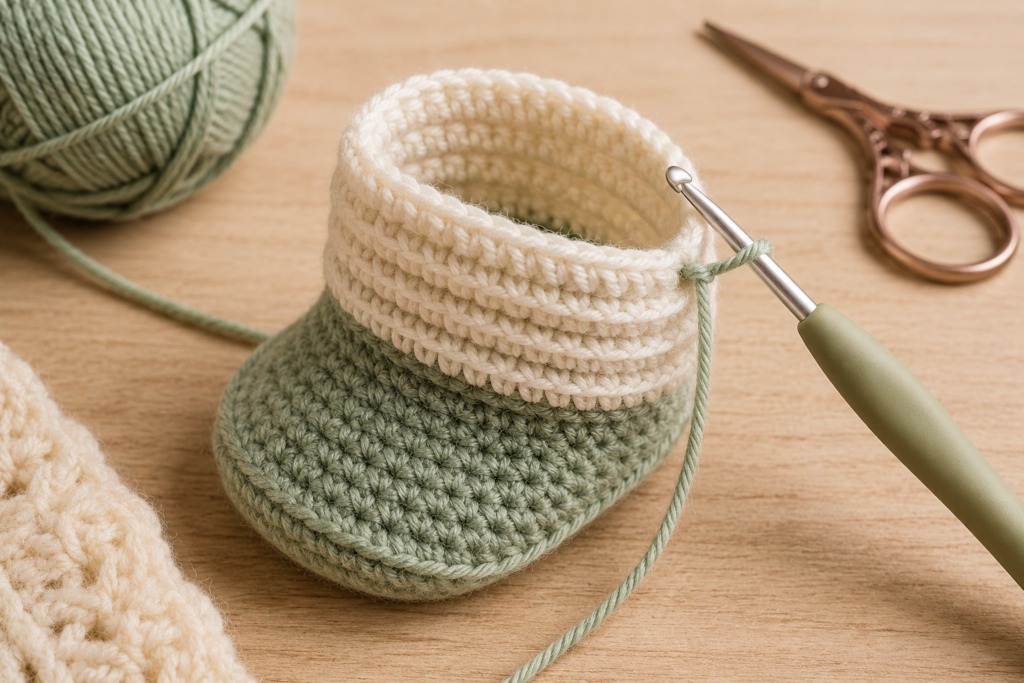
Now we’ll finish the top edge.
Round 10
Work:
1 sc in every stitch around.
Slip stitch to the beginning if you prefer joined rounds.
Round 11
Work:
1 hdc in every stitch around.
This creates a slightly softer and taller cuff.
Round 12
Work:
1 hdc in every stitch around.
Finish with a slip stitch.
Optional Ribbed Cuff
For a more textured bootie, replace the final two rounds with:
hdc in the back loop only
around the entire opening.
Repeat for 3–5 rounds.
This creates a stretchy ribbed cuff.
Finishing the Bootie
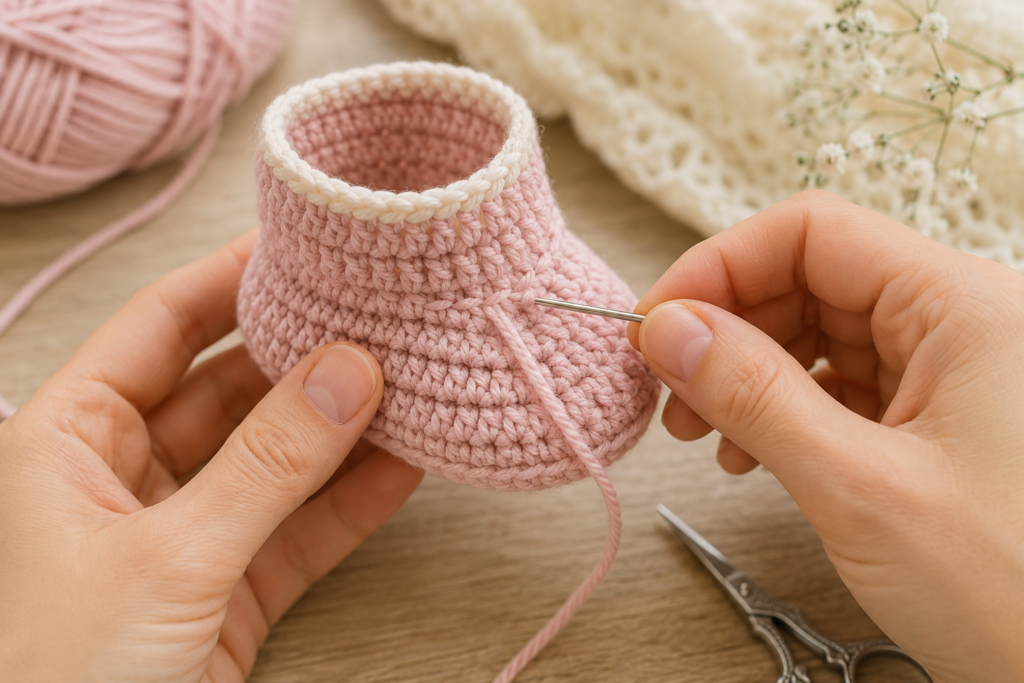
Cut your yarn, leaving a tail of approximately 10–15 cm.
Pull the yarn through the final loop.
Thread it onto a tapestry needle.
Weave the tail through several stitches on the inside of the bootie.
Change direction and weave it through again.
Trim the excess.
Repeat the process with any remaining yarn tails.
Important
Do not leave long loose yarn ends inside the bootie.
Everything should be securely woven in.
Make the Second Bootie
Repeat the entire pattern.
Try to keep your tension consistent between both booties.
Helpful trick
After finishing the first bootie, write down:
- Number of sole rounds
- Number of upper rounds
- Number of decreases
- Number of cuff rounds
This makes the second bootie much easier to match.
Pattern 2: Simple Mary Jane-Inspired Baby Booties
If you want something slightly more decorative, transform the classic bootie into a Mary Jane-inspired design.
The base can be made using the same sole and upper construction.
The difference is the strap.
Creating the Strap
Choose the side where you want the strap to begin.
Attach yarn with a slip stitch.
Chain:
8–12 chains
Adjust the chain length according to the bootie’s size.
Work back across the chain with single crochet.
Attach the strap to the opposite side with a secure stitch.
Important baby-safety note
For an actual baby-worn item, avoid using a loose decorative button or other small detachable fastener.
Instead, you can:
- Make a crocheted loop
- Use a securely integrated crochet closure
- Leave the strap as a decorative element
- Or use a non-detachable, securely sewn closure appropriate for the garment
Always inspect the attachment before use.
Pattern 3: Ribbed Cuff Baby Booties
These are perfect when you want a cozy, sock-like appearance.
Start with the classic bootie construction.
After completing the upper, work the cuff using:
hdc BLO
for several rounds.
The back-loop-only technique creates visible horizontal ridges.
Recommended cuff
Work:
4–6 rounds
depending on how tall you want the bootie.
For a shorter bootie:
3–4 rounds
For a taller ankle bootie:
5–7 rounds
Avoid making the cuff excessively tight.
Pattern 4: Button-Free Strap Booties
This style gives you the appearance of a little strap shoe without relying on small buttons.
Start with the classic bootie.
Create a narrow crocheted strap:
Chain 8–10
Work back across the chain using sc.
Secure one end to the bootie.
Create a small crocheted loop on the opposite side.
The strap can pass through the loop and sit neatly across the top.
This gives the bootie a cute Mary Jane-inspired appearance while keeping the decoration simple.
Pattern 5: Bow-Trim Baby Booties
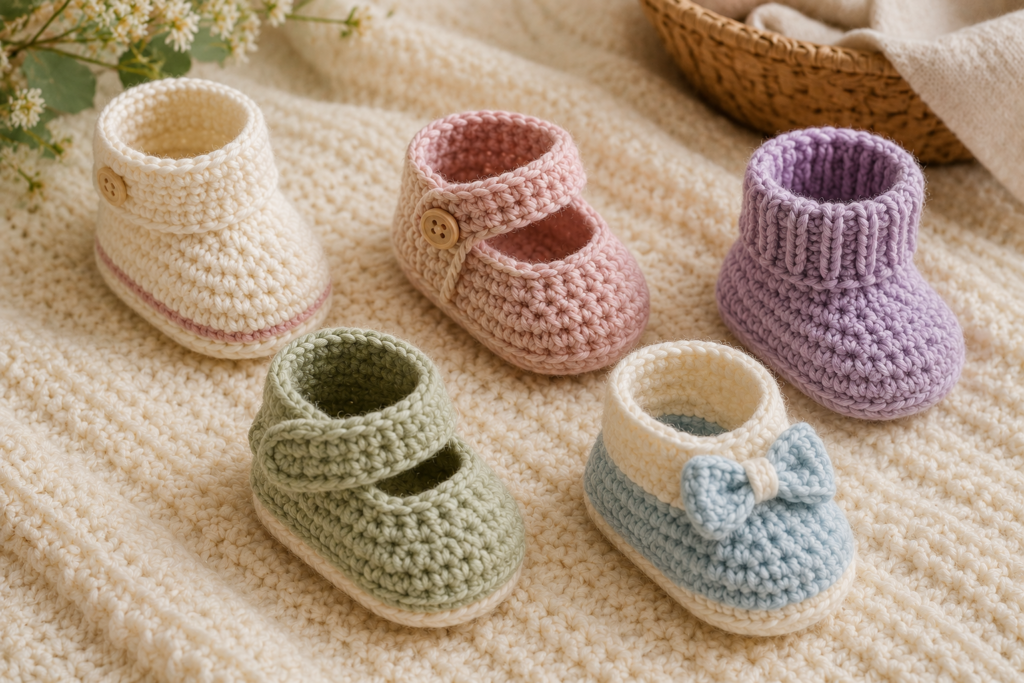
For a baby shower gift or special occasion, you can create a delicate bow-inspired appearance.
Start with the classic bootie.
Finish the cuff with:
1 round sc
followed by:
1 round slip stitch
Then create a small flat crochet bow separately.
Simple Crochet Bow
Chain:
12
Work several rows of sc until you have a small rectangle.
Fasten off.
Pinch the center.
Wrap a small amount of yarn around the center to create the bow shape.
Safety
For an item intended for actual baby wear, I recommend not attaching a loose bow unless you can make the attachment extremely secure and regularly inspect it.
For photography or decorative display, the bow can simply be positioned on top of the booties without permanently attaching it.
How to Adjust the Booties for Different Sizes
The easiest way to resize baby booties is to adjust the sole length first.
Don’t simply make every part wider.
To make the bootie longer
Add stitches along the straight portion of the foundation chain.
For example, instead of starting with 11 chains, try:
12–13 chains
Then follow the same oval construction.
To make it shorter
Use fewer foundation chains.
For example:
9–10 chains
Then adjust the number of stitches around the oval accordingly.
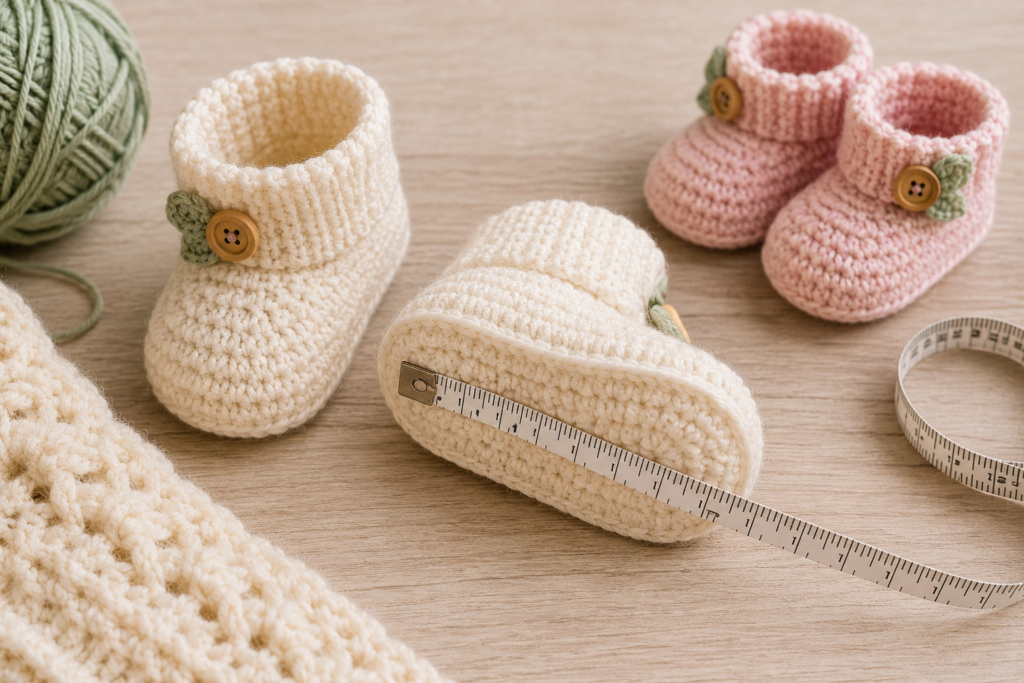
Approximate Baby Bootie Sizing
| Size | Approx. Sole Length |
|---|---|
| Newborn | 8–9 cm |
| 0–3 months | 9–10 cm |
| 3–6 months | 10–11 cm |
| 6–12 months | 11–12 cm |
These are approximate measurements, not guaranteed shoe sizes.
Whenever possible, measure the baby’s actual foot.
Leave enough room for comfortable movement rather than making the bootie fit tightly.
How to Check the Fit
A properly fitted baby bootie should:
- Slide onto the foot without excessive force
- Not squeeze the toes
- Not leave deep marks around the ankle
- Allow the toes to move
- Stay comfortably in place
- Not be excessively loose
Remember that babies grow quickly.
If you’re making booties as a gift, slightly generous sizing may be more useful than making an extremely snug newborn pair.
How to Make the Booties More Comfortable
The yarn and stitch tension both matter.
Choose soft yarn
Avoid scratchy or very stiff fibers.
Avoid bulky seams
Try to keep the inside of the bootie smooth.
Weave ends carefully
Loose ends can create uncomfortable bumps.
Don’t over-tighten the cuff
The cuff should hold the bootie in place without squeezing the ankle.
Keep the sole flexible
Baby booties aren’t walking shoes, so the sole doesn’t need to be rigid.
Color Ideas for Crochet Baby Booties
One of the easiest ways to personalize a pair is through color.
Soft Pink & Cream
A classic baby shower combination.
Sage & Ivory
Modern and gender-neutral.
Lavender & White
Soft and delicate.
Butter Yellow & Cream
Cheerful and timeless.
Dusty Blue & Beige
Perfect for a neutral handmade wardrobe.
Rainbow Pastels
Use one color per round for a playful crochet look.
Easy Ways to Customize the Pattern
Once you understand the basic construction, you can create dozens of variations.
Add stripes
Change color every 1–2 rounds.
Use a contrasting cuff
Make the entire bootie cream and use lavender for the top edge.
Add a textured sole
Use a slightly raised stitch pattern.
Make a taller ankle
Add extra cuff rounds.
Create matching accessories
Make:
- Baby hat
- Crochet blanket
- Baby mittens
- Headband
- Sweater
using the same color palette.
This is especially useful if you’re creating a coordinated handmade baby gift set.
Common Crochet Baby Bootie Problems
Why is my sole curling?
Usually, the issue is tension or insufficient increases.
Try relaxing your tension or checking the increase placement.
Why is my sole wavy?
Too many increases can cause the edge to ruffle.
Check that you’re following the increase sequence consistently.
Why does one bootie look different from the other?
Your tension may have changed.
Try crocheting both booties in the same sitting and compare their measurements as you go.
Why is the opening too tight?
The toe may have too many decreases, or the cuff may be too restrictive.
Remove one decrease round or use a slightly larger hook for the upper.
Why are my booties too large?
Check your gauge.
If your stitches are larger than expected, try a smaller hook.
Why are the booties too stiff?
Your hook may be too small or your tension too tight.
Try going up one hook size.
How to Wash Crochet Baby Booties
Always follow the care instructions for your specific yarn.
For washable yarn:
- Place the booties in lukewarm or cool water.
- Use a gentle detergent.
- Avoid harsh scrubbing.
- Rinse thoroughly.
- Gently press out excess water.
- Reshape while damp.
- Allow them to dry completely.
Avoid high heat unless the yarn specifically allows it.
Don’t twist them aggressively
Twisting can stretch the stitches and distort the sole.
Baby-Safety Checklist
Before giving handmade booties to a baby, inspect them carefully.
Check the seams
Make sure nothing is coming apart.
Check the yarn ends
All ends should be securely woven in.
Check decorations
Avoid loose buttons, beads, bells, plastic eyes and similar small pieces.
Check ribbons
Loose or long ribbons can present safety concerns. For everyday baby wear, it’s better to avoid them or use only securely integrated, appropriately designed closures.
Check the fit
The bootie should never restrict circulation.
Inspect regularly
Handmade items can wear out.
If the bootie becomes damaged, stop using it until it has been repaired or replaced.
How to Turn This Into a Beautiful Baby Gift
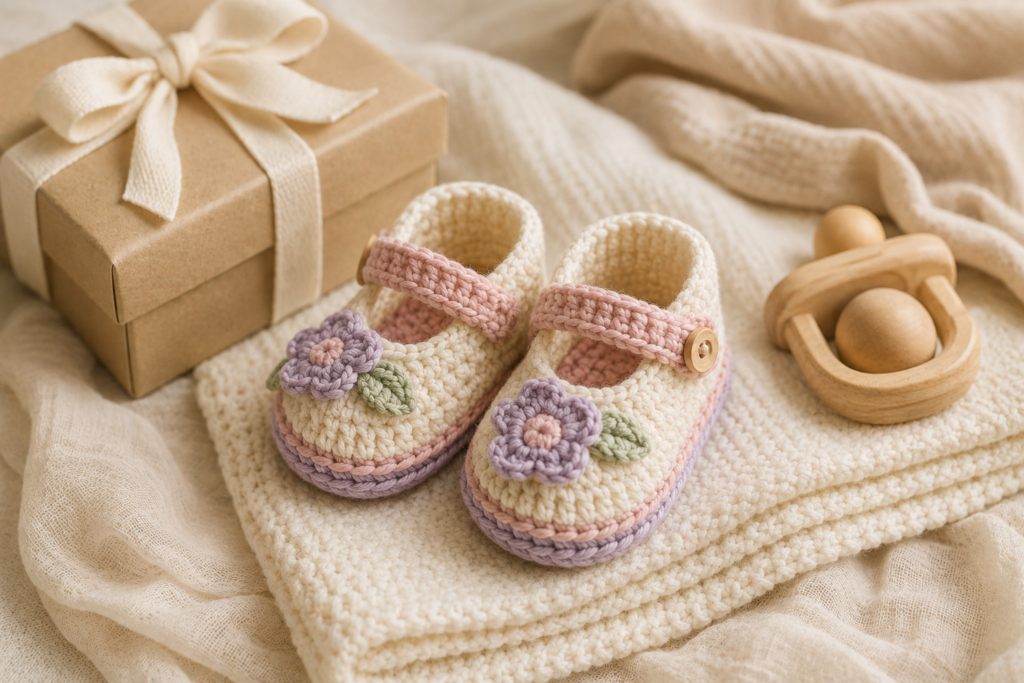
Crochet baby booties are especially attractive when presented as part of a small handmade set.
Try pairing them with:
Crochet booties + baby hat
or:
Crochet booties + small blanket
or:
Crochet booties + handmade cardigan
Choose one coordinated color palette throughout.
For example:
Sage + cream + dusty pink
can be used for the booties, hat and blanket.
Beginner-Friendly Crochet Plan
If you’re completely new to crochet baby footwear, don’t try the most complicated version first.
Follow this order:
First project
Classic booties.
Second project
Add two-color stripes.
Third project
Try the ribbed cuff.
Fourth project
Make the Mary Jane-inspired version.
Fifth project
Experiment with color combinations and decorative details.
Once you understand the sole and upper construction, you’ll be able to adapt the basic pattern into many different designs.
Frequently Asked Questions
What is the easiest crochet baby bootie pattern?
A simple bootie made from an oval sole and basic single-crochet upper is one of the easiest approaches for beginners. It allows you to practice increases, decreases and shaping without complicated stitch patterns.
What yarn is best for crochet baby booties?
Choose a soft, washable yarn that feels comfortable against delicate skin. Baby-weight, DK and some light worsted yarns can work well depending on the desired size and fabric.
What crochet hook should I use for baby booties?
A 4.0 mm hook is a useful starting point for medium-weight yarn, but always check your gauge and the finished measurements. The yarn label’s recommended hook size is also a good starting reference.
How do I make crochet baby booties bigger?
Increase the length of the foundation chain and adjust the number of stitches around the sole. Measure the finished sole rather than relying entirely on age-based sizing.
How long should a newborn crochet bootie be?
A newborn sole may be approximately 8–9 cm long, but baby foot sizes vary. Measuring the intended recipient is the best way to choose the size.
Are crochet baby booties safe?
They can be appropriate as handmade accessories when they are properly fitted, securely constructed and regularly inspected. Avoid loose small decorations, long loose ribbons and poorly secured yarn ends.
Can I add buttons to crochet baby booties?
For baby items, small detachable buttons can present a choking hazard. A button-free decorative design or securely integrated crochet closure is a safer approach.
How long does it take to crochet baby booties?
A beginner may take a few hours to complete a pair, while an experienced crocheter may finish them considerably faster. Yarn weight, stitch complexity and customization all affect the time.
Can crochet baby booties be washed?
If the yarn is washable, the booties can generally be cleaned according to the yarn manufacturer’s care instructions. Reshape them while damp and allow them to dry completely.
Final Thoughts
Crochet baby booties are a wonderful small project for anyone who wants to make something handmade without committing to a large garment.
The classic bootie pattern is the best place to begin because the construction teaches several useful crochet skills: creating an oval sole, working in rounds, shaping the upper, decreasing around the toe and finishing a small garment neatly.
Once you’ve mastered the basic shape, you can turn the same construction into completely different designs by changing the cuff, adding stripes, creating a strap or experimenting with colors.
For gifts, a coordinated set of crochet booties, a baby hat and a small blanket can be especially beautiful.
Most importantly, take your time with the finishing. Secure your yarn ends, check the seams, make sure the fit is comfortable and avoid detachable decorations that could create a safety hazard.
With a little practice, one simple pattern can become an entire collection of adorable handmade baby booties.
More Crochet Baby Projects to Try
If you enjoyed these crochet baby booties, you may also like:
- 31 Crochet Baby Sweater & Cardigan Ideas That Are Too Cute to Resist
- 21 Easy Crochet Baby Cardigans for Beginners
- 25 Adorable Crochet Baby Hat Patterns
- 31 Crochet Baby Blanket Ideas for Beginners
- 21 Cute Crochet Baby Accessories to Make
- 25 Crochet Baby Shower Gifts You Can Make by Hand
- 21 Easy Crochet Baby Clothes for Beginners







