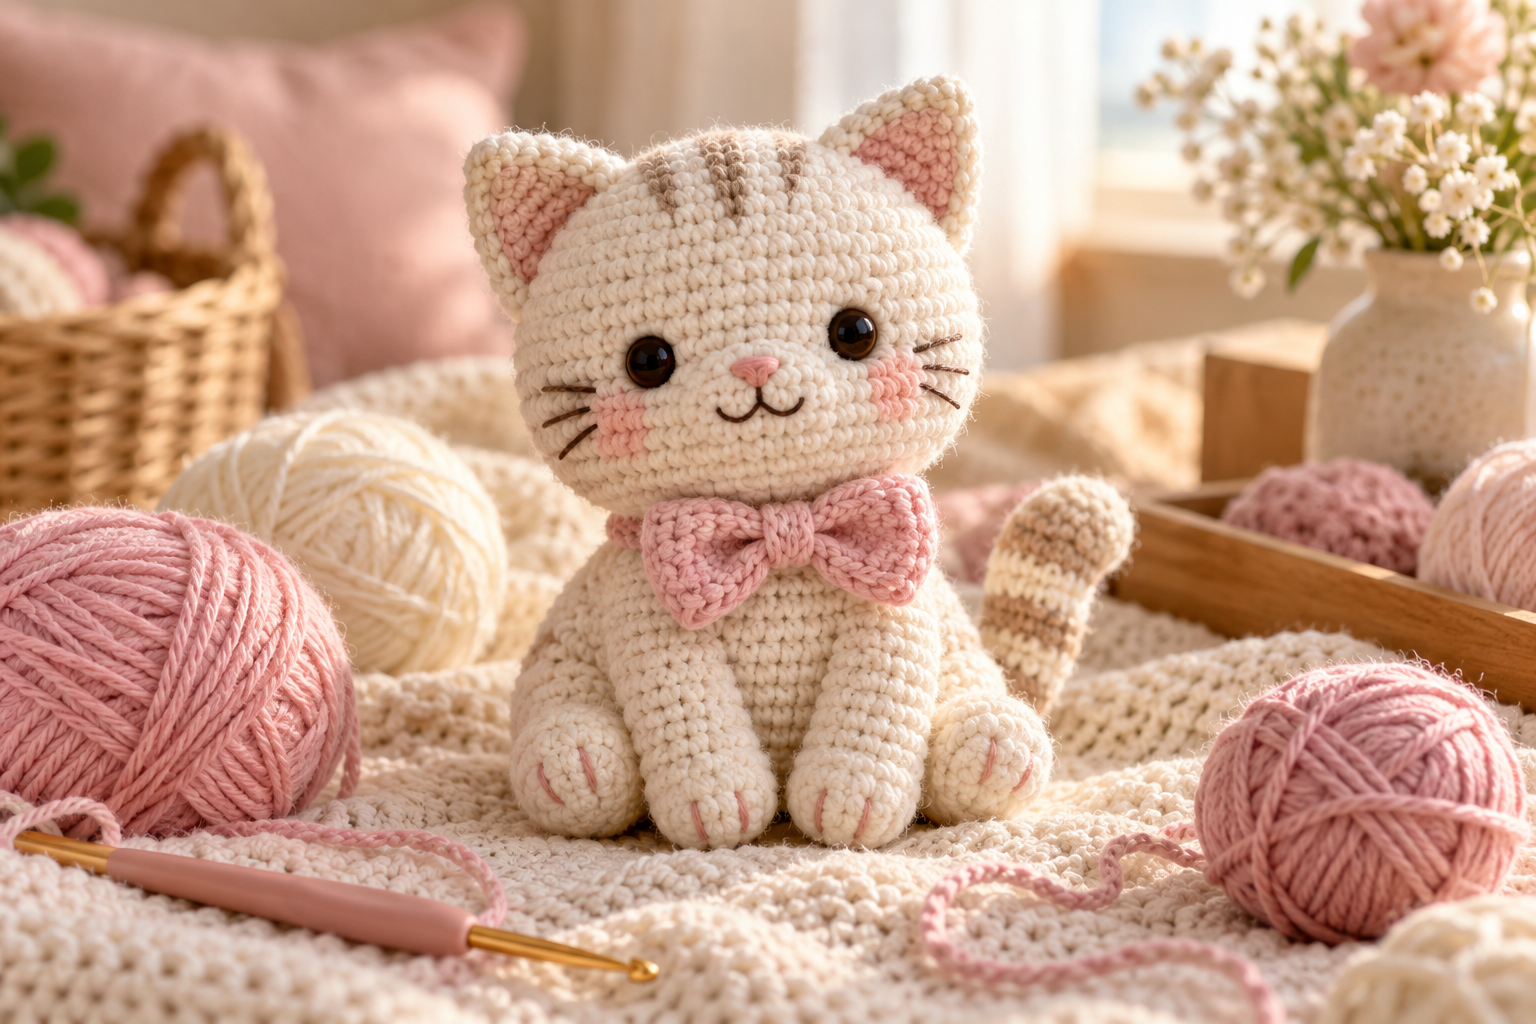
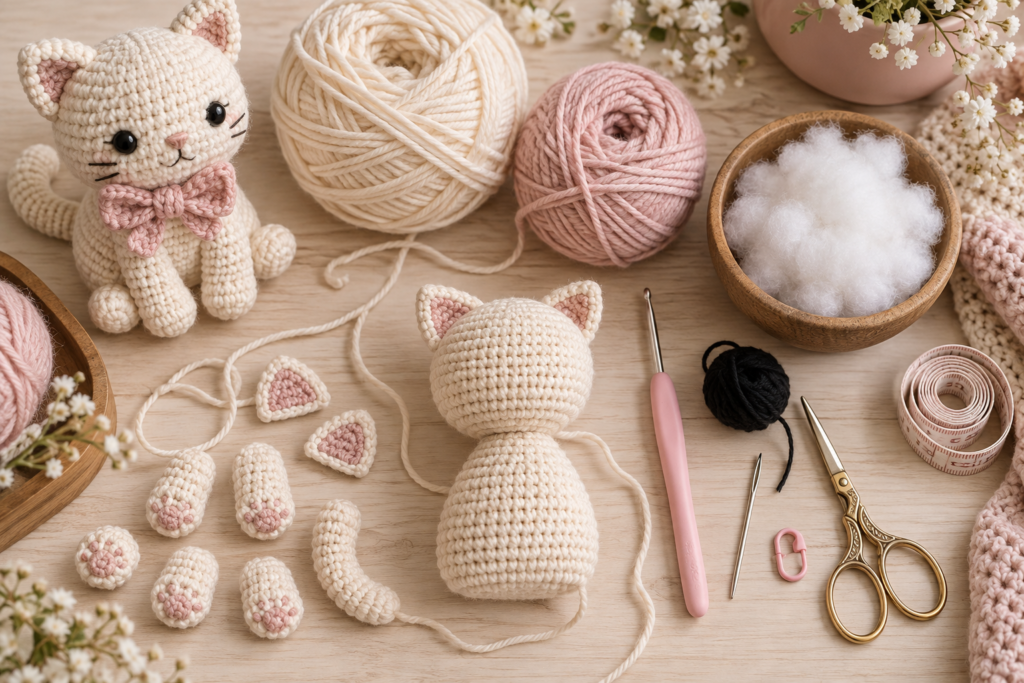
If you love cute crochet animals, this little crochet cat amigurumi is a fun project to add to your handmade collection. With a round head, tiny ears, embroidered whiskers, a sweet bow and a simple body, it has the charming look of a classic kawaii cat while remaining approachable for crocheters who are comfortable with basic amigurumi techniques.
This tutorial includes an original cat amigurumi pattern, a complete materials list, stitch guide, shaping instructions, step-by-step assembly, stuffing tips, sizing information, troubleshooting advice and ideas for customizing your finished cat.
The design can be made in classic white and pink, or you can choose completely different colors to create your own unique character.
Design note: This tutorial is for an original kawaii cat amigurumi design. It is not an official character pattern, and the project is not affiliated with or endorsed by Sanrio. If you’re specifically looking for the official character information, you can visit Sanrio’s Hello Kitty collection.
Table of Contents
- About This Crochet Cat Amigurumi
- Project Overview
- Materials You’ll Need
- Choosing Yarn for Amigurumi
- Crochet Hook Size
- Gauge and Finished Size
- Crochet Abbreviations
- Important Amigurumi Techniques
- Original Crochet Cat Pattern
- Head Pattern
- Body Pattern
- Ears Pattern
- Arms Pattern
- Legs Pattern
- Bow Pattern
- Face Details
- Complete Step-by-Step Assembly
- How to Stuff Amigurumi Properly
- How to Create Clean Color Changes
- How to Embroider the Face
- Customization Ideas
- Common Mistakes and Troubleshooting
- Safety Considerations
- Washing and Care
- Gift Ideas
- Related Crochet Posts
- Frequently Asked Questions
- Final Thoughts
About This Crochet Cat Amigurumi
This small cat is worked primarily in continuous rounds, making it a good introduction to basic amigurumi construction.
Instead of crocheting one large flat piece and sewing it together, the main components are created separately and assembled at the end.
The project includes:
- A rounded head
- Small triangular ears
- A compact body
- Two arms
- Two legs
- A decorative bow
- Embroidered whiskers
- A small embroidered or crocheted nose
- Safety eyes or embroidered eyes
The finished cat can be used as a decorative plush, shelf ornament, handmade gift or part of a larger crochet animal collection.
Project Overview
| Feature | Details |
|---|---|
| Skill level | Beginner to intermediate |
| Crochet style | Amigurumi |
| Main stitch | Single crochet |
| Construction | Worked in rounds |
| Yarn | Sport/DK or similar |
| Suggested hook | 2.5–3 mm |
| Approximate size | 15–18 cm |
| Main colors | White + pink |
| Stuffing | Polyester fiberfill |
| Techniques | Increase, decrease, magic ring, sewing |
| Project type | Decorative plush |
The exact finished size will vary depending on your yarn, hook and tension.
Save This Crochet Cat List – Adorable Amigurumi Kits & Patterns
Looking for the cutest crochet cats to make this season? This adorable gray amigurumi kitty is the perfect inspiration. Whether you’re a complete beginner or an experienced crocheter, these cat projects are fun, relaxing, and make wonderful gifts.
Best options right now:
- Complete beginner kits that include yarn, safety eyes, stuffing, hook, and step-by-step video tutorials
- Realistic life-size cat patterns
- Cute small kitten kits perfect for keychains or desk decorations
Shop the Look:
👉 Cat Crochet Kits for Beginners
Materials You’ll Need
Main Materials
- White yarn
- Pink yarn
- Small amount of yellow yarn
- Small amount of black yarn
- Crochet hook
- Polyester fiberfill
- Yarn needle
- Scissors
- Stitch marker
Optional
- Safety eyes
- Small amount of embroidery thread
- Fabric marker
- Pins for positioning pieces
For amigurumi, choose a hook that creates a firm fabric. You generally don’t want large gaps between stitches because stuffing can show through.
Choosing Yarn for Amigurumi
A smooth yarn is usually easier to work with than a highly textured yarn when you’re learning amigurumi.
Sport or DK-weight yarn works particularly well for a small cat like this.
The Craft Yarn Council provides standardized yarn-weight categories and hook guidance, which can be useful when choosing substitute yarns.
| Yarn Characteristic | Why It Helps |
|---|---|
| Smooth texture | Makes stitches easier to see |
| Consistent thickness | Produces even shaping |
| Medium/light weight | Creates a manageable plush |
| Washable | Easier care |
| Soft fiber | Pleasant finished texture |
Color Palette
The classic combination for this project is:
White + pink + yellow + black
But you can easily create your own variation.
| Cat Style | Body | Bow | Nose |
|---|---|---|---|
| Classic kawaii | White | Pink | Yellow |
| Pastel | Cream | Lavender | Peach |
| Strawberry | White | Red | Pink |
| Minimalist | Beige | Dusty rose | Brown |
| Black cat | Black | Pink | Cream |
| Calico-inspired | White | Orange | Pink |
| Blue theme | White | Baby blue | Yellow |
Crochet Hook Size
For DK or sport-weight yarn, start around 2.5–3 mm and adjust according to your tension.
The Craft Yarn Council recommends relying on the millimeter measurement when selecting hooks because letter/number sizing can vary between manufacturers. It also recommends checking gauge rather than relying only on the label.
For amigurumi, you generally want a firm fabric, so you may use a smaller hook than you would for an open crochet garment made with the same yarn.
Gauge and Finished Size
Gauge isn’t as critical as it is for a fitted garment, but your tension affects the final size and appearance.
For this design, aim for compact, firm stitches without visible holes.
Approximate finished size:
15–18 cm tall
Your finished cat may be larger or smaller depending on your yarn and hook.
Crochet Abbreviations
This pattern uses US crochet terminology.
| Abbreviation | Meaning |
|---|---|
| MR | Magic ring |
| ch | Chain |
| sc | Single crochet |
| inc | Increase |
| dec | Decrease |
| sl st | Slip stitch |
| st | Stitch |
| BLO | Back loop only |
| FO | Fasten off |
| rep | Repeat |
The Craft Yarn Council maintains standardized crochet abbreviations and chart symbols if you want a useful reference while working through patterns.
Important Amigurumi Techniques
Before beginning, it helps to understand four techniques.
Magic Ring
A magic ring allows you to start a circular piece without leaving a large hole in the center.
Single Crochet Increase
An increase means working two single crochet stitches into the same stitch.
inc = 2 sc in the next stitch
Invisible Decrease
An invisible decrease joins two stitches together while keeping the outside of the amigurumi smoother.
Continuous Rounds
Instead of joining every round with a slip stitch, continue directly into the next stitch.
Use a stitch marker to identify the beginning of each round.
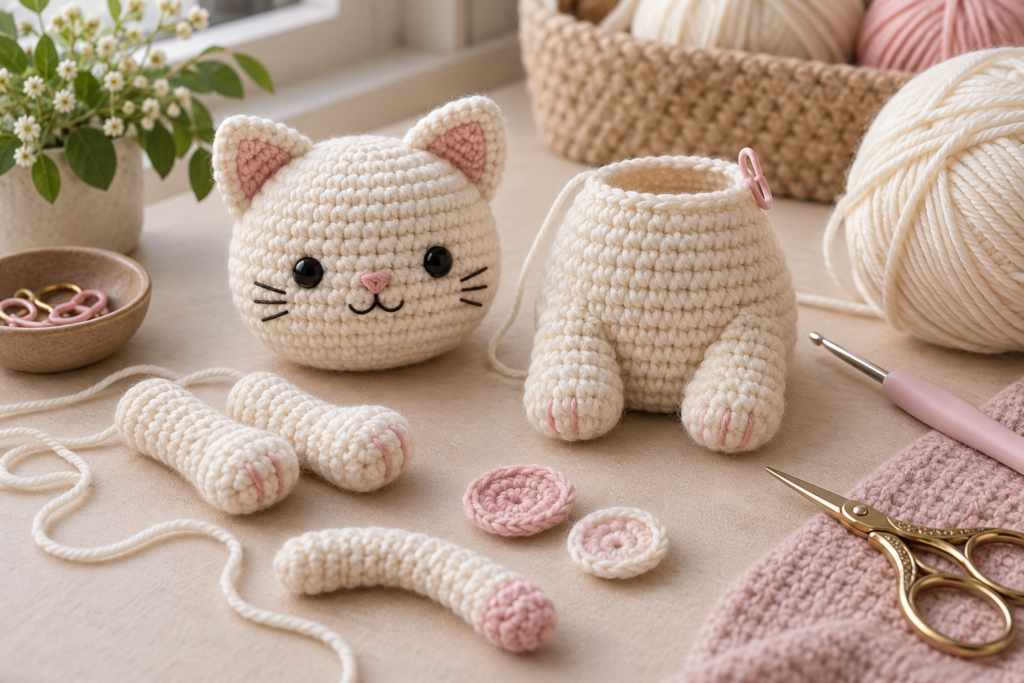
Original Crochet Cat Amigurumi Pattern
1. Head Pattern
Use white yarn.
Round 1
Make a magic ring.
Work:
6 sc into MR
Total: 6
Round 2
inc around
Total: 12
Round 3
(sc, inc) × 6
Total: 18
Round 4
(2 sc, inc) × 6
Total: 24
Round 5
(3 sc, inc) × 6
Total: 30
Round 6
(4 sc, inc) × 6
Total: 36
Rounds 7–11
sc around
Total: 36
This is where the head begins developing its rounded shape.
Round 12
(4 sc, dec) × 6
Total: 30
Round 13
(3 sc, dec) × 6
Total: 24
Insert the safety eyes between approximately Rounds 8 and 10, leaving several stitches between them.
Check the placement before securing them permanently.
Round 14
(2 sc, dec) × 6
Total: 18
Begin adding stuffing.
Round 15
(sc, dec) × 6
Total: 12
Add a little more stuffing if necessary.
Round 16
dec × 6
Total: 6
Fasten off and close the opening.
Leave a tail if you need it for sewing.
2. Body Pattern
Use white or pink yarn depending on your preferred design.
For a two-tone cat, make the upper body white and introduce pink lower down.
Round 1
6 sc into MR
6 stitches
Round 2
inc around
12 stitches
Round 3
(sc, inc) × 6
18 stitches
Round 4
(2 sc, inc) × 6
24 stitches
Round 5
(3 sc, inc) × 6
30 stitches
Rounds 6–9
sc around
30 stitches
Change to pink if you want a pink clothing section.
Rounds 10–12
sc around
30 stitches
Round 13
(3 sc, dec) × 6
24 stitches
Round 14
(2 sc, dec) × 6
18 stitches
Stuff the body firmly but without stretching the stitches.
Round 15
(sc, dec) × 6
12 stitches
Round 16
dec × 6
6 stitches
Fasten off and close.
3. Ears — Make 2
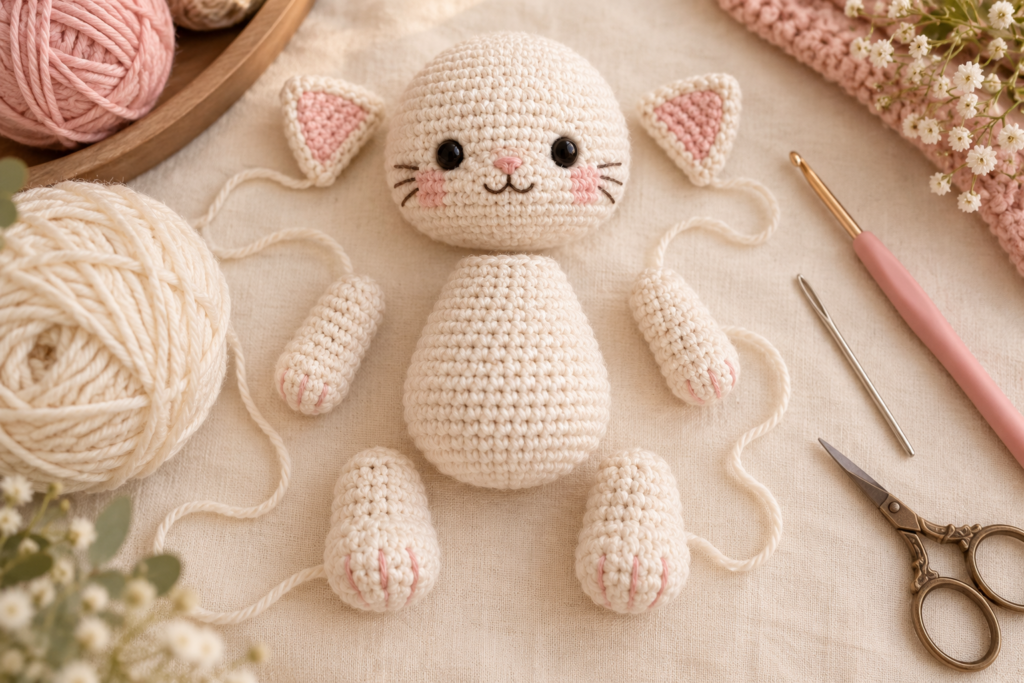
Use white yarn.
The ears are worked as small flattened triangular pieces.
Round 1
Make a magic ring.
Work:
4 sc
Round 2
sc around
4 stitches
Round 3
(sc, inc) × 2
6 stitches
Round 4
sc around
6 stitches
Round 5
(2 sc, inc) × 2
8 stitches
Round 6
sc around
8 stitches
Fasten off.
Do not stuff the ears heavily.
Flatten each ear gently before sewing.
4. Arms — Make 2
Use white yarn.
Round 1
6 sc into MR
6 stitches
Rounds 2–6
sc around
6 stitches
Add a tiny amount of stuffing.
Fasten off and leave a long sewing tail.
The arms should remain relatively soft so they sit naturally against the body.
5. Legs — Make 2
Use white yarn.
Round 1
6 sc into MR
6 stitches
Round 2
inc around
12 stitches
Rounds 3–5
sc around
12 stitches
Add a small amount of stuffing.
Round 6
(2 sc, dec) × 3
9 stitches
Fasten off and leave a long tail for sewing.
Flatten the top slightly before attaching the legs.
6. Bow Pattern
Use pink yarn.
Chain approximately 8.
Work back across the chain using single crochet.
Continue for several rows until you have a small rectangle.
Fasten off.
Pinch the center of the rectangle.
Wrap a short length of yarn around the middle several times to create the bow shape.
Secure the center.
You can make the bow larger or smaller simply by changing the starting chain and number of rows.
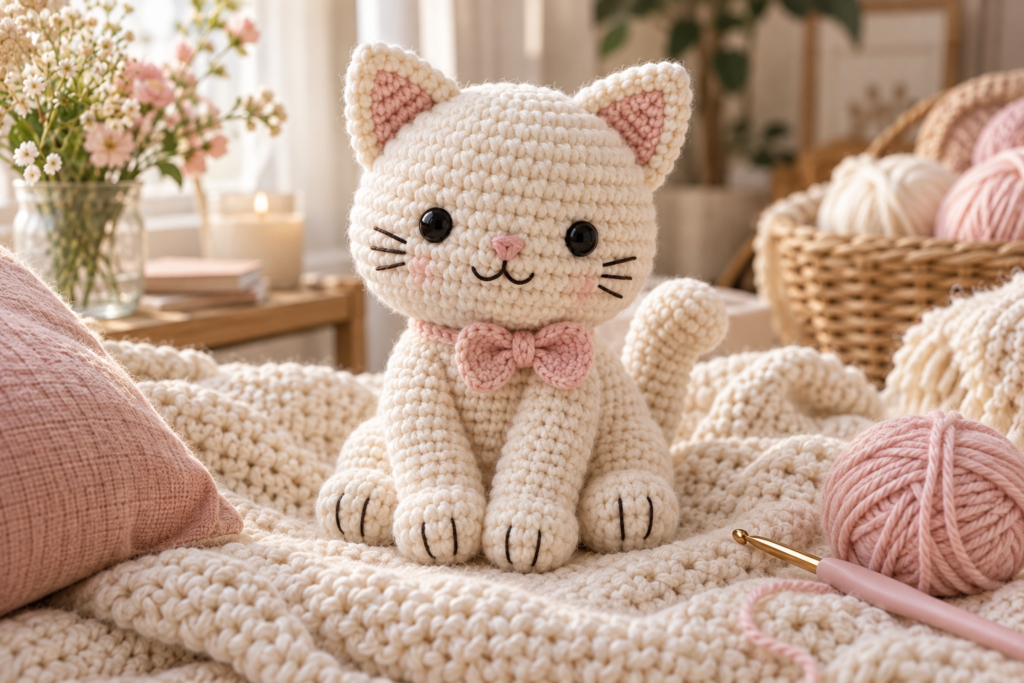
Step-by-Step Assembly
Assembly is where the separate crochet pieces finally become a recognizable cat.
Step 1: Finish the Head
Make sure the head is completely stuffed and closed.
Check the shape from several angles.
It should be rounded rather than completely flat.
Step 2: Position the Ears
Place the ears toward the upper sides of the head.
Before sewing, use pins to test several positions.
Moving the ears only a few stitches can dramatically change the expression.
Sew them securely into place.
Step 3: Attach the Eyes
If using safety eyes, position them symmetrically.
For an embroidered version, use black embroidery thread.
Keep the eyes relatively low and centered for a cute kawaii appearance.
Step 4: Add the Nose
Use a small amount of yellow yarn or embroidery thread.
Create a tiny oval or triangular nose between the eyes.
Step 5: Embroider the Whiskers
Use black embroidery thread.
Add three short whisker lines on each side of the face.
Keep them relatively small and symmetrical.
Step 6: Attach the Head
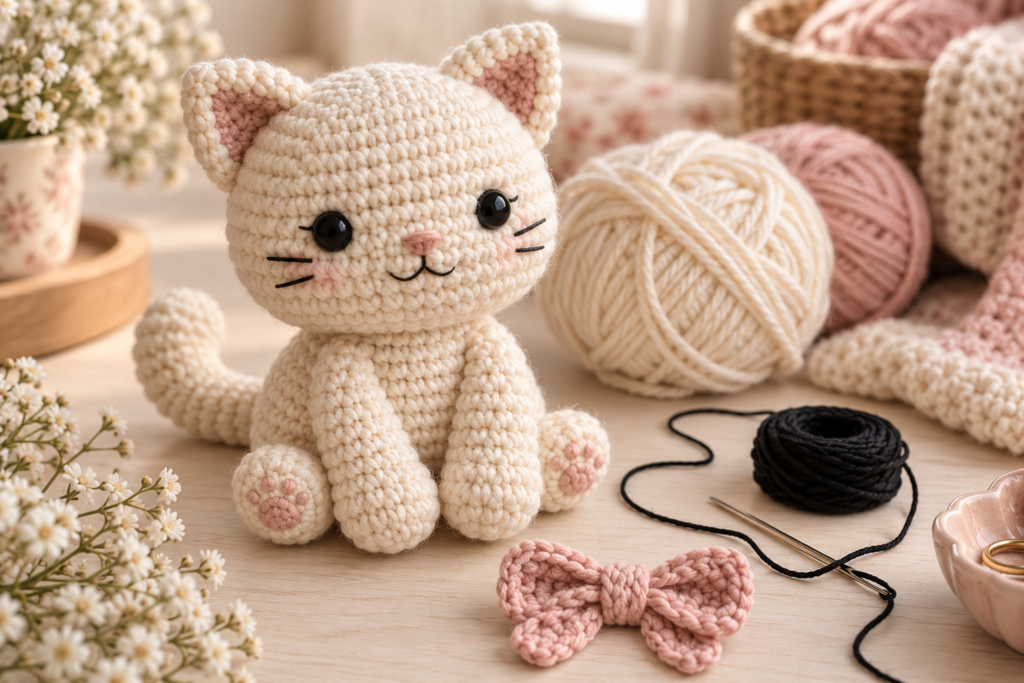
Position the head directly on top of the body.
Sew around the neck area using the yarn tail from the head or a matching yarn strand.
Work through both pieces several times for stability.
Step 7: Attach the Arms
Place one arm on each side of the body.
Keep them at approximately the same height.
Sew securely.
Step 8: Attach the Legs
Place the legs at the bottom of the body.
Check that the cat can sit upright before sewing them permanently.
Step 9: Attach the Bow
Sew the finished bow near one ear.
You can place it on either side.
Step 10: Final Inspection
Check:
- Head attachment
- Ear placement
- Eye symmetry
- Whiskers
- Bow
- Arm attachment
- Leg attachment
- Loose yarn ends
Weave in every remaining end securely.
How to Stuff Amigurumi Properly
Stuffing has a huge effect on the final appearance.
Too little stuffing can make the cat look floppy.
Too much can stretch the stitches and create visible gaps.
Better stuffing technique
Add small amounts at a time.
Push the stuffing toward the edges with the blunt end of your crochet hook or a stuffing tool.
Rotate the piece as you work.
Check the shape frequently.
For the head, pay particular attention to the cheeks and top of the head.
For the body, keep the stuffing firm enough to support the cat but not so firm that the stitches become stretched.
How to Create Clean Color Changes
If you’re making a pink-and-white cat, you’ll probably want a clean transition between colors.
When finishing the final stitch in the old color, complete the final yarn-over using the new color.
Then continue crocheting with the new yarn.
This keeps the transition cleaner than cutting the old yarn and joining the new yarn abruptly.
For a small amigurumi, neat color changes make a significant difference because the project is small enough that every detail is visible.
How to Embroider the Face
The face is one of the most important parts of a kawaii amigurumi.
You don’t need complicated embroidery.
Eyes
Use small black safety eyes or embroidered circles.
Nose
Use yellow or another contrasting color.
Whiskers
Use three short lines on each side.
Mouth
A tiny inverted “Y” or short curved line can create a simple expression.
Before embroidering, mark the approximate positions with pins.
This makes it easier to keep the face centered.
Customization Ideas
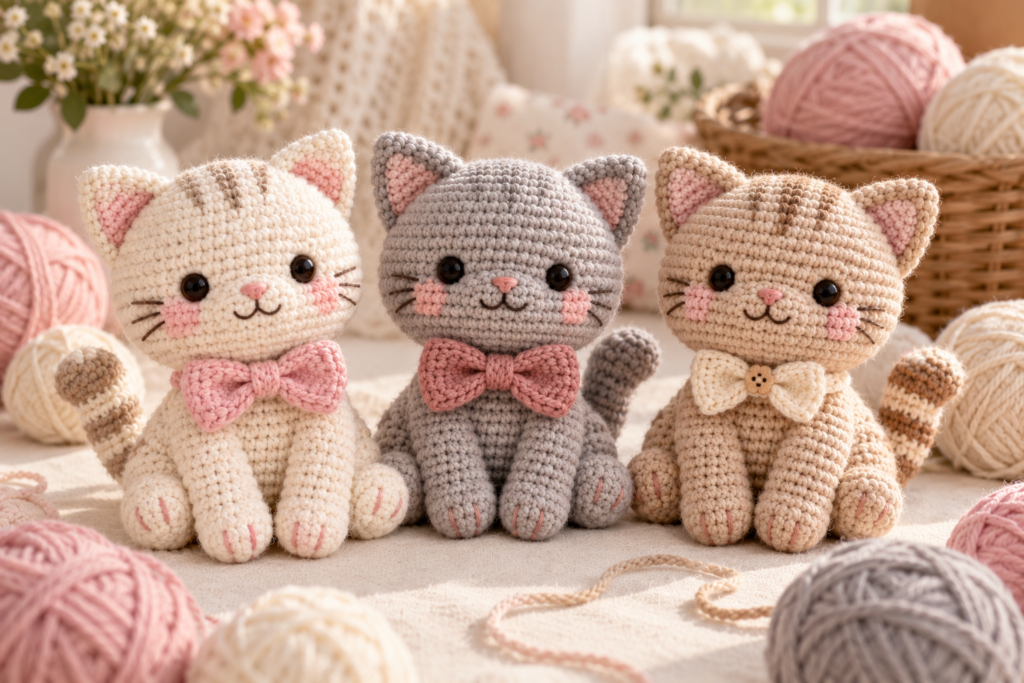
The basic pattern can become many different cats.
Change the Bow
Try:
- Pink
- Red
- Lavender
- Blue
- Yellow
- Floral print fabric
- Two-color crochet bow
Change the Body Color
Try a:
- Black cat
- Gray cat
- Cream cat
- Brown cat
- Orange cat
- Calico-inspired cat
Add Clothing
You can add a simple crocheted dress, skirt, collar or sweater.
Add a Tail
For a cat with a visible tail, make a simple crocheted tube:
- Make a magic ring.
- Work 6 sc.
- Continue sc around for approximately 15–20 rounds.
- Add a small amount of stuffing.
- Fasten off.
- Sew the tail to the back of the body.
A slightly curved tail can be shaped during sewing.
Common Mistakes and Troubleshooting
My head has holes
Your hook may be too large or your tension too loose.
Try a smaller hook.
The stuffing is visible
This usually means the stitches are too loose or the piece is overstuffed.
Reduce the amount of stuffing or use a smaller hook.
My head isn’t round
Check your increase and decrease rounds.
Missing one increase can change the shape noticeably.
My cat leans to one side
Check the placement of the legs.
The feet need to be positioned evenly around the bottom of the body.
The eyes aren’t level
Don’t sew or lock everything permanently until you’ve checked the face from straight ahead.
My ears look floppy
Avoid overstuffing them.
Instead, flatten them and sew through the base securely.
The face looks different from the example
That’s completely normal.
Small changes in eye spacing, ear position and nose placement can dramatically change an amigurumi’s expression.
Safety Considerations
If the finished cat is intended as a toy for a very young child, consider embroidering the eyes instead of using safety eyes.
Safety eyes can present a choking hazard if they become detached.
The same applies to:
- Buttons
- Beads
- Small charms
- Decorative pieces
- Loose bows
Inspect the finished piece carefully and make sure every component is securely attached.
This project is best treated as decorative unless you’ve specifically constructed and tested it as a child-safe toy.
Washing and Care
Care depends on the yarn you’ve chosen.
Always follow the manufacturer’s washing instructions.
For washable yarn:
- Use the recommended water temperature.
- Choose a gentle detergent.
- Avoid excessive agitation.
- Reshape the cat while damp.
- Allow it to dry completely.
Don’t assume every yarn labeled “soft” is machine washable.
How to Turn It Into a Handmade Gift
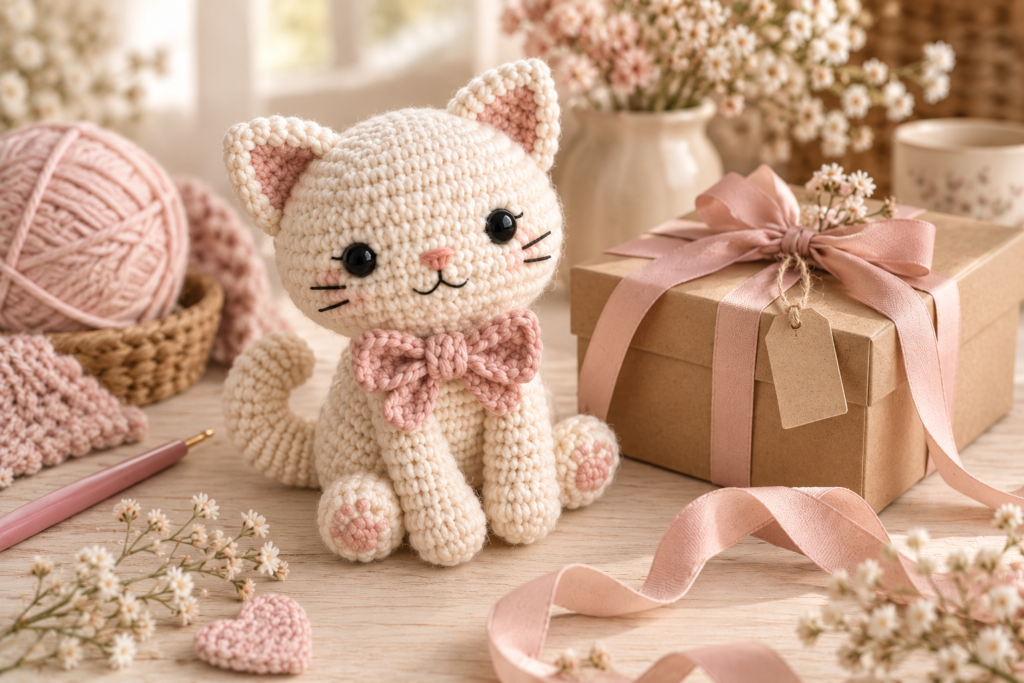
A crochet cat can be given on its own, but it also works beautifully as part of a handmade gift basket.
Consider pairing it with:
- Crochet baby socks
- Crochet baby booties
- A handmade baby blanket
- A crochet baby beanie
- A small crochet flower
- A handmade card
For an older child or cat lover, you could also create several cats in different colors and turn them into a small collection.
Related Crochet Posts
This project would fit particularly well into your existing crochet animal and baby crochet content clusters.
Easy Crochet Baby Socks Pattern
A small wearable project that pairs nicely with a handmade baby gift.
Crochet Baby Blanket With Matching Beanie
Create a coordinated handmade baby set with a striped blanket and matching hat.
Crochet Baby Sweater Patterns
A natural next step for readers who want to make more handmade baby clothing.
Free Granny Square Crochet Patterns
Perfect for readers interested in colorful crochet motifs and patchwork designs.
Crochet Daisy Mini Plush Pattern
Another small, beginner-friendly plush project for readers who enjoy making cute crochet characters.
Crochet Lying Duck Pattern
A fun animal amigurumi project that complements this cat pattern.
Crochet Penguin Pattern
Another beginner-friendly crochet animal for building a handmade amigurumi collection.
Frequently Asked Questions
Is this crochet cat pattern beginner-friendly?
Yes. The project primarily uses single crochet, increases, decreases and basic sewing. However, beginners may want to practice the magic ring and invisible decrease before starting the complete project.
What yarn is best for crochet cat amigurumi?
A smooth sport or DK-weight yarn is a good choice because it makes the stitches easy to see and produces a compact fabric.
What crochet hook should I use?
A hook around 2.5–3 mm is a useful starting point for sport/DK yarn, but adjust it according to your tension.
How much stuffing should I use?
Use enough to give the head and body a firm shape without stretching the crochet fabric.
Can I make this crochet cat bigger?
Yes. Using thicker yarn and a larger hook will create a larger cat. You can also enlarge individual components by adding additional increase rounds.
Can I make the cat without safety eyes?
Absolutely. Embroidered eyes are a good alternative, especially when the finished item may be handled by young children.
Can I sell cats made from this original pattern?
Yes, you can make finished physical items from an original pattern like this for personal use or sale. The pattern text and photographs themselves should not be copied and redistributed as your own.
How can I make my amigurumi stitches tighter?
Try using a smaller hook and maintaining consistent tension. A firm fabric is especially important for stuffed crochet projects.
Why does my amigurumi look larger than the example?
Finished size depends on yarn weight, hook size and individual tension. Even crocheters using the same yarn can produce different sizes.
Quick Crochet Cat Checklist
Before you begin:
- Choose your yarn colors.
- Select an appropriately sized hook.
- Prepare stuffing and a yarn needle.
- Learn the magic ring.
- Practice single crochet.
- Practice increases and decreases.
- Mark the beginning of every round.
- Check stitch counts regularly.
During assembly:
- Check ear symmetry.
- Position the eyes before permanently securing them.
- Keep the whiskers balanced.
- Stuff gradually.
- Check that the body stands or sits correctly.
- Sew every component securely.
- Weave in all yarn ends.
Final Thoughts
This crochet cat amigurumi pattern is a great project when you want something small enough to finish without committing to a large blanket or garment.
The basic construction is deliberately simple, but there are plenty of opportunities to make the finished cat your own. Change the colors, move the bow, embroider a different expression, add a tail or create an entire family of cats in different sizes.
If you’re building a larger collection of crochet animal patterns, this cat also makes a natural companion to crochet penguins, ducks, plush flowers and other amigurumi projects. By linking these projects together, readers can move from one tutorial to the next while discovering more of your crochet content.